


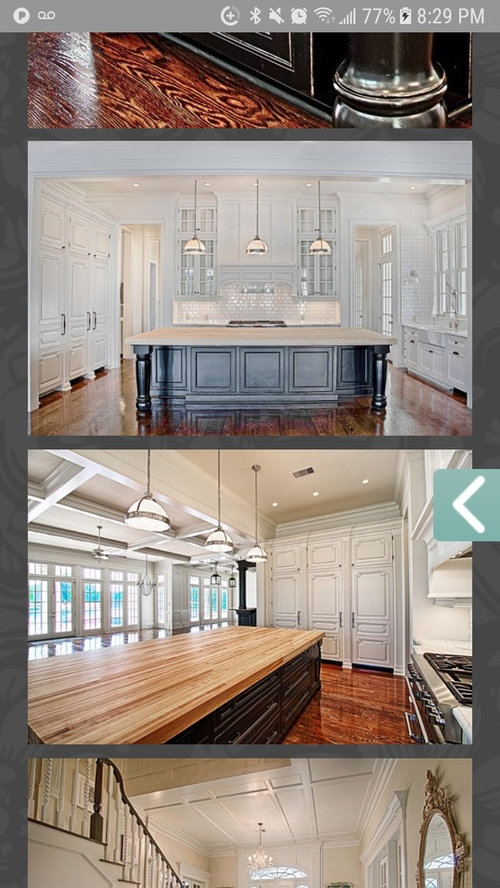
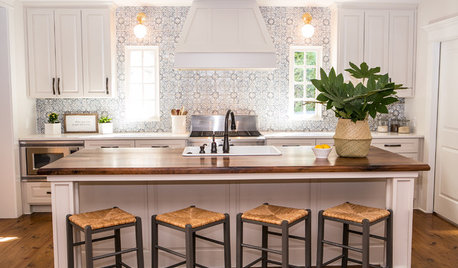
Need a 2000 sf floor plan with a kitchen layout like this
Emerie Morales
6 years ago
Featured Answer
Sort by:Oldest
Comments (19)
 PRO
PROPatricia Colwell Consulting
6 years agoRelated Discussions
Please comment on this floor plan (5 bdr under 2000 sq.feet.)
Comments (13)As already posted, I'd skip the garage and convert the space in more comfortable living, and make some other changes. Move the wall about 3' between the salon and the salle á dener so that more than six could eat at the same table. There will be occasions when you will want more than the immediate family. (Consider when the kids start bringing friends to dinner.) Use the shortened salon for office. Form a hall by putting a wall between doors in [ex]garage, just deep enough to permit shallow cubbies and storage shelves. If you put a sun-bay where the G doors are, the dimensions will remain close to 16x21, a nice size living area. Remove W/D and make shallow for coat closet. Remove foyer closet and change into wide arched entry into living area. Upstairs: Plead with BevAngel or one of the other great folks to re-design the bains so that W/D could fit in. I personally would not want that pair of steps at the top of the landing. It appears that would make the door to chambre 2 literally at the top of the long flight and lower than the doors to the other rooms. YMMV. And that landing looks rather small... be sure you can move long bureaus and box springs around. MB: If one took away that odd wall forming the walkin closet, instead using reach-in closets as placed, the MB will appear much larger while permitting space for personal sitting area. Be sure reach-in closets don't have wasted space -- these look quite deep. Be sure all the doors are wide enough. It looks as though the doors to the bains are each 30", much too narrow....See More750 SF Kitchen floor plan photo
Comments (15)Aptosca, I think Sarah was referring to her apartment being 750sq.ft. Sarah, I would switch the locations of the fridge and sink. What size sink are you looking at? If you can go with a single 20" sink, you can get a 24" sink base and a 12" cabinet on one side of the sink. Were you doing wall cabinets on that wall?...See MoreNeed help with first floor architecture plan ("living room" layout)
Comments (35)millworkman I am redoing the entire house besides the basement. that was renovated few years back. I pretty much knocking down everything on first and second floor and rebuilding. thinkdesignlive the wall itself was not structural but there where post on the ends is a beam needs to pass somewhere in that area. I can now have a post on the wall that covers the side of the fridge and have a small wall stick out on the opposite site I agree the the wall should only go until the edge if the fridge but thought to give a drop more privacy. Kristin S I took the island as a ready made model from sketchup. I will not be doing a 2 tier island and will have storage on the seating side to accommodate the pantry I have removed from first model. I do have another nice pantry we built in the basement under the stairs but of course I rather not have to go up and down all the time. As for the living room, don't pay attention how exactly I poisoned the carpet and sofa... I just downloaded a few items from sketchup library and put it to give an idea. As for tv fireplace. Im planing on a ventless fireplace that are relatively narrow in hight. and want tv on top on an accent wall. I like that look. See attached image from Pinterest...See MoreAdvice Needed for New Kitchen Layout (pics and plans included!)
Comments (22)So, I took a look..and I do have some concerns, especially if you try to fit a 48"D island into your space. Your space just isn't wide enough to have that deep an island + decent aisles + space to move around the island. Even a 41.5"D island is marginal. A few things have to be taken into account in your design: (1) You definitely need to have enough room for multiple cooks: "We're a family of four. Two kids, one 5 and one 10. Wife and I both love to cook and share the responsibility equally. Kids will also help out in the kitchen and our oldest loves to bake by herself." This means your aisles really need to be a minimum of 48". It also means you need to have more than one place to prep and, preferably, a water source in at least two locations so you're not fighting over the sink. (Add in someone trying to cleanup or load/unload the DW while others are prepping/cooking, and you're asking for trouble -- especially when your kids are in preteen + teen! (Trust me on this!) (2) Busy traffic in the Kitchen. The Kitchen is in the middle of the path between the Family Room and the Dining Room and, I think, between the entrance (far left) and the rest of the house -- including the stairs that I assume go upstairs to the bedrooms. That area is going to be busy. So, You need adequate aisles to allow considerable traffic + table seating and considerable traffic + island seating. Do not skimp on aisle space (or seating space)! You need a minim of 48" between the island and anything behind the seats (e.g., the stairs). More would be better, but your Kitchen isn't deep enough. (3) Island configuration: Since you need the minimum aisle widths (48") around the island, you cannot fit a 48" deep island. Instead, have a 3 seats along the back and one on the side. Is it ideal, no, but it's better than most I've seen. Your island is then 41.5" deep: 1.5" counter overhang in the front + 24" deep base cabinet + 1" decorative door/end panel on the back of the base cabinets + 15" seating overhang = 41.5" In addition, each seats need 24" of linear space, so only one seat will fit on the 41.5" long side --and-- you cannot overlap seats on a corner, so even skimping on linear space won't work. For 3 seats, that means you need 72" (6'). Your minimum island needs to be 72"W x 41.5"D For your Kitchen size: From what I was able to calculate, it appears the longest part of your Kitchen is no more than 116" + 71" + 19.5" = 206.5" [Note: The 19.5" measurement might not be right, I had to base it on what I saw elsewhere b/c a couple of key measurements were missing on your layout.] The stairs encroach on that, so where the island ends, it's a bit less than 149" The minimum space you need is: 25.5" + 48" + 41.5" = 115" and then add in 33" to accommodate the needed the space b/w the stairs and island = 148" [Why 33" and not 48"? This can be a bit complicated...the stairs are on a diagonal, so a straight line measurement doesn't work. Instead, I had to work with rotated lines to calculate what was necessary to accommodate a 48-inch aisle. If it's too complicated or I didn't explain it well, don't worry about it...you'll see the results in the layouts.] . Layouts.... With all of the above in mind, I came up with two layouts -- I like #1 the best b/c I think it gives you the best functionality, more workspace, and a more open feel. Both have two Prep Zones: (1) in the island with a prep sink and (2) on the perimeter b/w the cleanup sink and range. As you can see, Layout #1 has more space b/w the range and cleanup sink. The sink run of counters and cabinets are 3" deeper than standard. This gives you more storage (especially dish storage) and and deeper workspace. It also pulls the sink 3" farther from the window and window sill so you can easily fit any faucet, clean behind it easier, and minimize window splashing -- without being too far from the window to open it. The base cabinets are 27" deep (If you cannot get deeper base cabinets or they're too expensive, pull standard depth base cabinets (24"D) out from the wall 3" when they're installed.) The upper cabinets are 15" deep (Most lines now offer 15" deep uppers for a reasonable price) The deeper uppers also provide better storage for deeper items like platters or large dinner plates. The counter is 28.5" deep The deeper cabinets & counter also allow you to have a Dish Hutch. A Dish Hutch has a lot more storage than a standard base + upper setup. The upper goes down to the counter and, allows you to utilize the entire height for dishes, glasses, etc. In your layout, it's a 27" wide Dish Hutch. (That means you have an additional 27"W x 18" tall x 15"D = 7,290 cubic inches (about 4.2 cubic feet) of storage.) Other items: The island has a prep sink so the island can function as a Prep Zone (key Prep Zone items are water and counterspace). There's still plenty of open space for baking, doing homework, science projects, crafts, wrapping gifts, etc. The island also seats four people comfortably. Dish storage and the Cleanup Zone are outside the Prep and Cooking Zones -- allowing you to have multiple people working in the Kitchen -- prepping, cooking, baking, cleaning up, unloading the DW, setting the table, etc. -- without getting in each others' way. The MW is on the long counter at the "bottom" of the Kitchen. That space also makes a nice Snack/Tea/Coffee Center and, if necessary, a "tertiary" Prep Zone. While there isn't direct access to water, it can be used in a pinch for prepping. That long space also has additional storage space for pantry items or other needs. I suggest building up the half-wall b/w the Family Room and the Kitchen to at least 42" tall to allow a bit of separation and to block a direct view of the MW (assuming you put it there -- that seems to be the best location. It's at a usable height and has room around it for landing space. The both have a full-height 18" pullout pantry and, in front of the furnace exhaust bumpout, a full-height shelved pantry cabinet 18"W x 9"D. A lot will fit in that 9" deep pantry cabinet! Layout #2 has a 9" Utility cabinet (or another pantry cabinet). The Dining Room In Layout #1 has a partial banquette style -- one long side and one short side are in the corner. The other seats are chairs. It easily seats up to 6. If you have leaves, you might be able to squeeze in a couple more seats, but only if/when really needed b/c it will create aisle/traffic issues. There is plenty of space around the table for seat access. This layout allows you to move the Refrigerator to the other side of the furnace exhaust bumpout. This frees up space to the right for needed counterspace. (This is the primary reason I prefer this layout. It's worth losing the 9" wide utility cabinet -- at least to me.) In Layout #2, the Refrigerator will not fit on the left of the furnace exhaust bumpout, so the amount of counterspace around the range is significantly reduced. To fit the table, there are minimal aisles on the left (36") and top (35"). However, they are not "through aisles", so they should be OK. You'll have to do a bit of squeezing, but with only 4 people, it won't be bad. The important aisles are wide enough. Here they are: Layout #1: Layout #1's Zone Map: . . Layout #2 Layout #2's Zone Map:...See More
Naf_Naf
6 years ago
jmm1837
6 years ago PRO
PROSTUDIO MB
6 years ago
Emerie Morales
6 years ago
bpath
6 years ago
cpartist
6 years agolast modified: 6 years agoNaf_Naf
6 years agolast modified: 6 years ago PRO
PROMark Bischak, Architect
6 years agohollybar
6 years ago PRO
PROVirgil Carter Fine Art
6 years ago PRO
PROBeth H. :
6 years agoRaiKai
6 years ago PRO
PROSummit Studio Architects
6 years ago
summersrhythm_z6a
6 years agolast modified: 6 years agoUser
6 years ago PRO
PRONorth Coast Interiors
6 years ago
Michelle
6 years ago
Related Stories
BEFORE AND AFTERSKitchen of the Week: Saving What Works in a Wide-Open Floor Plan
A superstar room shows what a difference a few key changes can make
Full Story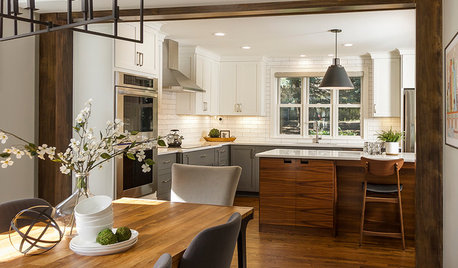
KITCHEN DESIGNKitchen of the Week: Remodel Spurs a New First-Floor Layout
A designer creates a more workable kitchen for a food blogger while improving its connection to surrounding spaces
Full Story
KITCHEN WORKBOOKNew Ways to Plan Your Kitchen’s Work Zones
The classic work triangle of range, fridge and sink is the best layout for kitchens, right? Not necessarily
Full Story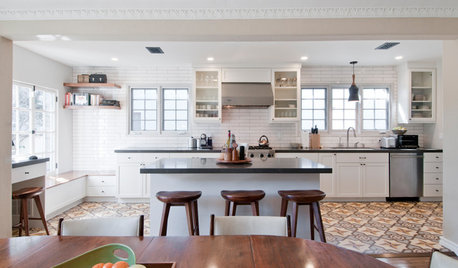
KITCHEN OF THE WEEKKitchen of the Week: Graphic Floor Tiles Accent a White Kitchen
Walls come down to open up the room and create better traffic flow
Full Story
LIVING ROOMSLay Out Your Living Room: Floor Plan Ideas for Rooms Small to Large
Take the guesswork — and backbreaking experimenting — out of furniture arranging with these living room layout concepts
Full Story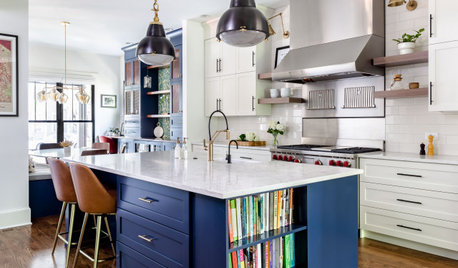
KITCHEN DESIGNKitchen of the Week: Smart Space Planning and Bold Style
A designer gives a kitchen an open layout to fit her clients’ lifestyle and a hip vibe to suit their tastes
Full Story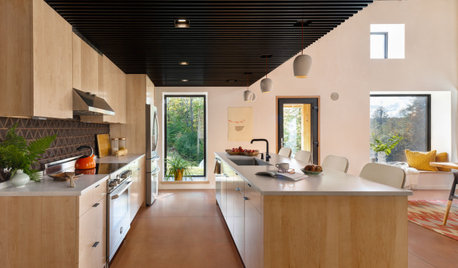
KITCHEN DESIGN10 Tips for Planning a Galley Kitchen
Follow these guidelines to make your galley kitchen layout work better for you
Full Story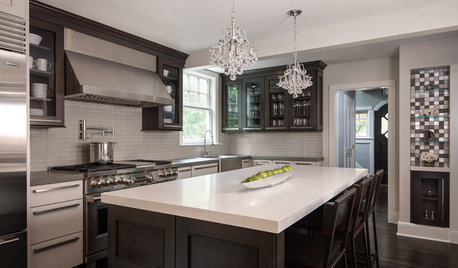
KITCHEN OF THE WEEKKitchen of the Week: An Awkward Layout Makes Way for Modern Living
An improved plan and a fresh new look update this family kitchen for daily life and entertaining
Full Story
KITCHEN DESIGN9 Questions to Ask When Planning a Kitchen Pantry
Avoid blunders and get the storage space and layout you need by asking these questions before you begin
Full Story
KITCHEN DESIGNAn Open-Plan Kitchen That’s Ready for Company
Cohesive materials and a new layout help create an attractive cooking, dining and entertaining space for a young family
Full Story


cpartist