


removing non-adjustable shelf from 60 year old "built in" "cabinet"
Pyewacket
7 years ago
last modified: 7 years ago
Featured Answer
Sort by:Oldest
Comments (7)
Related Discussions
Fun surprises when you open walls in a 60 year old house!
Comments (22)We found old business card like papers (1899) and receipts (1901) and hand written letters (1901 and 1902). A wooden umbrella handle, some metal decorative bands, a fabric sample book, and some old blouses. Structural nightmares around every turn, some far too recent to be acceptable. Horrible septic, no working well, and poorly done new electric that should have burnt the house down. Wood stoves were the only heating this house had ever had, and up until this past year, we had heated with stoves, but have upgraded to a wood furnace plus the stoves. Some walls still don't have insulation and some drywall is hiding crumbling plaster. We'll get to it one day. Here is the first page to the 1901 4 page letter. The envelope and letter were in amazing shape for their age....See MoreCan you IMAGINE putting a six-year-old kid on a non-stop train?
Comments (18)A shallow grave was not uncommon when hand dug by one individual on private property, especially in winter. Vaults were not common either. There are cemeteries in southern Illinois containing graves without vaults. Sometimes this is evidenced by a significant depression over the grave. For example, I had a grade school friend who was hired to mow a cemetery one summer in the 1940s. He was merrily making his way across the landscape with the mower when he and the mower sunk into a grave. Now, this young man was on the superstitious side and he thought for sure that the dead was about to grab him. He scrambled from the hole and ran from the cemetery. It is only in the last 60 years that some of these communities have passsed ordinances requiring burial vaults. Before that, it was the family's choice. A number of families short of funds buried without vaults; Some did it for personal belief reasons: There is a passage in the bible when paraphrased reads: You are made from dust and to dust you shall return. The reasoning is: Why prolong something that is going to happen anyway. Without vaults, wood caskets eventually decay and collaspe. Sometimes, a collasped grave makes a void under the surface and is not apparent until someone steps on it. It is dangerous to the grounds keeper and to anyone strolling the cmemtery. A vault requirement has become commonplace to protect from this hazard. Your theory of murder of Dear Addy is very plausible, but consider other possibilities: 1. Addy keeled over from heart attack. The shocked husband did not know what to do and buried her just as she fell. He surmised that he would be under suspicion. She would have been fully clothed and with shoes. Embalming is not necessary if the body is buried within 3 days after death. In early America, embalming was a luxury and not commonly done. It became popular during the Civil War because it was necessary to preserve the body for a week or more to allow time to ship the body and for relatives to gather for the funeral. Many soldiers were buried on or neaby the battlefield where they fell - some in mass graves. These bodies were not emblamed. 2. Addy died by an accident. 3. Addy committed suicide. Such an event would have been hush-hush. The 6 yr old: I know it was possible to put a 6 yr old on the train and semd her from Denver to Chicago. I myself would have not done this. I would have required an adult escort. I guessing she was put in charge of the Conductor who would have seen to it that she got off at the right stop and to answer her questions. Passenger service was much more personal in those days. But if i had been that little girl, I'd been very afraid. I would not have sent her alone on such a trip. There are too many things that could go wrong. Maybe her birthdate is in error and she was older than 6. An Aside: In my family search, I found an ancestor who died during a harsh winter. The ground was frozen deeply and the cemetery crew was not able to dig a proper grave on time. (They did not have bull dozers, back hoes, or nimble tractors back then. In frozen ground, graves were dug by pick and shovel.) A wake and funeral was celebrated on scheduled. The casket and body was put outside to freeze. The "stiff" was left frozen until the grave could be deepened. He was interred about 2 weeks after the funeral....See MoreWhat finish for 50 year old cherry cabinet doors?
Comments (10)You have lots of questions. I will try to answer some of them. Cherry will darken over time. However, cherry consists of sapwood (nearest the bark) and heartwood. The heartwood starts out salmon colored and will darken to a rich dark red. The sapwood starts out oatmeal colored and does not get red. Premium work will cut away the sapwood and delegate it to the scrap pile or secondary wood (parts you don't see). If the manufacturer is trying to avoid so much waste, they may employ "sap staining" in an attempt to bring the colors together. This normally involves first staining only the sapwood, then covering everything with a blending stain. Some manufacturers even bleach all the color out of cherry so it's all bland, and then use stains to restore the uniform color. Stripping may remove some of the added color, but it usually does not remove the patina, unless it's followed by aggressive sanding. What did you see in your stripping sludge, lots of color? Then, of course, you could have birch wood with a cherry stain. Cherry, for the DIY, can be particularly difficult to stain, both because it is prone to blotching, and because it may obliterate the natural beauty of the wood. --- The following is from a friend of mine that I will simply call "Steve," primarily because that's his name. You can achieve the color of the cherry very easily without the use of either stain or dye by using the schedule below. Over time the natural inclination of the cherry to darken with age will only make it better. Begin by carefully sanding thru 220g. Make sure that you remove all sanding scratches left by the proceeding grit and don't skip grits --120g, 150g, 180g, and finally 220g. Remove all sanding dust with a shop towel dampened with mineral spirits and carefully examine the MS wet wood for scratches you have missed and for evidence of glue squeeze-out that must be removed. Next, apply a liberal coat of boiled linseed oil (BLO). I'm talking here about applying a thick, syrup on pancakes application. Allow the oil to soak into the wood for about 25-30 minutes and then wipe away the excess and buff the surface as "dry" as you can with a clean towel. Then, set the piece aside for a few days to allow the oil to cure. The towel is a spontaneous combustion hazard so do not wad it up and throw it in a corner, but hang it up to dry. After a few days apply a 2# cut of garnet shellac mixed fresh from flakes. Simply brush it on with an inexpensive natural bristle brush with as little over-lap at the wet edge as possible and by keeping back-brushing to a minimum. Keep an alcohol dampened soft cloth in your free hand to pick-up runs and sags as they occur. The freshly mixed shellac will dry very quickly (25-30 minutes tops). You can then lightly sand, just enough to smooth the surface, and apply your varnish topcoat. For a light-colored varnish that will not darken itself over time use a soya oil based alkyd resin varnish such as McCloskey Heirloom. For a somewhat darker look switch to a tung oil based or linseed oil based varnish. I prefer Waterlox Original, a tung oil-based phenolic resin varnish. --- End of Steve's process --- NOTES: 1) A Tung-oil based varnish is not the same as tung oil. 2) 90% of things labeled "Tung Oil Finish" have not a drop of tung oil in them. They are either thinned varnishes or oil-varnish blends. They are NOT tung oil. This is typically true of anything you're likely to find in a home center or hardware store. It's not that they are bad products; they are just extremely over-hyped and you are being lied to....See MoreRemoving old 'stick built' cabinets without destroying the walls?
Comments (13)So it just so happens that I got an e-mail ad from Harbor Freight Tools showing the knockoff for $19.99, and I figured for that price, I could buy it just in case I get the guts to do this. You see, I've been refacing the cabinets for the last 4 years (working on and off)...but at the time I bought the refacing supplies, my options were unstained (yuk), dark, and "harvest oak". So I got the oak. It's not bad as oak goes -- it doesn't have that yellow look that oak can get, it's shaker doors, and I suppose if I wait long enough, oak will come back. But the kitchen has another problem that has to be addressed: It's 9.5' x 17' and the work area is a U along a wall shared with a bathroom and a load-bearing wall. It's sort of cut in half in the middle by the refrigerator on one side and a wall oven cabinet plunked in the middle of the wall on the other side. Between the wall oven and the start of the "L" (which has the cooktop) is a door to the outside. I would LOVE to get rid of that wall oven cabinet and replace the cooktop with a range. If I keep the existing pseudo-cabinets (and you can read my sad "Kitchen Hell" story, with photos, here, the appliance place said they can cut into the existing base cabinet and finish it off, which will also give sufficient clearance from the outside wall that would be next to the side of the range. But then the oven opens up and blocks the door, so I'm not sure how good an idea that is, even though another house on my block did just that. The other issue is that I would lose four cabinets, which I would want to replace by building a wall of cabinets on the other 9-1/2' wall that is blank...but I have no idea what I'd put up there. I'd hate to do more oak, but I have no idea what would go with. If anyone wants to take a crack at venturing opinions, I can take more photos. Or I can just live in this horrid kitchen until I can afford to remodel it (and can find a reputable contractor who would do it without costing me all my savings). It IS, after all, just a 1950's cape....See More
Pyewacket
7 years agolast modified: 7 years agoPyewacket
7 years ago PRO
PRODream Home Finishers
7 years ago


Related Stories

SMALL SPACESLife Lessons From 10 Years of Living in 84 Square Feet
Dee Williams was looking for a richer life. She found it by moving into a very tiny house
Full Story
MOST POPULARHow to Reface Your Old Kitchen Cabinets
Find out what’s involved in updating your cabinets by refinishing or replacing doors and drawers
Full Story
BASEMENTSRoom of the Day: Swank Basement Redo for a 100-Year-Old Row House
A downtown Knoxville basement goes from low-ceilinged cave to welcoming guest retreat
Full Story
UNIVERSAL DESIGNMy Houzz: Universal Design Helps an 8-Year-Old Feel at Home
An innovative sensory room, wide doors and hallways, and other thoughtful design moves make this Canadian home work for the whole family
Full Story
HOUZZ TOURSHouzz Tour: A 300-Year-Old Home Adapts to a Modern Family of 7
A new addition adds much-needed square footage to a 1750s home in Massachusetts
Full Story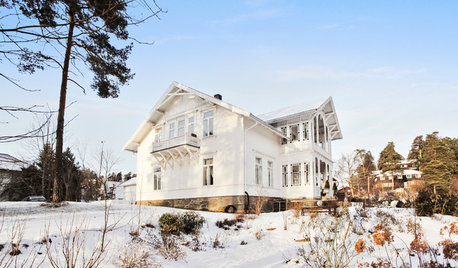
HOUZZ TOURSHouzz Tour: Updated Elegance for a 200-Year-Old Norwegian Mansion
Original details are restored to glory with a modern color palette and set off by fresh furnishings and a more open layout
Full Story
MOST POPULARFrom the Pros: How to Paint Kitchen Cabinets
Want a major new look for your kitchen or bathroom cabinets on a DIY budget? Don't pick up a paintbrush until you read this
Full Story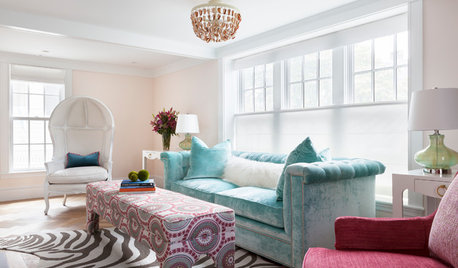
DECORATING GUIDESHouzz Tour: A Historic House Gets a Feng Shui Adjustment
In a Massachusetts seaside town, a traditional home is redecorated in a playful style and with attention to flow and balance
Full Story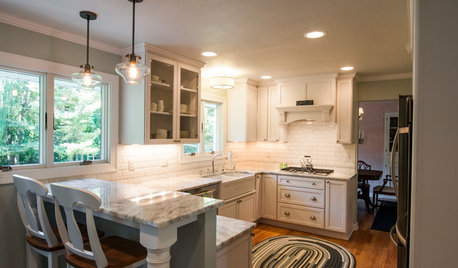
KITCHEN OF THE WEEKKitchen of the Week: 27 Years in the Making for New Everything
A smarter floor plan and updated finishes help create an efficient and stylish kitchen for a couple with grown children
Full Story
MOST POPULAR8 Life-Enhancing Home Resolutions for the New Year
You can take steps to make this the year your home truly becomes a place of comfort and joy
Full StorySponsored
Your Custom Bath Designers & Remodelers in Columbus I 10X Best Houzz


mike_kaiser_gw