


Please help me with my pizza
foodonastump
14 years ago
Sort by:Oldest
Comments (26)
Related Stories

HOUSEKEEPINGWhen You Need Real Housekeeping Help
Which is scarier, Lifetime's 'Devious Maids' show or that area behind the toilet? If the toilet wins, you'll need these tips
Full Story
MOST POPULAR7 Ways to Design Your Kitchen to Help You Lose Weight
In his new book, Slim by Design, eating-behavior expert Brian Wansink shows us how to get our kitchens working better
Full Story
HOME OFFICESQuiet, Please! How to Cut Noise Pollution at Home
Leaf blowers, trucks or noisy neighbors driving you berserk? These sound-reduction strategies can help you hush things up
Full Story
GARDENING GUIDESGreat Design Plant: Silphium Perfoliatum Pleases Wildlife
Cup plant provides structure, cover, food and water to help attract and sustain wildlife in the eastern North American garden
Full Story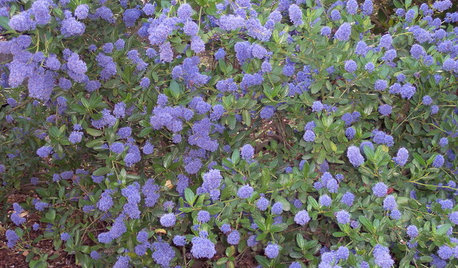
GARDENING GUIDESGreat Design Plant: Ceanothus Pleases With Nectar and Fragrant Blooms
West Coast natives: The blue flowers of drought-tolerant ceanothus draw the eye and help support local wildlife too
Full Story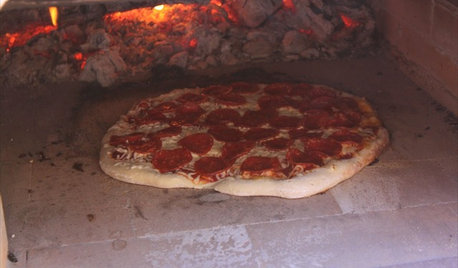
GREAT HOME PROJECTSHow to Get a Pizza Oven for the Patio
New project for a new year: Light a fire under plans for an outdoor oven and claim the best pizza in town
Full Story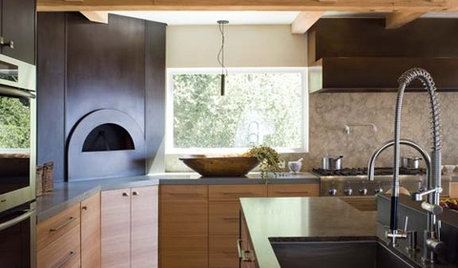
KITCHEN DESIGNKitchen Luxuries: The Wood-Fired Pizza Oven
If you love homemade pizza and are (ahem) rolling in dough, a wood-burning oven may be just the right kitchen investment
Full Story
Yes, Please: Parisian Hotel Flair
Bring on the Bling to Recreate the City of Romance at Home
Full Story

hawk307
teresa_nc7
Related Discussions
help me troubleshoot my heater please please
Q
please help me choose a paint color for my kitchen, please!!!!
Q
Please, GWers, help me with my layout! Can I get my big island?
Q
Please, please help me with my kitchen cabinets alignment dilemma!!
Q
noinwi
hawk307
shambo
Lars
lorijean44
foodonastumpOriginal Author
lindac
sally2_gw
User
noinwi
jojoco
claire_de_luna
hawk307
foodonastumpOriginal Author
claire_de_luna
hawk307
noinwi
hawk307
noinwi
hawk307
teresa_nc7
nandina
hawk307
becky_ca