


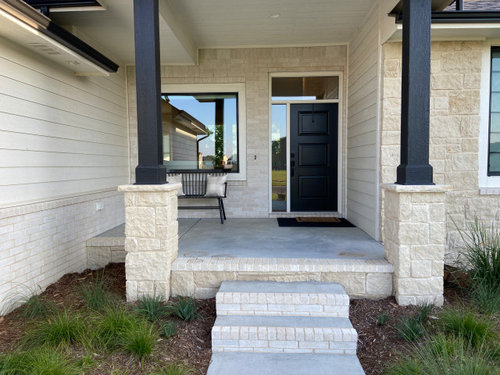
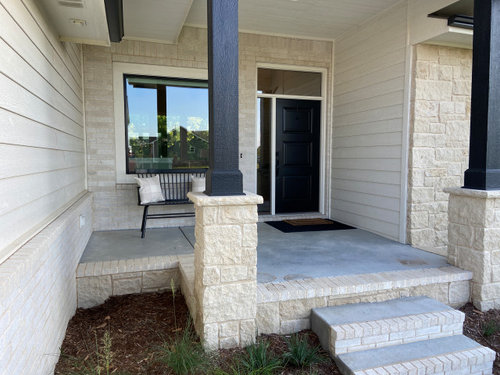
Help! I cannot figure out how to decorate my front porch.
HU-388264319
2 years ago
last modified: 2 years ago

Featured Answer
Sort by:Oldest
Comments (6)

vicki denson
2 years agoHU-388264319
2 years agoRelated Discussions
Help! sloped backyard...cannot figure it out!
Comments (26)I'm doing some second-guessing here, but it seems that you must get stormwater from the back yard to the front. Since the former french drain is non-functional, I'm wondering if you can change it to a slot-covered trough drain that collects water at the critical places and then directs it via underground pipe to an outlet somewhere toward the front yard... ?? Since you won't be hiring a hydraulic engineer, I would lean toward keeping it oversized... thinking about those big storms and the fact that drains tend to collect "stuff" and become clogged. 4" pipe is too small. 6" or a pair of them would be better. (If you can figure a way to keep it above ground, even better.) The exact details of how you constructed it would depend much on how the plan shapes up and what else you're constructing. Being as it's your own yard and your doing it on the cheap, you might even consider constructing a removable slotted grate made of treated wood. It wouldn't last like other materials, but you could get a few years out of it. In regards to planting on the hill, I'd be in favor of getting rid of all grass, thinking it's not fun to maintain, creating instead a solid small flowering tree canopy that would be limbed up with a high ceiling. Below it, a single, solid groundcover. Trees that come to mind would be redbud or saucer magnolia, with a preference for the former. 5 trees in a double staggered row (3 at back, 2 at front would do it.) A super cheap groundcover would be virginia creeper as you can find it everywhere and start your own cuttings. It's pest free and grows about 12" tall. You'd be able to incorporate other plants at edges, once some shade is up and running, and in the sunny areas....See MoreCannot for the life of me figure out how to post pics
Comments (16)The short story? Upload your photos to photobucket using the "800 by 600" pixel upload option. Done. You'll get a small file size but a photo that will display well. To answer your questions, here's the long story. And I'm not kidding. It's long. Way too long: "What I'm also trying to understand is the whole process: I take a picture with my 6.1 Kodak camera. The picture size is therefore________" Your file size depends on the settings on your camera at which you are taking photos. Most cameras offer a couple of choices, like "Image Quality: FINE/NORMAL/BASIC" and/or "Image size: LARGE/MEDIUM/SMALL". Those choices will define the amount of jpeg compression that your photo undergoes and thus they will define the size of the file that comes out of your camera. Generically a 6MP camera is probably putting out jpeg photos in the 2-3MB range. "Jpeg" is a compression program. It's a program that reduces the MB file size of the program by discarding redundant pixel color information from the photo's file for similar-colored pixels in the photo. It does not get rid of or discard any pixels. It just "averages" out red/ green/blue information assigned to similar colored pixels. jpeg looks at the photo's individual pixel information and says "these reddish pixels that are next to each other in this photo are so close in color, I'm going to consider them the exact same color". So it keeps the R/G/B information for one of the pixels, discards the RGB info for the other two, and assigns that saved RGB info to all three pixels. That allows your file to be smaller without destroying the overall visual integrity of the photo when you view it. If a file were to be over-compressed...too much information thrown away...then it can get ugly looking, very blocky. "When I upload it to Photobucket it remains 6.1 or do they change it as they "store it"__________" Using the default settings on PB it'll be uploaded as a small file. A MUCH SMALLER file. You've discovered the "Customize Your Upload Options" and you can use that to get a larger and more usable file size uploaded to your PB account. More about that later. "Of course talking about a picture in terms of 800x600 vs MB is confusing. " Your photo is made up of little dots, or to simplify, "pixels". If you have a photo that is "800 by 600", that's 800 pixels or dots wide by 600 pixels/dots tall. That's how "big" your photo appears. 800 dots wide. 600 dots tall. Each of those dots or pixels is a color, all those little colored dots together make up the photo. If each of those pixels is a different color, then the file size (the "MB" or "KB") will be large because the file has to store red/green/blue information for each and every one of those tiny pixels. If you take a photo of a piece of red paper, then theoretically the photo's jpeg file size will be smaller because so many of the pixels will be the same red color. The file doesn't have to "remember" as much red/green/blue information even though the number of pixels in the photo is the same. So if you take your glorious 6MP photo that's 3000 by 2000 pixels and upload it to Photobucket at the 320 by 240 pixel option, PB is going to throw way a lot of pixels. You uploaded a detailed file with 3000 times 2000, or 6 million pixels, and Photobucket is going to throw away and discard over 5.9 million of them! Gone forever! It'll display that photo small, 320 pixels by 240 pixels, so to the eye it will still look okay at that small size. But if you try to blow up or magnify the photo, pixels will have to be created to fill in the "holes", and the color information for those created pixels will be guessed at based upon what the neighboring pixels look like. You'll end up with a blocky looking photo. So the picture can have a physical size defined in terms of how many dots or pixels make up the picture. 3000 x 2000, 800 x 600, 320 x 240, etc. The pixels define how big or small the picture will be represented on your computer monitor or on a piece of paper when printed out. The photo file size, in MB or KB, is how much information is assigned to remember the color information of the pixels that make up the photo. 6MP is a large photo and will take longer to upload than a 1MP file. It's how much space the photo will take up n your computer's hard drive. I'm going to run you through a few examples, I hope this helps to clarify: I have a 2MB photo on my computer. I just uploaded it to photobucket, during the upload photobucket automatically reduced the file size from 2MB down to 38kb. Ouch! It reduced the pixel size (or the number of "dots" that make up the photo) from 3341 x 2217 (3341 pixels wide by 2217 pixels tall) to 310 x 212. That was done using the default upload setting of 320 by 240. This file is tiny, only 38kb, so it'll upload fast. But the small file can limit the quality of the photo seen by the viewer. Here is the quality of the 320 by 240 photo: By adding a "Width=" designator to the HTML code, I can make your browser display the photo larger. Previously it showed at 320 pixels wide, because that's it's size of the photobucket file. I'll add "Width=800" to make it display 800 pixels wide. Again, it's a 38kb file size, 319 x 212 photo that's being forced to display 800 pixels wide. Where did the extra pixels come from? They were made up, their color information copied from neighboring pixels in the photo's file. Since they had to be guessed at, the photo looks blocky due to the groupings of exactly-colored pixels all clumped next to one another: The photo shows larger, but it's blockier. Now going into photobucket's upload settings I chose "Best possible quality (while staying 1mb or less)". A large file size...but not ridiculous. Photobucket uploaded my same original 2MB, 3342 x 2217 pixel photo as a 745kb file that is 2301 pixels wide by 1527 pixels tall. At 745kb it's a large file size so it'll upload slower, but with all those pixels the resolution will be quite good. When I now have gardenweb show this new photo file at its native resolution, it looks like this: Since most people have their computer's screen displays set at 800-1200 pixels wide, this 2301 pixel wide photo causes you to have to scroll left/right to take it all in. It's not viewer friendly. So now I'll limit the photo by adding a "Width=800" to the html code and it'll show better. A better size, and with nice resolution: There actually is a point to this post, and it's this: Photobucket has an 800 by 600 upload selection. If you want a "bang for your buck" upload selection, use the 800 x 600 choice. Uploading my 2MB file using the 800 by 600 option gave me a 134kb file with pixel dimensions of 800 wide by 530 tall. A very manageable file size that will upload quickly, and a pixel size that will display nicely: Still awake? Not me. Zzzzzzzzzzzzzzzzzzzzzzzzzzzzzzz...See MoreI need some help figuring out how to lay out this kitchen
Comments (66)If you use lisa_a's with 2 entrances to the pantry it may just vent itself easily as I'd imagine the pocket entry door to it from the garage may stay open or ajar frequently. You could possibly fit it in the bump back to match the entrance stairs. Fridges in garages are pretty common around here but we have more issues with freezing temps than overly hot. Otherwise I'd put it in that spot in the garage where the writing says small appliances for inside the kitchen. That's not far of a walk at all....See MoreHelp.... Can't figure out how to decorate my living room wall
Comments (108)Roopa if you bought that oriental rug with the bright red and the aqua background, I would go with a pale aqua or pale blue wall. Off white, pale yellow or cream works very well too. It's the daytime light with all the beautiful windows you have to feel airy during the day and a pleasing wall color to look at night and enjoy, not overpowering!...See More
Sharon Fullen
2 years ago


Related Stories
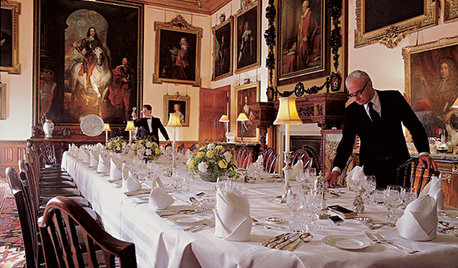
FUN HOUZZEverything I Need to Know About Decorating I Learned from Downton Abbey
Mind your manors with these 10 decorating tips from the PBS series, returning on January 5
Full Story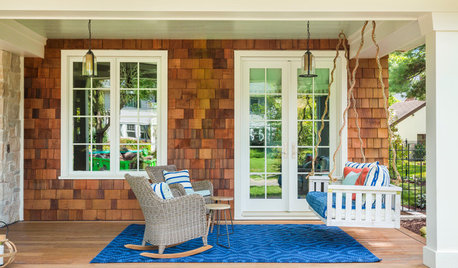
GARDENING AND LANDSCAPING10 Ideas for Decorating Your Summer Porch
Watch the world go by from a porch decked out with comfy furniture and inspiring accessories
Full Story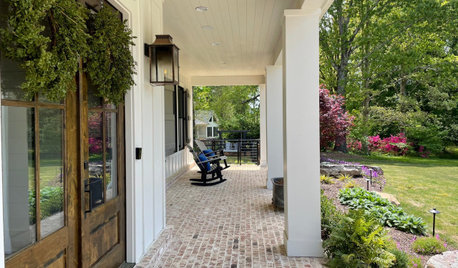
EXTERIORS10 Essentials for a Welcoming Front Porch
A few well-chosen pieces can help make your porch comfortable for relaxing and greeting neighbors
Full Story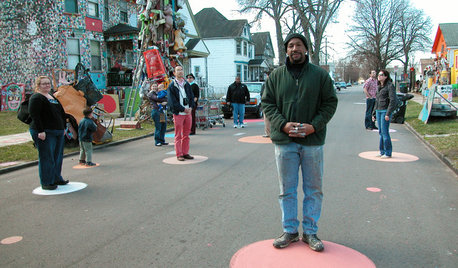
FUN HOUZZDecorated Houses Help Save a Detroit Neighborhood
Art's a start for an inner-city community working to stave off urban blight and kindle a renaissance
Full Story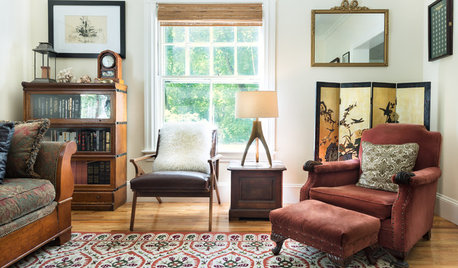
DECLUTTERINGCan’t Figure Out What ‘Sparks Joy’? Try This Question Instead
If you can’t decide whether to keep something or let it go, shift your perspective to find the answer
Full Story
PRODUCT PICKSGuest Picks: Decor to Make Your Eyes Bug Out
Insects are marching to a different tune these days, showing up on knobs, teapots and even tablecloths
Full Story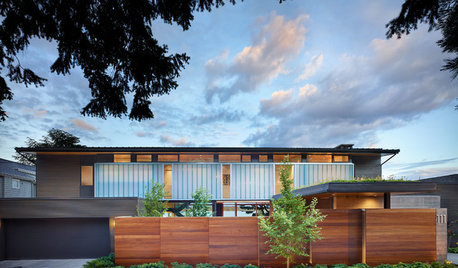
CURB APPEAL7 Questions to Help You Pick the Right Front-Yard Fence
Get over the hurdle of choosing a fence design by considering your needs, your home’s architecture and more
Full Story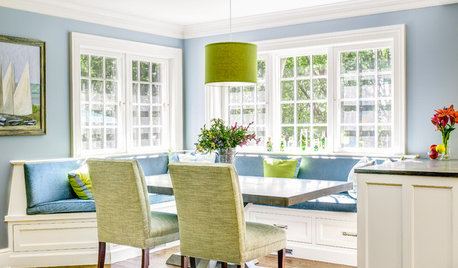
DECORATING GUIDESThe Dumbest Decorating Decisions I’ve Ever Made
Caution: Do not try these at home
Full Story
DECORATING GUIDESDecorating 101: How to Start a Decorating Project
Before you grab that first paint chip, figure out your needs, your decorating style and what to get rid of
Full Story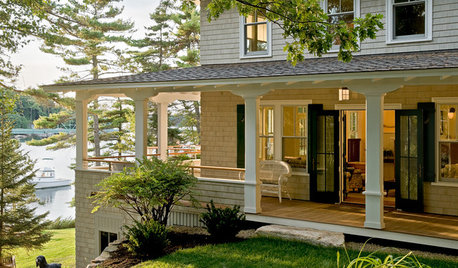
GARDENING AND LANDSCAPING7 Ideas to Get You Back on the Front Porch
Remember the good old days, when porches offered front-row seats to street scenes? They can be even better today
Full Story


Sabrina Alfin Interiors