


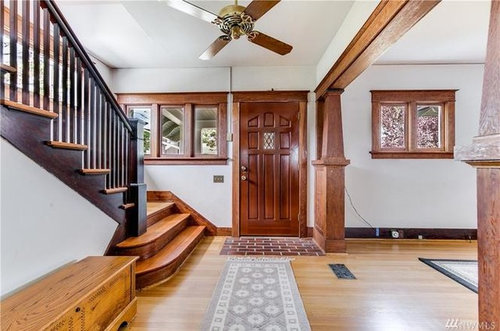
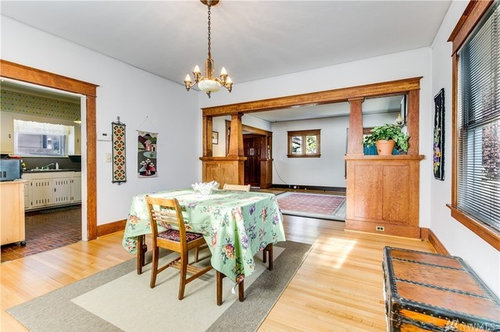
1920's craftsman home with poor quality wood
herman1234
5 years ago

Featured Answer
Sort by:Oldest
Comments (17)

sloyder
5 years agoRelated Discussions
Advice on baseboards in 1920s home & melding old with new
Comments (18)From what you've said, I'm guessing the best solution for you is to figure out what is really bugging you, and address that with the least possible work for the short term. Either match the grubby patches with the creamy colour, or paint it all so it matches the addition. You are in the busiest years of your life! You'll have more time later. Later, figure out what you want to do in the long term. Do it later. The only thing you want to avoid now is doing anything irreversible - like removing and discarding all the old moulding. Remove by all means, if that's what it takes to keep you sane, but don't discard! If your moulding has a nice profile, it is worth stripping even if you are going to repaint. Even if it is flat board, it's probably lovely old-growth wood, so give a future owner a chance even if you don't want to see it. You cannot strip "some" of the paint - it's pretty much all or nothing. But there is nothing forcing you to accept wood frames if you strip. Just clear-coat or shellac before you put more paint on, so a future owner can go that direction if desired. I have been living for 20 years with just the kind of paint you describe. Globby, put over unsanded filler, and drippy. Unbelievable that anyone could paint like this! It's on doors, moulding, and wainscoting. Actually we removed a lot of the moulding, but not all, and have done a lot of stripping. So I had some un-framed doors and windows for a long time, but they are almost all done. We will eventually strip more (kids are now grown), and probably repaint some of it. There is so much to do if you have an old house while the kids are small, we have always done whatever bugs us the most, and the rest, you just promise yourself you'll do it someday. What I have found the worst is living with half finished jobs - finished or unfinished is almost easier, though of course you have to get through the transition. And you know, someday comes before you know it. Enjoy the kids, put the time into them! One thing I have discovered is that painting over the drips and globs and ridges softens the old paint, so for about a day or two after your paint dries, you can relatively easily cut, with a utility knife, the worst offenders. That's been a lifesaver upstairs, where the attic is all beadboard that I am NEVER going to strip. I'm assuming I'm dealing with both latex and oil layers when this happens, so I hope it works for you. Karin L...See MoreInsulate attic in 1920s craftsman with converted attic
Comments (12)OP here. My roof is in great shape so I won't be replacing it any time soon plus it has some interesting curves to it so adding rigid foam and sleepers over the roof deck might be more trouble than its worth. See pic: I do have the gable vents and the giant vent over the porch so I think ventilation in the front part of the attic (the shorter knee wall in the original picture) is ok. I think what I've decided to do is to add soffit vents on the back of the house (where there are no intake vents). Then I'll install a foil radiant barrier on the bottom of the roof deck in all of the accessible attic areas. I will pull down the wood paneling stuff, add rigid foam between the studs in the knee wall as well as the roof rafters, and install sheetrock over it all. Its all 2x6 so I should be able to get 4 inches of foam (R20 or so) in there while still leaving a 2 inch gap for air flow under the roof. I found a guy on craigslist selling 4 inch closed cell foam at 75c per sqft. I've also thought about being cheap and just using fiberglass batts (r16) with baffles on the roof deck instead of foam. That would cost r4 but save quite a bit of money. So long as I make sure I've got a good air seal with the sheetrock and plenty of ventilation, after that, its all down to r value right? I've also essentially given up on the thought of spray foam on the roof deck. That would cost in the neighborhood of 5k plus the cost of ripping off and reinstalling the sheetrock....See More1920's Craftsman Vinyl floor to Complimemt Trim
Comments (3)It’a be a shame to put LVP with that beautiful wood. But if you must, look at Flooret Modin in Brenwick color for something close. However, it seems more of a contrast might be nice though....See MoreDoor frames for 1920's craftsman
Comments (4)This Old House is a great resource. Restored on the DIY network is good for seeing authentic looking craftsman homes, but less informative about how to restore. I'm in the process of turning my 1980s ranch interior back into a more craftsman/arts and crafts interior and have found google image and Pinterest to be somewhat helpful. In terms of your dilemma regarding the trim next to the wall, it originally would not have been cut and allowed to die into the wall and scribed to fit any irregularities. I have several in my home and that is what I'll be doing in those areas. Not ideal, but better than how it looks currently and I won't have to try to paint the crack in the future....See Morelovemrmewey
5 years agoleelee
5 years agocat_ky
5 years ago
queenvictorian
5 years ago
decoenthusiaste
5 years agoherman1234
5 years agosloyder
5 years ago
mnmamax3
5 years agoMissMyGardens
5 years agoAstrid C
5 years ago PRO
PROBeth H. :
5 years agolast modified: 5 years agoherman1234
5 years agoqueenvictorian
5 years ago PRO
PROPacific Coast Cabinetry
5 years ago
disco_lemonade
2 years ago
Related Stories
HOUZZ TVHouzz TV: Cool Reclaimed Wood Projects Fill a Craftsman’s Home
Using barn wood, beadboard and beams, this homeowner has crafted furnishings and features for his family’s Chicago home
Full Story
BEFORE AND AFTERS100-Year-Old Craftsman Home’s Master Suite Lightens Up
A designer balances architectural preservation with contemporary living in this Northern California remodel
Full Story
MY HOUZZMy Houzz: Patterns Perk Up a 1920s Craftsman in Berkeley
Before and After: See how layered patterns, contemporary wallpaper and color accents add punch to this California home
Full Story
GREEN BUILDINGHouzz Tour: A High-Performance Craftsman Home With Modern Touches
The palette of blue, green, coral and wood makes this energy-efficient Pacific Northwest house feel natural and warm
Full Story
ARCHITECTURERoots of Style: See What Defines a Craftsman Home
Charming features and intimate proportions have made Craftsman houses an American favorite. See their common details and variations
Full Story
FURNITUREHow to Spot High-Quality Wood Furniture
Discover the pros and cons of solid wood, plywood, particleboard and MDF furniture
Full Story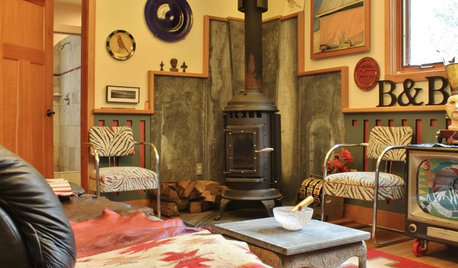
HOUZZ TOURSMy Houzz: An Artistic Craftsman Home Fulfills a Couple’s Dream
After nearly 40 years, two working artists build their art-filled dream home
Full Story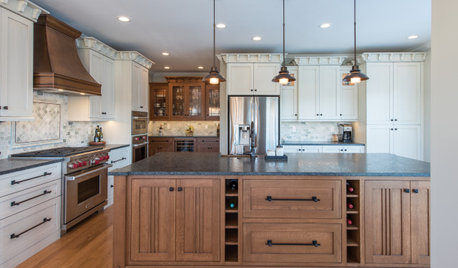
KITCHEN OF THE WEEKKitchen of the Week: White, Wood and Craftsman Style in Tennessee
Two designers use classic details, a large island and user-friendly storage to update a dysfunctional and dated space
Full Story
CRAFTSMAN DESIGNHouzz Tour: Thoughtful Renovation Suits Home's Craftsman Neighborhood
A reconfigured floor plan opens up the downstairs in this Atlanta house, while a new second story adds a private oasis
Full Story


K. Holiday