


Whole Wheat Bread in bread machine
Elizabeth
5 years ago
Featured Answer
Sort by:Oldest
Comments (6)
Related Discussions
Grainlady, Your Whole Wheat Bread....
Comments (2)No trouble at all. I have to credit my dear friend Mildred with this recipe. I have a sponge setting as I type. -Grainlady 100% Whole Wheat Bread Bread Machine Recipe (changes for making it by-hand towards the end) Sponge: 3/4 c. lukewarm buttermilk (I use homemade kefir.) 3/4 c. lukewarm water 2-1/2 c. freshly-milled white whole wheat flour (Prairie Gold from Wheat Montana is my favorite wheat) 1/4 t. ascorbic acid* 2 t. SAF-Instant Yeast Mix these ingredients in the bread machine pan and set the machine to QUICK DOUGH. As soon as the mixture is well mixed, unplug the machine and allow to sit (with the lid closed) at least 2-1/2 hours or up to 12 hours (or something in-between - I usually use a 2-1/2 or 3-hour sponge, or overnight. You may want to extend this time if using hard red wheat flour to closer to 8-12 hours for a more mild flavor). After the sponge has set, with a soft spatula, mix these ingredients into the sponge: 2 T. melted coconut oil (or butter or veg. oil) 2 T. agave nectar (or honey) 1 egg (option: I also add 1/3-1/2 c. chia seed gel. **) Add to the top of the sponge mixture in the pan: 2-1/4 c. freshly-milled whole wheat flour 2 t. salt (on top the flour) Set the bread machine on regular DOUGH cycle and process. Check the dough to make sure it's formed into a nice soft ball and adjust the hydration as needed. Grainlady changes: I process the dough in the bread machine until the dough is mixed and kneaded. I don't let it raise in the machine. I place the dough in a dough rising bucket, place the lid on the top and allow the dough to rise ALMOST double. Whole wheat dough doesn't have the extensibility that white bread dough does, so try not to let it go more than double. Using a dough rising bucket helps you to accurately judge when dough has doubled. For this recipe a 2-quart container with a tight-fitting lid works perfectly. Back to original recipe: After the bread machine finishes the dough cycle (or has doubled in the dough rising bucket), dump the dough onto a Silpat. With oiled/greased hands, deflate the dough by pushing it in the middle with your fist then drawing all edges of the outside dough into the middle (turning the dough inside-out so to speak). Divide the dough into portions (I scale the dough for accuracy.) Round each portion (make it into a smooth ball) so that all the gluten strands are going into the same direction. Cover; allow to rest 10-15 minutes so the gluten relaxes. Form dough (with oiled hands), pan, cover with plastic wrap for the final proofing - etc.... Two loaves - 375F - for 20-25 minutes or until internal temperature of the loaves are between 190-200°F. I make this bread into 3 small loaves (7-1/2x3-1/2-inch pans - 350°F for 20-25 minutes ------------------------------------------------------ * ascorbic acid powder is available at most health food stores. It's a very important ingredient when you make bread that includes wheat germ, which is in whole wheat flour. There is a substance in wheat germ called Glutathione. This substance breaks down the gluten and can result in a short loaf. The bran in whole wheat bread can also cut the gluten strands which results in a short squatty loaf. The sponge helps to soften the bran. The addition of 1/8 t. ascorbic acid per loaf of bread will counteract the negative effects of Glutathione. It will help prevent the gluten bonds from breaking down and will also help repair gluten bonds that have been broken. The ascorbic acid also helps sustain the leavening of bread loaves during baking. Yeast grows longer and faster when there is also ascorbic acid. Do not add it to sourdough recipes because they are naturally an acidic atmosphere. ** Chia seed gel is a mixture of chia seeds and water (1 part chia seeds to 9 parts water or 1/3 c./2-oz. to 2-cups water). This mixture thickens as the seeds absorb the water and adds hydration to the crumb of the loaf and keeps the bread softer longer. It looks like poppy seeds in the bread after it's baked. Excellent nutritional boost and additional fiber. BY HAND, place sponge ingredients in a glass or plastic bowl and mix the sponge ingredients together with a Danish dough whisk (or a wooden spoon) and beat the ingredients about 100 strokes. Cover, and allow to sit at room temperature at least 2-1/2 hours. After the sponge is done: add the flour gradually to the sponge mixture using a Danish dough whisk (or wooden spoon) and carefully beat in each addition of flour before adding more. You may end up beating the dough 500-800 strokes, but do as much mixing as you have the strength to do. If you need to stop and rest, that's fine. The rest will allow the dough to hydrate. Towards the end of mixing, add the salt (DON'T FORGET!!!). The gluten will tighten up and make mixing harder after adding salt. The better job you do of mixing the dough and developing the gluten while it's in the bowl, the less time you'll need to knead it. When you knead the dough, avoid adding a lot of bench flour. If you have a problem adding too much flour during kneading, grease/oil your hands during kneading instead - especially during the last 2-3 minutes of kneading. Complete per recipe above... --------------------------------------------------------- The link below has a similar recipe: (scroll down the page to locate the recipe) Old-fashioned 100% Whole Wheat Bread (source: "The Bread Bible" by Beth Hensperger) -Grainlady...See MoreQustions about yeast breads
Comments (13)gldno1- Here's the 100% Whole Wheat Bread Recipe. It's designed to be made in a bread machine, but it can be made by hand. I have to give my friend, Mildred from Missouri, the credit for this great recipe. 100% Whole Wheat Bread Bread Machine (changes for by-hand at the bottom of the recipe) Sponge: 3/4 c. lukewarm buttermilk (I use homemade kefir.) 3/4 c. lukewarm water 2-1/2 c. freshly-milled white whole wheat flour (Prairie Gold from Wheat Montana is my favorite wheat variety) 1/4 t. ascorbic acid* 2 t. SAF-Instant Yeast Mix these ingredients in the bread machine pan and set the machine to QUICK DOUGH. As soon as the mixture is well mixed, stop and unplug the machine and allow to sit (with the lid closed) at least 2-1/2 hours, or up to 12 hours (or something in between). I'd suggest at least 12 hours if you are using a whole wheat flour milled from red wheat varieties, for a more mild flavor. After the sponge has set, mix these ingredients into the sponge: 2 T. melted coconut oil (or butter or veg. oil) 2 T. agave nectar (or honey) 1 egg (I also add 1/3-1/2 c. chia seed gel. **) Add to the top of the sponge mixture in the pan: 2-1/4 c. freshly-milled whole wheat flour 2 t. salt (on top the flour) Set the bread machine on regular DOUGH cycle and process. Check the dough to make sure it's formed into a nice soft ball and adjust the hydration as needed. My changes: I process the dough in the bread machine until the dough is mixed and kneaded. I don't let it rise in the machine. I place the dough in a dough rising bucket, place the lid on the top and allow the dough to ALMOST rise to double. Whole wheat dough does NOT have the extensibility that white bread dough does, so try not to let it go more than double. Using a dough rising bucket helps you to accurately judge when dough has doubled. Place the dough into a dough rising bucket. It should come up to the 1-quart line. It's doubled when it reaches the 2-quart line. You can get plastic food storage containers (with a tight-fitting lid and graduated measures on the side) at restaurant supply stores (or through King Arthur Flour - aka dough doubler). For this recipe a 2-quart container works perfectly.) After the bread machine finishes the dough cycle (or has doubled in the dough rising bucket), dump the dough onto a Silpat and with oiled/greased hands deflate the dough by pushing it in the middle with your fist then drawing all edges of the outside dough into the middle (turning the dough inside-out, so to speak). Divide the dough into portions (I scale the dough for accuracy.) Round each portion (make it into a smooth ball) so that all the gluten strands are going into the same direction. Cover and allow to rest 10-15 minutes so the gluten relaxes. Form dough (oil your hands when you handle the dough), pan, cover with plastic wrap for the final proofing - etc.... I make this bread into 3 small loaves (7-1/2x3-1/2-inch pans - 350°F for 20-25 minutes), OR one 1# Pullman Loaf and use the other 1# of dough for 6 pecan rolls OR an 8-inch pan of dinner rolls - sometimes I use a portion of the recipe for hamburger or hot dog buns. If making two regular loaves, bake in a 375°F oven for 25-minutes. A very versitile dough. ------------------------------------------------------ * ascorbic acid powder is available at most health food stores. It's a very important ingredient when you make yeast bread that includes wheat germ (which is in whole wheat flour). There is a substance in wheat germ called Glutathione. This substance breaks down the gluten and can result in a short loaf. The bran in whole wheat bread can cut the gluten strands, which results in a short squatty loaf. The sponge helps to soften the bran. The addition of 1/8 t. ascorbic acid per loaf of bread will counteract the negative effects of Glutathione. It will help prevent the gluten bonds from breaking down and will also help repair gluten bonds that have been broken. The ascorbic acid also helps sustain the leavening of bread loaves during baking. Yeast grows longer and faster when there is also ascorbic acid. Do not add it to sourdough recipes because they are naturally an acidic atmosphere. ** Chia seed gel is a mixture of chia seeds and water (1 part chia seeds to 9 parts water). This mixture thickens as the seeds absorb the water and adds hydration to the crumb of the loaf. It looks like poppy seeds in the bread after it's baked. Excellent nutritional boost and additional fiber. --------------------------------------------------------- BY HAND, place sponge ingredients in a glass or plastic bowl and mix the sponge ingredients together with a Danish dough whisk or a wooden spoon and beat the ingredients about 100 strokes. Cover, and allow to sit at room temperature at least 2-1/2 hours, but up to 12 hours. After the sponge is done: add the flour gradually to the sponge mixture using a Danish dough whisk (or wooden spoon) and carefully beat in each addition of flour before adding more. You may end up beating the dough 500-800 strokes, but do as much mixing as you have the strength to do. If you need to stop and rest, that's fine. The rest will allow the dough to hydrate. Towards the end of mixing, add the salt (DON'T FORGET!!!). The gluten will tighten up and make mixing harder after adding salt. The better job you do of mixing the dough and developing the gluten while it's in the bowl, the less time you'll need to knead it. When you knead the dough, avoid adding a lot of bench flour. If you have a problem adding too much flour during kneading, grease/oil your hands during kneading instead - especially during the last 2-3 minutes of kneading. -Grainlady...See MoreMy first whole wheat bread
Comments (17)This recipe was given to me by a dear friend, Mildred, from Arkansas. She got a similar recipe from Pleasant Hill Grain but wasn't happy with it, and together we "tweaked" it. This recipe is designed for a Zojirushi Bread Machine (make the dough only - not baked in the bread machine), but it will work if you want to make it by-hand. We call it "Mildred Bread" at our home, and there is a 3x5 recipe card with the ingredients safely taped to the bread machine. It's our everyday bread. I make loaves, dinner rolls, burger buns, hot dog buns, cinnamon rolls, etc. all from this same dough. Sometimes I'll make one 1-pound or 1-1/2-pound loaf and use the remaining amount of dough for rolls, cinnamon rolls, burger buns, etc.... This recipe is a bit wordy with explanations (that's the teacher in me from teaching so many bread classes ;-), but once you've made it, you'll be able to follow a 3x5 recipe card with the ingredients listed on it, like I do. CAUTION: Not all bread machines are capable of mixing 100% whole wheat bread dough, so check your user's manual. Enjoy, -Grainlady 100% WHOLE WHEAT BREAD Sponge: The night before, remove the bread machine pan and add the ingredients: 3/4 c. warm buttermilk (I use homemade kefir) 3/4 c. warm water 2\-1/2 c. freshly milled hard wheat (red or white) flour 1/4 t. ascorbic acid (if you don't have, or can't find, ascorbic acid, use Fruit Fresh \- but the acid is important!!!) 2 t. SAF\-Instant Yeast (I suggest SAF\-Instant Yeast and have never used anything else for this recipe) Place the pan into the bread machine and set on the Quick Dough setting and allow the ingredients to mix together well for a few minutes (you may need to scrape down any dry particles with a spatula), then turn the bread machine off (at the button, don't pull the plug or you risk damaging your bread machine computer). Shut the lid, and allow this mixture to set overnight. (If you are in a hurry, let the ingredients sponge for 1\-1/2 hours and then finish making the bread.) \*\*If making the recipe by hand, mix the ingredients well using a Danish Dough Whisk or a wooden spoon. Cover the bowl (using a shower cap, a Quick Cover, or a sheet of plastic wrap) and allow to sit on your counter at room temperature. If you have a dough\-rising bucket, use it for mixing the dough as well as for rising. After mixing in a dough\-rising bucket, snap on the lid and allow the sponge to sit on your counter. The next day (or anytime after 1\-1/2\-hours), remove the bread machine pan and add these ingredients to the sponge: 2 T. coconut oil (melted \- or use vegetable oil or melted butter) 2 T. honey or agave nectar 1 egg (I also add 1/3\-1/2 c. of chia seed gel, but that's optional.) On top of these ingredients in the bread machine pan add: 2\-1/4 c. freshly\-milled whole wheat flour 2 t. salt Place the pan back into the bread machine. Set bread machine to Quick Dough Cycle and start the machine. After it has been working for 5\-minutes, or so, be sure to check the hydration of the dough. You want a nice soft ball that is slightly sticky to\-the\-touch. It's better to err on the side of a wet dough than a stiff dry dough, so adjust the dough by adding more flour, or adding more water, if necessary. As soon as the dough has completed the kneading cycle (don't allow the dough to rise in the bread machine), turn the machine off. Remove the pan from the bread machine and dump the dough out onto a SILPAT (no flour necessary). With oiled hands so the dough doesn't stick, pat the dough into a dough\-rising bucket (I use a 2\-quart plastic food storage container that has graduated measurements on the side. I got the container at the local restaurant supply store, but you can find dough\-rising buckets at King Arthur Flour and elsewhere on\-line. I have them in three sizes for different amounts of dough.) Snap the lid on the dough\-rising bucket and allow it to rise until just under "double". (If the dough comes up to the 1\-quart line, it will be double when it reaches the 2\-quart line.) Check the rise after 20\-25\-minutes. It rises quickly if your kitchen is warm, and slower if your kitchen is cool. \*\*If making the dough by\-hand, add the 2 t. salt, 2 T. agave nectar (or honey) and egg to the sponge mixture, and then add enough of the 2\-1/4 c. of whole wheat flour to make a nice soft dough (add more flour than 2\-1/4 c., if necessary). Add the flour gradually \- a little at a time, and beat each addition of flour into the mixture before adding more. A Danish Dough Whisk is the perfect tool for this process (as well as stirring all batters and doughs), but a wooden spoon will also work well. If you do a good job of mixing, you won't need to spend as much time kneading. When making bread dough by\-hand, you need to spend a good deal of time beating the dough with the spoon or Danish Dough Whisk. You develop the gluten during the mixing, as well as during kneading. When you don't have the strength to mix it with a spoon anymore, place the dough on an oiled counter top and knead until the gluten has developed (6\-10 minutes). If you use an oiled counter top you won't have to add flour to the dough. By doing a good job of mixing, you will need only a little additional flour \- or none at all. If your dough is a shaggy sticky glob, you didn't do a good job of mixing. Oil your hands so they don't stick to the dough while handling it. Place dough in a dough\-rising bucket, snap on the lid, and allow the dough to rise until it's just below "double". Follow the remaining instructions... \-\-\-\-\-\-\-\-\-\-\-\- When the dough has doubled in bulk, you will need to take the lid off the dough\-rising bucket and punch it down. To do that, oil your hand and make a fist. GENTLY drive your fist through the center of the dough. Now grab the outer edge of the dough and pull it into the center hole. Do this all the way around. This moves the cooler outside dough to the inside (you have essentially turned the dough inside\-out.) This method degasses the dough and also redistributes the yeast throughout the dough. Place the dough out onto a SILPAT (a silicone mat). Handle the dough with oiled hands \- no flour necessary. If you are making more than one loaf from this dough, now is the time to scale it (weigh it on a kitchen scale), and divide the dough into equal portions. Round each portion. You round the dough by cupping both hands around the dough ball while it sits on the counter and gently pull the dough from the top to the bottom, moving it slightly each time you pull it down, until you have a nice, smooth ball of dough. A smooth ball of dough will get the gluten strands running in one direction and will hold in the gasses in. Cover the dough (I use a bowl or my dough rising bucket, or a sheet of plastic wrap) and allow it to rest for 10\-15\-minutes. This allows the gluten strands to relax. To form a loaf... With oiled hands, pat the dough out on the Silpat until it's about 1\-inch thick and the width of the pan you are going to use. Roll the dough up and pinch the seam closed. Tuck the ends under the bottom. Place the dough, seam side down, into a greased loaf pan/s and cover with plastic wrap. Allow it to double in bulk. Bake in a preheated 375 degrees F oven for about 25\-minutes, or until it's between 195\-200\-degrees F when you check it with an instant read thermometer....See MoreNeed bread machine recipe--wheat/gluten free
Comments (10)Have you searched for celiac + "bread machine". A number of newsgroups are discussing the same problem. Some excerpts: . Instead of three eggs, try using one egg plus two egg whites; . for more leavening, add 1 to 3 teaspoons Egg Replacer; . for a rounded loaf, a springy texture and success every time, add 1 teaspoon unflavored gelatin to the dry ingredients before dumping them into your mixer or bread machine. From: Larson Sharon (zzlarson@ACC.WUACC.EDU) Subject: BREAD MACHINE RECIPE Makes 1 medium loaf 3 large eggs 1 teaspoon cider vinegar 1/4 cup olive oil (or canola) 1 1/2 cups water 2 cups white rice flour 1/2 cup potato starch 1/2 cup tapioca flour 1/3 cup cornstarch 1 Tablespoon xanthan gum 3 Tablespoons sugar 1 1/2 teaspoons salt 1 Tablespoon egg replacer (optional--I didn't) 2/3 cup dry milk 2 1/4 teaspoons active dry yeast Combine eggs, vinegar, oil and water; pour carefully into baking pan of electric breadmaker. In mixing bowl, combine rice flour, potato starch, tapioca flour, cornstarch, xanthan gum, sugar, salt, optional egg replacer, dry milk and yeast; mix well. Add dry ingredients to baking pan. Carefully seat pan in breadmaker. Select normal/white cycle; start machine. (For machines with "bake only" cycle--such as Red Star which is what I use--select "dough" cycle for mixing, then stop, then "bake only" to finish bread.) After mixing begins, help scrape any unmixed ingredients into the dough with a rubber spatula. Stay at edges and top of batter so as not to interfere with the paddle. When bake cycle is complete, remove pan from machine. Invert pan and shake gently to remove bread. Cool upright on rack before slicing. *Note: Use potato starch--not potato flour. All ingredients except yeast, which may be cold, should be at room temperature. Humidity and other factors can affect dough consistency, which should be stiffer than cake batter but not as stiff as cookie dough. If dough appears too dry, add liquid, one tablespoon at a time, to achieve consistency that allows machine to mix by itself. I personally have not had to adjust the recipe--midwest, Kansas/Missouri area. (This recipe was adapted from a recipe of Red Star Yeast & Products.)...See More
Elizabeth
5 years ago
Related Stories
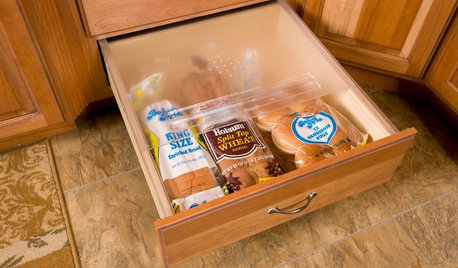
DESIGN POPBakers’ Home Storage Tips for Sliced Bread’s 90th Birthday
In honor of the bread slicer’s debut in 1928, we offer the best bread storage tips since, well ... you get it
Full Story
HOUSEKEEPINGHow to Clean Your Washing Machine
Cleaning your washer once a month will ensure that it stays spick-and-span along with your clothes
Full Story
KITCHEN DESIGNA Designer Shares Her Kitchen-Remodel Wish List
As part of a whole-house renovation, she’s making her dream list of kitchen amenities. What are your must-have features?
Full Story
KITCHEN DESIGNKitchen Accessory: The Breadbox
The breadbox — freestanding or built-in — still has a place in the modern kitchen
Full Story
LIFESimple Pleasures: The Joy of Baking
Fill your house with a heavenly scent and your heart with cheer by making time to bake
Full Story
SMALL KITCHENS10 Simple Ways to Bring Order to a Small Kitchen
It can be tricky keeping a compact cooking space tidy, but these ideas can help
Full Story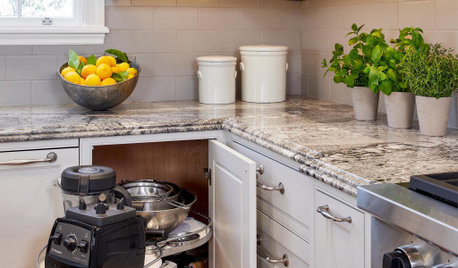
KITCHEN STORAGEFoolproof Storage Solutions for Corner Kitchen Cabinets
Consider Lazy Susans, pullouts and more to maximize storage
Full Story
KITCHEN DESIGNHouzz Call: Tell Us About Your First Kitchen
Great or godforsaken? Ragtag or refined? We want to hear about your younger self’s cooking space
Full Story
FARMHOUSESWorld of Design: See How 9 Families Live and Farm on Their Land
Join us as we visit the homes and farms of passionate food producers and hear about rural life around the globe
Full Story
LIFESimple Pleasures: Indulging in Teatime
Get out the china cups and cream-slathered scones. Tea with treats can make even an uneventful day feel extravagant
Full Story

Lars