


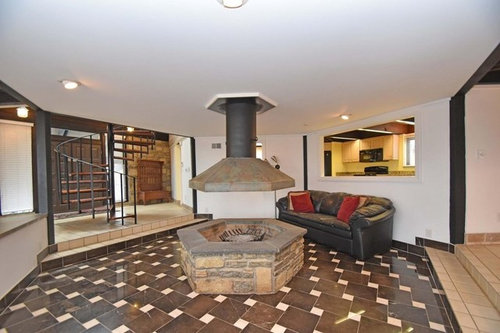
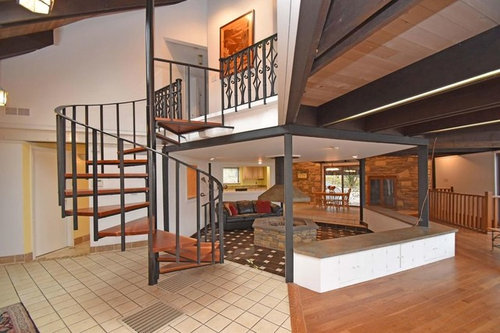
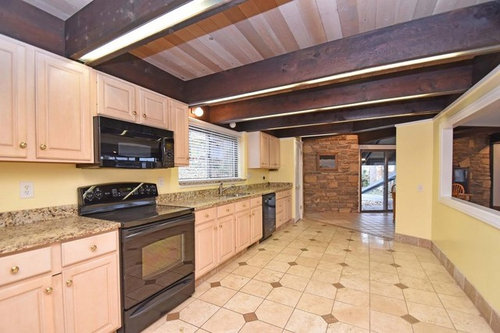
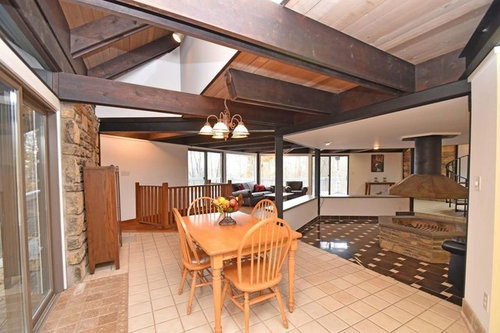
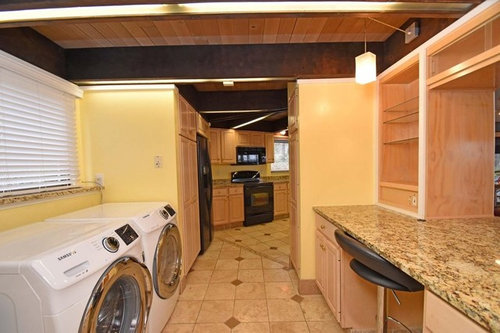
Would love to hear your first thoughts!
Michelle Duncan
5 years ago

Featured Answer
Sort by:Oldest
Comments (90)

everdebz
5 years agolast modified: 5 years agoeverdebz
5 years agoRelated Discussions
Would LOVE to Hear Your Opinions on The Best Vacuums
Comments (108)Yesterday I was in Costco and they had the Shark Rotator Powered Lift Away 3 in 1 vacuum on sale with an instant $60. manufacturer's rebate. I paid $239 and it came with the under appliance tool, the upholstery brush, a 2 in1 crevice tool, the weird floor tool where you can attach a cloth and vacuum and dust simultaneously, the canister caddy and the attachment that I really like - the mini motorized brush. The vacuum head LED lights and another light on the handle. I had been using the top model Sears Progressive canister for years but I don't like their newest model - nor the price - so I thought I'd give the Shark a try. Costco has a wonderful return policy too. I used it immediately because my black Lab is a notorious shedder. It seemed to do a good job. One thing I noticed and didn't like is that the wheels are close together and I have one rug that shows vacuum marks - well for some reason the Shark leaves very noticeable wheel lines in the rug. The next time I vacuum I'll do a little comparison test. Vacuum half the family room with the Kenmore and half with the Shark. Empty the containers and then vacuum again switching vacuums and see how much they pick up. I've avoided Shark for the same reason I've avoided all of those "As Seen on TV" things. The informercials are just so enthusiastic and loud that they remind me of Boardwalk shills....See MoreI would love your thoughts on my tile plan
Comments (10)I like the idea of painting ceiling same as walls. Hosenemesis, there would be less strips than you described. BUT, I agree that with white tile, than color, than white ceiling, it might be stripy. That has been my thought too. I tried white trim and color walls as a sample in my kitchen remodel last year and it looked like a circus tent! My rooms are small and one can never get far enough away or between the door frames to have a nice ratio of trim vs wall color. I solved the problem in the kitchen by painting the trim as the walls and I love it. Prairiegirlz5, you illustrate a very glamourous bath! Sounds lovely. This bath will have a bit of glam but overall it has to function as a frequently used toilet for my farmer husband and others that may be working or visiting. I do want it to look sort of like the early 20th century and similar to my kitchen as it is just off from the kitchen. Now, I think I may have to alter the color plan. I yanked a bit of my remnent soapstone out of the shed to take a look and " :O these colors aren't going to work!" Tile pattern will stay the basic pattern but the listello may be tiny running bond so I can get a good matched white and stay in budget. I could go with a Ming green listello but I don't want a strip of color. The slate floor will stay, as will the soapstone. But what color do I paint the walls? Did someone above say light green? I may have to go that direction because the veining in the soapstone is green! I was thinking that there was more white veining. It pays to keep your materials close at hand throughout the process, not hidden away and counting on memory. The paint that I used in my kitchen was BM Titanium and it looks fabulous with another soapstone I have there. I just wanted a more ocean-y feel to the colors in the BR. Any thoughts are welcome....See MoreCustom framing quote...yowza!!! would love to hear your thoughts
Comments (28)Because the print means so much to you, it's worth it to get exactly the frame you want without repainting or making do, especially if you don't like the profile of the moulding. A decent frame can only enhance it and you'll always love it. My brother used to own two frameshops and always framed items for me at cost with no labor charges. Because he bought quality supplies, was, himself, a perfectionist, and I could get very nice frames with the discount, they still cost as much as retail. Since then, I've had numerous prints and original paintings framed at Hobby Lobby and found they were more reasonable than Michael's and have been totally pleased. It's kinda like the cost of eyeglass frames, without the glass-it's hard to explain the huge difference in cost for basically, plastic frames....See MoreNew kitchen layout...would love your thoughts!
Comments (9)Your kitchen layout looks remarkably similar to mine, although mine is smaller. My pantry is in the angled corner. Plan close-up And when (almost) completed: I had really wanted two DWs, but couldn't make both fit on the cleanup sink wall if I still wanted that dish hutch and sink centered on the window. The second DW lost. I also thought about a DW drawer for the island next to the prep sink, but knew the storage space there for prep items was much too valuable. Without seeing a graphed or other drawing of your space with measurements, I suggest putting two DWs flanking the cleanup sink instead of the DW drawer for glasses at the prep sink. Glasses won't be dirtied at the prep sink anyway, right? You'll have plenty of prep utensils, prep bowls, etc that you'll dirty there. Personally, I wouldn't want someone invading my prep zone just to stick a dirty glass in a DW drawer. That's what the cleanup sink is for and why the zones are separated. Your DW also takes away very valuable prep zone storage. I cook a lot and extensively from scratch. We compost most food scraps also, but I would not want to be without a trash pullout in the prep zone. I would hate to drag a blood meat package across the aisle from the prep zone to the trash by the cleanup sink. With the trash and recycling next in the prep zone, I just twist to my left, dump, and move on. As for moving your prep sink south on your layout, I recommend leaving a good landing space on the end. Another part of my layout that makes cooking so easy and functional is the large landing space on the island end near my fridge and pantry. When I begin cooking, I pull out ingredients from fridge and pantry and park them on the end of the island there. Then I move to my prep zone with cutting board to start prep. When I need the garlic and onions, I reach or sometimes take one step right to grab them. The leftover garlic cloves go back in the garlic bowl and I set it back in the landing area while grabbing whatever else I need. I LOVE this system as it keeps the food items I'm not using out of my way, but close. And putting unused ingredients back into fridge or pantry is quick and easy. My island is 2" shorter than yours. I highly recommend my island setup for your kitchen. From top to bottom on your drawing, I'd do --16" trash pullout (trash in front and recycling behind) --wide drawers for prep tools, bowls, etc --prep sink (I store my compost bucket under the sink.) --24" MW drawer at the bottom (This keeps MW handy for re-heating leftovers or melting butter from the fridge, and it gives you a 24" landing counters referenced earlier.) Here's how it looks in my space. Two additional recommendations. 1.) Drawers. Drawers. Drawers. Use them everywhere. 2.). Make an inventory of everything you plan to store in your new kitchen. Everything. Then assign each item to a zone, i.e. cooking, prep, baking, cleanup, storage (storage containers, zip baggies, etc) and, if applicable, snack zone. Once that is done, map each item into a drawer or cab. You'll find out quickly if you've got enough space in your island prep zone with the DW drawer idea. I envy your huge range, giant fridge and walk-in pantry! I hope you post photos of the room when it's all done. Apologies for the book I just wrote. :) This post was edited by breezygirl on Wed, Aug 20, 14 at 2:14...See More
Michelle Duncan
5 years ago
H202
5 years agoMichelle Duncan
5 years agomotupeg
5 years agoUser
5 years agoeverdebz
5 years agoEmily
5 years agoMichelle Duncan
5 years agoUser
5 years ago
intheevnt
5 years agoMichelle Duncan
5 years ago
Danielle Black
5 years ago
Laura Villar
5 years ago


Related Stories
MOST POPULARFirst Things First: How to Prioritize Home Projects
What to do when you’re contemplating home improvements after a move and you don't know where to begin
Full Story
KITCHEN DESIGNHouzz Call: Tell Us About Your First Kitchen
Great or godforsaken? Ragtag or refined? We want to hear about your younger self’s cooking space
Full Story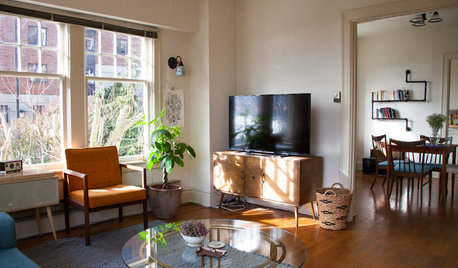
HOUZZ TOURSMy Houzz: Thoughtful, Eclectic Style for a Sunny Seattle Apartment
Creative couple builds their first home together piece by piece in a sun-filled rental
Full Story
CURB APPEAL7 Finishing Touches for a Thoughtful Front Yard
Make a great first impression with artful house numbers, water features, garden art and more
Full Story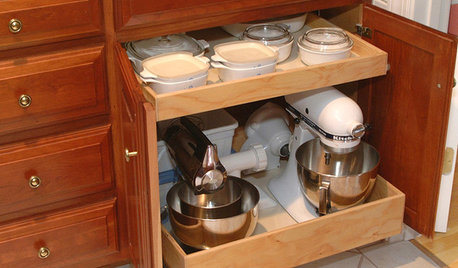
KITCHEN APPLIANCESConsidering a New Kitchen Gadget? Read This First
Save money, time and space by learning to separate the helpers from the hassles
Full Story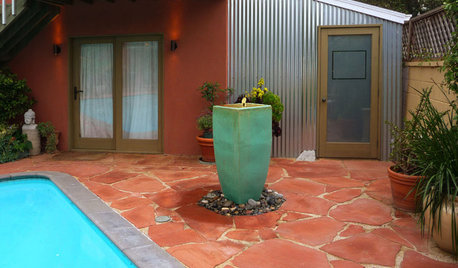
HOUZZ TOURSHouzz Tour: From Detached Garage to First Solo Studio
Postcollege, a daughter stays close to the nest in a comfy pad her designer mom created from the family's garage
Full Story
PRODUCT PICKSGuest Picks: 20 Decor Pieces for That First Home Away From Home
Gather ideas now for a comfy and stylish dorm room in the fall — or try these finds in a new grad's first solo digs
Full Story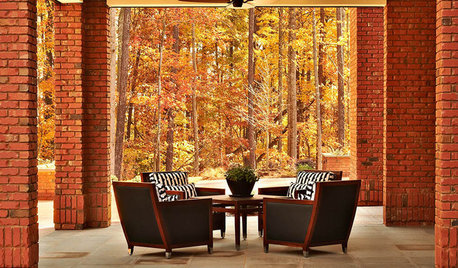
ARCHITECTUREGet a Perfectly Built Home the First Time Around
Yes, you can have a new build you’ll love right off the bat. Consider learning about yourself a bonus
Full Story
KITCHEN DESIGNKitchen of the Week: Function and Flow Come First
A designer helps a passionate cook and her family plan out every detail for cooking, storage and gathering
Full Story
CRAFTSMAN DESIGNHouzz Tour: Thoughtful Renovation Suits Home's Craftsman Neighborhood
A reconfigured floor plan opens up the downstairs in this Atlanta house, while a new second story adds a private oasis
Full Story

ilesliemy