


Open Table Food Quiz- Are You Confused By Menu Terms And Food Jargon?
User
7 years ago
Featured Answer
Sort by:Oldest
Comments (39)
Related Discussions
FOOD PHOTO TIPS: Part 2 - Lighting & White Balance
Comments (0)Posted by canarybird (My Page) on Wed, Jul 15, 09 at 18:24 FOOD PHOTO TIPS: Part 2 - Lighting & White Balance Hi everyone! For those who are learning to use their cameras, I hope you are still interested in my little tutorials. As I mentioned previously, I'm recounting only what I've learned or read in the past years while playing with my cameras. But I hope I can help those who haven't had the chance to experiment as much as I have and who are still struggling with the manual. So let's go once more to look at setting up by a window in daylight. I'm continuing with the numbering of photo examples in case I need to refer back to any one of them by number. Side Lighting - Daylight To continue with indoor daylight exposures, let's move the tripod around to the side and see how the subject looks with a light from the window, coming from the left side...(tomatoes and peach haven't shrivelled yet thank heavens). That's also a very beautiful lighting and it has been seen in many paintings of old masters, such as the Dutch painter Johannes Vermeer (remember Girl with the Pearl Earring) where he creates mood magic with light falling from a left window onto household objects and people. We may need a little practice to get the same effect but here you see the highlight on the left side of the tomatoes in the LCD screen Fig. 9. At this moment the camera is in PORTRAIT mode which is found on the SCENE menu with the icon of a girl's head. Portrait mode is meant for capturing subjects that are fairly close to the camera ....imagine someone sitting on a chair in front of you and you are going to take their portrait. In some, if not most digital cameras, portrait mode has a slight warming effect which is meant to enhance skin tones. So it can also be good for taking food shots. If you are without a tripod, hold the camera firmly and brace your elbows against your sides, remembering to press the shutter button halfway to let the camera focus, then smoothly press the rest of the way down. Fig. 10 shows a short tripod good for tabletop photos. At this short distance, there will be some slight distortion of the subject. If my table were a little longer I would probably move the camera back a little and zoom in. Fig. 11 shows the same with a piece of white paper at the right to reflect light onto the dark side. You can see the difference it makes in Fig. 12 where the paper was removed. Look especially at the plate underneath the bowl. Where it is bright in the first photo, it is shadowy in the second. I would need a taller piece of white board or foam to be sure and get the bright reflection on the contents of the bowl as well, although you do see some light reflected on the tomato. Since the camera is so near to the subject I would stay in PORTRAIT mode and add an option to the camera setting by clicking on my TULIP ICON which activates MACRO. (Have I scared you with this?) Sorry. Macro can come later then, but if you have seen that little tulip on the back of your camera,.... well as long as you know that it's for taking closeup photos. It can usually be added in to most other camera settings.Fig. 13 shows the photo the camera took at that position on the tabletop tripod. WHITE BALANCE or WB You may have seen WB or AWB somewhere on your camera menu as you were searching for something else. It's a pretty important part of setting up your camera for taking photos in all light conditions. Nowadays however digital cameras are pretty smart and with SCENE modes, the manufacturers have tried to think of every possible photo situation you may have, from night shots and fireworks to cuisine and have programmed those settings into the camera. However nothing can equal the human eye and cameras sometimes misjudge the type of light in a scene. That's why as well as the always present AUTO, you have adjustable options for telling the camera what type of light you have. Fig. 14 shows the window setup using a normal tripod and the camera in Portrait mode. I'm going to take some photos to demonstrate WHITE BALANCE. In Fig. 15 you see what comes up after I press the MENU option on my little Olympus Stylus 800. You see the letters WB as the bottom option. Pressing the bottom button would bring up the White Balance menu. Fig. 16 shows that WB menu open on my other camera, and there you see there are seven options to choose from. (Oops....you can see my messy desk.) AUTO - not hard to figure that out. You let the camera decide what the light temperature is... (warm to cool). SUNNY - with a sun icon, this is one outdoor setting to choose when you have sun and want to be sure the camera knows that. CLOUDY - with a cloud icon, this option is also for overcast skies but is nice to use indoors by a window like this one when the light is not too strong. I nearly always take my food photos indoors by a window with CLOUDY as the white balance setting. BULB - with a light bulb icon, this is the setting to use under an incandescent, standard light bulb. Failure to use this setting in evening photos under lamplight will result in the photo having an orange hue. Using it in daylight will give a strong blue cast to your picture. FLUORESCENT 1, 2 & 3 - If you've seen and wondered what these centipede icons are on your camera, now you know. Someone had the bright (no pun intended) idea that a fluorescent bulb icon should look like this. Well whatever, we have to accept that it represents fluorescent bulbs. There are three on my cameras, denoting different temperatures of fluorescent bulbs. I find that the first is warm and adds a nice cosy glow to a photo, despite that it may be daylight with no light bulb in sight. The second appears more neutral and the third adds a mauve cast to a photo. I'm speaking now of a comparison of the effects that setting has in a daylight situation. If you are in an office or shop where there is fluorescent lighting, you could perhaps find your white balance menu and try out those three options. The nice thing is that you can see the difference in your viewfinder while you scroll through them before taking a photo. AWB...stand for auto white balance, which you may see on a screen or in a menu. I've taken some photos to demonstrate these differences in white balance. I will leave the first seven as thumbnails. But you see as they are a little darker, the differences in the colour temperatures of the WB settings are quite pronounced. They follow the order of my list above, starting with AUTO and ending with FLUORESCENT 3. You see the heavy blue of photo 4 in both series. That's the result of using the incandescent bulb setting when you are actually photographing with daylight. It's the correct setting however for under a lightbulb when no daylight is present. 1. Auto 2. Sunny 3. Cloudy 4. Incandescent lightbulb 5. Fluorescent 1 (warm) 6. Fluorescent 2 (neutral) 7. Fluorescent 3 (mauve cast) The next series of seven photos are full size, with the camera setup just as in Fig. 14, using a white paper SWEEP (that comes later) as a seamless background. I've also increased the EV ...( exposure value or exposure compensation) a little to brighten the pictures and give the 'heavenly' effect to the backlight. (EV comes later too...don't get scared.) Since I've raised the exposure value (opened up the lens a bit more) the following photos are quite bright and the differences in the white balance is not so noticeable: Well I hope this hasn't been too much at once. If so, please just ask me to slow down or explain anything that's not clear. Next time we'll get into lighting by artificial light, how to use a sweep (other than a broom) and correcting the exposure to lighten or darken your photos with a push of your finger on the EV button. Until then, thanks for joining me. I'll have the next instalment ready soon. Sharon (Canarybird) (All text and photos copyrighted) Follow-Up Postings: o RE: Food Photo Tips: Part 2 - Lighting & White Balance clip this post email this post what is this? see most clipped and recent clippings * Posted by shaun (My Page) on Wed, Jul 15, 09 at 20:58 You are incredible!!! o RE: Food Photo Tips: Part 2 - Lighting & White Balance clip this post email this post what is this? see most clipped and recent clippings * Posted by trsinc (My Page) on Wed, Jul 15, 09 at 21:02 What shaun said!! Thank you so much for all of the time and effort you put in to these posts, Sharon. Very generous of you!!! :-) o RE: Food Photo Tips: Part 2 - Lighting & White Balance clip this post email this post what is this? see most clipped and recent clippings * Posted by deborah_ps (My Page) on Wed, Jul 15, 09 at 22:18 I've had company for the past month and so have been unable to check in until today...what a treat to see your tutorials Sharon :) I'll be off to the Caribbean this Friday and your lessons will certainly help! Gracias :) o RE: Food Photo Tips: Part 2 - Lighting & White Balance clip this post email this post what is this? see most clipped and recent clippings * Posted by sooz (My Page) on Wed, Jul 15, 09 at 22:52 Totally awesome and sooooo helpful and step-by-step (that's how I learn!). Thank you!!!!!! :O) Sooz o RE: Food Photo Tips: Part 2 - Lighting & White Balance clip this post email this post what is this? see most clipped and recent clippings * Posted by momto4kids (My Page) on Thu, Jul 16, 09 at 9:53 I've been threatening to take a photography class, but no one gives a class way out where I live! This is SOOOOO perfect and completely addresses my needs! Sharon, you are so patient and so amazing! I feel like you're talking directly to me in terms I can totally understand. I am very grateful. I cannot wait to put it into practice! o RE: Food Photo Tips: Part 2 - Lighting & White Balance clip this post email this post what is this? see most clipped and recent clippings * Posted by canarybird (My Page) on Sun, Jul 19, 09 at 13:05 Thanks everyone...I'm glad you're finding it easy to follow. The next one will be about using a sweep (seamless paper backdrop) and how to correct the lighting with the EV button. I think that will be enough for one time, so taking photos under artificial light will come after that. Back soon, SharonCb :-) o RE: Food Photo Tips: Part 2 - Lighting & White Balance clip this post email this post what is this? see most clipped and recent clippings * Posted by kathleen_li (My Page) on Mon, Jul 20, 09 at 0:26 Thank you, Sharon! You are a wonderful teacher! Monique told me about the macro, never knew it was there!...See MoreFood Photo Tips: Part 7 - Macro & Camera Icons
Comments (0)Posted by canarybird (My Page) on Wed, Aug 19, 09 at 16:21 Food Photo Tips Part 7: Macro, Closeups & Camera Icons Hi again everyone. I'm back with another entry on how to use your digital camera for taking tabletop photos. Today I want to again go over shooting closeups or macro photos, as well as explaining the use of some of those icons on your camera. Icons for MACRO and SUPERMACRO The term macro when used with photography refers to making small objects look larger through the lens of your camera. Point and Shoot cameras have a normal focal range within which objects are in focus, that is, the camera is able to see your subject clearly and record a sharp image. However if you get too close to something the camera is no longer able to focus. By using the MACRO function on your camera you are able to get a closer shot . You may have found that when you try to get a closeup picture of something on a table or even a closeup of a flower, the result is blurred, even though you braced the camera on the table or used a tripod and had enough light. Depending on your camera you were perhaps too close to the object for the camera to be able to successfully focus. Many digital cameras have a flashing focus light which you can see in a corner of the viewfinder or on the LCD screen to warn you that the camera could not focus properly while you attempted to take a closeup photo. You have to then move backward a little or switch on your MACRO mode. Remember that you should always press the shutter button half way to let the camera focus on your subject before pressing it fully. If the light begins to flash as you do that halfway press, then you know the photo will be out of focus unless you change something. Either move further away or turn on your MACRO setting, press halfway again and your focus lamp (that light in the screen corner that flashes) should stop flashing. It should stay fixed and give a little beep to tell you that it now has the subject in focus and you can finish pressing the shutter. Note: don't confuse the FOCUS light with the FLASH symbol because they can both blink. The flash symbol is a red thunderbolt, which if blinking, indicates there is not enough light to take an optimum photo. Examples of using PORTRAIT mode without MACRO when camera was too close to be within focal range, and then the same setup using PORTRAIT and MACRO mode. Some cameras have SUPER MACRO which allows you to get very close to your subject, where in some cases the camera can be placed less than an inch away from the subject. I'll show some examples: Coins in PORTRAIT mode without macro, then with MACRO, then with SUPER MACRO. Here are a couple of cameras owned by forum members with their focal ranges (distances at which things will be in focus.) The Kodak Easy Share DX 6490 - this camera will focus normally from infinity down to 2 feet away from the subject. If you want to get closer than 2 feet to that piece of blueberry shortcake, you will have to turn on your MACRO mode (it may also be termed CLOSEUP mode). The macro mode on this camera will focus from 2.3 feet down to 4.8 inches. So you should get a sharp picture within that range. Canon Powershot SD880 IS - another member's camera. This one can get as close as 1.6 ft in a normal mode setting. Closer than that and you have to turn on your MACRO mode which has a focal range of 1.6 feet down to 0.8". That means you could put the camera a little less than one inch away from your subject. That would be too close for food photography but you can try it at a distance of 1.6 feet and see how it turns out. On my Olympus SP560 UZ the macro and normal settings have the same focal ranges, which is 3.9" to infinity (10 cm to infinity.) So when I want to get really close I use the SUPER MACRO setting which gets as close as 0.4" (less than a 1/2 inch). Good for insects, flowers or miniature items. On the little pocket-size Olympus Stylus 800, the normal focal range is from infinity down to 19.7 inches. If I want to get closer than 19.7 inches to my subject, I have to turn on MACRO mode, which is good down to about 8 inches away. Closer than than I would switch on SUPER MACRO if it were appropriate for the photo. Examples with this pocket camera are the photos of eggs,above. You should be able to use macro in several of your cameras SCENE settings appropriate for a closeup photo , such as PORTRAIT, INDOOR, CANDLE, DOCUMENTS, AVAILABLE LIGHT, CUISINE, but not in pictures where distance is a necessary factor in the photo. (Landscape, landscape and portrait, fireworks, sunsets etc.) Try setting your camera to PORTRAIT mode and prepare a plate of fruit or other food. Set the WHITE BALANCE (WB) and if not during daylight, to the type of lighting you have. If the picture through the viewfinder (or LCD screen) looks dark, then use the EXPOSURE COMPENSATION (EV) button to get a plus factor until the picture through the viewfinder looks good. Take a picture. Then holding the camera in the same position (or with your tripod) switch on the same options plus the MACRO (or closeup) mode. Take the photo again and compare the two. Or better still, take several because its a fact that the more you practise and the more photos you take, the better they will become. If you continually experience blurry photos it might be a good idea to check out your normal focal range in your (shudder) manual under specifications, Macro Mode Shooting", or go online to *one of the websites that does reviews* and look at the specs for your camera model. There you will see the normal focal range (it may be called shooting range or macro/close-up mode) as well as the MACRO range. *A couple of good websites for checking out details of your camera are: Steves Digicams as well as DP Review. But the easy way to check it out is to get close to your subject, half press the shutter and if the focus light blinks, move back and repeat pressing the shutter until you find a distance where the light no longer blinks. That will be the focal limit of your normal range. Closer than that you will need to switch on MACRO. Other reasons for blurry photos are: 1. Not enough light. The camera needs more time to focus in low light and during that time you or the subject have moved. Use a tripod. This is true especially for indoor or evening photos, and when using night scene options on your mode dial. 2. Camera shake. Even though you have strong light your photos are still blurry. You are moving the camera or your subject is moving. Dont move the camera when you press the shutter button. Hold arms tightly to your sides, brace yourself against a wall, rest the camera on a solid object or use a tripod. If necessary, breath out and hold it while you press the shutter! (Remember to breath in again please.) Leaving MACRO for now, I wanted to go over the BUTTON OPERATIONS and THE MODE DIAL to briefly go over what some of those icons mean and what will they do when you click them into action. Heres a typical MODE DIAL, found on the top right of a digital camera When you turn this dial and select a mode, you are telling the camera to change the settings for a certain situation. Some cameras will have some of these icons together on a separate mode entitled SCENE or SCN on the mode dial. Typical mode choices found on the top of a modern camera dial are for :MOVIE, AUTO, CHECK PICTURES (Review), GUIDE, MY MODE, and M, S, A, P for choosing MANUAL, SHUTTER PRIORITY, APERTURE PRIORITY and PROGRAM. The photo shows icons for an older digital camera where some of the scene options were included there rather than in an in-camera menu. Heres what they mean: AUTO The simplest of all shooting modes, the settings are fully automatic. The camera selects what it deems to be the optimum focus and exposure for your still picture. PORTRAIT - suitable for taking a portrait style photo; the camera sets a wider aperture (lens opening) to blur the background a little, so the subject stands out clearly from the background. SPORTS - suitable for fast action shots, in this mode, the camera sets a faster shutter speed to catch moving objects such as people in sports events. LANDSCAPE & PORTRAIT the camera sets the optimal shooting conditions for a background scene with a subject in the foreground. LANDSCAPE the camera will use a small aperture (lens opening) to be sure the whole of the photo will be in focus, from foreground to background. This is the opposite setting to PORTRAIT where the background is deliberately blurred. Blues and greens are enhanced in this setting. NIGHT this is where you will need a tripod because the camera will use a slow shutter speed, meaning that any movement while the shutter is open will create a blurry photo. You can have some interesting results with coloured lights and portraits in night scenes. Do play around with this mode and see what comes out from your inventiveness. SELF PORTRAIT hold the camera at arms length and turn it toward you to take a photo of yourself. A fun mode. MOVIES the camera sets aperture and shutter speed for optimum results for taking movies. You may have to click on the microphone icon in one of your menus to include sound. MY MODE perhaps not seen on all cameras, this mode allows you to save a group of settings of your choice which can be recalled together with one click. PLAYBACK MODE allows you to go back and see the photos youve just taken. APERTURE PRIORITY also seen as AV on a mode dial. This setting lets you set the aperture setting manually while the camera chooses the appropriate shutter speed for that aperture (lens opening). SHUTTER PRIORITY also seen as Tv on a mode dial. This setting lets you choose the shutter speed manually while the camera chooses the appropriate aperture for that shutter speed. These two above settings are semi-automatic in that you have control over one or the other function. For example if you want to photograph sports and you know you need a fast shutter speed and dont want to rely on the automatic sports mode, then you would use the SHUTTER PRIORITY setting and let the camera choose the appropriate aperture. If you want to set a certain aperture setting but let the camera figure out the shutter speed then you would choose APERTURE PRIORITY. You can control the DEPTH OF FIELD, or the blurriness of the background where you want the background to recede and a subject in the foreground to stand out sharply by using a wide aperture setting. We could perhaps go in the next tutorial or so a little into DEPTH OF FIELD because I think many folks would like to learn how to get that beautiful effect of a single flower or piece of cake (!) standing sharply against a dreamy blurred background. PROGRAM MODE With just a little more freedom to be creative than the AUTO mode, here the camera sets both the shutter speed and the aperture, allowing you to adjust other functions such as white balance, ISO. I think this has been very long today so although we havent got much more to cover in the next two or three tutorials (I thought wed finish with ten all together), I think next time Ill go over the FLASH icon and FLASH menu as well as the SELF-TIMER option which lets you jump into your photos. Subjects Id like to mention: Depth of Field and how to make those beautiful Blurry Backgrounds, the important triangle of variables that you need to know: APERTURE, SHUTTER SPEED and ISO, how they work together and how to adjust them..or at least understand what is happening. And oh yes.I have to finish that full sized LIGHT BOX so we can see what results we can get from that! I hope you are understanding it all and if you have questions please ask here or PM me. So thanks for joining me. I'll be uploading the next installment soon. And please feel free to save the pages on your computer. Sharon (Canarybird) :-) (All text and photos copyrighted) Free for personal, non-commercial use Follow-Up Postings: o RE: Food Photo Tips: Part 7 - Macro & Camera Icons clip this post email this post what is this? see most clipped and recent clippings * Posted by coconut-nj (My Page) on Mon, Aug 24, 09 at 8:38 Sharon, while I haven't been posting directly to your photo tip threads, I've been following them avidly. I so appreciate all the effort you've gone to to explain in such an easy way so many aspects of taking good [better for some of us] pictures. The last week or so I've been very busy organizing and then hosting our family reunion at a local fancy diner and have not had a real chance to digest the latest installments. The macro stuff interests me very much. I've tried to use my macro recently and found when I did the camera refused to take the picture?? Odd. LOL.. I'll figure it out but I suspect I'll have to dig through the manual to see what the problem is. Your post makes me suspect it has something to do with the camera not being able to focus on what I'm trying to do or the distance, or something..heh.. and it won't fire as self preservation. Smiles. I'll figure it out and then be back to digest more of your post. Btw, I got a tripod for my birthday! Yay.. I relative I had staying with me for a while apparently absconded with my last tripod. Grrrr... Needless to say I'm looking forward to using the tripod to work on some of your 'lessons'. Thanks for all your great work on our behalf. o RE: Food Photo Tips: Part 7 - Macro & Camera Icons clip this post email this post what is this? see most clipped and recent clippings * Posted by canarybird (My Page) on Mon, Aug 24, 09 at 10:58 Thank you coconut, and good that you have a tripod now. I'm wondering what mode or scene you are using on your camera when you add in the macro factor. Are you in AUTO or PORTRAIT (closeup) mode? If you are in a scene mode such as landscape for example, you can't use macro as well because you would sending two different messages to the camera...a landscape or far away mode such as sport or sunset and macro, a very closeup mode. The other thing, if you are in PORTRAIT mode and adding in macro, the camera should take the picture unless you are too near your subject or it is too dark. Does you focus lamp blink (the dot in the corner of your screen) before the camera refuses to take the photo? If so, that tells you that the camera can't focus at the distance you are from your subject. Move back a little and keep pressing the shutter button half way several times until the blinking stops. Then take the picture. Let me know if that works and if not I'll think of something else. Luck....:-) SharonCb o RE: Food Photo Tips: Part 7 - Macro & Camera Icons clip this post email this post what is this? see most clipped and recent clippings * Posted by coconut-nj (My Page) on Wed, Aug 26, 09 at 1:13 Good points Sharon, I'll check it out. I thought I had been in food mode, but maybe not. Also the lack of light is quite possible, I'll check that out too. Thanks. Smiles. o RE: Food Photo Tips: Part 7 - Macro & Camera Icons clip this post email this post what is this? see most clipped and recent clippings * Posted by antiquesilver (My Page) on Sun, Aug 30, 09 at 1:42 I don't remember if it's this lesson or another that you suggested using the Self Portrait Timer setting with a tripod to avoid camera shake. So simple & yet so effective. The tripod part is standard but I don't remember being advised about using a timer before but it certainly makes a difference on inside shots. o RE: Food Photo Tips: Part 7 - Macro & Camera Icons clip this post email this post what is this? see most clipped and recent clippings * Posted by canarybird (My Page) on Sun, Aug 30, 09 at 5:57 Right on track antique silver. I'm going over the self-timer in the next entry, hope to have it ready for Wednesday for those who have never tried out using that feature on their camera, along with setting up the tripod and some tips on that. The self timer avoids any shake you might cause to the camera when you press the shutter button. A shutter cable release is another inexpensive addition which permits you to press the shutter without disturbing the camera body. Both systems will help you to eliminate blur caused by camera shake. SharonCb o RE: Food Photo Tips: Part 7 - Macro & Camera Icons clip this post email this post what is this? see most clipped and recent clippings * Posted by dirtgirl07 (My Page) on Sun, Nov 1, 09 at 13:54 Hi Sharon, I feel a little guilty not posting about food!! I have a question that you might be able to answer. I'm trying to take photos of miniature paintings (2.5x3.5in) and the varnish creates a major shine on them. Do you think your mini light box and macro would work on these? The shine is similar to that you get off of jewelry and silver. We've even tried scanning them in which does reduce that glare, but not completely. Thanks for any help! Beth o RE: Food Photo Tips: Part 7 - Macro & Camera Icons clip this post email this post what is this? see most clipped and recent clippings * Posted by canarybird (My Page) on Sun, Nov 1, 09 at 17:28 Hi Beth.... If you're taking closeup shots of miniatures you should be in macro mode. Reflection is always a problem with shiny objects. The light box would be fine as long as you can diffuse the light source by using white tissue or drafting paper and can change the camera angle as well as moving the objects around until the reflected light is not bouncing up into the camera. It will take quite a bit of juggling around to get the angle where you don't see the reflection, but diffusion is just as important. Good luck! SharonCb o RE: Food Photo Tips: Part 7 - Macro & Camera Icons clip this post email this post what is this? see most clipped and recent clippings * Posted by dirtgirl07 (My Page) on Sun, Nov 1, 09 at 18:44 Thanks Sharon! I guess it's going to be an experiment. After posting the question I realized that these were not 3 dimensional either - but flat surface.. That was going to be a challenge on the surface glare. They have to be photographed straight on. The scanned version may have to do, but it doesn't pick up the detail well. Thank you for your posts on the photography - those were great. Your photos are all wonderful looking and after seeing them and a lot of gorgeous blogs, you must have trained a LOT of people. Makes looking at all that food delicious!! Beth...See MoreFood Photo Tips: Part 9 - Setting Up a Tripod
Comments (0)Posted by canarybird (My Page) on Sat, Sep 5, 09 at 21:57 Food Photo Tips: Part 9 - How to set up a Tripod Hi again everyone. I'm back with another entry on how to use your digital camera for taking tabletop photos. Sorry my tutorial is a few days late this time. It's been a busy week over here. I wanted to give several camera tips today but once started on how to set up a tripod, I was carried away when creating the photos and diagrams, so it took longer than expected. As there are many photos, some may be small size, but all will expand with a mouse click. Setting up a tripod can be a little more confusing than one might first imagine. If you have tried it for the first time by turning all the knobs and flipping the locks, you may have ended up with legs that won't sit still and a top piece that hangs over and won't stay upright. Whatever you do, try these suggestions without a camera attached until you have got the hang of it. Here below is a typical entry level lightweight tripod, shown in its folded position. Total length is 14 inches, weight just under 2 pounds. Price around $75.00. Note that in this position the long handle, called the 'pan-handle' is bent downwards and the small crank handle is also folded down. First thing to do is lift up both to get them away from the legs (right). The next step is to flip up a leg locking lever (below left), and extend one leg fully, being sure all lower sections have snapped open: Close the leg lock lever and then do the same with the other two legs, being sure all sections are fully extended and the levers are locked: Only then should you open the three legs. Press the leg braces down and tighten the leg brace nut. Now the tripod is open, turn it so one leg is the leading leg in front of the camera and the other two legs are on either side of you, so you are standing in the space between them. Attaching the camera to the tripod: Two ways to attach the camera to the tripod are 1. by a screw on the tripod head which screws up into the base of the camera or 2. the quick-release plate, which comes in different forms, but is a fast way to put on and take off your camera from the tripod. The tripod I show here has a quick-release plate, which once screwed to the bottom of the camera, will enable the camera to be snapped into place on the quick-release platform of the tripod head by opening the lever. Here below is a camera, the quick-release plate with its screw and a small coin. The coin is used to turn the screw, attaching the plate to the camera. Here is the plate affixed to the bottom of the camera, and showing how to open the quick release lever: By holding open the quick-release lever with one hand, you can slip the camera with the attached plate into the platform, and then press the lever closed: By loosening the side tilt locking nut, you can then lift up the platform and your camera is ready to operate in a vertical position: When you were first setting up your tripod, after extending the legs, you may have found the head is pointing in the wrong direction. If the tripod head is pointing in the wrong direction, you need to loosen the panning lock nut and swivel the head until it is pointing forward and the pan-handle is at your left hand. The following examples are with the legs withdrawn so the tripod is shorter and can be used on a table: Panning or turning around the tripod head Here you see that with the panning lock nut loosened, you are able to swivel the tripod head around. You can also tilt the head down by turning the pan-handle a little as though it were a screwdriver which will release the tilt up/down of the head. When you have the right angle for your photo, turn the pan-handle in the opposite direction to tighten the head at the chosen position: Here are the names of the parts of this tripod, and the parts of the tripod head. Remember you can enlarge each photo with a mouse click: Tabletop Tripod Here is a small but sturdy tabletop tripod which I sometimes use. The legs will extend another 1 1/2 inches by twisting the black locks, and the central column may be raised by loosening the centre twist lock. This tripod has both pan and tilt functions and uses a screw head to fasten it to the bottom of the camera. Well I hope this will be a useful guide if you are using a tripod for the first time. It is always advisable to practise setting up the tripod a few times without your camera attached just in case you are unlucky enough to have it fall over. Set it up on a firm, level ground or floor and check that all levers are locked. If indoors be careful that small children or animals won't be tripping over the legs. I hope you understand all and if you have questions please ask here or PM me. So thanks for joining me. I'll be uploading the next installment soon. And please feel free to save the pages on your computer. Next time I'll show a little about photographing silverware, the flash menu and self-timer. Sharon (Canarybird) :-) (All text and photos copyrighted) Free for personal, non-commercial use Follow-Up Postings: o RE: Food Photo Tips: Part 9 - Setting Up a Tripod clip this post email this post what is this? see most clipped and recent clippings * Posted by publickman (My Page) on Mon, Nov 2, 09 at 2:38 Kevin has a tabletop tripod similar to the one you pictures, and he also has a unipod, which I have not used. We used the tabletop tripod for the Spanokopita demonstration, which you may recall. Lars o RE: Food Photo Tips: Part 9 - Setting Up a Tripod clip this post email this post what is this? see most clipped and recent clippings * Posted by canarybird (My Page) on Mon, Nov 2, 09 at 5:21 I love that little tabletop tripod although it's not been as useful to me as a floor length model. I've never had a unipod or monopod and I think they're best for crowded places where tripods are too bulky, such as sporting events where support is needed for heavy long lenses. The spanokopita demo was great but the camera seemed to be hand held. I think you were using the tabletop tripod in your demo of making little chocolates way back when. I've forgotten their exact name but they looked good. o RE: Food Photo Tips: Part 9 - Setting Up a Tripod clip this post email this post what is this? see most clipped and recent clippings * Posted by publickman (My Page) on Wed, Nov 4, 09 at 2:28 You're right - Gina was holding the camera for that video, as you can tell from her voice, which is the most prominent. I have a lot of raw video with other demonstrations that I have not had time to get around to editing yet. I don't even have my sewing room completely organized yet for video editing, although the computer I use for video editing is already set up there - along with two sewing machines, which have been getting a lot of use lately. When I finish making all the drapes, curtains, pillows, and cushions that I need, I will convert the room to a video editing room. Unfortunately, it is too small to be both simultaneously. I'm still in the process of settling in, and I guess it's going to take a full year. Lars o RE: Food Photo Tips: Part 9 - Setting Up a Tripod clip this post email this post what is this? see most clipped and recent clippings * Posted by canarybird (My Page) on Fri, Nov 6, 09 at 11:32 Making home videos is another field that interests me. But I have only an old two ton Sony video recorder that uses tapes. One day I hope to get a little HD digital video camera for using outdoors especially for recording birds, beach and nature. A dedicated room sounds like a great idea. SharonCb...See MoreHow to keep control of my own menu for an open house...
Comments (31)I think part of this is how well do the host/guest know each other. I was brought up to ask "What can I bring?" when invited to someone's home. If the answer was "Nothing!" I would still feel rude showing up empty handed unless I knew the host well and had entertained back and forth with them enough to know that was expected. An open house to me is very different than a dinner party. It's throwing together all the people the host(s) may know: friends, family, neighbors, co-workers - and if the open house is during the holidays these people may bring along their house guests as well. In that situation, I would expect many people to show up with something - wine, beer, sparkling soda, plates of cookies, dips and crackers, the 'famous jello mold' - lol. So what? That's part of the fun! The move of covering every spare space with food deliberately so there is no room for whatever a guest brought is more than passive/aggressive. It's extremely controlling and not at all in the spirit of a holiday open house....See More
lindac92
7 years agosushipup1
7 years ago
Suzi AKA DesertDance So CA Zone 9b
7 years agocolleenoz
7 years ago
Olychick
7 years agolast modified: 7 years agodiane_nj 6b/7a
7 years ago
Gooster
7 years ago
Related Stories
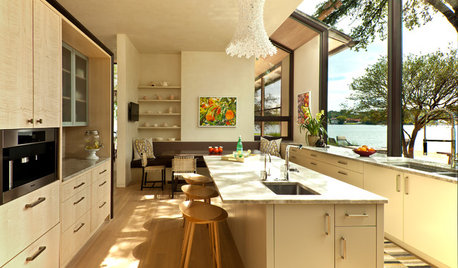
MOST POPULARHouzz Quiz: What Style of Kitchen Should You Have?
Should you be cooking up a storm in a modern, traditional, farmhouse or another style of kitchen? Take our quiz to find out
Full Story
LIFEA Quick Downsizing Quiz for the Undecided
On the fence about downsizing? We help you decide whether that fencing should encircle a mansion or a mini trailer
Full Story
DINING ROOMSBuffet, Sideboard, Server, Credenza: What's the Difference?
Learn the definitions and details to make shopping for dining room storage furniture less confusing
Full Story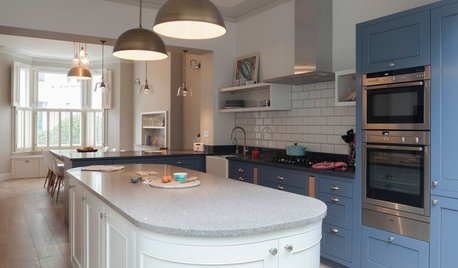
HOMES AROUND THE WORLDTraditional Kitchen Opens Up and Lightens Up
Removing a wall was key to creating a large kitchen and dining space for family life in this London house
Full Story
KITCHEN DESIGN9 Ways to Conjure a Parisian Bistro in Your Kitchen
Stir in some French flair with lighting, flooring and decor that may have guests requesting a menu
Full Story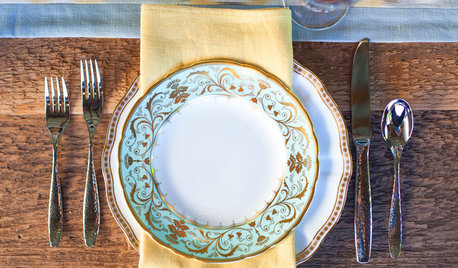
ENTERTAININGHouzz Guide: How to Set a Table
Here’s everything you need to know to prep your table for a get-together
Full Story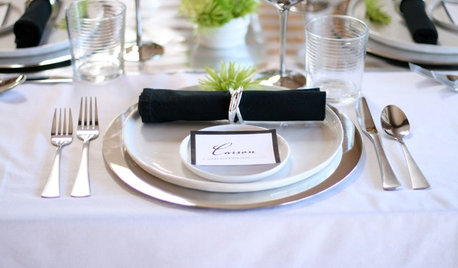
ENTERTAININGA Place for Everything: Beautiful Ways to Style Your Table
Polish your silver and pull out your china as we look at how tables were laid out traditionally and how they shine now
Full Story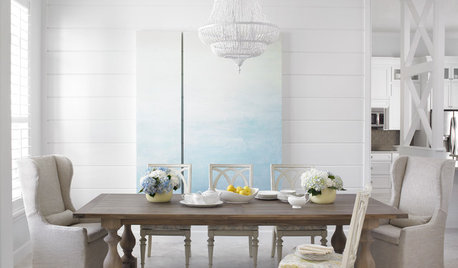
FURNITUREForever Furniture: A Buyer’s Guide to the Dining Table
There comes a time when a make-do piece of furniture won’t do. We give you a leg up on choosing the right table for you
Full Story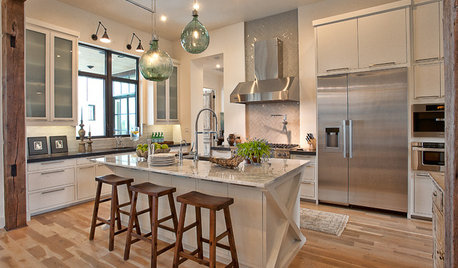
KITCHEN DESIGNEcofriendly Kitchen: How to Choose Flooring
Conserve natural resources and your long-term finances by choosing kitchen flooring materials with durability and beauty
Full Story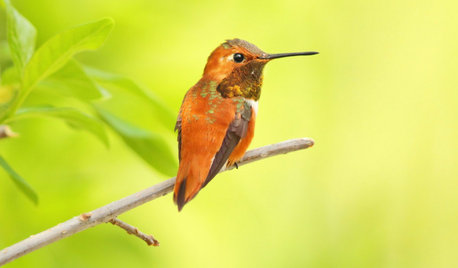
GARDENING GUIDESBackyard Birds: Invite Entertaining Hummingbirds Into Your Garden
Hummingbirds — unique to the Americas — zip through open landscapes seasonally or year-round. Here’s how to attract them
Full Story
laceyvail 6A, WV