


Beadboard in the vintage kitchen...how far up wall?
Lavender Lass
8 years ago
last modified: 8 years ago

Featured Answer
Sort by:Oldest
Comments (10)
Related Discussions
Tiling over painted MDF beadboard
Comments (9)I disagree, you do not have to tile on cement board in an application like this. We're talking *one single row* of thin, lightweight, small tiles for a decorative backsplash, not a huge wall of tile! You can do single rows of tile on good-condition drywall using thinset. You can add a moisture barrier if it's a high use / wet area. A thin sticker-like sheet of stone is definitely not the look we're going for, plus I imagine it would leave weird gaps with the beadboard grooves. And there's no way I'm buying an awful sheet of that cheap tile board to cover my gorgeous beadboard with. We're talking one single row of tile, here, did you misread my post? I called a couple of tiling professionals I know and have worked with in the past. They said cement board would be complete overkill in my application which is just a 3" high strip around my small vanity. I saw the two tile guys at church this morning, and they gave me these instructions for tiling a single decorative row over painted MDF beadboard, and said it will work for tiling over regular wood beadboard as well. So here is the info if anyone else is looking: 1. Make sure the beadboard is secured to the wall properly, you don't want to tile over loose beadboard. Also inspect the beadboard to make sure it's in good condition. No warping, mold, peeling paint, or anything of that nature. 2. Lightly sand the area and wipe clean. 3. Trowel on pre-prepared thinset mortar for small projects. Fill in the grooves of the beadboard with the trowel, and smooth it out. You can use a moisture barrier membrane at this point. 4. Let it dry over night. Apply the tiles by 'buttering' more thinset on the back of each tile and pressing to the wall. After it's dry, grout as you normally would, and seal the grout. They did agree with me that grouting neatly with those ridges / grooves in the beadboard will be a bit tricky at the top, and thought taping off with painters tape was a good solution. Anyway, maybe it'll be a disaster, and I'll come back to eat crow butterfly, but I'm definitely trying these instructions....See MoreHas anyone restored old beadboard walls? HELP
Comments (13)Well, you can feast your eyes on my attic; I'm thinking you might be facing something similar. I stared at these boards, which were/are painted dirty white, for nearly 20 years before I figured out what to do. Or rather, how to decide what to do. I have two rooms upstairs. One is done in narrow boards with tons of end-to-end joints hanging in the middle of nowhere, and it's bumpy and uneven and ugly as sin. There was nothing for it but to cover it up, which I've done with panelling on one wall, and in another part of the room with wallpaper. I've also started panelling the ceiling with 1/8" maple plywood but don't have a photo of that yet. My husband is not a fan of the wallpapered part, but it works for me. I plastered (oh yes I did) all the cracks, smoothed the wall as much as I could, and papered over it. Half the room so far. For the rest, I've discovered an underpaper that may spare me the plastering. First two photos here of the original look and the panelling. Pardon the mess; after 20 years there are no empty rooms, and the house is so messy I have trouble getting presentable photos! The other room, shown in the third photo, had wider boards, not so many joints, and was installed better, flatter. That, I decided I could paint. It is shown here partly done (and with only one coat on one wall); again, pardon the stuff. Yes, this is how I work my way around the room. I am nearly done the room now, and really liking it painted, much better than I expected. I REALLY hated it when it was white with the dark floor. Am also doing a hallway, in a creamsicle orange colour, and that is looking pretty good too. So one question is, is the installation of your boards nice enough to paint? I have to admit I don't recommend the papering (sounds like that's been tried!). I used a satin finish paint; the old paint was flat, and yuck. If the boards are just bad, then consider removal or covering with panelling. Or with gyproc. An unexpected pain in these rooms is the corners. How do the walls meet? Mine have huge uneven gaps and need corner moulding. It used to have a quarter round, which I hated and have replaced with a square 1x1. I also had holes that were cut in - to get into to the attic shoulder walls - and have had to devise covers for these. Another question you might want to consider is fire safety. It should be noted that gyproc will give you a bit more time than wood, I think. Ours is a small simple house and egress is comparatively straightforward. If yours is more complicated, and if grandkids are involved, you might want a better fire-rated wall material, and that would argue for removal and gyproc. I am not a fan of multiple layers on walls - had trouble even doing the 1/8 inch ply. Maybe we just have so little space I hate to lose even an inch, plus there is spacing out the moulding, and it's messy to get through. So if you are going to do drywall, I would tend toward removal of the beadboard. You could preserve it and use it instead as wainscot, perhaps. Or as fencing. Or as moulding. Or give it away. But wow, unpainted old beadboard? I bet it's nice wood if you refinish it, but I'm not sure I'd feel obligated to keep it on the walls as it is, holes and all. Wood can actually be used around a tub; it's more resilient with water than you'd think. Karin L...See Morepainting beadboard ceiling
Comments (3)Thanks for the responses, it helps to get an outside opinion! They are the strips of beadboard. I think if/when we put in our new dream wall cabinets, the seam will be underneath them except for a few places. We're painting it white so maybe they won't be so noticeable after all, and if they bug me we'll consider putting a thin molding across them. I have seen that before, now that you mention it....See MoreHelp-hubby painting beadboard.....
Comments (6): ) the truth of, any woman who can paint their own nails, put on their own makeup, or vacuum a rug without sucking up all the cat toys... is a better painter than about half of the 'professionals' out there. I agree with Mjsee - but I use Purdy brushes because they're readily available. my angled trim brush is 15 years old, and in better shape than cheaper brushes right off the Home Depot wall display. those cheap foam brushes, however, are wonderful for getting in the grooves of beadboard (and good for you for using the tongue and groove - the larger panels are the modern equivilent of fake wood panelling) I would indeed prime, let it dry overnight, and then lightly sand **this is one of the few places I use sanding blocks, even if it's just a scrap piece of wood with a bit of flannel on the bottom - flat sanding surface makes for easier going)...in some cases, the 3M brand 'scrubby' style sanders work really well for taking the 'fur' off freshly painted boards) wipe it all down, vacuum, and wipe it down again with a 'tack' cloth (I cheat and use one of those microfiber dusting cloths) and apply your first coat of paint. wood trim, including beadboard, used to be done in glosses because they were using oil-based paints that were more durable. the look is very traditional...but not critical, if you have a durable paint....See More
Lavender Lass
8 years agoLavender Lass
8 years ago


Related Stories
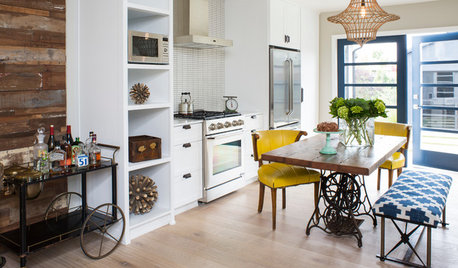
KITCHEN DESIGNKitchen of the Week: One Man's Vintage-Modern Mash-Up
Eclectic style meets Scandinavian modern in a Los Angeles bungalow kitchen designed for entertaining
Full Story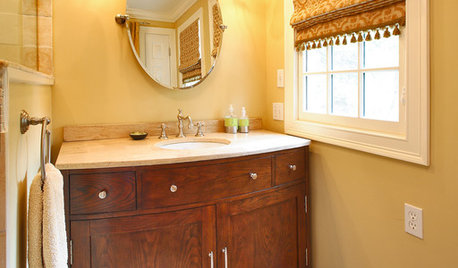
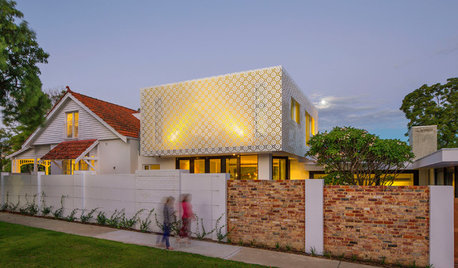
ARCHITECTUREHouzz Tour: A Vintage Home Wrapped Up in a Box
A work-at-home couple completes an eye-catching contemporary renovation that builds on an Arts and Crafts home
Full Story
WALL TREATMENTSBeadboard Panels Offer a Shortcut to a Classic Style
Traditional touch: Change up plain bathroom walls with beaded hardwood planks and trim you can install yourself
Full Story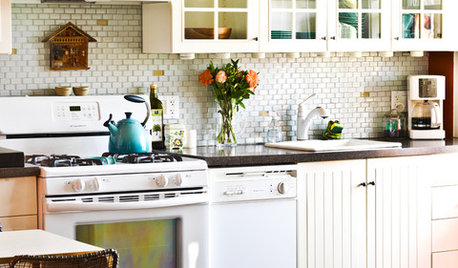
SMALL HOMESMy Houzz: Color and Vintage Style Jazz Up Tradition in Chicago
Orange walls and one-of-a-kind artwork enliven a small fixer-upper for a couple in Chicago's Hyde Park
Full Story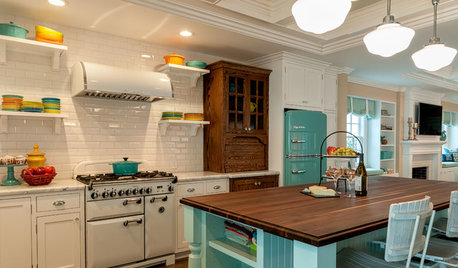
COASTAL STYLEKitchen of the Week: Vintage Beach Bungalow Style
A coastal color palette, retro details and modern amenities make life easy and cheerful in this 1940s home
Full Story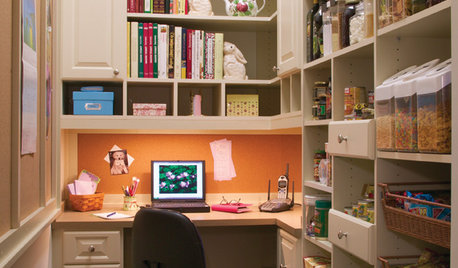
KITCHEN DESIGN11 Ways to Wake Up a Walk-in Pantry
Give everyday food storage some out-of-the-ordinary personality with charismatic color or other inspiring details
Full Story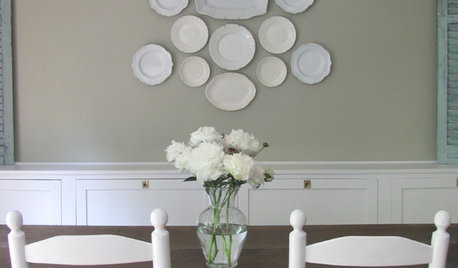
KITCHEN DESIGN10 Classy Ways to Jazz Up Your Kitchen Walls
Ditch the kitsch — these ideas let you decorate your kitchen walls in a tastefully appealing way
Full Story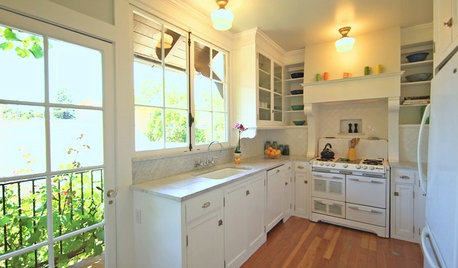
HOUZZ TVHouzz TV: A Just-Right Kitchen With Vintage Style
Video update: A 1920s kitchen gets a refined makeover but stays true to its original character and size
Full Story
DECORATING GUIDESBrush Up on Paintable Wallpaper for a Posh Look
Customize your wall treatments the affordable way, with richly textured wallpaper painted any color you like
Full Story


cookncarpenter