


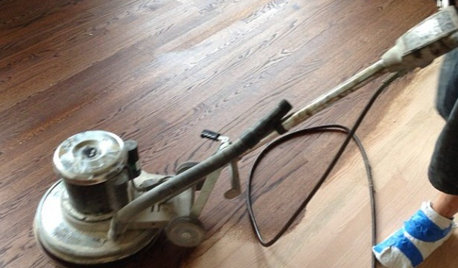
Refinish varnished floor
jefsboys
13 years ago
Featured Answer
Sort by:Oldest
Comments (11)

aidan_m
13 years agojefsboys
13 years agoRelated Discussions
Using Shellac or Varnish on an Old Pine Floor
Comments (14)Hi, the Sealcoat is a very high quality shellac, as such it's perfectly suitable for woodwork, although I have two issues: 1) It's very pale and I happen to like a little color, so I always do two coats of the garnet shellac first (on my old-house woodwork) then use the clear sealcoat to build the gloss. 2) It's thin, so you have to use a good technique on vertical surfaces, like trim and doors to avoid runs, drips, and "curtains". If you're applying it in a warm/hot day, you need to work incredibly fast to keep the necessary "wet edge" or you will be rubbing out the last coat. Which brings me to my last point: If you rub out the last coat with 0000 steel wool and furniture wax, you will have a beautifully smooth finish that's very luxurious in feel and appearance. Casey...See MoreTips for pre staining floor B4 Oil/Varnish Blend topcoat?
Comments (15)Here is a useful article and cuts through some of the BS on the label. http://www.popularwoodworking.com/techniques/finishing/oil-finishes-their-history-and-use I have not looked in a while, but last I did, Watco Danish Oil was about 6/9 mineral spirits, 2/9 boiled linseed oil, and 1/9 varnish. So it's a thin oil-varnish blend. In another writing, Flexner pooh-poohs Watco's claim that it "hardens from within" -- first, it does not soak in all that much and second, BLO is a soft finish when cured. Many people roll their own oil-varnish blend with equal parts thinner, oil, and varnish as the above article suggests. A very common practice. If you want difference, alter the proportions up or down. But you should not try to build much film with an oil-varnish blend as the oil will keep the film soft. They're designed to be wipe on-wipe off. If you put a puddle of an oil-varnish blend on a piece of glass and let it cure, you'll see wrinkling around the edges(oil effect) and smoother in the center (varnish effect) The higher proportion of oil, the more wrinkling. As far as how varnishes are made, you add a resin (phenolic in the case of Waterlox, alkyd and/or urethane in other cases) and an oil (tung oil in Waterlox, linseed or soy oil in others) It's heated and becomes a varnish. It's not oil and resin any more, just as when you bake bread it's not flour, water and yeast anymore. You can't separate out the components, but you can determine the attributes based on ingredients, just like you can tell white, rye and whole grain breads apart. Waterlox is a varnish, plain and simple. In the dozens of pages at waterlox.com where they talk about "tung oil finish" (playing on the tung oil mystique), there is one line that says, "We view our Waterlox Original Tung oil finishes as varnishes, and while many make untrue product claims, Waterlox has never made any claims that we manufacture anything but a varnish." https://waterlox.com/Support/Guide?id=55d7f899-9e95-430b-9788-6ee59ed27e30&q=...See MoreDo you have to refinish all flooring if refinishing one room?
Comments (5)It is easiest if the boards run parallel to the opening between the spaces as it looks better to finish complete boards rather than have a line cutting across the width of a board. In my previous home, the owners at the time chose to refinish the bedrooms and install a flat oak board like a saddle underneath the doors for a break point. If it is parallel to the boards, you can just tape off the existing floor and have the finishing done up to the tape. This requires extra care to keep the equipment from straying on to the finished floor, but it is not impossible. In that house, the dining room and hall was carpeted when the adjoining floor was refinished. When we removed the carpet, the original finish color did not match the refinished wood but it was not very noticeable. My husband was concerned that the newly laid kitchen flooring in the current house would not match up to the original floors and the different wood cuts would absorb stain differently. So, I asked him how much the different finishes bothered him in the previous house. He had completely forgotten the two finishes did not match and those spaces were different type, sheen and color of finish. When we were staring directly at the newly finished floor, it was obvious but only stuck out for a short time. In the photo you can see the original boards at the top and the rift cut at the bottom. The darker colored board came from stain seeping under our tape line. We used the same stain but finished the floors at different times in the project....See MoreRefinishing a painted and varnished banister
Comments (0)Hi all, I am working on refinishing a banister and am looking for advice on the right approach to the project. Starting Point The banister currently is covered by paint on the lower portions and balusters and sealed varnish on the handrail. There are nicks, small areas of damage, and larger gouges in the handrail that will need to be filled or addressed in some way. Section of banister pre-work Example of gouge (post vanish removal) that was previously filled in with mismatched filler Objective My goal is to repaint everything that is currently brown to white and revarnish the handrails to a lighter color (if possible, open question). I'd also like to repair the minor damage and gouges in a way that minimizes being able to see these imperfections in the final state. Recommended Process I've been told to use a stripper to remove the paint and the varnish which I've mostly completed for one section of the banister that you can see below. In general, the process I've been told to follow is: (1) Strip away what's there (2) Clean any residual material with a scrubbing pad or metal brush (3) Sand everything (120 grit) For the portion of the banister to be painted (4) Perform repairs where needed (5) Prime everything that will be repainted (6) Sand again (240 grit) (7) Paint For the portion of the banister to be varnished (handrail) (4) Perform repairs where needed (5) Sand again (240 grit) (6) Paint Current state of the first banister length I'm working on stripping Open Questions (the first batch) Any input on the process outlined above in terms of how to go about this project or the order of operations? My biggest challenge thus far are the small details and features (as small as a quarter-inch of working space in some areas). I can deal with that for the current stripping process but when it comes to sanding, how can I efficiently sand this down while dealing with those details. All the automatic sanders I've seen are too big for the job, are there other tools I could use for this? Thank you for any input or ideas!...See Moreaidan_m
13 years agobigdoglover
13 years agoUser
13 years agojefsboys
13 years agojefsboys
13 years agoboisenoise
10 years agoDebbie Downer
10 years agoboisenoise
10 years ago
Related Stories
GREAT HOME PROJECTSWhat to Know Before Refinishing Your Floors
Learn costs and other important details about renewing a hardwood floor — and the one mistake you should avoid
Full Story
GREAT HOME PROJECTSHow to Refinish a Wood Deck
Keep your deck looking its best — and save feet from splinters — by applying a new stain and sealant every year or so
Full Story
FLOORS11 Distinctive Finishes for Original Floorboards
Whether you go for glossy, painted or matte boards, make your wood floor the star
Full Story
FLOORSHow to Paint Your Hardwood Floors
Know how to apply nail polish? Then you can give your wooden floors a brand-new look
Full Story
KITCHEN DESIGNEye-Catching Colors for Your Kitchen Floor
Revitalize a tired wooden floor with a paint or stain in an unexpected color
Full Story
STAIRWAYSThe Upstairs-Downstairs Connection: Picking the Right Stair Treatment
Carpeting, runner or bare wood? Check out these ideas for matching your staircase floor treatment to upstairs and downstairs flooring
Full Story
HOUSEKEEPINGHow to Clean Hardwood Floors
Gleaming wood floors are a thing of beauty. Find out how to keep them that way
Full Story
MATERIALSWhat to Ask Before Choosing a Hardwood Floor
We give you the details on cost, installation, wood varieties and more to help you pick the right hardwood flooring
Full Story
MOST POPULARPros and Cons of 5 Popular Kitchen Flooring Materials
Which kitchen flooring is right for you? An expert gives us the rundown
Full Story
FLOORS10 Ways to Make the Most of Your Home’s Original Floors
Save yourself the cost of replacing your old floorboards with these tips for a new finish
Full Story


bigdoglover