

free form breakfast lasagna
10 months ago

Featured Answer
Sort by:Oldest
Comments (19)
 10 months ago
- 10 months ago
Related Discussions
Fall Lasagna Garden Setup Questions
Comments (13)I've read your post & hope I can answer your questions. We've done all the landscaping here, but not all in the same year. It does take time to figure out what you like, so once you do a bed you also might change it, so don't worry about permanent designs so much as just try something. You might find out about free plant swaps in your area to fill your beds with what is prolific in your area, plus if the plants are free you can spend more on tools & gloves. For veg beds prefer 3' between as plants lean out from edge & 2' isn't wide enough unless you only plant down the center of the beds. Wood chips are slow to decompose & ideal for paths, but not vegetable bed mulch. They also work for around shrubs & trees, but not so well around perennials. Too heavy, chunky, harbor slugs, etc. Great that you have access to it for free. I love our wood chip paths over all other paths we have. Will need renewing because they decompose. Keep at least 4" thick to suppress weeds. Compost over your existing soil in fall works great for soil improvement to plant in spring. Use what you can acquire spreading at least 4-6" for the veg. garden. If you improve the soil for perennials & shrubs that way they'll also thrive after planting needing a lot less fuss. Certainly doable for a couple, but also overwhelming if new gardeners. Probably the best thing is to do what you most want to do & keep up with one project at a time. Building a new bed is easy. Planting can go pretty quickly, too. It's the maintaining & moving things around that can be time consuming, so what you plan ahead with spacing, right plant right place, etc. helps ensure success. It's easy to do too much & burn out. Though what you do now in fall will make it much easier to garden in spring! If all you do is spread compost, then top with wood chip mulch you'll be able to move the mulch aside before planting in spring and won't have a weedy space to deal with! If you don't want to have to move the wood chips in spring just cover the compost with shredded fall leaves. Then you can plant right in them in spring. Lighting in winter is different than summer due to the sun's position in the sky, so observing & taking notes is useful. The wood chip mulch will be heavy if wet, so volume depends on what you have to haul it and how well you can lift huge bags. It does make a mess inside vehicles no matter what you try to do with the heavy duty bags, etc. When hauling a lot of it anything you can do to save your back helps. Even empty garbage cans in the back of the truck work well because you can lean & dump in place or on tarps that you'd then drag to where you need them. Kids' plastic sleds also work great for this dragging to spots. Wheelbarrows tip, but heavy duty carts seem easier for me to handle. 5 gallon buckets also work for quick unloading, but are harder to fill. Try a compost calculator to figure out how much you'll need to cover your garden spaces at various depths you decide. Here is a link that might be useful: compost calculator...See MoreSpecific questions on Lasagna Gardening
Comments (14)Lindrusso, I agree, lasagna gardening is not foolishness. I started a herb bed two years ago using the lasagna method, and enlarged it this past winter, using nothing but cardboard, leaves, used coffee grounds (UCGs are a great green, BTW!) and soil. (I know, most lasagna gardening gurus say you don't need soil, but it worked for me). I let the leaves and UCGs sit and decompose over the winter, covered with burlap, stapled into the ground with those big garden staples to keep it all from blowing away. Then in the spring I topped it all off with garden soil, and planted tomatoes. I dug down through the decomposed cardboard to plant the tomatoes, and they grew like crazy! A real jungle, it was awesome. I am never going to till another garden bed. I've never used peat in a lasagna bed, and I only put kitchen wastes into my compost bin. You should definitely dig and bury the kitchen scraps to keep the critters at bay. I believe that burying kitchen scraps in existing beds is called trench composting. You mighty try googling that phrase. So, to sum up my responses to your questions....... 1. I am very interested in being able to use scraps from the kitchen. I have read that many folks compost right in the beds rather than (or in addition to) having a compost heap. If I do this, can I just scatter the kitchen scraps right on top of the bed or do I need to cover the scraps each time to prevent pests, flies, etc.? Don't scatter, bury. 2. If I do need to cover kitchen scraps, I would use brown material, right? Do you all keep a supply of brown material at hand for tossing on the pile when you need to cover things like kitchen scraps? Like maybe a large trash can filled with leaves or something? When I bury the kitchen wastes in my compost pile, I almost always top them with a layer of browns, usually shredded paper, of which I have many, many bags. 3. After I add a layer of something like hay or straw, do I need to top off with something with a little weight to hold it in place? Seems to me stuff like that would blow away! Burlap and staples works well to keep stuff from getting blown away. 4. What sorts of things do you all use as the very top layer when planting in the spring? I've read that grass clippings can be used - this appeals to me as this is the most readily available item because we have a large lawn and it's free - best of all. I use soil. And I don't mulch with anything right now, but I plan to start mulching next year with shredded leaves. When I used grass clippings, I too ended up with grass growing in the bed. 5. If I use things like corn husks or plant refuse (non-diseased, not weeds) - can I just throw them in and leave them on top or do I need to cover or do anything else to them? I would bury plant refuse just like I do the kitchen scraps. 6. Is there anything in the kitchen that is particularly bad for attracting pests (besides the obvious no-nos like meats, etc.)? By the time I get around to composting my kitchen scraps, they are usually pretty slimy anyway, and the only critters interested in them at that stage are earthworms and the rest of what you'll hear referred to around here as "the microherd." I hope you find my comments helpful. Alison...See MoreNeed more green in my lasagna garden?
Comments (13)Thank you all. I have been lurking around GW trying to learn everything at once, but this is my first post. All of the forums have been greatly helpful. Can't imagine trying to learn all of this on my own :) I'm trying to turn the empty yard this house came with into something we can enjoy. I think it was too dry. I hadn't watered it since I built it. I wasn't sure if I was supposed to :) Glad to know it doesn't end up getting hot. That helps my nerves :) It rained over the last couple days and it did shrink a few inches, so I will keep watering it. Does an inch a week (adjusted for rainfall) sound right? I'll keep adding layers too. I'll get grounds form coffee shops daily, but I'm out of browns. I could use shredded computer paper (lots to get rid of) but I'm not sure about the ink in a veg garden. Maybe I'll volunteer to do some raking in the neighborhood. Mustard Seed, would the carpet start to stink? Have a bunch of that to get rid of too but worried about smell. Not sure about direct seed or transplanting vegetables. Read about winter sowing and that sounds great so whatever I can winter sow I will. The rest I'll direct sow if this decomposes enough or if not I'll start in little containers. The area defiantly gets plenty of sun. From about 10 or 11 to sunset in the summer it will get full sun. Actually kinda worried that it will get too hot. We regularly get days 100* and hotter in July August. The house is ~6' away from the garden and has stucco siding. Not sure if that will be too much for it. May be building a shade structure for afternoon sun. We'll see :) Thanks Again Mike...See MoreLasagna garden over bermuda (ok, it didnt work)
Comments (28)I'm thinking that gardening here would have been a lot easier if only we had poured a concrete slab first and then built raised beds atop the concrete slab. We might have had bermuda grass sprout in the raised beds, but at least it couldn't have also popped up in the pathways. Bermuda grass is evil and I hate it. Also on the hate list? Lambsquarters, Johnson grass, any and all wild amaranths but especially Palmer's amaranth, wild carrots, wild bidens, crab grass, greenbrier and poison ivy. Other than that, I love practically everything else that grows here. This actually is my best bermuda grass year in a very long time. I worked long and hard this year to try to keep it out of the garden. Was I 100% successful? Heck no, but I think I can say I was 95% successful and I'd been working hard to dig out and get rid of any that sprouts or creeps into the garden. I put down a commercial grade of landscape fabric in every pathway but one and covered it with a 4" thick layer of mulch. Prior to putting down the fabric, I rototilled each path and raked out all the weeds and plant roots I could find. The one path that didn't get the landscape fabric was the control path for comparison. Within 2 weeks, I had bermuda grass and other weeds sprouting in the control bed and have been fighting them there ever since. In the pathways where I put the landscape fabric, occasionally something sprouts in the mulch, but I always pull it out, no matter what it is, before the roots can grow down through the landscape fabric. When you use landscape fabric, you have to use a heavy, woven one that does NOT have those little holes punched in it to allow water (lol, and weed seeds and everything else) to flow through the fabric. You have to have the ground clean and bare when you put the fabric down and immediately put down a thick layer of mulch so it is so dark that nothing can sprout beneath the fabric and grow upward. And, you have to pull out every single weed that sprouts in the mulch the very moment you first spot it. Using all the above techniques keeps my garden pathways clear, clean and weed-free, but I have to be very persistent about keeping the weeds out. If you let weeds grow up through the landscape fabric from underneath it or grow down through it from above, you'll have a big mess that is almost impossible to clean out. Finding the right landscape fabric is important. I was really stupid our first year here and bought the one sold at Sam's and Wal-mart (still sold there all these years later too) that has all those millions of little pre-punched holes in it that are supposed to let water through. Well, weeds and grass grew up through every little hole. It was the biggest mess I'd ever seen. Then I found a really heavy-duty one at CostCo. I buy it on rolls that are about 220' or 230' long and 4' wide. It is woven and tough---the bottom is almost like felt. As long as I am careful to install it as described above, it reduces my weed-pulling time to almost nothing. I would love to find the same fabric 8' wide. If I did, I'd put it on all sides of the garden outside the garden fence and cover it with gravel....and dare the bermuda grass to find a way to get under, over or through that and creep into the garden. It would be a perfect solution....See More 10 months ago
- 10 months ago
 10 months ago
 PRO10 months ago
 10 months ago
- 10 months agolast modified: 10 months ago
 10 months agolast modified: 10 months ago
- 10 months agolast modified: 10 months ago
- 10 months agolast modified: 10 months ago
- 10 months ago
- 10 months ago
- 10 months agolast modified: 10 months ago
- 10 months ago
- 10 months ago
- 10 months ago
 10 months ago



Related Stories
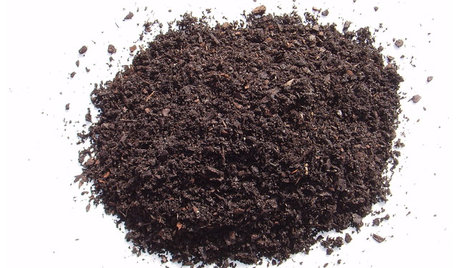
GARDENING GUIDESGet on a Composting Kick (Hello, Free Fertilizer!)
Quit shelling out for pricey substitutes that aren’t even as good. Here’s how to give your soil the best while lightening your trash load
Full Story
HOUZZ TOURSMy Houzz: Cozy Country Meets Bohemian Artistic in Australia
Healthy helpings of salvage and rustic art give a pastureland home free-spirited style
Full Story
HOUZZ TV LIVEStep Inside a Modern Home Built With Old-School Craftsmanship
Watch and read how an architect combined modern forms and materials with crafted details to create long-lasting style
Full Story
MODERN HOMESHouzz Tour: A Modern Take on a Montana Log House
Multiple buildings form a vacation compound that's more like environmental art than architecture
Full Story
ARCHITECTUREThe Clever Ledge: Where and How to Use It
Sometimes a ledge — not a shelf — is what you need for form and function. Here’s our room-by-room guide
Full Story
KITCHEN DESIGN91 Kitchen Banquettes to Start Your Morning Right
Slide into one of these stylish breakfast nooks and stay awhile
Full Story
KITCHEN ISLANDS9 Kitchen Bars and Islands That Use Space Wisely
With some smart planning, you can fit an island or a breakfast bar into just about any cooking space
Full Story
KITCHEN OF THE WEEKKitchen of the Week: Bold Color and Sweeping Curves
This orange, blue and white London kitchen, breakfast bar and seating area flow in a sinuous S
Full Story
KITCHEN DESIGN9 Ideas for Creating a Casual Dining Perch in Your Kitchen
As a dining, conversation or homework spot, a breakfast bar can be a welcome addition. Here’s how to work one in
Full Story
DECORATING GUIDESBudget Decorating: How to Decorate Smart and Slow
To make the most of your decorating dollar, forgo the disposable stuff, think vintage and free first and give yourself a splurge
Full Story
foodonastumpOriginal Author