


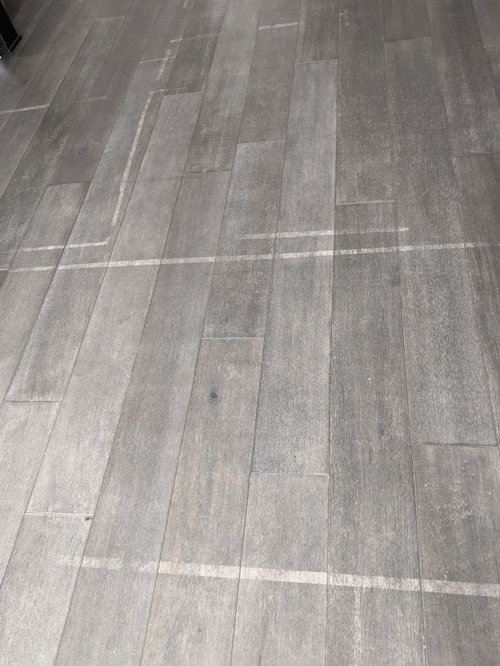
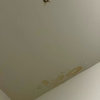
Need help! Painters tape pulled color off of oil finished floor!
karrots911
3 years ago
Featured Answer
Sort by:Oldest
Comments (6)

midcenturymodernlove
3 years agoRelated Discussions
Cork flooring surface came off with tape!
Comments (3)"Tape issues 1. Not supposed to be used on flooring with coatings such as acrylic, polyurethane or wax. 2. It can be used on low gloss paint and LAMINATE FLOORING... -- Not cork, wood or bamboo. ** It works by the tape surface easily lifting off it's own glue. When you pull the tape from the surface of the wood, it leaves the glue on the wood and the plastic tape comes off. The flooring industry would refer to this as releasable adhesive. The PROBLEM? The adhesive is not the same gloss as the surface it was placed, leaving bands the width of the tape. -- IF the tape is left on the floor too long it chemically and mechanically bonds to the surface (plasticizers) and is not possible to remove or remove the marks left by the tape."...See Morewhen to remove the painters tape?
Comments (5)Drying time between coats is listed on the directions for using the paint, and of course varies with temperature and humidity. I am not a pro painter, but over the years, have had a variety of results using painter's tape. I've found its ability to peel up and leave a crisp edge is related to the quality of the paint, but with BM, you won't have a problem. The method I use does not include pressing the tape down with a putty knife or sealing it with other paint. What I do is put it down, and press it with my finger, but when I paint, I paint as if there's no tape there at all. That takes longer, but what you get is not a lot of paint on the tape, and you get nice, crisp edges when you peel it off. When you really slop the paint on, peeling the tape off is likely to leave ragged edges. As to when to remove the tape, I don't do it sooner than 24 hours after I lay down the last coat. The tape usually comes with guidelines as to the maximum amount of time it can be left applied before its removal will do stuff like pull up the drywall paper....See MoreAura roller marks & painters tape issue
Comments (16)Generally, you are correct. Lower nap means less stipple. But I have used 1" nap sleeves to roll flats plenty of times. I used to work for a contractor that only did new homes and speed was the name of the game. His theory was bigger naps hold more paint so that painter has to dip less which saves time. It says right on the package that 1" nap is for 'rough surfaces'. 3/4" nap is for 'semi-rough surfaces'. Eventually I learned how to apply paint with big naps so that it looked like I used a 1/2" nap. Now, we had 30 guys and not all of them could do that....some were pigs. Give a pig a 1" nap sleeve and they could really make a mess. I'm talking BIG stipple and ugly skid marks that would come from loading that sleeve up with so much paint that the roller would slide around on the wall. And of course, they would leave it. That's new construction painting for ya. So, generally speaking it is true that lower naps=lower stipple, but the application technique is also very important. Plus, if you are painting with flats and you are using a 3/8" nap sleeve because you are trying to maintain a low stipple, you may be creating other problems. It's important to put enough paint on the wall to keep that wet edge going...with a 3/8" nap size, that may be difficult to do. It's possible of course, but I just find rolling flats to be much easier when I am putting the paint on heavier and spreading it out. Another factor to consider is that paints dry fast. If you are using a small nap sleeve, they are going to dry even faster. One way to get roller stipple to show is to roll back into something that has already started to dry...this you certainly want to avoid. The W pattern to me is just simply a way to explain to people to spread the paint out and then roll back into it. What you don't want to do is slap your dip in one place. Here is what I do. Imagine that one column is 9" (the size of your roller). One dip of my roller will get me 2 columns worth of wall space done if the walls are 7-9 feet high roughly. I dip my sleeve and skip that first column so that all that paint I just unloaded from my fresh dip on the wall is in column #2. I then roll out column #1 and then roll back into column #2 once or twice to finish filling column #1 in. After that first column is filled, column #2 doesn't have that much paint in it because I worked it out already....yeah, really really hard to explain with words, but I hope you get the idea. I'm really not making a letter, and I'm certainly not breaking the wall down into upper and lower. You really want to roll ceiling to floor. If you go and watch videos on youtube by pro painters, this is how you will see most of them paint. I think maybe the W pattern concept was invented before they used rolling poles....See MoreNeeded: Painter's Tape Tips
Comments (6)If the paint on which you put the tape has not cured for at least several days or was applied on a surface that was not prepared properly (i.e., lightly sanded and possibly primed), the the tape will pull away the paint. All you can do in this case is go back and touch up the surface on which the paint pulled off with an artist brush. Here is what works for me to get a straight line on trim/wall joints: Apply the painter's tape, then either apply a very thin bead of clear painter's caulk at the joint, wipe off the excess with a damp cloth - you want a very thin layer, let it dry, paint, let dry for 30 mins. or so, then pull off the tape. On ceiling/wall joints, apply the 2" tape to the ceiling, indenting into the ceiling about 1/8". Wall/ceiling drywall joints are always uneven, so it's impossible to get a straight line by finding the exact 90 degree angle point. Indenting into the ceiling about 1/8" solves that problem. When you paint, the wall color paint will fill that 1/8" space, but you'll never notice it. All you'll see is a straight line. After you've applied the tape, paint a thin layer of the ceiling paint along the edge of the tape and let dry. Paint a 2-3" strip of the the wall paint along the tape edge, being sure not to "glop" a lot of paint at the tape edge. You don't need to remove the tape right away. You might want to leave it on until you roll the whole wall because invariably, if you're like me, the roller overshoots and I get a splotch of paint on the ceiling which I quickly have to wipe off. With the tape still there, you have that margin of safety. Once the walls are painted, pull the tape off and you should have a real nice straight line. Another hint for using the Frog tape: Apply it, then moisten the joint edge with a damp cloth. That activates the "glue", creating the bond ahead of time. I found that the Frog tape works well along the side edges of doors/windows/cabinets, but not as well along baseboards. I still like the caulk idea the best along baseboards....See More PRO
PROJohnson Flooring Co Inc
3 years agoci_lantro
3 years agoGayle
2 years ago
Related Stories
GREEN BUILDINGOff the Grid: Ready to Pull the Plug on City Power?
What to consider if you want to stop relying on public utilities — or just have a more energy-efficient home
Full Story
REMODELING GUIDESFinish Your Remodel Right: 10 Tasks to Check Off
Nail down these key details to ensure that everything works properly and you’re all set for the future
Full Story
DECORATING GUIDESQuick Fix: Multipurpose Painter's Tape
Five creative uses beyond a paint job for those favorite blue rolls
Full Story
LIFE10 Helpful Things to Check Off Your List on a Rainy Day
When the weather feels right for staying inside, try one of these pleasant to-dos
Full Story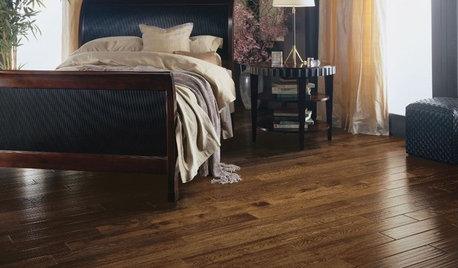
REMODELING GUIDESYour Floor: An Introduction to Solid-Plank Wood Floors
Get the Pros and Cons of Oak, Ash, Pine, Maple and Solid Bamboo
Full Story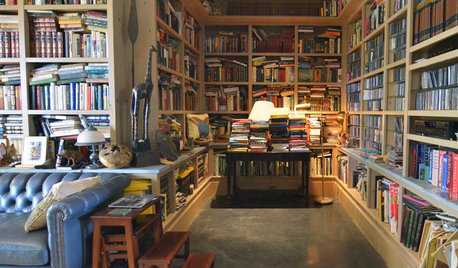
HOUZZ TOURSMy Houzz: Oregon Landscape Inspires a Painter’s Dream Home and Studio
Acres of unspoiled land and abundant natural life surround this special live-work space in eastern Oregon
Full Story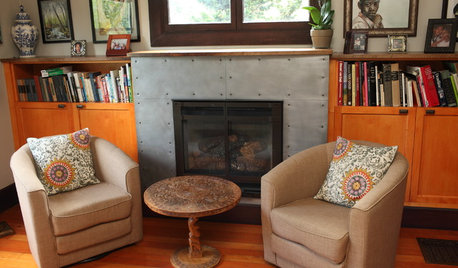
HOUZZ TOURSMy Houzz: Personalized Style in a Portland Painter’s Live-Work Home
Empty nesters bring DIY touches and industrial-style creativity to their 1908 Oregon house
Full Story
REMODELING GUIDESDesigner Confessions: Torn Between Wood Floors
19 Photos to Help You Choose a Wood Floor Finish
Full Story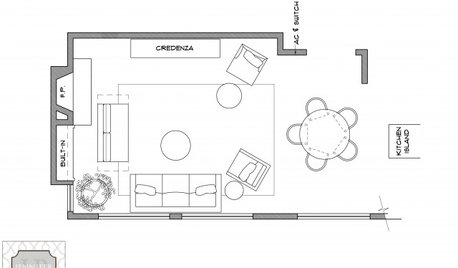
DECORATING GUIDESArranging Furniture? Tape it Out First!
Here's how to use painter's tape to catch any interior space-planning mistakes early
Full Story
HOUSEKEEPINGThree More Magic Words to Help the Housekeeping Get Done
As a follow-up to "How about now?" these three words can help you check more chores off your list
Full Story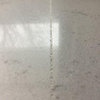

Mrs. S