


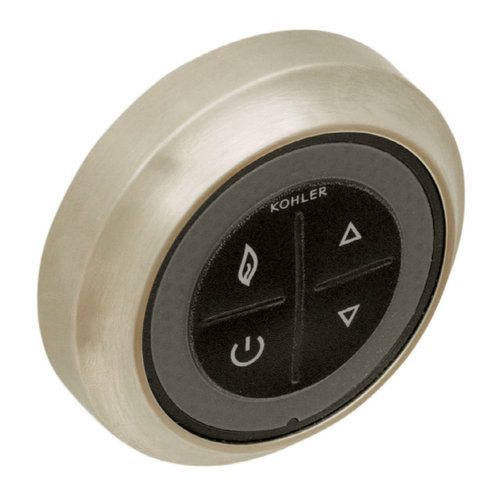
Could anyone explain what these Kohler bathroom symbols mean?
Jane Ericson
5 years ago
Featured Answer
Sort by:Oldest
Comments (7)

Annette Holbrook(z7a)
5 years ago
nhbaskets
5 years agoRelated Discussions
What do the symbols on a soil map mean?
Comments (11)I went to the site you gave. On entering the site I get a county wide map and then turn on the township layer. I can zoom the township but I can't get the soil mapping to turn on. I'm working from a national soil data base. Linked below is a part of the mapping in the south end of Beavercreek Township. Can you tell if you are on the photo or north,south, east, west of it? Here is a link that might be useful:...See MoreRebuilding Basement Bathroom ... I Could Use Some Advice (long)
Comments (0)I have a clear picture in my head of what this bathroom will look like when it's finished ... getting it to that point is going to be challenging. The space is 61" x 92". It is the original bathroom to our 1848 house, added as a one-story addition outside the back door when the house got plumbing in the 1920's or 30's. This is the right side of the room: and this is the left: The door is 28", opening in and to the left toward the tub, almost centered on the wall. Everything in this room except the basketweave tile floor is leaving. The toilet is old, the finish on the cast iron sink is worn through from years of dripping water, and the ceramic sink base has a crack that was repaired with packaging tape. The clawfoot tub will find a new home ... I plan to build a step-back cupboard in its place, to provide some much-needed storage. We have 4 other full baths in this house. Having a clawfoot tub in the basement is cool, but not very practical. The tub was added by the previous owner, so we don't feel guilty about removing it. We are going to remove the window, too. This bathroom addition is buried inside a larger 1960's era addition, and the window looks out into the garage ... with a lovely view of our water system. By taking out the window, I'll have a bit more depth to work with to build a better cabinet where the tub was. And I'll have a place to hang my inspiration poster. The electric is finished. We removed all the scary old wiring and the seriously illegal junction box behind the sink. Now we have a box for a yet-to-be-chosen light fixture, a new switch, and an electrical outlet (which the room didn't have before). For plumbing, we have to replace all the supply lines. The original galvanized supply was discontinued when the bathroom was remodeled during the 1960's construction. The copper replacement lines were run in the weirdest way, and the toilet supply leaked, so we're replacing them. The galvanized sink drain was still in use, but it has rust on the Y that connects to the elbow of the sink drain ... so it looks like we will have to see if we can cut it and attach a modern drain to it. Removing the whole thing doesn't look to be an option, because it goes down below the floor that we want to save. I have to call a plumber. I really want to reroute these radiator pipes, and put them into the wall. They were running outside the wall ... across the wall over the toilet, down the left-hand corner, and across the baseboard to the radiator under the window. This means that we'll have to shut down the boiler ... sigh. This is the my inspiration for the stepback cupboard. I know I got this photo from a decorating blog, I just don't remember which one. I love the size and proportions of this piece ... mine will have 4 doors, no drawers, and no glass. I haven't decided what color it should be ... maybe a vintage-type red? We're going to use this medicine cabinet. I bought it years ago at a thrift store, and I've been holding onto it until I could find just the right place for it. It has a beveled mirror, which I removed before I remembered to take a 'before' photo. I've stripped more than my fair share of paint off of things during the restoration of our house, and restoring and repainting this piece should be pretty straight-forward. BTW, if you're working on something and you're tempted to just paint over the hardware .... don't. Here's where I could use some help. I have my heart set on using a sink like this: (without the side extensions). Though I can't find one right now, I know they're pretty readily available if I'm patient in my search. I want to build a vanity to coordinate with the stepback cupboard, install a maple top (I have a bit of old maple basketball floor stashed away for just this type of project), and inset the sink. Has anyone seen a sink like this done this way, does this exist only in my imagination? There are two new sinks that may give me a similar look, if I can't find an old one in good shape. A new sink would be DH's choice, BTW. The Kohler Gilford, which comes in 24" and 30" widths. and this sink from American Standard, which only comes in 30" I haven't seen either of these sinks in person, but I lean toward the style of the AS sink from what I've seen in photos. I'm concerned, however, that 30" will look like I've plunked a kitchen sink into the bathroom, and the 30" sink only leaves minimum toilet space in the 61" width of the room. For this reason, I feel I should investigate the Kohler 24" model. Wall color? Probably some sort of ivory beige with white trim. I'm not a beige sort of person, but it feels right in this room. Any thoughts? I'd sure like to hear some other opinions. I have this sneaky suspiciou that there's something I may be missing. Thanks, Connie...See MoreBathroom Reveal, Thanks to the Bathroom and Remodel Forums! (pic
Comments (56)This old thread got revisited. @dani_m08 to answer the question about extra probe, I believe I ordered an extra one when I bought the set up. The probe wire is just setting in the junction box I think but honestly I cant remember. When I laid out the underfloor heating and the probe, I just ran another probe near the first probe, and it was then sealed into the floor self leveling compound as per instructions. then the end was just threaded into the wall like the one that would be live, and not connected, but just laying there in the box. Regarding the tile layout. I just decided to run it this way, after getting instructions on the 90Degree way, IIRC. The herringbone that I love is from my childhood and the side walks in my neighborhood that all ran at 45Degree. so that to me is herringbone. I know you posted on @sochi thread about her amazing bathroom and a wall mounted faucet. I would totally do it if I had the right sink for it. In my case I had made my sink out of soapstone and an integrated backsplash. The pictures of this bathroom reveal are no longer available because of the use of photo bucket, when it was Gardenweb. I did not keep my account with photo bucket. I'll add some of the reveal pictures so you can see the sink and floor. Regarding the sink there is no ledge for water to drip from my hands when using the faucet. The water drips right into the sink. In my other bathroom with a deck mounted faucet I am always wiping up drips and it is a nuisance. I much prefer the setup for this sink. Below: I love the flush finish from the faucet to the bottom of the sink. nothing drips on a counter or edge of a sink. Below: looking in from the doorway. Below: Here I am finishing up the sink. the backsplash was epoxied on as a separate piece. The whole soapstone install in the room took next to nothing to buy as they were all small pieces that I epoxied together with a 3 part stone epoxy. Below: this is the counter at the tub, and is in 2 long pieces but I was able to epoxy them together at there edges to make a wide slab for the top. All the soapstone was finished with a 60 grit sandpaper to be rough and this lovely soft tone of blue/green/gray/white. I did not oil it so this color tone would remain light. Below: If I recall correctly @sochi helped me decide on this Hubberton Forge Mirror. I have 3 different metals in this room, but they are all a cool silver to black color. Below: the center of this tower shares space with the kitchen on the other side of the wall. there is also some extra space that houses some electrical wiring. this is an old simple house. this bathroom was an add on when it got move to the farm in the 30s IIRC. The plumbing was all rearrange and some of the details that were orignially there I kept but updated it, such as this tower feature. The old one went and the carpenter did a wonderful job with this one. Below: This feature was another thing I kept from the old bathroom but flipped it from the other end and had the carpenter put drawers in it. Before it was a hell hole. things got lost and the build was soooo old and creapy I didn't like using it for storage. Now it is perfect for storage....See MoreBathroom from hell - Two year old bathroom tile flexing
Comments (30)@Amir Ali - I just wanted to post a comment in order to: 1. Let you know that I completely understand what you are going through right now. I have TWO FAILING slate floors that are part of current bathroom renovations. The master bathroom floor had not been grouted due to delays on his part. I discovered that some of the tiles were COMPLETELY LOOSE - and some sounded like they were only partially bonded to the floor. This floor is failing - and it has BARELY been walked on because the bathroom renovation basically stopped due to issues - bathroom isn’t usable so the only use has been when I’ve gone in there to take photos or measure something = maybe some tiles had been walked on four or five times before I started discovering the loose tiles. It is obvious that the tiles failed to bond to the floor - the mortar must have skinned over or something. I am NOT reinstalling the loose tiles. IMPORTANT - my former contractor does not fit the definition of what people here on Houzz love to refer to as a “hack” (at least not the actual business that I hired to do the work) - however, his employee clearly did not know what he was doing (or just didn’t care) - and that makes the owner of the business liable for this work. The business has hundreds of Google ratings (4.9/5), owner is a member of TCNA, I had several reviews from people I know (and trust), and I DID NOT JUST TAKE THE LOWEST BID - I am NOT a CHEAPSKATE. I am so tired of people AUTOMATICALLY blaming the homeowner when they have ZERO basis to do so. Making assumptions and basically telling homeowners that they are IDIOTS and CHEAP really makes me upset. Okay, I’m finished with my rant! 😂 The ”fix” is this: The ENTIRE floor is being torn apart. Not only is the tile being removed, the cbu will be taken out. New contractor assumes that he will also find that former contractor failed to add the required second layer of plywood in order to make sure that the substrate was prepared correctly in order to have a natural stone floor installed. Based upon the above issues, I investigated the slate floor that was installed in one of the other bathrooms back in April. I noticed a few grout issues - and as I went around knocking on each tile, the sound on many tiles indicates tiles that are only partially bonded. This is what the floor looks like from a standing position: And this is what it looks like when I realized that I needed to inspect it after the failure in other bathroom: I have cracks and broken spots of grout in many places. I also have some grout which is stuck on my tile because the contractor failed to seal the tile (as required) prior to grouting (I found this out later - I was in the hospital while this floor was being installed) and made promises over and over to come remedy the issue. So, this floor will also be ”fixed” in the same manner as the first one - I’m just waiting to have it ripped out until after the other bathroom is completely finished. 2. I also wanted to let you know that regardless of whether (i) you have a written contract, and (ii) that contracts specifically provides (or fails to provide) a five year (or however long) warranty period, you still have recourse against the contractor who installed your tile. Most states (probably all but I haven’t done research on this issue in every state) have enacted statutes that protect homeowners for this type of issue. In my jurisdiction, there are specific statutes that relate to home renovation projects - these statues require (among other things) that all work must be done in a good and workmanlike manner. Following industry standards, as well as manufacturer’s specifications, are part of this requirement. Also, the consumer protection act in my state also protects homeowners against contractors who perform shoddy work. I am 99% positive that your state will have some similar statutes. If you want to share your jurisdiction, I am happy to take a quick look in order to point you in the right direction. MANY jurisdictions require the homeowner to provide the contractor with notice and a right of remediation. Unless you follow the requirements of your particular statutes, you won’t be able to bring an action against your contractor to recover damages. FYI - my former contractor has chosen to ignore the notice I provided, so I then was free to hire another contractor to do the remediation work. My former contractor will owe me the money I have to spend to correct his failure to properly install my tile (which will greatly exceed what I paid him - removing tile + cbu + buying new material (including nice slate tile - because I didn’t purchase cheap slate tile for the the project initially). I am sorry that you’re going through this because it is NOT fun. I decided to consider myself “lucky” because he hadn’t yet installed this tile on my laundry floor! Hopefully, you won’t have water damage that will require even more remedial work in order to fix it....See More
Jane Ericson
5 years agolast modified: 5 years ago
kudzu9
5 years agoJane Ericson
5 years agolyndseyrudder63
last year

Related Stories
BATHROOM DESIGN10 Bathroom Trends From the Kitchen and Bathroom Industry Show
A designer and his team hit the industry’s biggest show to spot bathroom ideas with lasting appeal
Full Story
REMODELING GUIDESBathroom Workbook: How Much Does a Bathroom Remodel Cost?
Learn what features to expect for $3,000 to $100,000-plus, to help you plan your bathroom remodel
Full Story
BEFORE AND AFTERSBefore and After: 6 Bathrooms That Said Goodbye to the Tub
Sleek showers replaced tub-shower combos in these bathroom remodels. Could this be an option for you?
Full Story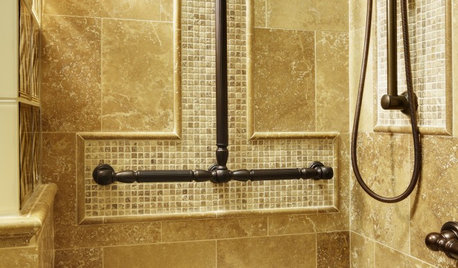
BATHROOM DESIGNBathroom Safety Features That Support Your Style
'Safety first' doesn't mean style comes in second with bathroom grab bars, shower seats and more designed for the modern home
Full Story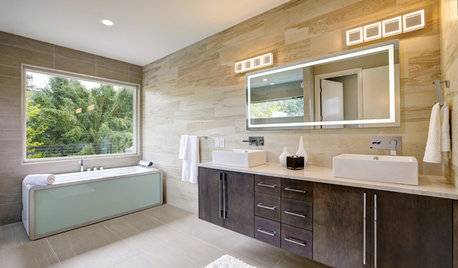
BATHROOM DESIGN8 Elements of Contemporary-Style Bathrooms
Does a sharp, clean and uncluttered bathroom sound good to you? If so, a contemporary design could be the key
Full Story
REMODELING GUIDESA Dark Atlanta Attic Welcomes a Light-Filled Bathroom
From architecturally quirky attic to sunny bathroom, this renovated space now has everything a growing family could need
Full Story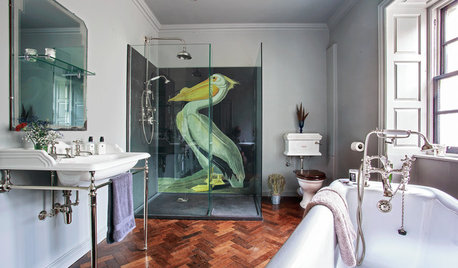
BATHROOM DESIGNAlter-Ego Bathrooms That Reveal the Real You
We all have sides of our personalities we tend to hide away. Could your bathroom be the place you can truly be you?
Full Story
UNIVERSAL DESIGNBungalow Bathroom Gains New Accessibility
Better design and functionality make life easier for a homeowner in a wheelchair
Full Story
BATHROOM DESIGNNew This Week: 4 Small Bathrooms With a Shower-Tub Combo
See how designers enhance the classic space-saving feature with tile color, vanity style and other design details
Full Story
SMALL SPACES10 Tips for Chic Little Bathrooms
Get more visual appeal and storage in less space, following the lead of these stylish compact bathrooms
Full Story
ci_lantro