


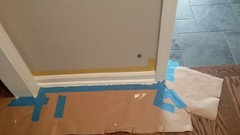
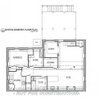
Advice for protecting house during hardwood floor sanding/staining?
Jen B
5 years ago
last modified: 5 years ago
Featured Answer
Sort by:Oldest
Comments (34)

User
5 years agoRelated Discussions
renting with dogs ... how do we protect hardwood floors?
Comments (10)Thanks all for these helpful commments. I followed the link about padding for hardwood floors and was pleased to see that rebond polyurethane is recommended since it is cheap. Someone gave us some nice free carpet remnants and some nice-looking polyurethane padding with one coated side, but for some reason that padding has a strong chemical smell, so I guess we will have to bite the bullet and actually put out some cash for new padding. I'm intrigued by the idea of using another area rug as padding for this carpet, but it sounds expensive and too thick! In answer to the question of whether we couldn't have rented a place without hardwood, what a sensible question :-) But actually, we were really lucky to rent a place at all with three large dogs! And our rental happens to be right across the street from the house we're remodeling! So no, we didn't have another option anywhere near this attractive. I wouldn't risk just clipping the dogs' nails in this situation to protect the wood, so a pad under our temporary carpet it shall be. The advice to roll up the carpet periodically to remove carried-in dirt is obviously from a fellow experienced dog owner :-) and is very well-taken. Fortunately, our dogs are all very reliable in terms of housebreaking so we don't expect any problems in that area. Thank you all so much for your kind input!...See MoreHardwoods going in today- advice re protecting during const?
Comments (13)Secondhalf - it doesn't sound as if what you were told was wrong; you just have to layer it with knowledge of your household. Technical chickens and all. For sure if liquid gets on ramboard and it is not cleaned away, it can hold moisture on a wood floor and be more problematic than if it weren't there. If the football team decides to test out their new cleats on this groovy surface, you might wish you had ramboard present. We'll leave the chickens out of it ;) But probably scattering feed in between floorboards isn't recommended. So YMMV, depending on what you actually *do*. The GC is making some random generic recommendation for what seems to work best in general. You happen to know what will be happening specifically, so you can modify accordingly! Also, quite frankly, because you've asked the question at all suggests a certain level of nervousness about it and so you might want to consider using the ramboard just for peace of mind. But keep an eye out for trapped moisture. And ban cleats, claws and the un-housebroken of whatever kingdom. :)...See MoreFootprint in my newly stained hardwood floors, pro advice?
Comments (11)That's a foot print in the stain not just in the finish. Yes the 'fix' is to to a patch repair. They would sand down the area to raw wood, restain that area and then apply 2 coats of finish (with all the appropriate cure times to be observed). Then the entire floor gets a final coat of finish. It is the FINAL coat that offers the continuous finish/gloss level. To reduce your fears, Satin is a VERY forgiving finish. It has a lovely glow. This glow DULLS DOWN as it ages. It might start off as a HIGHER GLOSS Satin (be prepared) but it will ALWAYS settle down. This takes 1-3 months. So don't panic if you see a nice glowy floor on day 1. That will change. Once the 3 months has passed, the floor will sit happily at the satin level it was destined to be. Then, like all floors, it slowly dulls down withe wear. Higher traffic areas dull a little faster. So your foot print area (being in a high traffic spot) will mostly likely dull down nicely. The question becomes: Which bugs you more? A foot print such as the one you found (noticeable once you know it's there) or a *possible* sheen difference that will disappear with age? There is only one person who can answer that question - and that's you. Permanent foot print vs. 'disappearing' gloss difference? I'm not worried about the gloss level. I would worry about the stain variation....See MoreSanding and/or polyurethane as sealant for hardwood floor
Comments (31)Lyndee Lee: Thank you. Good to know. I am going to try to get the odor out of this bedroom by lightly rinsing the floor with water, sopping it up with paper towels, continued airing out of the room via open windows, and probably priming the walls. If all this doesn't work, I may try sealing the floor with Sealcoat or something like that before putting down LVP. I am reconsidering use of Zinsser Bin for the walls and ceiling, as it seems like it would be unnecessary overkill if the odor is just Pine Sol on the floors and not from the old carpet/carpet padding. I have read that shellac primer could pose a problem especially to interior walls that are exterior on the other side, due to shellac's effectiveness in sealing. Might not be good to seal in moisture into sheetrock wall, but, I am not a professional painter and wouldn't know the particulars of this. Plus, I am not wild about the idea of putting shellac on every surface of a bedroom's walls. So, I am looking into other odor trapping primers for the walls that are water based and low VOC. Feels like I am spinning my wheels....See Morecat_ky
5 years ago
Kathryn P
5 years agolast modified: 5 years agoJennifer Dube
5 years agoJen B
5 years agopalimpsest
5 years agoJen B
5 years agoAurora Tee (Zone 6a)
5 years agoJen B
5 years agoUser
5 years agolast modified: 5 years agoJen B
5 years agoAurora Tee (Zone 6a)
5 years agolast modified: 5 years agoAurora Tee (Zone 6a)
5 years agolast modified: 5 years agoBruce in Northern Virginia
5 years agoJen B
5 years agoJen B
5 years ago PRO
PROAnglophilia
5 years agolast modified: 5 years agoCole Man
5 years agolast modified: 5 years ago
lhutch13
5 years agoJen B
5 years agolast modified: 5 years agoAurora Tee (Zone 6a)
5 years ago
Embeth
last yearJen B
last year
Related Stories
HOUSEKEEPINGHow to Clean Hardwood Floors
Gleaming wood floors are a thing of beauty. Find out how to keep them that way
Full Story
MATERIALSWhat to Ask Before Choosing a Hardwood Floor
We give you the details on cost, installation, wood varieties and more to help you pick the right hardwood flooring
Full Story
FLOORSHow to Paint Your Hardwood Floors
Know how to apply nail polish? Then you can give your wooden floors a brand-new look
Full Story
REMODELING GUIDESTransition Time: How to Connect Tile and Hardwood Floors
Plan ahead to prevent unsightly or unsafe transitions between floor surfaces. Here's what you need to know
Full Story
REMODELING GUIDESContractor Tips: Smooth Moves for Hardwood Floors
Dreaming of gorgeous, natural wood floors? Consider these professional pointers before you lay the first plank
Full Story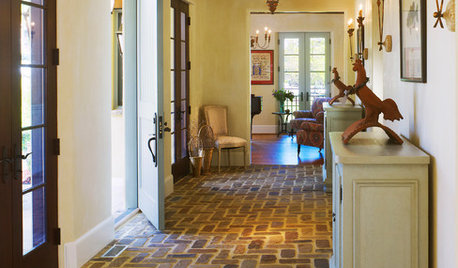
RUSTIC STYLEBrick Floors: Could This Durable Material Work for Your House?
You love the old-world look, but will you like the feel of it underfoot? Learn the pros and cons of interior brick flooring
Full Story
ARCHITECTUREStilt Houses: 10 Reasons to Get Your House Off the Ground
Here are 10 homes that raise the stakes, plus advice on when you might want to do the same
Full Story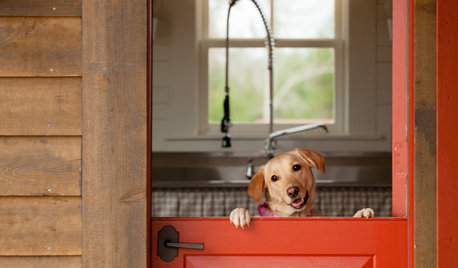
LIFEThe Polite House: On Dogs at House Parties and Working With Relatives
Emily Post’s great-great-granddaughter gives advice on having dogs at parties and handling a family member’s offer to help with projects
Full Story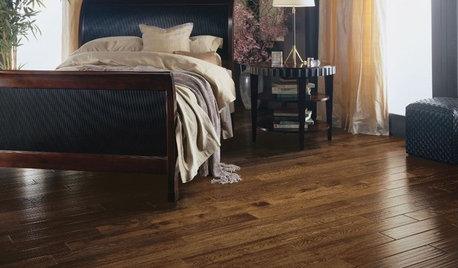
REMODELING GUIDESYour Floor: An Introduction to Solid-Plank Wood Floors
Get the Pros and Cons of Oak, Ash, Pine, Maple and Solid Bamboo
Full Story
REMODELING GUIDESHow to Protect (Even Enhance!) Your Relationship While Renovating
No home improvement project is worth a broken heart. Keep your togetherness during a remodel with this wise advice
Full Story

Jen BOriginal Author