


Transition Time: How to Connect Tile and Hardwood Floors
Plan ahead to prevent unsightly or unsafe transitions between floor surfaces. Here's what you need to know
JW
July 9, 2013
Transitioning a bathroom’s tile floor to the hardwood of another room is often given little forethought. However, not planning the transition can result in a final product that doesn’t meet your expectations, or a floor assembly that’s destined to fail.
Most of the floor framing in North America is designed to meet a base industry standard. This standard (usually measured as a deflection rating) allows for materials like small ceramic tile, vinyl, carpet and hardwood to be used on floors. But these days most of my clients want large, natural stone tile.
Many also want the tile to transition seamlessly from one room to the other. This can be done, but most homeowners don’t know that their home has to be designed with extra strength and rigidity to carry this weight.
Below you’ll learn what to specify when planning a transition from tile flooring to hardwood.
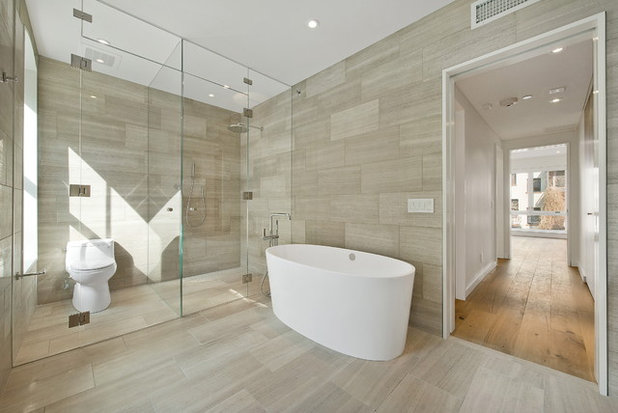
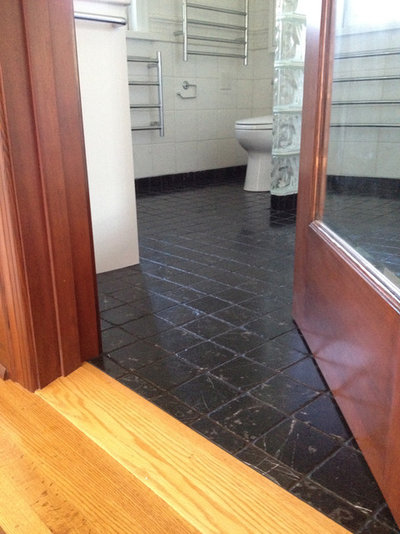
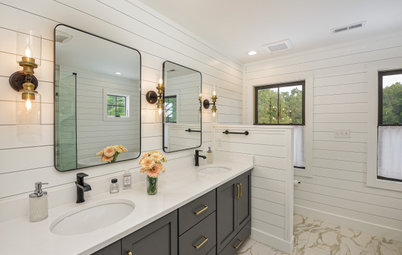
This bathroom is a great example of current trends in bathroom design: plenty of space, bright light, a great soaking tub and a walk-in barrier-free shower.
Notice the flush transition from hardwood flooring to tile. Looking closer (click on the photo to enlarge it), you’ll see that the tile is large (about 1 foot by 2 feet) and made of marble; both features require a stiffer floor than most homes have.
Tip: If you’re working with large-format tile or natural stone, specify that your rooms meet a stronger deflection rating: L/720, instead of the base-standard L/360. This number indicates how much flex a floor has before tile is installed — both the Tile Council of North America (TCNA) and the Terrazzo, Tile and Marble Association of Canada (TTMAC) require L/720 for heavy installations.
Hire a professional tile installer for seamless transitions
Most of today’s floor tile is ⅜ inch to ¾ inch thick. Most hardwood flooring is ¾ inch thick. This means that when you put tile next to hardwood flooring, your tile choice will be critical for a flush transition.
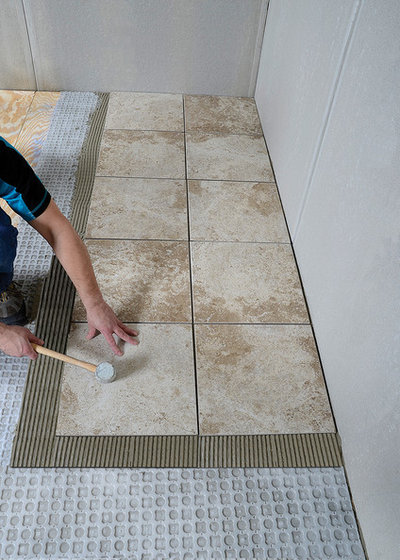
Simply tiling on top of a plywood subfloor is not an option — this practice is frowned upon and is not permitted by the TCNA or TTMAC. However, you can install a thin uncoupling mat (like Laticrete’s Strata Mat or Schluter Systems‘ Ditra) to meet the tile industry’s requirements.
Tip: Installing a second layer of plywood over your subfloor and under your hardwood allows for more floor preparation options in the future. This is also a valid option if your home’s floor joists were not designed for a stronger, heavier floor. However, this should be planned early on, since it affects how your stairs and stair risers are built.
Here's an action shot of tile being installed over an uncoupling membrane from Laticrete, which prepares the plywood subfloor for tile.
Tip: If your floor isn't strong enough to meet the right deflection rating, an uncoupling membrane won't help. Increasing the floor joist width or adding another layer of plywood is a better and safer option.
Tip: If your floor isn't strong enough to meet the right deflection rating, an uncoupling membrane won't help. Increasing the floor joist width or adding another layer of plywood is a better and safer option.
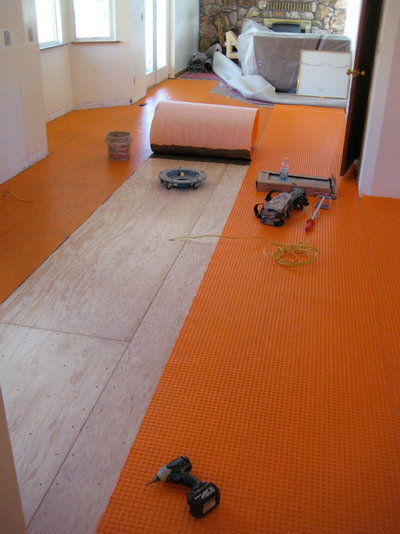
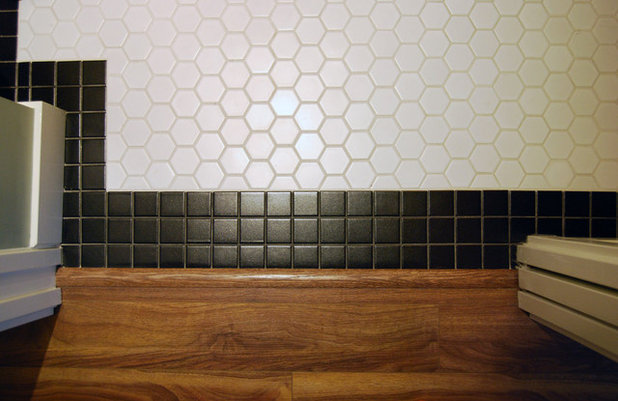
Here Tarkus Tile is prepping for a tile installation with a second layer of plywood and an uncoupling membrane. The orange material (Schluter Systems‘ Ditra) was installed with a quality modified thinset (mortar). Since this home’s existing framing was not suited to hold the new tile selection, the installers beefed up the subfloor to make sure the installation would last for years to come.
Tip: The choice between a flush installation from tile to hardwood and one that meets industry guidelines should not be a hard one. Always follow industry guidelines! They will probably be stricter than local building codes.
Find a general contractor to oversee your flooring project or remodel
Tip: The choice between a flush installation from tile to hardwood and one that meets industry guidelines should not be a hard one. Always follow industry guidelines! They will probably be stricter than local building codes.
Find a general contractor to oversee your flooring project or remodel
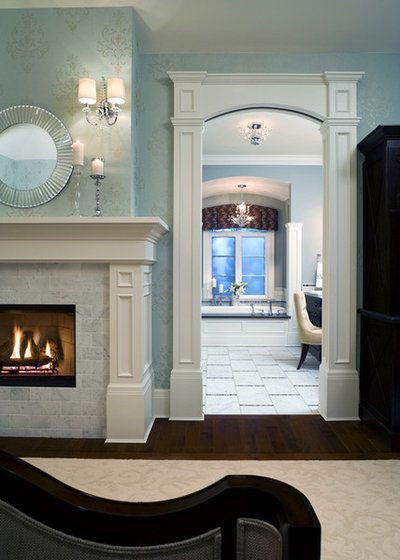
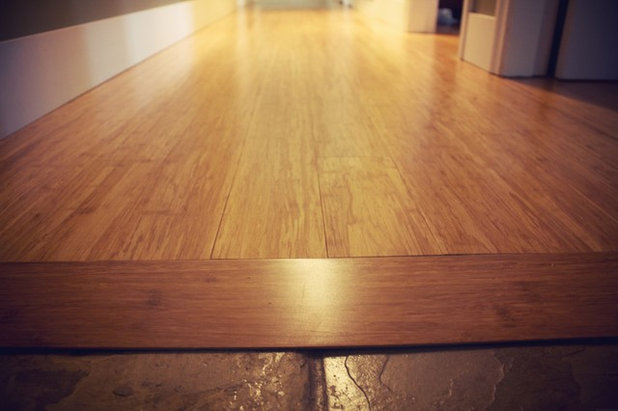
This custom oak transition helps adjust for the difference between the bathroom floor and the bedroom floor in this master suite. This is often called a reducing wood transition, because it works with two surfaces, reducing their height differences.
We centered the tile installation under the door, so when the door is closed you see only tile in the bathroom and oak in the bedroom.
Tip: I find that these transitions look cleaner if the door jamb (the vertical part of the door frame) overlaps the tile a little bit. But this is hard to do if the tile hasn’t been installed yet. If possible, install your bathroom door after the tile installation.
The simplest way to link floor tile and hardwood of different heights is with a transition strip. These strips can be finished to look like the floor or painted to stand out.
Tip: Leave ⅝ inch to ¾ inch of space centered underneath the door for the bottom of the transition strip. If you affix a piece of scrap baseboard or plywood in the same size, it'll help keep this channel clean of thinset, making the transition strip much easier to install.
Tip: Leave ⅝ inch to ¾ inch of space centered underneath the door for the bottom of the transition strip. If you affix a piece of scrap baseboard or plywood in the same size, it'll help keep this channel clean of thinset, making the transition strip much easier to install.
A custom transition can be milled by your flooring contractor for installation after the tile is complete. Notice where the wood transition meets the tile here — the wood is not cut to a feathered edge but kept to about ⅛ inch thick. This makes the edge stronger. The reducing transition also overlaps the tile, which helps with movement, since wood and tile expand at different rates.
More: 20 Great Examples of Transitions in Flooring
More: 20 Great Examples of Transitions in Flooring


We at Frasure Home Improvements feel like everyone deserves our best. We constantly push for excellence. We truly... Read More

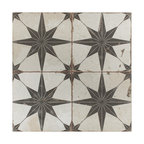
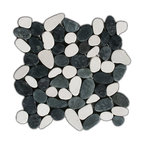
Related Products

Custom Home Works is a full-service Ohio contracting company specializing in high quality custom design, building... Read More
Related Stories

Working With Pros
Which Pro Should You Hire for Your Project?
Find out whether you need a contractor, an architect, an interior designer or another professional for the job
Full Story
Bathroom Workbook
How to Remodel a Bathroom
Create a vision, make a budget, choose your style and materials, hire the right pros and get the project done
Full Story

Bathroom Design
How to Prepare for a Bathroom Remodel
By Becky Harris
Ease the disruption of a bathroom renovation with these 10 tips
Full Story

Decorating Guides
15 Ways to Create Separation in an Open Floor Plan
By tidgboutique
Use these pro tips to minimize noise, delineate space and establish personal boundaries in an open layout
Full Story
Kitchen Workbook
How to Remodel Your Kitchen
Follow these start-to-finish steps to achieve a successful kitchen remodel
Full Story
Remodeling Guides
How to Survive a Major Remodeling Project
By Eva Byrne
Get expert tips for improving your home while preserving your sanity
Full Story

Working With Pros
10 Questions to Ask Potential Contractors
Ensure the right fit by interviewing general contractors about topics that go beyond the basics
Full Story
Life
9 Secrets to Successfully Remodeling a House Together
By Laura Wheat
Learn how to put your stamp on a project while avoiding unnecessary conflicts
Full Story

Modern Architecture
How to Improve the Comfort of Your Midcentury Modern Home
By Colin Flavin
You can maintain the era’s signature style in your home while improving its thermal performance
Full Story

Materials
5 New Trends in Flooring for 2024
By Julie Sheer
See the latest looks in luxury vinyl, engineered wood, porcelain, laminate and other products debuting this year
Full Story
Hello,
Not sure if anyone can help but I sure would appreciate any and all assistance!
I live in a 3 bed, 3 bath, single story ranch home (with basement) that has 2-1/2" x 11-7/8" x 30' I-Joist's (APA Product Report #PR-L252). The spacing between floor joists is 17 1/4". The sub-floor on top of I-Joists is 3/4" OSB.
I would like to install 3/4" red oak hardwood throughout the home and in the bathrooms 12" x 12" or possibly 12" x 16" x 1/4" or 3/8" thick ceramic or porcelain tile. There is a ever so slight "soft" feel (I believe) to the OSB.
I was prepared to not give this any thought as some "tradesman" say screw and GLUE 1/2" cement board and you will be fine : - ((!?
Doing some digging I'm seeing words like "defection" for the first time. YES I'M CLUELESS : - (. This is a paragraph I saw online that got me looking into my existing floor joist which as far as I can tell have a defection rating of L/252... "If you’re working with large-format tile or natural stone, specify that your rooms meet a stronger deflection rating: L/720, instead of the base-standard L/360.
>>>>>>>> In your opinion can this floor handle tile? <<<<<<<<<
If it can handle tile should I be considering installing 1/2" plywood atop the 3/4" OSB, then cement board or something like Ditra?
Again... any and all assistance is greatly appreciated!
Dan
Any ideas of how to make a large/high threshold transition appear less sloped to reduce the look of a 2 inch difference in height? (joists do not allow for lowering higher tiled floor) - Most of main level is lower. Thanks!
help mine is like this too! I need some help too!