


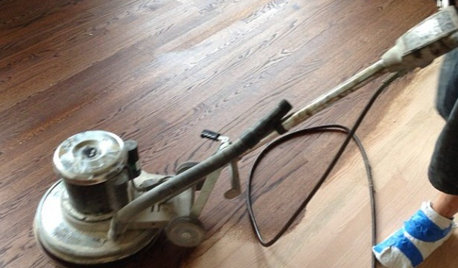
60 grit final sand for hardwood refinish?
Bob Smith
5 years ago
last modified: 5 years ago
Featured Answer
Sort by:Oldest
Comments (8)

geoffrey_b
5 years agoRelated Discussions
Damp hardwood after sanding floors
Comments (3)Two things. Is the meter accurate? Im not saying yours isnt but when i do a reading i always like to double check. Because the meters Can go outta whack and need adjustment. Now assuming the meter works in good fashion. You said water pipes are 20ft away that doesnt matter. If you have a leak water can travel. If you had a full blown leak youd know but condensation over time could cause the same issue. Pet stains in theory could get your high reading if the pets urinated in the area fairly recently. But you are left with two scenarios. One you get some fans out and let the floor dry out for a week and then retest. Or you rip up the floor in the area and inspect the subfloor. Was your floor cupping? Why did you start sanding?...See MoreScratches on hardwood after refinish with Bona Traffic HD?
Comments (58)I know this is an old thread but I felt the need to reply. We used Bona Traffic 5 years ago using spice brown stain followed by the Satin poly HD 2 part system. I remember back then it stated the darker color allow 12 hour dry time which we did. Then we applied two coats of finish. I recall that it took longer then 2 weeks to fully set and get solid but eventually it did and worked out great. Fast forward we got a new house. Great wood floors. Again we refinished them using the Bona HD traffic 2 part system in semi gloss. We used a lighter finish this time which stated on the stain can stated to allow 2-3 hours drying time in normal humidity. So this time around we followed the instructions and allowed 3 hours for the stain to dry on a lovely 75 degree sunny day. I did not go heavy on the stain and I would use a dry cloth to buff out the excess as I went along. Everything looked great. We have experience with the sanding so we spent roughly 10 hours using the different grits down to the 100 grit as the final step as instructed. Floors were lovely and down to the bare unadultured wood. We then vacuumed them and got every last bit of dust off using special footies as to not contaminate the floor with our feet. We could not have followed the instructions more perfectly. In fact we researched for a week and spoke to a floor refinishing company just to insure we did things 100% correctly. Well here we are now, 12 days in and I can scratch this off with my nail in many places. I am not talking just a scratch in the wood, but a peeling of the top coat scraping down to and exposing bare wood. I am sick to my stomach. The floor will not last. It is supposed to be strong like for a gym. This would not hold up to a room of infants. We luckily were finishing in a vacant home so nothing was placed on the floor for 10 days. It's not even worth moving all of our heavy furniture and starting over so I am going to put laminate floors over top of this and be done with it. I called Bona and they told me that they suggest 8 hour stain drying time. Well then why the heck would you state on your product 2-3 hours? Human error on my part? I think not I did everything that Bona said. Disgusted with the product. I should have used a cheaper oil base from the big box store. Biggest regret of my life. Perhaps Bona stored the product in a cold warehouse? Maybe it was a faulty batch with bad hardener? I have no idea but it behaves like something that did not have hardener. However I checked the unused bottle the next day and it was solidifying in the jug. Something failed and I can't understand what because I followed Bona instructions to a T....See MoreHardwood floors have scratches/scuffs/discolor after sanding/staining?
Comments (83)I just went through the same thing. But then I'm a rehabber and get my fixer uppers at foreclosure sales at half their final market value. Hand the contractor a copy of your photos, and then simply lock the contractor out of the house. Ignore any payment the contractor thinks they have coming. And start over. Document what's there. but it looks like you have plenty of pictures in hand in case the contractor has the gall to complain later formally or try to take credit for someone else's work. Moving on, the first thing you'll want to do is change your mindset to only contracting out a room or two at a time. If the contractor doesn't work out, there is less money involved. I've never seen a floor contractor who would or could show the work of his last job, especially with old rehab floor boards. I'm sure it is difficult since they often times got fired from their last job. It is true that a good contractor can take one look at your floor and assess it on sight. The problem is that you can't, and you can't tell a real contractor from a poser, and you can't believe anything that you are told by a poser. Next you'll need to assess a room of interest. You'll need to drum sand at 36 or 40 grit. A Home Depot $75/day drum sander will work fine. Always spread lowering the drum control over a 12" long rolling movement to prevent burning the floor, which is the term for a hard drum drop. An untrained millenial with that instruction could do it if you take away his cell phone for the day. You'll need the millenial for the day anyway to lift the sander. Subsequent sandings at higher grit numbers will follow. End with an orbital 12x18" sander finish buff at 100 grit starting with pencil marks on 5 separate occasions then twice with the 12x18" screen buff with use of a $1 carpenters pencil to scribble on every sq ft of sanded oak between every grit number. Any floor contractor could do it, but few will do it piecemeal. A 6" 60 grit disc on a Harbor Freight $130 Hercules Sander is used for edge sanding and to feather out any accidental drum drops which are simple to find after the first coat of stain is applied. Stay clear of professional edge sanders, which homeowners often times call the Tasmanian Devil. Stain and finish are applied wearing an FDA Approved air pressure mask fed by an air hose from a $500 HobbyAir machine plugged in outdoors. The proactive approach is more like feeling out the unstained floor with finger tips like Helen Keller or shining daylight or hallogen light on the bare sanded oak before staining to find any dips caused by hard drum drops. Using a flooring contractor, probably the best you could do would be an option to quit at $1 a sq/ft or two if the drum sanding doesn't yield accceptable results. If the floor gets too thin or the marks you wish to lose are too deep to sand out before making the floor too thin, then you have your answer, and you are ready for new wood. New wood doesn't cost much. I paid $3.20 sq/ft for the wood material plus self installation. Always pay more for longer boards in the mix. And your floor looks beat and pet or plant water stained half to death anyways. New red oak of dubious quality is widely available on Facebook for $1/sq ft in any sized quanity. You'd think you died and went to heaven if $1/sq ft new oak flooring in 2.5" width was installed in lieu of your existing flooring, moisture content, acclaimation time, and warpage aside...start really small. Dark stain like Minwax Jacobean, two or three coats, and a 15 minute wait time will cover almost anything in minimally acceptable fashion on really beat floors. Once you pull that thread in the sweater of rehab, the whole sweater often times unravels. Replacing wood flooring is not an all or nothing proposition. In one house with 1700 sq ft, I had 2 sq ft replaced in 4 different rooms, before final drum sanding. They can reweave in a repair for about $300 a spot and if the carpenter is good, you can't even tell. It is a refinish contractor who knows the good temp floor carpenters that do good spot repairs. In another house, I paid a demo contractor to remove all the existing boards and then nailed in 3286 sq ft of new red oak using a $160 floor cleat nailer from Harbor Freight, a $50 jig saw, and a $90 Porter Finish nailer from Harbor Freight, and a $160 air compressor from Harbor Freight, and a $110 10" framing saw from Home Depot. It took weekends for a couple of months. Cleats are about $10 a box at Harbor Freight. Any handyman with access to youtube videos can do the installation. The trick is hidden female-female join strips available over the counter from Lumber Liquidators for 50 cents /ft and special order nose pieces for $4/ft that have the 1/4 female grove for level drops like stairs. Works just like lego. Cleats only go in the male connection or tongue side. I hired an unsuspecting millenial handyman through Angi's List by asking for floor leveling and trained him using youtube videos to do the leveling, sanding, staining, and polyurethane paid one day at a time. Even that has to be limited to a room or two a day. Cost was less than half professional estimates and few flooring contractors will do anything without a contract for everything, and you never know which steps he can do well, and which he will fail at. In Chicago, a good flooring contractor has a cost of $1.5 sq ft., but they only like to work in the city limits. In Ohio, it's more like $10/sq ft for just the finish contractor even on simple unfinished new wood installation, which is what they all figure they are worth. You'd have to do a room complete yourself to qualify for project managing others, but then you'd be very capable for knowing when to fire someone. 90% of professional flooring installers fail at floor leveling or rather floor smoothing in older houses. After talking with the president of the NHWA, and the all of the most expensive flooring contractors in my area, it is obvious that I'm the most knowledgeable in leveling or smoothing out 20 year old big box Homes believed to have been built by the cheapest contractors in all the land. Don't allow removal of any wood strips or other underlayment pieces especially those glued or stapled in place under the existing flooring or you risk entering into the wonderland of the next level of skilled craftsman, the floor leveler who will offer to remove your floor boards to the rafters and install new underlayment plywood in lieu of leveling on top of your existing floor underlayment....See MoreHair, debriefs after hardwood floors refinishing
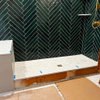
Comments (7)Thank you for sharing these thoughts. Just to clarify, all the issues we saw were noticeable at the arms length, and judging by the last picture the contractor had to scape so deep into the finishing to remove some of these, which I'm guessing means that some were not in the top coat. The company said that they have someone else to spot fix. I'd love to know if the spot fixing is really possible. What potential issues you see with spot fixing? Is re-coating better? What the risks of re-coating are? What do you see as a potential realistic solution bfor us, especially given the cost of the project?...See More PRO
PRONational Hardwood Flooring & Supplies
5 years agoBob Smith thanked National Hardwood Flooring & SuppliesBob Smith
5 years agoSJ McCarthy
5 years ago PRO
PROG & S Floor Service
5 years ago
Related Stories
GREAT HOME PROJECTSWhat to Know Before Refinishing Your Floors
Learn costs and other important details about renewing a hardwood floor — and the one mistake you should avoid
Full Story
FLOORSHow to Paint Your Hardwood Floors
Know how to apply nail polish? Then you can give your wooden floors a brand-new look
Full Story
REMODELING GUIDESTransition Time: How to Connect Tile and Hardwood Floors
Plan ahead to prevent unsightly or unsafe transitions between floor surfaces. Here's what you need to know
Full Story
HOUSEKEEPINGHow to Clean Hardwood Floors
Gleaming wood floors are a thing of beauty. Find out how to keep them that way
Full Story
MATERIALSWhat to Ask Before Choosing a Hardwood Floor
We give you the details on cost, installation, wood varieties and more to help you pick the right hardwood flooring
Full Story
GREAT HOME PROJECTSHow to Refinish a Wood Deck
Keep your deck looking its best — and save feet from splinters — by applying a new stain and sealant every year or so
Full Story
MATERIALSMesquite: The Brawny Beauty for All Over the Home
Denser than other hardwoods and sporting beautiful coloration, mesquite makes a fine material for flooring, countertops, furniture and more
Full Story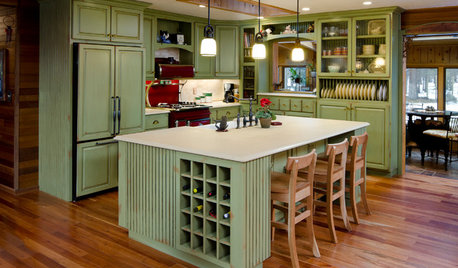
MOST POPULARHow to Reface Your Old Kitchen Cabinets
Find out what’s involved in updating your cabinets by refinishing or replacing doors and drawers
Full Story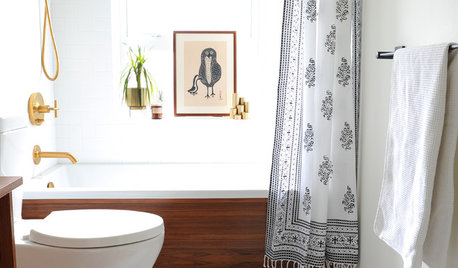
BATHROOM DESIGNBefore and After: 9 Small-Bathroom Makeovers That Wow
Ready to remodel? Get inspired by these bathroom projects that come in at less than 60 square feet
Full Story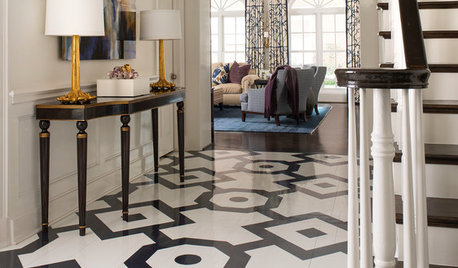
FLOORS6 Alternative Flooring Ideas to Kick Up Your Style
Rubber, cork, concrete and other materials are worthy options in lieu of hardwood or tile
Full StorySponsored


Beth H. :