


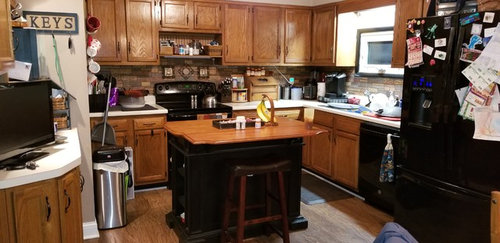
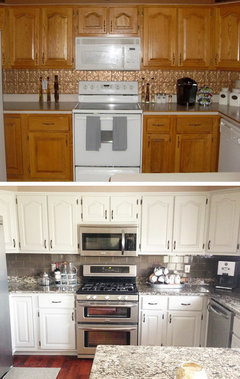
paint cabinets 1st and then replace countertops?
Dee Schnell-Myers
6 years ago
Featured Answer
Sort by:Oldest
Comments (18)

lucky998877
6 years agoRelated Discussions
Kitchen Redesign -- 1st post -- need advice
Comments (4)Can you put the sink on the wall where you currently show the fridge/dw, moving dw to the end where the fridge is. Then fridge down beside the pantry, stove pretty much where it is. And a small prep sink on the island close to fridge end. That would make the kitchen work better re. your stated goals re. 1 cooker/baker and 1 helper/cleaner. It would let you have the ice tea maker and vitamix between fridge and stove (with water handy at the prep sink behind), keeping snackers, tea drinkers, and smoothie makers out of your main cooking/baking space. And you could use the area between range and sink as your baking area with your kitchenaid mixer and bread machine, utilizing the depth of the corner counter depth for their regular storage while still having the usable countertop in front when needed. The breville might work in that run too. It would mean you couldn't reuse your corner sink base, but it looks like you have the other corner cab by the peninsula that you could repurpose for that space. Good luck!...See More1st attempt at design plan - please give feedback
Comments (18)Marcolo and Blfenton, the box thing in the southeast corner is just that, a box constructed out of drywall to take up the corner. I hate blind corner cabinets, so I would rather "waste" the corner entirely rather than spending money on corner cabinetry I hate, especially since it lets me put more efficient drawer storage on each side of the corner. It also allows me to have tall cabinetry on the east wall and uppers and lowers on the south wall, without having an issue where they meet in the corner. I might put a door in the guest room wall to utilize the 27" x 27" space from the other side to store items we do not need to get to often, like luggage. I agree that having the wall ovens 4' away from the nearest landing spot on the island is not ideal, but it is a big improvement over the 7' walk between wall ovens and counters in our current kitchen. If we move the wall ovens to the east wall, there is still at least a 4' walk to the island. Amanda, the trash pullout and dishwasher are on opposite sides of the sink cabinet. I will also have storage for dishes, Rubbermaid containers, plastic wrap, etc. on the south wall. That way, after meals, the plates and pots all go to the counter next to the sink, leftovers can be packaged, dishes can be scraped into the trash and then go into the dishwasher. When I empty the dishwasher, the dish storage is on uppers on that wall. It sounds like cooktops on islands are not popular. I agree it is not ideal, but it was the only way to get the entire wall of tall cabinets on the east side. My DH loves the look of that wall, and that wall will be highly visible from our kitchen and dining room. I would prefer a real hood to a downdraft vent, but, then again, I have lived without a proper hood for 10 years. Mahlgold, I am having trouble balancing the look we want with function. We plan to do prep on the island and the counter to the left of the sink. Those 2 areas give us more counter space than we have had in any prior kitchen. We do not own a coffee maker or toaster oven. Our only countertop appliances are a KA mixer, small toaster and blender. The mixer and blender will go under the uppers to the left of the sink (mixer in far left corner on an angle). The toaster could also go on that counter, or maybe behind the lift door on the left side of the east wall along with bread storage. We only do breakfast and lunch at home 1 or 2 days per week. I am not sure how many or how deep of drawers to put in the tall cabinets. I drew each side with 5, but it could be 3 or 4. This kitchen has so many more lower cabinets than we have ever had before, that I am not sure what to put in all of them. On the right side tall cabinet, I thought I would want a couple of shallow drawers at the top to store extra trays for the Advantium, pot holders (those will be kept in 3 different locations near all the hot appliances) and wine tools like the opener, Vacu-vin, etc. Maybe a drawer for DH's vast tea bag and leaf collection and related tools. We could put all the empty baby bottles and plastic plates for the kids in a drawer in that tower or on the south wall. On the left side tall cabinet, I could use the drawers to store pyrex, roasting pans, pie tins and other baking dishes that might not fit in the drawers below the wall oven. My stove top pots and pans and utensils will go in drawers below or next to the cooktop on the island, as I have several feet of drawers on the south side of the island. The wall ovens were put on the north wall (where they are in the current kitchen) because they are less attractive to look at. Also, if we get the side opening Gagg ovens, they would be difficult to place in the east wall because they need at least 8" between the hinge side of the oven and an adjacent wall, so we could not put them at the very end of a cabinet run. It is also tricky because we are trying to find space for 3 wall ovens: standard 30" convection oven, speedoven/microwave, and steam oven. They are too tall to stack all together in one column and still have at useful heights. I will use the speedoven/microwave more than once a day, so I would be miserable having that oven below countertop height. I also hope to use the combi-steam oven regularly. I feel like we should have 1 full size oven, but that one will get the least use (I very rarely bake or cook large meals), so I could buy the Thermador wall oven with the standard door and put it under the counter somewhere and stack the other 2 together on a wall. The problem with swapping all the cooling appliances to the north wall and the pantry to the east wall as was suggested is that the pantry is only 16-18" deep and the appliances are 24" deep, which would prevent us from having a 24" deep coat closet on the hall side of that space. (We really need a coat closet because the house does not have one now.) I will think about whether we can steal coat space from another room, like the guest room. I am debating the idea of a prep sink on the island. DH looked at me like I was crazy when I suggested a second sink 5' away from the main sink. We do not use the sink a lot for prep. We rinse the veggies, but then put them on a cutting board and move it to where we want to work. We use a large bowl to collect veggie or meat waste when we peel, chop and trim. Sadly, we do not have any family in this state, so no one brings us food to prepare. It is just DH and I in the kitchen now, although we hope our two daughters will like to cook as they get older....See MoreIf you're doing one thing at a time, what should be done 1st?
Comments (26)I don't like tiny knobs on big doors...so that bothers me, but the real issue is...if you have one knob it should be lower on the upper doors and higher on the lower doors (did that make sense? heh heh) But frankly, a 3" or more pull would look better, and I'd bet you could use the existing hole on many of those doors and drill one below it for the other hole. You can play with looks in advance and see what works. The green or yellow would look nice with both white and almond :) The green especially would help the almond blend easily. Now that I know they're not white...I'd be careful about painting in white. You'll immediately make the appliances look very bad by painting white on the cabinets surrounding them. Really...it would be a big mistake. For that fridge, you could take a sledge hammer to the back wall and poke that fridge back into the framing area by taking out a few 2x4's (if it's not a support wall). You can build a header around the space and push the fridge back, then maybe some trim and you'll be amazed how much better it looks. The cabinets I just removed from our remodel are the cabinets you have by the way. (VERY CLOSE anyhoo). The previous owner had changed to a corian type countertop and that did help with the look somewhat (but they were still orange oak LOL) and they didn't have any trouble holding up that counter :) I wouldn't put 3cm granite on them (because spending that type of money on counter tops when you need to do other things is silly) but I'd look to some of the prefab granite out there. We're getting a gold colored granite out of asia at $44 sq ft, with finished edges and a 4" backsplash, all installed, $44 sq ft for our new place (rental). I'll be putting that on top of some 1977 cabinets :) and they'll be just fine :)...See Moreadding extension - reconfigure 1st floor layout
Comments (40)I recently added a little more than 300 sf one story addition to the back of my 2 story house (similar to yours and about 90 yrs old). Extended tiny kitchen by 5 ft, added an office (I work from home) with plans to turn it into my bedroom after retirement (aging in place, here I come!), a full bath. and storage closet. I also took out the load bearing wall between kitchen and DR to get more light and openness. Oy! that was a messy surprise. Had to move/replace all the pipes (including old iron sewer pipe) electrical, radiator pipes, etc. The cost of the consultation with an engineering architect for that one wall alone was almost 1k. Anyway, I also looked into buying a different home (with main floor bed/bath) as an alternative as it definitely would have been cheaper overall. The addition cost almost 160k (an hour from to DC). As luck would have it, nothing suitable was popping up on the market in the area so I bit the bullet. I live in a very desirable small historic district which I adore and wanted to stay. plus I got to pick out everything myself! So I get wanting to stay in your location. I wanted to share my experience, cost, and the plans (below)with you. I only wish I had made the office larger so it would be a more spacious bedroom later....See More
herbflavor
6 years agolast modified: 6 years ago
FeatherBee
6 years ago
Dee Schnell-Myers
6 years agoDee Schnell-Myers
6 years agoDee Schnell-Myers
6 years agoChessie
6 years agoDee Schnell-Myers
6 years agoChessie
6 years agolast modified: 6 years agoLizzie Bennett
6 years agoherbflavor
6 years agoDee Schnell-Myers
6 years agoLizzie Bennett
6 years ago
Derek Lehman
6 years agoFeatherBee
6 years agoLizzie Bennett
6 years agonosoccermom
6 years ago


Related Stories
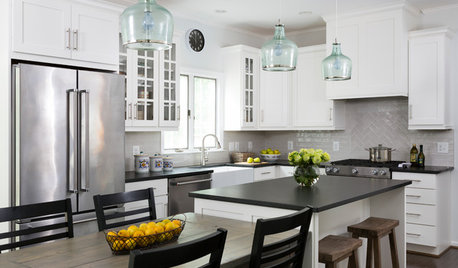
KITCHEN MAKEOVERSWhite Cabinets and Black Countertops Make a Winning Combination
The new pairing replaces dark cabinets and beige countertops for a bright and airy modern update
Full Story
MOST POPULARFrom the Pros: How to Paint Kitchen Cabinets
Want a major new look for your kitchen or bathroom cabinets on a DIY budget? Don't pick up a paintbrush until you read this
Full Story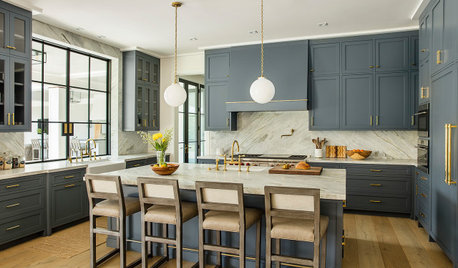
KITCHEN CABINETSNew This Week: 6 Blue Paints for Stylish Kitchen Cabinets
See how undertones in blue cabinets create diverse styles and moods, from playful and fun to daring and dramatic
Full Story
KITCHEN CABINETSPainted vs. Stained Kitchen Cabinets
Wondering whether to go for natural wood or a painted finish for your cabinets? These pros and cons can help
Full StoryKITCHEN CABINETSKitchen Cabinet Color: Should You Paint or Stain?
Learn about durability, looks, cost and more for wooden cabinet finishes to make the right choice for your kitchen
Full Story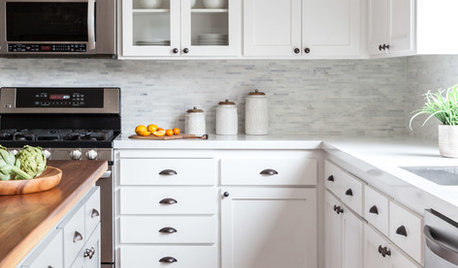
KITCHEN CABINETSHow to Update Your Kitchen Cabinets With Paint
A pro gives advice on when and how to paint your cabinets. Get the step-by-step
Full Story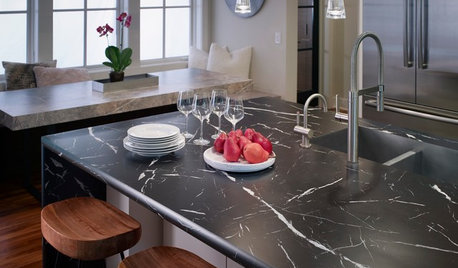
KITCHEN DESIGNNew Looks for Cabinets and Countertops Emerging in 2019
Dark colors, wood patterns and thin surfaces are a few of the trends seen at the recent Kitchen & Bath Industry Show
Full Story
MOST POPULARChoosing Color: See 1 Cute Home in 3 Exterior Paint Palettes
Here’s proof that a little bit of fun color can add a whole lot of flair to your house
Full Story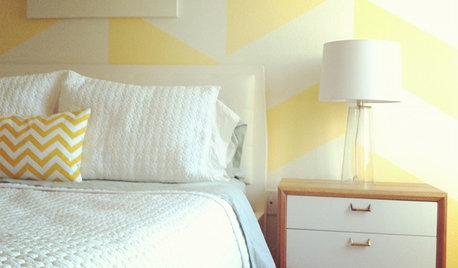
DECORATING GUIDESBudget Decorator: 25 Fab Projects With 1 Paint Can
Whether there's only an inch left or your paint can overfloweth, these household painting projects will get your creative juices flowing
Full Story
PAINTINGWhat to Know About Milk Paint and Chalk Paint — and How to Use Them
Learn the pros, cons, cost and more for these two easy-to-use paints that are great for giving furniture a vintage look
Full Story
jhmarie