

Not for bakers only fondant question
8 years ago
Featured Answer
Sort by:Oldest
Comments (23)
 8 years ago
 8 years ago
Related Discussions
question for bread bakers
Comments (20)We keep our house cool, too, and my challa rises fine on the counter. You can even do the second rise in the refrigerator overnight. I usually make a few at a time, so after the first rise, I shape the loaves and wrap (in foil) and freeze the extras. When I want to use them, I take them out and unwrap, put on a greased sheet or in a greased loaf pan, cover with the greased foil from the freezer, and let it sit 6 hours before baking. Comes out exactly the same as if I bake it the same day. As for storage, I, too, had read that the refrigerator makes bread go stale fast. We keep sliced bread in the freezer, because we don't use it very fast. I toast it straight from the freezer or pack lunch sandwiches with frozen bread (keeps the filling fresh, too); to eat right away, I nuke it for a few seconds, but only as much as I'm sure we will eat. For the homemade or other special bread, we keep it in plastic bags in a breadbox in the pantry. I don't know why it's so, but a breadbox really, really does keep bread fresh so much longer....See MoreCookie question for the bakers
Comments (17)lizbeth-gardener- --Perfectly softened butter should still look solid, but "give" a little when you press it lightly with your finger and leave a slight indent, but shouldn't be soft in feel or appearance. You don't want partially-melted butter. Using butter that is too soft can cause cookie spread. --Instead of the touch test for butter, try taking the temperature (place the thermometer into the stick from the narrow end into the center of the length of the stick) . Optimal temperature for fat/butter is 65-67-degrees F when you measure it with an instant-read thermometer. Since butter warms quickly when it's beat, starting at this cooler temperature prevents it from getting too soft during mixing. --Cold-from-the-refrigerator butter will be soft in 30-40-minutes at room temperature. You can speed that up by grating the butter on a large hole box grater, and grating it is a better method than in the microwave. --Don't use butter that has been sitting out on the counter for hours/days because it will probably be too soft (aka "slack" butter) due to ambient kitchen temperatures. --Thoroughly chilled dough will help assure the fat is solid once again - although if the dough got overly-warm at any point, the texture can change because the moisture and the fat in butter can separate. There are all kinds of tests for the "perfect" amount of refrigerator time, but there are too many variables from recipe-to-recipe to make that determination without testing each one. I have recipes that work best mixed and baked immediately (especially low-fat, or if liquid fat is used in the recipe), others need to be chilled at least an hour or 12-hours works well. If I freeze the dough balls, I prefer thawing them in the refrigerator overnight rather than baking them frozen, although, that's just one more option. --If you have a large amount of cookie dough to bake, be sure to keep it in the refrigerator while waiting for use. The heat in the kitchen can cause the fat to melt and the dough to go "slack", especially towards the end of the batch. --Don't continue to stir the cookie dough between handling for portioning because mixing it will over-develop the gluten and you'll get tough cookies. Pilllog mentioned not aerating the dough..... It's not so much about aerating as it is about over-mixing and over-developing the gluten once the flour has been added, which will cause the cookies to be tough. Once the fat/sugar have been properly mixed, don't over-mix the dough once the eggs have been added or the fat/liquid can "break". --Avoid placing cookie dough on a hot/warm pan. Have at least 3-4 cookies sheets to use so you always have one that is completely cool before loading the dough on it. Even warm pans will begin melting the fat in the dough. --Other causes for cookie spread: too much sugar (be sure to measure carefully), large-grained sugar (fine-grained is a better choice), too much baking soda - which makes the pH too high, too much grease or fat residue on the pan (wipe off between batches - better yet, cover them with parchment paper), incorrect temperature or cold oven temperature (be sure to preheat and check your oven for actual temperature using an oven thermometer). --Another important, and often missed, point.... When mixing the fat and sugar, be sure to take your time. If you rush through this step you can cause cookie spread because the two ingredients haven't been properly incorporated and the sugar crystals will remain too large. Other points to consider: -Size of the cookies you make. -Use a portion scoop so you get like-sized cookies which bake in the same amount of time. -Use a timer, and remember, the first pan normally takes a little longer then the subsequent pans. -In a standard oven, only bake one pan of cookies at a time and turn the pan half-way through baking. If you have a convection oven, reduce the temperature by 25-degrees F, and half-way through turn the pans and move the pans top to bottom. On a personal note, I've used nothing but insulated baking sheets for over 30-years, however I don't bake directly on the pans, I always top them with parchment paper. Adding parchment paper will give slightly different results on ALL pan types, as would adding a silicon sheet. When judging cookies at Fairs I can usually tell which kind of pan was used by the bottom of the cookies. Each pan type will give different results and there are different hints and tips for baking on each of them successfully. -Grainlady...See MoreQuestion for bakers
Comments (8)Consider if this would work. Before you refrigerate the dough, roll into a cylinder shape and then wrap in plastic wrap to refrigerate. When chilled, unwrap, and using a chefs knife, cut into 1 ü inch wide slices. Then cut each slice with the knife into quarters. This way, the dough is just about the right size to roll into a ball before you are handling it and getting it warm. You could even pop it back in the fridge a few minutes after you chunk it before you roll into balls....See MoreCalling all fondant experts
Comments (1)Hi Susytwo: I am by no means an expert, but have made numerous fondant covered cake over the years. You don't need a super thick layer of buttercream on the outside, but you want enough that you can cover the cake smoothly, as the fondant will show lumps and bumps and dips that are underneath it. Whatever you do, do not used canned frosting - it will not hold up and could well be the ruin of your cake. Not sure what your time constraints are for making more buttercream, but you could use ganache to cover and or fill the cake layers or some of them. It's very quick to make, just heat some heavy cream and pour over chopped up chocolate. (google for exact proportions - I am not at home right now.)I actually prefer to cover the cake with ganache before fondant- I always get better results than I do with buttercream. You can use other fillings like lemon curd, preserves, mousse, but it is best to have a generous dam of buttercream on each layer to hold those fillings in. I think you will have a much easier time of things if you can manage to make more buttercream - I always make twice as much as I think I need and often end up using a good deal of the extra. Have you already torted your cake (cut it into layers?) If not, maybe you could make just three layers instead of five. An advantage to this is that not only will you need less buttercream, but the fewer layers you have, the more stable your cake is. Jane...See More 8 years ago
 8 years ago
- 8 years ago
- 8 years agolast modified: 8 years ago
 8 years ago
 8 years ago
- 8 years ago
- 8 years ago
- 8 years ago
- 8 years ago
- 8 years agolast modified: 8 years ago
- 8 years ago
- 8 years ago
- 8 years ago
- 8 years agolast modified: 8 years ago
- 8 years ago
 PRO8 years ago
- 8 years ago
 8 years ago
- 8 years ago



Related Stories
KITCHEN DESIGNKitchen of the Week: A Baker’s Dream Come True
The smart layout gives a family space to enjoy eating, cooking and baking together
Full Story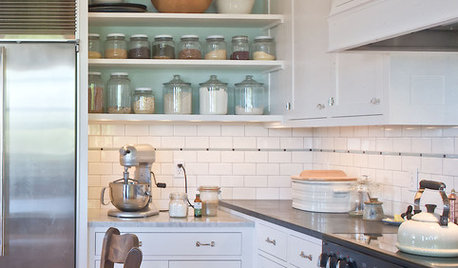
KITCHEN DESIGNLove to Bake? Try These 13 Ideas for a Better Baker's Kitchen
Whether you dabble in devil's food cake or are bidding for a bake-off title, these kitchen ideas will boost your baking experience
Full Story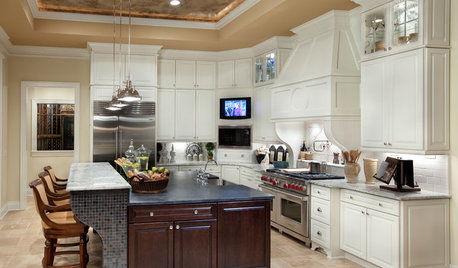
REMODELING GUIDESPlanning a Kitchen Remodel? Start With These 5 Questions
Before you consider aesthetics, make sure your new kitchen will work for your cooking and entertaining style
Full Story
KITCHEN DESIGNKitchen of the Week: Organic Modern Style for a Chef and a Baker
Warm and light-filled, this minimalist kitchen in California gets its character from beautiful wood grains
Full Story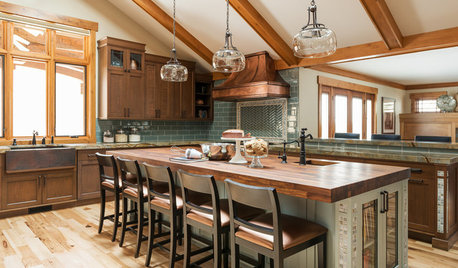
KITCHEN DESIGNA Utah Kitchen Perfect for a Baker and Her Family
This Craftsman-style kitchen remodel provides function and beauty with a hidden baking center and a custom copper hood
Full Story

HOUZZ TOURSMy Houzz: Modern and Airy Style on a Budget
Patience, creativity and help from family turn a baker’s cookie-cutter condo into a bright and cheerful home
Full Story
HOUZZ TOURSHouzz Tour: A Metaphor and 18 Bikes Inspire a Modern House
Abstract questions help an architect design an expressive, personal home for a Seattle couple
Full Story
KITCHEN DESIGNA Cook’s 6 Tips for Buying Kitchen Appliances
An avid home chef answers tricky questions about choosing the right oven, stovetop, vent hood and more
Full Story
DECLUTTERINGDecluttering Help: What to Do When Nothing ‘Sparks Joy’
If the Marie Kondo phrase doesn’t help you decide what to keep and what to discard, try asking these 4 questions
Full Story

annie1992