


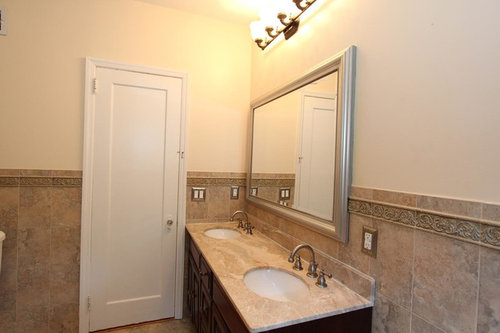
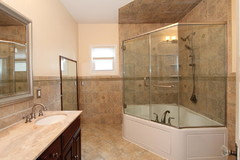
need low key help with our traditional bathroom
amanda treacy
6 years ago

Featured Answer
Sort by:Oldest
Comments (7)
Related Discussions
Bathroom Reveal, Thanks to the Bathroom and Remodel Forums! (pic
Comments (56)This old thread got revisited. @dani_m08 to answer the question about extra probe, I believe I ordered an extra one when I bought the set up. The probe wire is just setting in the junction box I think but honestly I cant remember. When I laid out the underfloor heating and the probe, I just ran another probe near the first probe, and it was then sealed into the floor self leveling compound as per instructions. then the end was just threaded into the wall like the one that would be live, and not connected, but just laying there in the box. Regarding the tile layout. I just decided to run it this way, after getting instructions on the 90Degree way, IIRC. The herringbone that I love is from my childhood and the side walks in my neighborhood that all ran at 45Degree. so that to me is herringbone. I know you posted on @sochi thread about her amazing bathroom and a wall mounted faucet. I would totally do it if I had the right sink for it. In my case I had made my sink out of soapstone and an integrated backsplash. The pictures of this bathroom reveal are no longer available because of the use of photo bucket, when it was Gardenweb. I did not keep my account with photo bucket. I'll add some of the reveal pictures so you can see the sink and floor. Regarding the sink there is no ledge for water to drip from my hands when using the faucet. The water drips right into the sink. In my other bathroom with a deck mounted faucet I am always wiping up drips and it is a nuisance. I much prefer the setup for this sink. Below: I love the flush finish from the faucet to the bottom of the sink. nothing drips on a counter or edge of a sink. Below: looking in from the doorway. Below: Here I am finishing up the sink. the backsplash was epoxied on as a separate piece. The whole soapstone install in the room took next to nothing to buy as they were all small pieces that I epoxied together with a 3 part stone epoxy. Below: this is the counter at the tub, and is in 2 long pieces but I was able to epoxy them together at there edges to make a wide slab for the top. All the soapstone was finished with a 60 grit sandpaper to be rough and this lovely soft tone of blue/green/gray/white. I did not oil it so this color tone would remain light. Below: If I recall correctly @sochi helped me decide on this Hubberton Forge Mirror. I have 3 different metals in this room, but they are all a cool silver to black color. Below: the center of this tower shares space with the kitchen on the other side of the wall. there is also some extra space that houses some electrical wiring. this is an old simple house. this bathroom was an add on when it got move to the farm in the 30s IIRC. The plumbing was all rearrange and some of the details that were orignially there I kept but updated it, such as this tower feature. The old one went and the carpenter did a wonderful job with this one. Below: This feature was another thing I kept from the old bathroom but flipped it from the other end and had the carpenter put drawers in it. Before it was a hell hole. things got lost and the build was soooo old and creapy I didn't like using it for storage. Now it is perfect for storage....See MoreBathroom Reveal, Thanks to the Bathroom and Remodel Forums!X-Post
Comments (6)Lovely! I like the classic white tile and porcelain and how you used furniture pieces in the bathroom. I love that the storage at the end of the tub has pull-outs that can be reached from the toilet. Your custom sink and backsplash and counter are unique and beautiful. Yours may be the first bathroom sink I have seen in which a small or medium dog could be washed! That is a good thing! I showed your pictures to my DH because I am thinking of classic tiled walls with a chair rail for when we redo our bath in a couple of years. He liked it! I was expecting him to say, "too old fashioned." He did not, he said it looked nice. From him, nice is a compliment. He even liked your rows of listello. I was just at the Tile Shop's site the other day looking at the Hampton tiles because someone was selling some on Craigslist. I am hoping to do as you did and get what I can cheaper there, and fill in the rest from the store. I can see that you worked very hard to secure all of your materials - and then cut the floor tiles to size and culled the Hampton tiles, too! You succeeded very well in getting the look you wanted while saving money along the way. Congratulations, and thank you for the pictures and great detail and supply list....See Morebathroom choices so far. help badly needed.
Comments (10)I opened all the links. 1st, I would get well known faucets and not something I've never heard of. If they fail you want excellent warranties. I noticed that these faucets have a flat top. I have one lovely faucet with a flat top and it is always getting spots on it. A rounded spout will shed the water better between hand washing. I have to always keep a microfiber towel at the faucet and clean it up after each wash. My other traditional faucet from the same company is not like this with water spotting. Both are Chrome. 2nd, if it was me, I would stick to chrome, cheaper and more durable in the long run I believe. When I finish this text I am going to link to a sight I used before, because it has a lot of info on bathroom layouts, and faucets. Look around the site for help. I have no interest in this link other than it helped me when I was choosing faucets and planning my layout. 3rd, I know nothing of that toilet but it looks interesting with that flushing system. Keep us posted on that. 4th I put in my own warming floors and had DH help with the pour of self leveling compound (SLC) to imbed the wires. I did not use the matts because of expense. I just saw at Lowes that they now have a NEW Ditra uncoupling membrane that allows the insertion of the warming wires within the Ditra waffles. This, I believe would be great, as one wouldn't need SLC. You'd install the Ditra and then the wires within the Ditra, then tile. At least that is what I think is done. Ditra is a very respected uncoupling membrane. If you have a wood subfloor you will need an uncoupling membrane of some sort. If you go to the John Bridge Tile forum, you can ask all sorts of questions there. They are VERY knowledgeable like Mongo, Bill, and Stonetech are over here. I haven't seen Stonetech so much lately. He is over on John Bridge (but goes by a different name), as is Bill. You have to know all this stuff before you buy anything else :) There is more to learn and it is fun. Just don't go too fast or you will have over bought and over spent. There is a balance to be made with information and purchases. Faucet infromation, page one of two, see link at bottom of the page....See MoreNew build...need help with bathroom mirrors, island lights, and knobs
Comments (8)I would stick with nickel for all the knobs, in both rooms. Black will look very stark with your other options, and in your bathroom, the floor gives you enough darkness. Round is better than square for knobs because over time as they need to be tightened, the square ones get crooked. I like your third lighting option, which looks more sophisticated. I would wait on the bathroom mirrors until you see the completed space. At that point, it will be more apparent whether metal or wood frames are better, and what shape/size is best....See More
amanda treacy
6 years ago

Related Stories
BATHROOM DESIGNKey Measurements to Help You Design a Powder Room
Clearances, codes and coordination are critical in small spaces such as a powder room. Here’s what you should know
Full Story
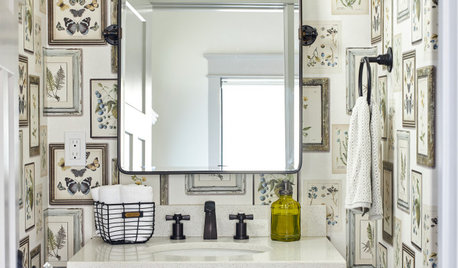
BATHROOM STYLESYour Guide to a Traditional-Style Bathroom
Designers achieve this timeless look with furniture-like pieces, soft colors and classic hardware
Full Story
BATHROOM DESIGNNew This Week: 6 Midsize Bathrooms With a Low-Curb Shower
See the features and finishes that bring style and functionality to this popular bathroom configuration
Full Story
BATHROOM DESIGNKey Measurements to Make the Most of Your Bathroom
Fit everything comfortably in a small or medium-size bath by knowing standard dimensions for fixtures and clearances
Full Story
SELLING YOUR HOUSE10 Low-Cost Tweaks to Help Your Home Sell
Put these inexpensive but invaluable fixes on your to-do list before you put your home on the market
Full Story
KITCHEN DESIGNKey Measurements to Help You Design Your Kitchen
Get the ideal kitchen setup by understanding spatial relationships, building dimensions and work zones
Full Story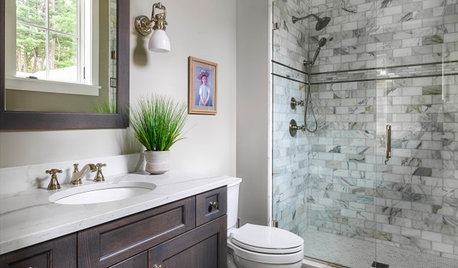
BATHROOM DESIGNNew This Week: 5 Bathrooms With a Curbless or Low-Curb Shower
Design pros, including one found on Houzz, share how they handled the shower entrances and other details in these rooms
Full Story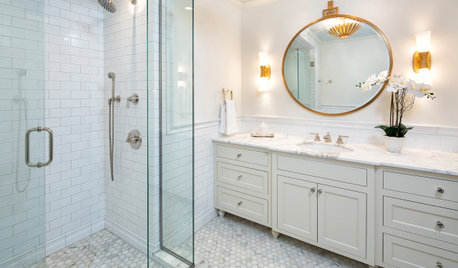
BATHROOM WORKBOOK7 Key Things to Establish When Planning a Master Bathroom
If a new en suite bathroom is in the cards, read this expert’s guide to working with the space you have
Full Story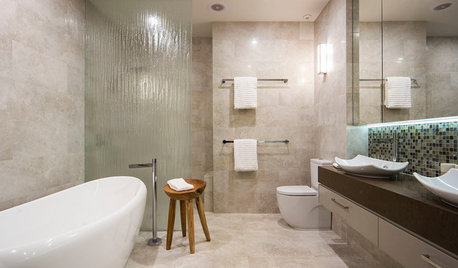
SELLING YOUR HOUSE10 Tricks to Help Your Bathroom Sell Your House
As with the kitchen, the bathroom is always a high priority for home buyers. Here’s how to showcase your bathroom so it looks its best
Full Story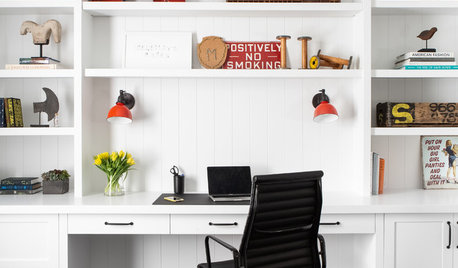
REMODELING GUIDESKey Measurements to Help You Design the Perfect Home Office
Fit all your work surfaces, equipment and storage with comfortable clearances by keeping these dimensions in mind
Full Story


suzyq53