


Taking soil samples for lab. analysis. Get your money's worth.
User
7 years ago
last modified: 7 years ago
Featured Answer
Sort by:Oldest
Comments (14)
Related Discussions
Logan Labs analysis
Comments (39)Daniel, I ended up buying the Honda with the 190cc engine. It was more than I wanted to spend, but I was afraid I was going to be disappointed with the 160cc engine. More power was the whole point in upgrading, so I talked myself into the bigger one. Based on my dad's experiences with Honda mowers, I fully expect this mower to last 10-15 problem free years, so spending a little extra to get what I really wanted was worth it. Anyway, I took her for a spin today - what a beast! Even in the neglected, overgrown areas of my lawn it never flinched. And it is FAST. I only ran it at full speed for a second and I practically had to jog behind it. Half speed is more than enough. Such an impressive machine compared to the LawnBoy. Morpheus, I decided to try Spectracide Weed Stop instead of Weed B Gon for my war on Star of bethlehem. I don't know anything about the chemicals, but the Weed Stop label specifically lists Star of bethlehem so I figured I'd give it a shot. I'm using it in addition to Tenacity, of course. Hopefully it's a deadly cocktail....See More2017 Logan Labs Test Help (year 2 of soil management)
Comments (25)An excellent analysis and I'm very impressed. As an engineer, I live in the world of assumptions. As long as they’re understood, all is well. However here, I’m making a LOT of assumptions that I don’t understand very well at all, so I’m not too comfortable with my conclusions. That is compounded by the inability to really check the change from last year because of my lack of consistency (I know, I know). After going through the numbers in detail, I now see just how helpful a truly consistent measurement would have been. I'd say that's a pretty accurate description for soil analysis: a bunch of assumptions. This isn't a controlled lab situation and each year's soil sampling and test results can/will very sometimes significantly, so any variable we can control when sampling helps reduce those fluctuations. To try to stay grounded in expertise, I’ve generally just taken morpheuspa’s plan from 2016 and based on RidgeRunner’s ranges and comments, tried to convince myself of whether I could justify using the same 2016 recommendations. So, my thoughts: Why not? It's as good a place to start as any and better than starting from scratch. Assuming M III Phosphorus is what I’m adding with starter fert, bag rate of scotts starter fert (24-25-4) is 0.75 lb/k Phosphorous, or 32.67 lb/ac. I added that 4 times in 2016 for a total of 131 lb/ac of P. Not all of that hung around apparently, and since the B1 section increased by 47lb/ac and the F1 section only increased by 14lb/ac, it appears that the F1 section uses/loses P faster than the B1 section. A couple of clarifications: 1) M III (M3) is the test that was used. It is a cocktail of chemicals that is used to extract nutrients for measurement. In this case the Phosphorous is reported as lbs per acre of P2O5. (Other labs may report it as ppm of elemental Phosphorous). The nice thing about reporting it as P2O5, is that P2O5 is the form of Phosphorous contained in fertilizers. So your assumption is right. 2) Phosphorous moves very slowly (down or otherwise) through the soil and phosphorous binds within days of application and can become unavailable to the plant. In acidic soils it binds to Aluminum and Iron. In high pH soils, it binds with calcium. An assumption: the difference between F1 and B1 may be due in part to the difference in pH between your two soils as reflected in the initial test. If the target is 200, seems like another season of about 4 starter fert applications would make sense, although in the B1 section it seems like I’m cutting it close. Maybe I’ll apply a couple of the apps in that section at 0.5 bag rate? I concur. As an alternative (based on your budget) Milorganite has reconfigured their formula to 5-4-0 from 5-2-0. Now only 10-20% might be organic P, but organic P is "slow" release and would help supply P to your turf better over time. (All of P2O5 is inorganic and although inorganic P is readily available to the turf plant, it also readily binds up. I gave you the 200 range, because you had mentioned that you didn't know what target you had been given last year, 200 is his/a common target for a high maintenance lawn. Some general points of clarification: 1) for every pound of N that a plant uses (not every pound of N that is applied--but USED) the plant needs and uses 1/2 pound of Potassium and 1/4 pound of of Phosphorous. whichever is missing, is the limiting factor. 2)The ranges I gave you are the ones that soil scientist have found within which plants "appear" to do well. They are quantities averaged for soil types and plants. Research has shown that values below the range result in poor performance. That as you approach the low end, additions of that nutrient are more likely to show a visible improvement in the plant and as you approach the high end, additions of the nutrient are much less likely to result in any improvement. Values above the high end are very unlikely to show any improvement and at some point can be detrimental to the plant. (did I say this before?) Bottom line, as you progress with balancing your soil, if you reach a point within the range where you no longer see improvement, you've reached your optimum in regard to any nutrient. My Ca/Mg ratios are roughly in range (F1/B1 5.1/13.1) and slightly up from 2016 (4.7/10.6), so that’s fine, but the Calcium saturation is fairly far off. I’m assuming that this is what is causing my low pH values, but not sure how that’s calculated. Also not sure how to calculate what my expected increase in Mg saturation should be based on the fast acting lime. But since my calcium is clearly low, at a minimum I can add the same calcium (lime) app I did last year (F1: 3lb/k, B1: 1lb/k, spring and fall). The question would be can I increase that app, particularly in the B1 section, and what should the corresponding Mg app be? Since the Ca/Mg ratio is on the low side in F1 maybe I should add less Epsom Salt than I did last year? Say, 1lb/k instead of 2lb/k? Add the same or more in the B1 section to keep that ratio from becoming too large. Say, 2lb/k again. This is when a buffer pH test would help- a lot IMO. If they still have your sample (30 days?) they could run that for about $10 per sample. You are correct that base saturation reflects low pH readings and if you fill up all but 10 to 15% of the cation sites with Ca, Mg. and Potassium and leave the 10-15% to Hydrogen, you should end up with a pH in the 6's. But none of those nutrients neutralize the acidity. For soils, an addition of carbonate will do that. It's better to know how much carbonate/lime (an amount derived from buffer pH testing) is needed to raise pH than to estimate based on total base saturations. BSCR, CEC, lime and differences in lime products, etc. is a bit involved, but I'm happy to clarify any questions you have on them. As it stands now, without a buffer test, as your pH is not really moving and/or dropping and as you want to avoid freeing up any more Aluminum (which can be toxic to the turf in addition to the P issue), you want to raise your pH using lime additions. Your Mg is near sufficient levels, so it shouldn't be an impediment to your turf, however, if you wish to address the base saturation ratio, yes, 1#/k for B1 only of Epsom (considering the difference in sampling and to avoid over shooting) and mixed with the lime. Yes, I'd increase the lime app. As both areas are near the same pH, fast acting lime at 9lbs/k (B1 and F1) would be indicated and even that may not make for much movement in pH on a future test. It should help the available P values to raise. Potassium values seem to be low, and the saturation fell significantly, which, based on morpheuspa’s statements, probably has to do with the Calcium. Common lawn wisdom makes me think I should add in a potassium-rich “winterizer” app in the fall to bump that number. But it again seems like I need to add at least what I added of Potassium Sulfate in 2016 (F1: 3lb/k). However, this time it looks as though adding 3lb/k to the B1 section also might be a good idea. Agree, in fact, I'd suggest increasing to three apps of 3#/k this year. Avoid applying within 2-3 weeks of any lime app. I’ve been sufficiently warned about playing with boron in my lawn to try to improve the number without very specific advice, so I’ll probably just leave that alone this round. That's up to you, based on the soil tests and your previous app,, you could apply 2 tablespoons of Borax per k again to raise values into the optimal range. Your decision. I would have done the jar test, but I came home to a light dusting of snow. Winter isn’t done with us yet, even in S. Carolina. Hope that makes sense. Feel free to ask for any clarifications. Once again, nice job....See More6B Lawn Fert Program - Thoughts? (Blended grass types)
Comments (2)I'm off to get a soil study done... That's a good idea prior to adding amendments. Proper and consistent soil sampling is a must in order to reduce inconsistencies and get the most accurate results possible. Proper: When digging the samples, use only high quality steel tools. Use only plastic buckets for holding and mixing the samples. Avoid brass, galvanized or other zinc coated utensils. Otherwise, the sample can be contaminated. If you do not have a soil sampling tool (auger or probe), insure that your soil sample is an even thickness vertical slice and not a wedge shaped slice. Take 8 samples, evenly dispersed, from each 60 x 60' area. Try not to sample any sooner than 30 -60 days after an amendment application. Consistent: Take all samples to the same depth (4" for turf) and do so each year of testing. Use the same "range" of soil for each sample and from year to year. e.g. soil from the 0" depth down to the 4" depth (preferred, but remove the soil surface and any fresh fertilizer prills it may contain). or from 1"-4", or the 2" to 4" depth, etc. Stay consistent. Take the samples in the same month each year. Use the same lab each year. Use an established professional or university lab that offers a broad menu of testing processes, reports results in ppm or lbs/acre and at a minimum, reports CEC/TEC, Ca, Mg, P, S, K, Na, OM, Mn, Zn and Cu. Verify that they offer ammonium acetate cation and buffer pH testing and that their fees are reasonable. Verify if they use Mehlich III as their default extractant and extra points if they offer Bray (or Morgan) and Olsen too. Do the vinegar test on a small sample. If it fizzes, request that an ammonium acetate test be performed. If it doesn't fizz, either ask for or be prepared to request that (if the test comes back with a soil pH less than 6) a buffer pH test be done. I would encourage you to read this whole thread for additional information: http://forums2.gardenweb.com/discussions/4535255/taking-soil-samples-for-lab-analysis-get-your-moneys-worth?n=14...See MoreLawn Soil Test Companies - Minnesota
Comments (7)Proper and consistent soil sampling is a must in order to reduce inconsistencies and get the most accurate results possible. Proper: When digging the samples, use only high quality steel tools. Use only plastic buckets for holding and mixing the samples. Avoid brass, galvanized or other zinc coated utensils. Otherwise, the sample can be contaminated. If you do not have a soil sampling tool (auger or probe), insure that your soil sample is an even thickness vertical slice and not a wedge shaped slice. Take 8 samples, evenly dispersed, from each 60 x 60' area. Try not to sample any sooner than 30 -60 days after an amendment application. Consistent: Take all samples to the same depth (4" for turf) and do so each year of testing. Use the same "range" of soil for each sample and from year to year. e.g. soil from the 0" depth down to the 4" depth (preferred, but remove the soil surface and any fertilizer prills it may contain). or from 1"-4", or the 2" to 4" depth, etc. Stay consistent. Take the samples in the same month each year. Use the same lab each year. Use an established professional or university lab that offers a broad menu of testing processes, reports results in ppm or lbs/acre and at a minimum, reports CEC/TEC, Ca, Mg, P, S, K, Na, OM, Mn, Zn and Cu. Verify that they offer ammonium acetate cation and buffer pH testing and that their fees are reasonable. Verify if they use Mehlich III as their default extractant and extra points if they offer Bray and Olsen too. Do the vinegar test on a small sample. If it fizzes, request that an ammonium acetate test be performed. If it doesn't fizz, either ask for or be prepared to request that (if the test comes back with a soil pH less than 6) a buffer pH test be done. I would encourage you to read this whole thread for additional information: http://forums2.gardenweb.com/discussions/4535255/taking-soil-samples-for-lab-analysis-get-your-moneys-worth?n=14...See More
User
7 years agolast modified: 7 years agoUser
7 years agolast modified: 7 years agoUser
7 years agolast modified: 7 years agobeckyinrichmond
7 years agoUser
7 years agobeckyinrichmond
7 years agoUser
7 years agolast modified: 7 years agoUser
7 years agobeckyinrichmond
7 years ago
Related Stories
GARDENING GUIDESGet the Dirt on Your Garden’s Soil
Understand how your soil supports your plants so you can ensure your garden’s success
Full Story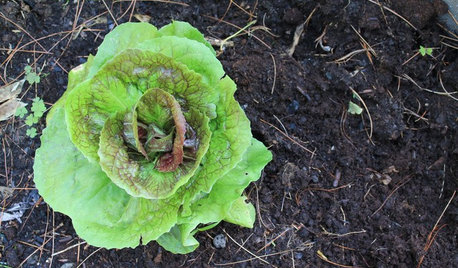
FARM YOUR YARDHow to Get Good Soil for Your Edible Garden
The nutrients in your soil feed the plants that feed you. Here are tips on getting it right — just in time for planting season
Full Story
HEALTHY HOMEGet the Lead Out: Lead Safety at Home
Keep your family safe by properly testing for and dealing with lead in old painted surfaces, water and soil
Full Story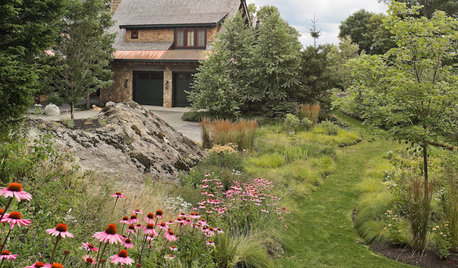
GARDENING GUIDES13 Risks to Take for True Garden Rewards
Go ahead, be a rebel. Breaking rules in the garden can lead to more happiness, creativity and connection with the earth
Full Story
MOST POPULARHow to Get Rid of Household Mold
Find out how to work with a pro to stop mold from damaging your house and health — and how to prevent it from forming
Full Story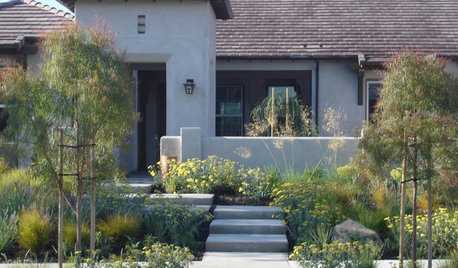
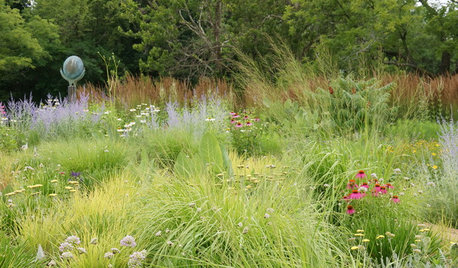
LANDSCAPE DESIGNGet Along With Less Lawn — Ideas to Save Water and Effort
Ditch the mower and lower your water bill while creating a feast for the eyes with diverse plantings and gathering places
Full Story
COLORSpeed-Dial Color Selection to Get the Best Result
You’ve belabored your color decisions and are still stuck. Here is how to evaluate your space and make choices that are right for you
Full Story
PETSSo You Want to Get a Cat
If you're a cat lover, the joys outweigh any other issue. If you haven't lived with one yet, here are a few things to know
Full Story
ORGANIZINGWant to Streamline Your Life? Get a System
Reduce stress and free up more time for the things that really matter by establishing specific procedures for everyday tasks
Full Story
HEALTHY HOMEGet Cleaner Indoor Air Without Opening a Window
Mechanical ventilation can actually be better for your home than the natural kind. Find out the whys and hows here
Full Story
User