


repair plaster behind bathroom tile
Will Hauser
7 years ago
last modified: 7 years ago


Featured Answer
Sort by:Oldest
Comments (6)

geoffrey_b
7 years ago PRO
PROMint tile Minneapolis
7 years agolast modified: 7 years agoRelated Discussions
Emergency Bathroom repair (Long)
Comments (3)I know you! Having recovered from my kitchen, I would like to redo my master bath but have been held up on trying to find a way to improve the shower. I stop over here on occasion to see if I can find inspiration. So sorry you have all this to deal with. I think your ideas are good. Making the bath blend with the rest of the house is good, just keep in mind that it doesn't have to match if you want a little different personality. The larger tub adn less surround sounds good too. The lighint issue is hard to picture, but I don't think you can go wrong with a modest number of recessed lights and a chandelier in the center. The box for the chandelier could house a ceiling fan or different type of fixture down the road. Make sure they are on different switches and you will provide a lot of lighting options. I have an engineered wood floor that has been down 6-8 months now. We ran it through the kitchen also where DH drips at the sink and have it at the back door where kids and dogs come in after being in the pool. We had a party where I was surprised at the number of kids who came in dripping. The water wiped right up -- no damage and I was actually glad we didn't still have our tile, because even with the texture, that much water would have had someone on slipping and falling on it. Mine is Bella Cera, but it is marketed under different names in other areas. They did a floating installation but I watched them put glue along all the edges, so that may help seal the edges. There used to be a thread on HGTV that had a series of photos of what appeared to be my same flooring under the Palmetto Road name. Mine is Bella Cera Amalfi Coast by Southern Floors. I can't find that now, but here is a photo from their website that was one of those on HGTV. I'd have taken the house with the floors, but I like them in mine too. ;-) I can't recommend cork from the stuff we ordered but did not install. I wanted it and would have loved it if it had been something that would clean. What we laid down to check the color with the hardwood was a very different color from the sample, but the real killer was that the floor dust that got on it when we had it down wouldn't clean with anything dry and both the recommended Bona cleaner and a barely damp microfiber cloth created a haze on the finish. Didn't look like anything we could live with so we put the wood down throughout. It's holding up great....See MoreRepairing Bathroom Plaster for Tiling
Comments (13)Holly: I'm somewhat bemused to be arguing with you on how long it takes to redo a bath, because I'm usually the one saying "no way that contractor should take a month to remodel your bathroom; it should be 1 week tops!" But I just finished tiling a tub surround with subways and it took 2 full Saturdays for tiling only. Granted, that included a window and a niche, and a glass listello, but there are still plenty of cuts on ends/corners. You also neglected the paint-on waterproofing over the cement board, which needs a day to dry, though you do have the plastic moisture barrier, so that could be omitted. You also forgot the 14 trips to Home Depot for the stuff you forgot to buy or didn't get enough of. Or the new stuff you need because you encountered something unexpected. Oh, and my weekends are only 2 days long. :-) In any case, we're hijacking the poor OP's thread. Sorry about that, clueless. Our 1920 house has lathe and plaster walls but the outside walls all have boards with grooves routered into them for the plaster keys to hold to. Does it look something like this? Also, the wire mesh is used in an older method of tiling, that entails embedding the mesh in concrete, making a pretty thick and incredibly stable wall. However, it's done in lieu of plaster, not behind it, so I'm not sure why it's there in your situation. Bill V could probably tell you how/why it was constructed that way, though I haven't seen him around for a while. You might also try posting in the Old House forum for someone who might be able to explain the construction. What everyone else has said is correct, however: you need to not just put plaster and tile back here. You either need to cover it up short term with something that will protect it from further damage, like a sheet of acrylic or fiberglass surround, or else rip it out and repair it. You could also just rip the whole thing out and put in an acrylic/fiberglass surround for a few hundred bucks and some elbow grease....See MoreRepair plaster bathroom wall.
Comments (3)I'm not sure what's behind the wood panel; I'm assuming something used to be mounted in the wall and was removed, so it's probably just empty space. The other side of the wall looks normal, so no clues there. I'll drill a hole to find out. The wallpaper will be removed; I don't know how cleanly it will come off considering the condition of the plaster behind it, but we shall see. Beadboard is a good option. We'll consider it. Thanks everyone for the advice :)...See MoreRepair plaster behind tiles
Comments (7)We all have different methods. Here's my recommendation: Tuck some tar paper (or some other barrier) between the copper and the existing metal lathe if you can. Wrap the tub stub with tar paper, tape it in place. Doesn;t need to be anything purdy or fancy. You want to keep any cement-based product off the copper. Patch in new expanded lathe over the tar paper, you can weave it in to blend the new metal with the old. You'll want to mix two things up; a portland cement slurry, and fat mud. Portland cement bonding slurry. This will act as a bonding agent to help the new mud stick to the existing wall mud. Simply mix portland cement with water to make a thin paste. Brush it on the existing mud to help the new mud stick to the old. Pretty simple. Fat mud. You'll fill that gap with fat mud. "Fat" simply means it has lime in it. Lime make a bit sticky. Recipes vary, but generally, mix by volume 4 parts sand, 1 part portland cement, and 1 part lime. You can buy bags of each individual component at most any box store. Dry mix all the ingredients. Add water carefully. You mix it wetter than deck mud (deck mud is wetted until it's barely moist, it's grainy like beach sand used to build a sand castle) but not as wet as a concrete mix that can flow out when poured on a flat surface. When shaped into a mound, fat mud will hold that shape instead of slumping flat. The goal is to get the fat mud to be wet enough to stick to itself, but dry enough to stick to vertical surfaces and not slump or fall off the wall. If you do youtube seach for "fat mud shower wall" I'm sure there are videos out there. When ready, clean existing surfaces, then paint them with the portland cement slurry. There's no magic here. Just get it on there. Then fill your hole with the fat mud. You can pack it in with a trowel, build it out so the mud patch s slightly proud of the surrounding surface. Then take a stick that's wider than the patch, place it against the good wall below your patch, and use a left/right sawing motion to shave the mud flush with the existing wall....See More
kats737
7 years agoWill Hauser
7 years ago- PRO
Mint tile Minneapolis
7 years agolast modified: 7 years ago
Related Stories
WALL TREATMENTSSurface Smarts: Venetian Plaster
Centuries-old Venetian plaster has made a roaring comeback in modern interiors. Could this old-world wall favorite work in your home?
Full Story
BATHROOM DESIGNConvert Your Tub Space Into a Shower — the Tiling and Grouting Phase
Step 3 in swapping your tub for a sleek new shower: Pick the right tile and test it out, then choose your grout color and type
Full Story
BATHROOM DESIGN10 Top Tips for Getting Bathroom Tile Right
Good planning is essential for bathroom tile that's set properly and works with the rest of your renovation. These tips help you do it right
Full Story
BATHROOM DESIGNBathroom Surfaces: Ceramic Tile Pros and Cons
Learn the facts on this popular material for bathroom walls and floors, including costs and maintenance needs, before you commit
Full Story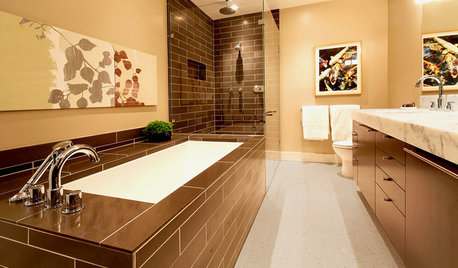
BATHROOM DESIGNDesigner Trick: Take Your Shower Tile to the Ceiling
Tile the whole wall in your shower to give your bath a light and lofty feel
Full Story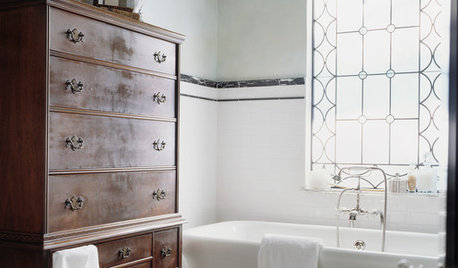
BATHROOM COLOR12 Gorgeous Black and White Bathrooms
Luxurious materials, vintage touches and thoughtful color splashes make these chic spaces worth borrowing ideas from
Full Story
KITCHEN BACKSPLASHESHow to Install a Tile Backsplash
If you've got a steady hand, a few easy-to-find supplies and patience, you can install a tile backsplash in a kitchen or bathroom
Full Story
DECORATING GUIDES7 Design Rules and Why You Should Break Them
Think tile is only for kitchens and bathrooms? Art should hang at eye level? Time to consider breaking these old rules
Full Story
BATHROOM DESIGNFloor-to-Ceiling Tile Takes Bathrooms Above and Beyond
Generous tile in a bathroom can bounce light, give the illusion of more space and provide a cohesive look
Full Story
REMODELING GUIDESTransition Time: How to Connect Tile and Hardwood Floors
Plan ahead to prevent unsightly or unsafe transitions between floor surfaces. Here's what you need to know
Full Story
Will HauserOriginal Author