


Whole Wheat (continued)
annie1992
8 years ago
Featured Answer
Sort by:Oldest
Comments (9)

plllog
8 years ago
grainlady_ks
8 years agolast modified: 8 years agoRelated Discussions
Whole-wheat or whole-grain yeast rolls?
Comments (2)Just make your regular yeast rolls and substitute some whole wheat flour for about half the white flour. But I wouldn't worry...Wheat rolls are better fora diabetic...but they are not a really good thing to eat. The thing to remember about a diabetic diet...is it's not all 'white carbs" but things with a low gylcemic index...t.hose things that take longer to turn to sugar.... Whole wheat is better than white bread....but it's still carbohydrate. Don't worry about it...put some rye crisp or rye bread on the table if you think he will miss it....See MoreMy first whole wheat bread
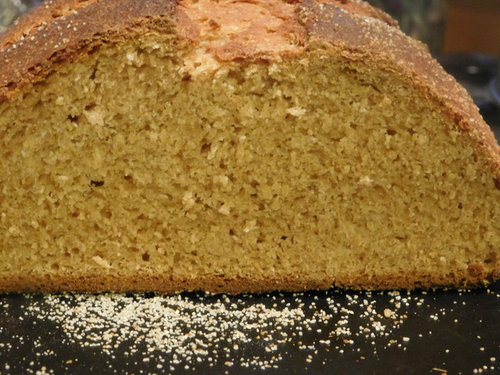
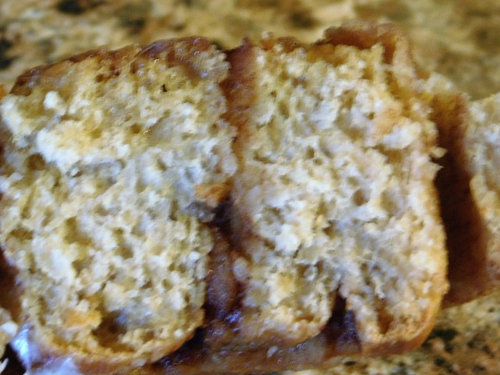
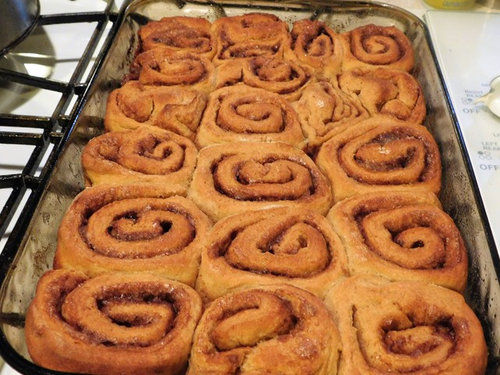
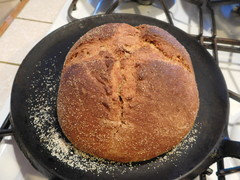
Comments (17)This recipe was given to me by a dear friend, Mildred, from Arkansas. She got a similar recipe from Pleasant Hill Grain but wasn't happy with it, and together we "tweaked" it. This recipe is designed for a Zojirushi Bread Machine (make the dough only - not baked in the bread machine), but it will work if you want to make it by-hand. We call it "Mildred Bread" at our home, and there is a 3x5 recipe card with the ingredients safely taped to the bread machine. It's our everyday bread. I make loaves, dinner rolls, burger buns, hot dog buns, cinnamon rolls, etc. all from this same dough. Sometimes I'll make one 1-pound or 1-1/2-pound loaf and use the remaining amount of dough for rolls, cinnamon rolls, burger buns, etc.... This recipe is a bit wordy with explanations (that's the teacher in me from teaching so many bread classes ;-), but once you've made it, you'll be able to follow a 3x5 recipe card with the ingredients listed on it, like I do. CAUTION: Not all bread machines are capable of mixing 100% whole wheat bread dough, so check your user's manual. Enjoy, -Grainlady 100% WHOLE WHEAT BREAD Sponge: The night before, remove the bread machine pan and add the ingredients: 3/4 c. warm buttermilk (I use homemade kefir) 3/4 c. warm water 2\-1/2 c. freshly milled hard wheat (red or white) flour 1/4 t. ascorbic acid (if you don't have, or can't find, ascorbic acid, use Fruit Fresh \- but the acid is important!!!) 2 t. SAF\-Instant Yeast (I suggest SAF\-Instant Yeast and have never used anything else for this recipe) Place the pan into the bread machine and set on the Quick Dough setting and allow the ingredients to mix together well for a few minutes (you may need to scrape down any dry particles with a spatula), then turn the bread machine off (at the button, don't pull the plug or you risk damaging your bread machine computer). Shut the lid, and allow this mixture to set overnight. (If you are in a hurry, let the ingredients sponge for 1\-1/2 hours and then finish making the bread.) \*\*If making the recipe by hand, mix the ingredients well using a Danish Dough Whisk or a wooden spoon. Cover the bowl (using a shower cap, a Quick Cover, or a sheet of plastic wrap) and allow to sit on your counter at room temperature. If you have a dough\-rising bucket, use it for mixing the dough as well as for rising. After mixing in a dough\-rising bucket, snap on the lid and allow the sponge to sit on your counter. The next day (or anytime after 1\-1/2\-hours), remove the bread machine pan and add these ingredients to the sponge: 2 T. coconut oil (melted \- or use vegetable oil or melted butter) 2 T. honey or agave nectar 1 egg (I also add 1/3\-1/2 c. of chia seed gel, but that's optional.) On top of these ingredients in the bread machine pan add: 2\-1/4 c. freshly\-milled whole wheat flour 2 t. salt Place the pan back into the bread machine. Set bread machine to Quick Dough Cycle and start the machine. After it has been working for 5\-minutes, or so, be sure to check the hydration of the dough. You want a nice soft ball that is slightly sticky to\-the\-touch. It's better to err on the side of a wet dough than a stiff dry dough, so adjust the dough by adding more flour, or adding more water, if necessary. As soon as the dough has completed the kneading cycle (don't allow the dough to rise in the bread machine), turn the machine off. Remove the pan from the bread machine and dump the dough out onto a SILPAT (no flour necessary). With oiled hands so the dough doesn't stick, pat the dough into a dough\-rising bucket (I use a 2\-quart plastic food storage container that has graduated measurements on the side. I got the container at the local restaurant supply store, but you can find dough\-rising buckets at King Arthur Flour and elsewhere on\-line. I have them in three sizes for different amounts of dough.) Snap the lid on the dough\-rising bucket and allow it to rise until just under "double". (If the dough comes up to the 1\-quart line, it will be double when it reaches the 2\-quart line.) Check the rise after 20\-25\-minutes. It rises quickly if your kitchen is warm, and slower if your kitchen is cool. \*\*If making the dough by\-hand, add the 2 t. salt, 2 T. agave nectar (or honey) and egg to the sponge mixture, and then add enough of the 2\-1/4 c. of whole wheat flour to make a nice soft dough (add more flour than 2\-1/4 c., if necessary). Add the flour gradually \- a little at a time, and beat each addition of flour into the mixture before adding more. A Danish Dough Whisk is the perfect tool for this process (as well as stirring all batters and doughs), but a wooden spoon will also work well. If you do a good job of mixing, you won't need to spend as much time kneading. When making bread dough by\-hand, you need to spend a good deal of time beating the dough with the spoon or Danish Dough Whisk. You develop the gluten during the mixing, as well as during kneading. When you don't have the strength to mix it with a spoon anymore, place the dough on an oiled counter top and knead until the gluten has developed (6\-10 minutes). If you use an oiled counter top you won't have to add flour to the dough. By doing a good job of mixing, you will need only a little additional flour \- or none at all. If your dough is a shaggy sticky glob, you didn't do a good job of mixing. Oil your hands so they don't stick to the dough while handling it. Place dough in a dough\-rising bucket, snap on the lid, and allow the dough to rise until it's just below "double". Follow the remaining instructions... \-\-\-\-\-\-\-\-\-\-\-\- When the dough has doubled in bulk, you will need to take the lid off the dough\-rising bucket and punch it down. To do that, oil your hand and make a fist. GENTLY drive your fist through the center of the dough. Now grab the outer edge of the dough and pull it into the center hole. Do this all the way around. This moves the cooler outside dough to the inside (you have essentially turned the dough inside\-out.) This method degasses the dough and also redistributes the yeast throughout the dough. Place the dough out onto a SILPAT (a silicone mat). Handle the dough with oiled hands \- no flour necessary. If you are making more than one loaf from this dough, now is the time to scale it (weigh it on a kitchen scale), and divide the dough into equal portions. Round each portion. You round the dough by cupping both hands around the dough ball while it sits on the counter and gently pull the dough from the top to the bottom, moving it slightly each time you pull it down, until you have a nice, smooth ball of dough. A smooth ball of dough will get the gluten strands running in one direction and will hold in the gasses in. Cover the dough (I use a bowl or my dough rising bucket, or a sheet of plastic wrap) and allow it to rest for 10\-15\-minutes. This allows the gluten strands to relax. To form a loaf... With oiled hands, pat the dough out on the Silpat until it's about 1\-inch thick and the width of the pan you are going to use. Roll the dough up and pinch the seam closed. Tuck the ends under the bottom. Place the dough, seam side down, into a greased loaf pan/s and cover with plastic wrap. Allow it to double in bulk. Bake in a preheated 375 degrees F oven for about 25\-minutes, or until it's between 195\-200\-degrees F when you check it with an instant read thermometer....See MoreWhite whole wheat flour vs. reg. whole wheat
Comments (7)Yes, white whole wheat flour can be used for cookies. And yes, there is hard and soft white wheat as plllog explained. There are also spring hard/soft white or red wheat and winter hard/soft white or red wheat to get even more complicated than things really need to be. And don't forget durum wheat (the type of wheat best used for pasta/noodles) and all the ancient varieties. Before going gluten free, I used a large number of wheat varieties: durum, hard spring white, hard winter white, soft spring white, hard winter red, hard spring red, triticale (a hybrid of wheat and rye), as well as spelt, kamut, and einkorn (ancient varieties). I saved soft white wheat (because it was so expensive -purchased from Bob's Red Mill) for some (not all) quick breads, biscuits, and pastry, as well as for cakes (especially delicate chiffon and angel food cake). I would use a 3:1 mix of soft white wheat and spelt OR oat groats (milling flour myself) for a low-protein flour similar in protein to cake flour. I also milled rye, barley, sorghum, and many other grains/seeds/beans for flour. I milled the mixture of grains into a very fine flour and made sure to sift it (removing any large pieces of bran) before using it for cake. Since you may not have any soft white wheat flour available for your cookies, just make sure when making cookies (or anything leavened with chemical leavening - soda, baking powder) NOT to over-mix them or you will develop too much gluten and will get tough cookies or baked goods using regular (hard) white whole wheat flour. This is yet another time I suggest using a Danish Dough Whisk (or a wooden spoon) instead of a stand or regular mixer. Keep mixing to a minimum once the flour has been added. If you use white whole wheat flour in a recipe that is designed for bleached or unbleached all-purpose flour, you may find you need to add a little more hydration, OR reduce the amount of whole wheat flour by 1-tablespoon from each cup of flour called for in the recipe, and adjust accordingly, if needed. If you can find recipes that specifically call for whole wheat flour you will find you have better results until you get accustomed to using it. Check your public library for wholegrain cookbooks. The recipe at the link below from the Kansas Wheat Commission is one of my favorites using 100% whole wheat flour :-). This recipe will work with either white or red whole wheat flour, but white whole wheat works best due to the flavor differences. If you want to kick it up a notch, add 1/8-1/4 t. of Fiori di Sicilia (an all-natural citrus and vanilla scented flavoring from King Arthur Flour - but caution, a little goes a long way). You may want to take a look at their recipe collection for a lot of great recipes using whole wheat flour. I've collected the Kansas Wheat Commission Recipe Books for years (free when you attend the Kansas State Fair in Hutchinson, KS) and have them going back several decades. -Grainlady Here is a link that might be useful: Whole Wheat Sugar Cookies...See MoreHow long does whole wheat flour keep?
Comments (11)I store cornmeal in the freezer also, but I use a lot more whole wheat flour than I do cornmeal. I also store semolina and vital wheat gluten in the freezer, but they are in small bags because I do not use that much of them. I do go through these fairly quickly, but I once bought some VWG that had expired, and I had to take it back to the store. Now I carefully check expiration dates on VWG before buying and store it immediately in the freezer. I go through so much whole wheat flour that it does not have time to go bad. I make 100% whole wheat bread about every other week, and this recipe also has VWG in it. I generally use semolina on the pizza peel instead of cornmeal, but yesterday I had to use cornmeal, and while I did not notice the taste, I did notice that it was much worse about burning than semolina. Our pizza oven gets to 950°, and if there is any cornmeal left on the pizza stone, it will easily burn. We bake two pizzas in quick succession, and Kevin said that he cannot clean off the stone between them. I'm going to look for a tool to do this, but I'm hoping the peel will do the job....See Moremustangs81
8 years ago
annie1992
8 years agoannie1992
8 years agograinlady_ks
8 years agoplllog
8 years agoannie1992
8 years ago
Related Stories

ARCHITECTURERoots of Style: French Eclectic Design Continues to Charm
Hip roofs, towers, quoins ... if your house includes architectural elements like these, you might trace its design lineage to France
Full Story
REMODELING GUIDES10 Tips to Maximize Your Whole-House Remodel
Cover all the bases now to ensure many years of satisfaction with your full renovation, second-story addition or bump-out
Full Story
DECLUTTERING5 Ways to Jump-Start a Whole-House Decluttering Effort
If the piles of paperwork and jampacked closets have you feeling like a deer in the headlights, take a deep breath and a baby step
Full Story
TRANSITIONAL HOMESHouzz Tour: Room for the Whole Gang in This Cape Cod Home
As homeowners transition to being empty nesters, they expand their summer house to serve extended family year-round
Full Story
HOUZZ TOURSHouzz Tour: Whole-House Remodeling Suits a Historic Colonial
Extensive renovations, including additions, update a 1918 Georgia home for modern life while respecting its history
Full Story
Houzz Products: Get a Whole New Look — Without New Furniture
With a fresh-looking decor trio (rug, light fixture, wall covering), they won’t even notice that same-old sofa
Full Story
HOLIDAYSA Thanksgiving Tradition to Last the Whole Year
Looking for a thoughtful yet simple way to capture your family's gratitude? Grab a jar and paper
Full Story
ROOM OF THE DAYRoom of the Day: A Design That Works for the Whole Family
A new kids’ space in the basement enables a young family to give their family room some grown-up style
Full Story
UNIVERSAL DESIGN12 Must-Haves for Aging in Place
Design a home that will continue to be accessible, safe and stylish as the years go by
Full Story
SMALL KITCHENSKitchen of the Week: A Small Galley With Maximum Style and Efficiency
An architect makes the most of her family’s modest kitchen, creating a continuous flow with the rest of the living space
Full Story
shambo