


GRIMY PANS TIP
nannygoat18
8 years ago
Featured Answer
Sort by:Oldest
Comments (27)

lindac92
8 years agograinlady_ks
8 years agoRelated Discussions
Need tips on cleaning stain on plastic shower pan
Comments (2)I had pretty good success with CLR, but I've never tried it on plastic. Check the instructions on that. It does zap rust stains pretty well. Have you tried magic erasers? I haven't found many stains that aren't successfully removed with one of those puppies!...See MoreA tip, Tip Speed.
Comments (12)I do take things for granted sometimes. I should have also mentioned that you should use a tall enough vessel if you don't want to re-decorate your kitchen. Give it a try with plain water, it will take a couple of minutes and you will see that it will not splatter. Don't squash this idea until you have tried it. Ann, FOAS, wattage rating in appliances can be complicated and misleading. I am not going to explain that here. For a blender, rotation speed is obviously very important. There is a reason why not too many blenders tell you their RPM, because they don't want you to know and compare. You can have a hundred horse power motor that only rotates at 100 RPM, and that will not be a very good extremely powerful blender. You will also notice that most immersion blenders do not have ventilation holes like a counter top blender. Where does the heat go? 500 watts is over 1300 BTUs of heat that needs to go some place. Posted by Lindac "Any motor will run faster when it's not doing "work"....everything from a stand mixer to a stick blender to a chain saw to a car running out of gear." But in this technique, the motor is working very hard. When you lift the blender out of the liquid, the motor immediately gains speed. The speed is stored "Potential Energy" in the motor's rotor mass, just like a flywheel in a steam engine. The stored (momentum) energy is the key why this "in and out" technique works. Did someone say "Squash"? I made a kabocha squash soup, so creamy smooth with a hand blender. :-) dcarch...See MoreFood Photo Tips: Part 9 - Setting Up a Tripod
Comments (0)Posted by canarybird (My Page) on Sat, Sep 5, 09 at 21:57 Food Photo Tips: Part 9 - How to set up a Tripod Hi again everyone. I'm back with another entry on how to use your digital camera for taking tabletop photos. Sorry my tutorial is a few days late this time. It's been a busy week over here. I wanted to give several camera tips today but once started on how to set up a tripod, I was carried away when creating the photos and diagrams, so it took longer than expected. As there are many photos, some may be small size, but all will expand with a mouse click. Setting up a tripod can be a little more confusing than one might first imagine. If you have tried it for the first time by turning all the knobs and flipping the locks, you may have ended up with legs that won't sit still and a top piece that hangs over and won't stay upright. Whatever you do, try these suggestions without a camera attached until you have got the hang of it. Here below is a typical entry level lightweight tripod, shown in its folded position. Total length is 14 inches, weight just under 2 pounds. Price around $75.00. Note that in this position the long handle, called the 'pan-handle' is bent downwards and the small crank handle is also folded down. First thing to do is lift up both to get them away from the legs (right). The next step is to flip up a leg locking lever (below left), and extend one leg fully, being sure all lower sections have snapped open: Close the leg lock lever and then do the same with the other two legs, being sure all sections are fully extended and the levers are locked: Only then should you open the three legs. Press the leg braces down and tighten the leg brace nut. Now the tripod is open, turn it so one leg is the leading leg in front of the camera and the other two legs are on either side of you, so you are standing in the space between them. Attaching the camera to the tripod: Two ways to attach the camera to the tripod are 1. by a screw on the tripod head which screws up into the base of the camera or 2. the quick-release plate, which comes in different forms, but is a fast way to put on and take off your camera from the tripod. The tripod I show here has a quick-release plate, which once screwed to the bottom of the camera, will enable the camera to be snapped into place on the quick-release platform of the tripod head by opening the lever. Here below is a camera, the quick-release plate with its screw and a small coin. The coin is used to turn the screw, attaching the plate to the camera. Here is the plate affixed to the bottom of the camera, and showing how to open the quick release lever: By holding open the quick-release lever with one hand, you can slip the camera with the attached plate into the platform, and then press the lever closed: By loosening the side tilt locking nut, you can then lift up the platform and your camera is ready to operate in a vertical position: When you were first setting up your tripod, after extending the legs, you may have found the head is pointing in the wrong direction. If the tripod head is pointing in the wrong direction, you need to loosen the panning lock nut and swivel the head until it is pointing forward and the pan-handle is at your left hand. The following examples are with the legs withdrawn so the tripod is shorter and can be used on a table: Panning or turning around the tripod head Here you see that with the panning lock nut loosened, you are able to swivel the tripod head around. You can also tilt the head down by turning the pan-handle a little as though it were a screwdriver which will release the tilt up/down of the head. When you have the right angle for your photo, turn the pan-handle in the opposite direction to tighten the head at the chosen position: Here are the names of the parts of this tripod, and the parts of the tripod head. Remember you can enlarge each photo with a mouse click: Tabletop Tripod Here is a small but sturdy tabletop tripod which I sometimes use. The legs will extend another 1 1/2 inches by twisting the black locks, and the central column may be raised by loosening the centre twist lock. This tripod has both pan and tilt functions and uses a screw head to fasten it to the bottom of the camera. Well I hope this will be a useful guide if you are using a tripod for the first time. It is always advisable to practise setting up the tripod a few times without your camera attached just in case you are unlucky enough to have it fall over. Set it up on a firm, level ground or floor and check that all levers are locked. If indoors be careful that small children or animals won't be tripping over the legs. I hope you understand all and if you have questions please ask here or PM me. So thanks for joining me. I'll be uploading the next installment soon. And please feel free to save the pages on your computer. Next time I'll show a little about photographing silverware, the flash menu and self-timer. Sharon (Canarybird) :-) (All text and photos copyrighted) Free for personal, non-commercial use Follow-Up Postings: o RE: Food Photo Tips: Part 9 - Setting Up a Tripod clip this post email this post what is this? see most clipped and recent clippings * Posted by publickman (My Page) on Mon, Nov 2, 09 at 2:38 Kevin has a tabletop tripod similar to the one you pictures, and he also has a unipod, which I have not used. We used the tabletop tripod for the Spanokopita demonstration, which you may recall. Lars o RE: Food Photo Tips: Part 9 - Setting Up a Tripod clip this post email this post what is this? see most clipped and recent clippings * Posted by canarybird (My Page) on Mon, Nov 2, 09 at 5:21 I love that little tabletop tripod although it's not been as useful to me as a floor length model. I've never had a unipod or monopod and I think they're best for crowded places where tripods are too bulky, such as sporting events where support is needed for heavy long lenses. The spanokopita demo was great but the camera seemed to be hand held. I think you were using the tabletop tripod in your demo of making little chocolates way back when. I've forgotten their exact name but they looked good. o RE: Food Photo Tips: Part 9 - Setting Up a Tripod clip this post email this post what is this? see most clipped and recent clippings * Posted by publickman (My Page) on Wed, Nov 4, 09 at 2:28 You're right - Gina was holding the camera for that video, as you can tell from her voice, which is the most prominent. I have a lot of raw video with other demonstrations that I have not had time to get around to editing yet. I don't even have my sewing room completely organized yet for video editing, although the computer I use for video editing is already set up there - along with two sewing machines, which have been getting a lot of use lately. When I finish making all the drapes, curtains, pillows, and cushions that I need, I will convert the room to a video editing room. Unfortunately, it is too small to be both simultaneously. I'm still in the process of settling in, and I guess it's going to take a full year. Lars o RE: Food Photo Tips: Part 9 - Setting Up a Tripod clip this post email this post what is this? see most clipped and recent clippings * Posted by canarybird (My Page) on Fri, Nov 6, 09 at 11:32 Making home videos is another field that interests me. But I have only an old two ton Sony video recorder that uses tapes. One day I hope to get a little HD digital video camera for using outdoors especially for recording birds, beach and nature. A dedicated room sounds like a great idea. SharonCb...See MoreCleaning a mini bundt cake pan-of-six
Comments (7)You might try applying a coat of DAWN Platinum Erasing Dish Foam (foam plus a little water to make it spread farther and stay wetter) and let it sit on the problem areas of the pan long enough to soften the baked-on crud, then clean as normal. I have the 12-cup mini-Bundt pan similar to the one in your picture and use it all the time without the build-up problem. I spray my pans with Bakers & Chefs Cooking Spray making sure I carefully wipe off any over-spray that is on the flat surfaces before filling the pan. I've been using this cooking spray for around 20-years and don't have gunky pans, and I make all our baked goods all the time using somepans that are as much as 30-40 years old. I've also been cleaning my baking pans with the DAWN foam products since they came out on the market. -Grainlady...See Morelindac92
8 years agocarol_in_california
8 years ago
annie1992
8 years ago
cookncarpenter
8 years agolast modified: 8 years ago
Islay Corbel
8 years ago
debrak_2008
8 years ago
dcarch7 d c f l a s h 7 @ y a h o o . c o m
8 years agoci_lantro
8 years ago
nannygoat18
8 years agolascatx
8 years agonannygoat18
8 years agosally2_gw
8 years ago
cynic
8 years agorgreen48
8 years agolast modified: 8 years agolascatx
8 years agomxyplux
8 years agonannygoat18
8 years ago
sleevendog (5a NY 6aNYC NL CA)
8 years agonannygoat18
8 years agorgreen48
8 years agolascatx
8 years agolindac92
8 years agowestsider40
8 years ago
Bumblebeez SC Zone 7
8 years ago
Related Stories
FEEL-GOOD HOME8 Tips for Harmony in the Kitchen
Frustrated by the arguments that arise over kitchen duties? Check out these coping strategies
Full Story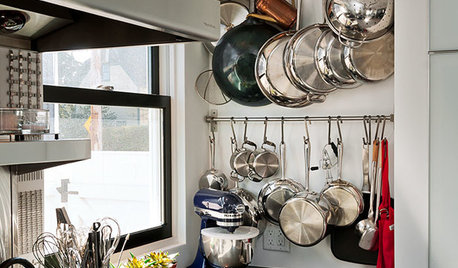
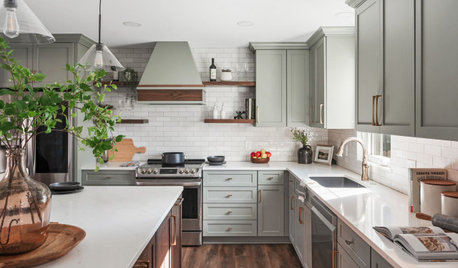
KITCHEN DESIGNHang 'Em or Hide 'Em: 10 Stylish Ways to Store Pots and Pans
Keep cookware neat and at the ready with racks, drawers and creative storage solutions
Full Story
KITCHEN DESIGN8 Kitchen Design Tips for Foodies
If you own at least one pricey knife and have a slew of kitchen tools, you’ll want to read this
Full Story
REMODELING GUIDESContractor Tips: Advice for Laundry Room Design
Thinking ahead when installing or moving a washer and dryer can prevent frustration and damage down the road
Full Story
KITCHEN DESIGN9 Popular Stovetop Options — Plus Tips for Choosing the Right One
Pick a stovetop that fits your lifestyle and your kitchen style with this mini guide that covers all the basics
Full Story
MOST POPULAR33 Magic Household Cleaning Tips
Houzzers from around the world share their tips for transforming housework into child’s play
Full Story
REMODELING GUIDESContractor Tips: How to Install Tile
Before you pick up a single tile, pull from these tips for expert results
Full Story
KITCHEN DESIGNA Cook’s 6 Tips for Buying Kitchen Appliances
An avid home chef answers tricky questions about choosing the right oven, stovetop, vent hood and more
Full Story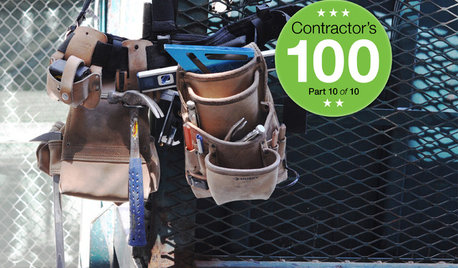
REMODELING GUIDESContractor's Tips: 10 Things Your Contractor Might Not Tell You
Climbing through your closets and fielding design issues galore, your contractor might stay mum. Here's what you're missing
Full Story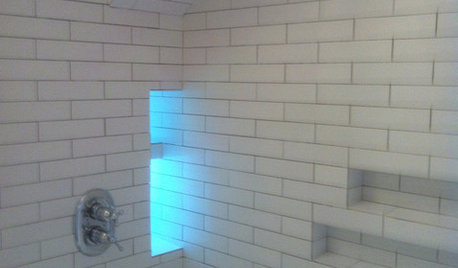
BATHROOM DESIGN10 Top Tips for Getting Bathroom Tile Right
Good planning is essential for bathroom tile that's set properly and works with the rest of your renovation. These tips help you do it right
Full StorySponsored
Leading Interior Designers in Columbus, Ohio & Ponte Vedra, Florida
nannygoat18Original Author