


Why is that some years my grass turns to seed really bad?
Lisa
8 years ago
last modified: 8 years ago
Featured Answer
Sort by:Oldest
Comments (20)

Lisa
8 years agoRelated Discussions
Why is my grass turning brown?
Comments (5)My first thought was that it may not be getting enough water. Have you ever measured how much water your sprinklers are putting down a week? We have had a really hot and dry spring in NJ. If you've never tested it before, you should try this: put out a opened tuna can, soup can or straight sided coffee cup and run the sprinklers as you normally would. Then, using a ruler, measure the depth of the water in the can. You need to be putting down about 1 inch per week. You may be surprised how much water that really is... Looking at picture 2, the other thought that came to mind is fertilizer burn. Do you use a drop spreader by any chance? (as opposed to a broadcast spreader) It is hard to tell, but the width of the brown streaks seem to be about the width of a drop spreader, where perhaps you went over the same section twice....See MoreSeeds: Would it really be so bad?
Comments (21)Patsy, I can't comment on planting your seeds now though I was thinking about trying the same thing. As for me, I normally have anywhere from a few hundred to maybe close to 1,000 seeds. Not alot by some standards. You and I are in similar climate zones. Others may cringe at my methods but I do not baby my seeds. I hybridize during blooming season and as pods ripen I collect the seeds in individual paper cups with the hybrid crosses written on them to let them air dry for a few days (sometimes much, much longer if I'm busy lol). Then they get transferred to more compact plastic craft containers with snaptight lids (similar to a tic tac container) and stuffed away in a kitchen cabinet til' the following year. You can buy these at Walmart. I've never had mold develop inside these containers as long as you let the seeds air dry well before hand. I don't refrigerate. I don't do any pre-germination stuff. I don't soak them in water, peroxide or anything to rehydrate prior to planting. I am too lazy for all of that lol! Around February I plant in a clear plastic container (the kind that store stuff under your bed). They are about 2 feet long x 18" wide x 5" deep (also available from Walmart) so even filled with dirt they can be lifted and moved around easily if your back is decent. I Drill plenty of drainage holes and fill it almost to the top with plain ole' potting soil mixed with a little peat moss. I water this thoroughly before planting the seeds. I don't use any soil-less mixes or sterile mediums and have never lost any to fungus or dampening off because I grow them outside with good air circulation as highjack mentioned. The only ones I have lost were due to me letting the soil dry out too long. I plant the seeds (either sprinkle randomly or in rows)very close together. Maybe an inch or so in between each one and sometimes less. Then sprinkle 1/4 inch of soil over top of them and gently wet this down with a fine mist spray from the hose so I don't displace my seeds from their rows. I use plastic forks with the names of my crosses stuck down into the dirt to mark my rows and then slip a white plastic trash bag with pull-tight straps over the whole thing leaving the straps untied on the end to let air in. The fork handles keep the plastic from laying on the soil and there's a nice warm air space inside like a mini-greenhouse. If the day gets too hot just take the bag off or pull it back part ways. These containers sit outside on my porch where they get some sunshine through the pickets and the afternoons temps are usually quite comfortable on most winter days. At night you can just tie the straps tight and this keeps the cats and other critters from disturbing the soil and helps keep your seedlings a little more insulated as the temps drop at night. If we do get a few extreme nights and the temps drop close to freezing then I pick them up and move them inside til' the next morning. I let the soil dry out a little between waterings then always water with a fine mist until the seedlings are a couple of inches tall and well rooted at which time a normal spray is usually fine. If the tray is kept in the trashbag most of the time it keeps the soil moist longer and you don't have to water as frequently, but it's good to pull the bag back from time to time to increase air circulation. I get good germination rates (85% or better by my estimation) and the seedlings are hardened off to the elements in the process so there's no transition period. You can see the roots growing around the sides of the clear container so once they start to crowd each other they get transplanted into the garden or nursery bed. If you're planting thousands and thousands of seeds this may not be a practical method but so far two or three of these trays is all I've needed for the amount of seeds I produce. I may try this same method now as well as plant some directly in the nursery bed and see how they compare and do through our winter. However if planting in trays now the seedlings will probably have to be transplanted into larger pots before the end of the year as someone else suggested, which could become more time consuming to water and more of a hassle to move all the pots inside when temperatures dip. Good luck with your babies! Danielle...See Morewhy does my grass look like this?
Comments (7)I wrote a detailed reply last night, but I must have closed without sending it. My first piece of advice would be to skip the gypsum in the future. It doesn't hurt anything, but it only helps certain kinds of clay, and the clay we have is not the kind that it helps. Watering with the split sprinkling helps to get the water deeper into the soil. You probably have no problem getting the top part of the soil to absorb water, since it's sandy loam/topsoil (how deep does this go?). Ideally, you'll want to penetrate into the clay as well, to encourage roots to go as deep as possible. It can be more difficult to get clay to absorb water, but once it's there, it retains water very well. I would also cut back to watering twice a week right away, increasing the times slightly (maybe not the full 50% to provide the same amount of water--I think we can use less water if we water less often, since we lose less to evaporation). After a few weeks of that, switch to watering once a week, applying double the amount you're applying now. If this works, you're using 2/3 the water you used to use. I'm not sure you want to ask me about seed mixtures. I'm cutting back on my watering and gradually replacing my KBG/fescue lawn with a low water lawn consisting of several natives and a few low water introduced species. I'm using streambank wheatgrass, western wheatgrass, crested wheatgrass and sheep fescue. My goal is to get to the point where I can have a green lawn if I water every other week. One drawback to my approach is that these grasses aren't as dark green as KBG. My main concern is reducing water use. If you're more interested in a dark green lawn, I would suggest asking for mix advice on the lawn care forum. There are some very knowledgeable people there who can make good recommendations....See MoreMy lawn really is in bad shape, I would love any help and suggestions!
Comments (8)HalloBlondie, thx for your ideas. The part of the lawn that is inundated with the coarse grass-like clumps is all we have in front of our townhouse. Probably 30' by 30', roughly. We did plant a gingko where the elm was but it will take many years to supply the same shade as the elm... We'll give your idea some thought; we'd be renegades, tho, vis a vis the adjoining neighbor's front yards (kids sometimes like to play all the way lengthwise across the the long span of lawns that extend across the front yards of the 5 townhouses...) If we really redo the whole space by adding shrubs, etc, it would kind of preclude that type of neighborhood play. I am wondering if yourself or anyone can ID the main clumps of stuff in my first pic and LMK how what can be done about it........See More
User
8 years agoLisa
8 years agoLisa
8 years agoUser
8 years agoLisa
8 years agoandy10917
8 years agoUser
8 years agoLisa
8 years agoLisa
8 years ago
hoganjr
8 years agoLisa
8 years ago
maidinmontana
8 years agotimtsb
8 years agoUser
8 years agotimtsb
8 years agoUser
8 years agoUser
8 years agohoganjr
8 years ago
Related Stories


GARDENING GUIDESGreat Design Plant: Purple Needle Grass, California’s State Grass
The long-lived, drought-tolerant Stipa pulchra is as admired for its benefits as for its good looks
Full Story
LIFESlow Living 101: Tips for Turning Off the Chaos
It may feel as though you're too busy to slow down and enjoy life. But even little changes can have a big effect
Full Story
FALL GARDENINGReflecting on a Gardening Year
Mistakes and successes, surprises and comforts. The garden helps us grow in new ways every year
Full Story
LIFETurn Off the Video Games and Turn On Your Kid's Creativity
Going nuts planning summer activities? Kids overdosing on screen time? It may be time to foster more self-directed play
Full Story
REGIONAL GARDEN GUIDESWelcome the Turning Season: Advice for Your September Garden
Roll with the cooler weather by planting away. Our gardening guides tell you what plant picks are best for each U.S. region
Full Story
REMODELING GUIDESHouzz Tour: Turning a ’50s Ranch Into a Craftsman Bungalow
With a new second story and remodeled rooms, this Maryland home has plenty of space for family and friends
Full Story
LANDSCAPE DESIGNEnergize Your Landscape With Masses of Grasses
Create year-round interest with waves of attention-getting grasses for all kinds of yards
Full Story
GARDENING AND LANDSCAPINGTurn Household 'Junk' Into Garden Treasures
Don't kick discarded household items to the curb — send them to the garden as planters, art pieces and conversation starters
Full Story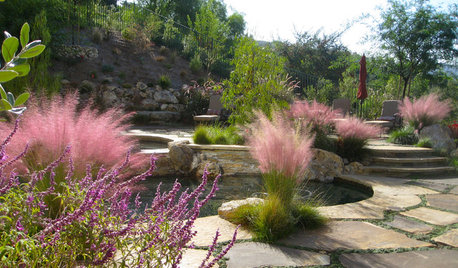
GRASSES10 Ways to Use Ornamental Grasses in the Landscape
These low-maintenance plants can add beauty, texture and privacy to any size garden
Full Story

User