


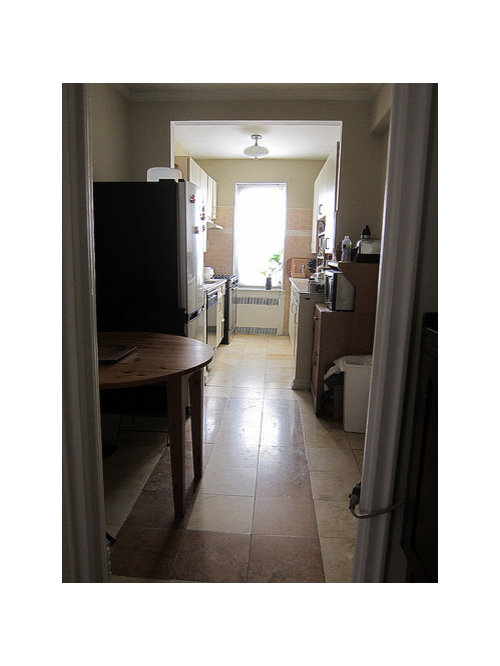
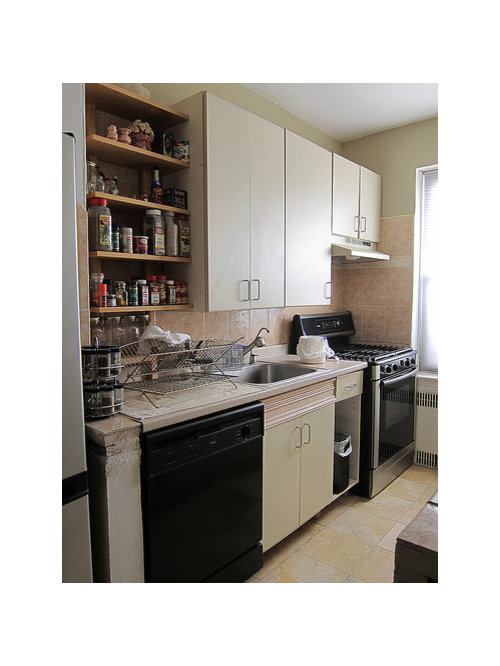
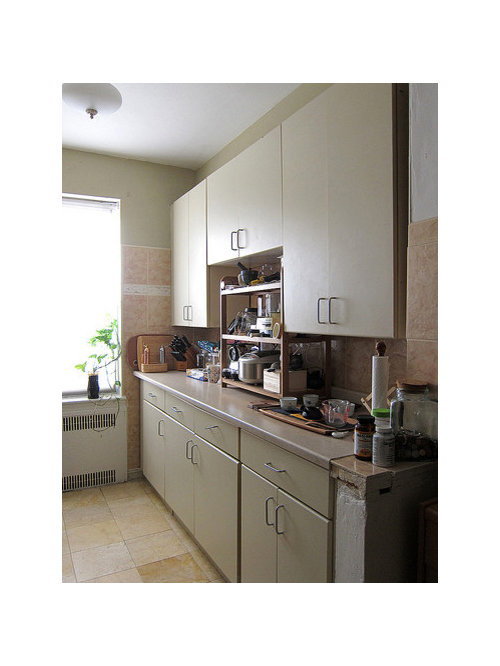
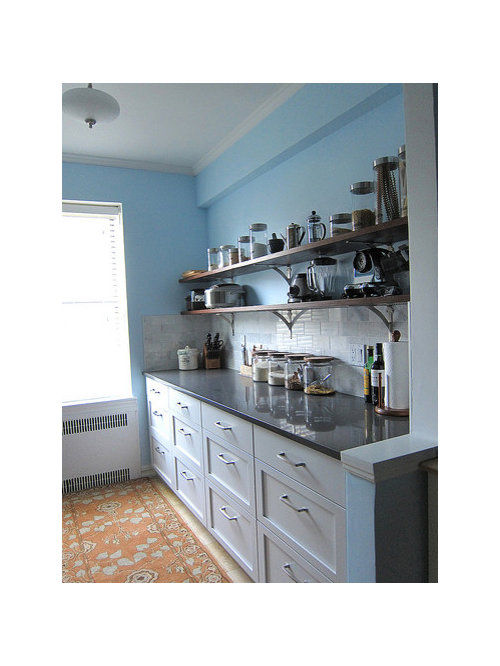
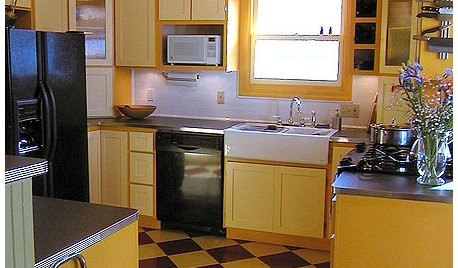
Finished NYC galley kitchen on a budget!
judibean
10 years ago


Featured Answer
Sort by:Oldest
Comments (30)

Holly- Kay
10 years agolast modified: 9 years ago
rkb21
10 years agolast modified: 9 years agoRelated Discussions
Finished Modest, Budget Kitchen
Comments (48)megaul: The windowsill is "attached" to the sill in the same way the countertop is "attached", i.e., using the same glue or epoxy the fabricators/installers used to attach the countertop below. Does that answer your question? They definitely templated for it when they did the template for the countertop. At that time, I specified how much I wanted it to extend past the sill lengthwise on either side. I wanted the sides of the sill to be flush with the edge of the molding, so we measured out how much overhang I wanted both ways, using the dimensions of the molding I had already selected. Make sense? So if you want that look, make sure you know the dimensions of your window molding before templating. Also, when you select your slab(s), make sure you have a pretty good idea of how big your sill is going to be, and if you want to allow for overhang, so you know if you have enough material for the sill, in addition to your counters. HTH!...See MoreMostly finished white/chocolate galley
Comments (85)Thanks, binsd! I don't hang out on the forums. Just don't have the time and it's a shame really; it's so fun over here. Anyway, I received an email question about how my counters are holding up, so I thought I'd post a quick 3-year report. Cork floors - love 'em. Comfy, good for a klutz like myself, hides dirt well, super easy to clean. Would do it again in a heartbeat. Fisher Paykel Dishdrawers - Awful, awful, awful. Replaced them with an integrated Bosch which works great. JennAir CD fridge - I like it quite a bit, but just last week had to have the touchpad replaced. Not cheap. Fratelli Onofri range - I do love this thing, but it has some issues. First, I should have purchased the large single oven instead of the double. It's been a very rare occurrence that I've needed to use both at different temps. The door seal on the large oven recently broke because it became brittle. Had to order a part from the UK to replace the seal. Additionally, the big oven has been flaky coming up to temp lately. I'm going to try a heavy-duty cleaning to make sure there aren't any blocked sensors or anything. Hopefully that fixes it. Cabs - I went with a cab company who primarily worked with stained cabs. I think it shows that they didn't do a lot of paint jobs. There are a couple of chipped areas and other places where you can tell the paint will be peeling someday. (Like on the underside of the sink cab door ??? weird.) Anyway - I think if you're getting painted cabs, be sure to work with someone who does paint to ensure the wood will be properly prepped and they take steps to make sure the paint hardens well, etc. Countertop - Finally, the info people want. :) I still love this stuff. Yes, it shows wear, but it's a warm, rustic-looking wear which is a-ok by me. If you drag something sharp and pointy across it, it will scratch. If you drag a bowl across it, you're probably fine. If you stand in one spot and do a lot of hand mixing in a bowl, it will probably create "rub" marks. If you drag a dish across it that has "unfinished" edges, it will leave a mark. I don't notice water mark problems around the sink. If water is left to sit and dry on the surface, it will leave a mark. Wipe it down with a dishcloth and the mark goes away. No biggie. I've tried to capture their current condition, but it's tough to photograph. I have only oiled them once since the original photos were posted. This is my most heavily used prep area: Here's another shot of the same area: Here's a scratch that just showed up a few weeks ago. I have no idea where it came from. Here you can see "rub marks" in my baking area where the mixing bowl "spins" on the countertop This is new also. There was a winter squash sitting in this spot. It had a bad spot and started to leak, causing this mark. Weird. I'm sure it will come right out if I oil it. Overall, still loving my kitchen! The layout has worked out fabulously and I love spending time in there. It has completely changed my life. Literally. I overhauled my diet shortly after it was finished and that made a drastic impact on my life. Thanks, Gardenweb friends!...See MoreGalley kitchen remodel
Comments (24)Thanks everyone for the feedback. I guess it just reinforces for me that the problem I have is how to configure the "breakfast room." I'm half tempted just to forget it, and focus my efforts and limited money on getting the most out of the galley. I hate this option, though, if only because it's probably not possible for me to squeeze sufficient food storage into the galley. Plus I really want to get better use out of the breakfast room space - with a small house it's particularly problematic to have wasted space. My last effort to make the room more user friendly involved putting in banquette style seating (a Home Decorators marked down version of the Ballard Designs corner benches)... it seems like it was never as convenient as it looked. Because of the proliferation of doors (entry door, closet door, staircase opening, opening to the playroom on the other side of the entry), it's hard to float a table in the center of the room without it basically feeling like you're sitting in the entryway or at the foot of the stairs. So after that long defense I've given a shot at a slightly different layout which satisfies my hopes for future Costco runs. Because of the stub wall on the fridge side, the high cabinets would be the slimmer depth models that Ikea has - only about 13 inches deep. I've stuck with what seems like an unpopular idea of a peninsula, which looks very strange because the Ikea software is quirky. I'd love any more critiques, feedback, ideas, whatever! I've tried to make it more symmetrical A couple of suggestions centered on eliminating the wall between the galley and the breakfast room - unfortunately it's just not an option. It would cost me about $5k to widen the opening so that the two rooms were better connected, and that's just not worth it to me - in part because it would create new problems (like the fact that you'd see all the appliances from the front door, which just seems wrong to everyone I ask.) @momtofour: is your kitchen on the FKB? If you have any pictures online, I'd love to see them. I think the idea of a super long run of base cabinets sounds great; in practice I'd worry that the countertops would just become a dumping ground for clutter. I currently have a 9 foot stretch of counterspace on the opposite side from the range, and I don't use it all that much, perhaps because I'm not a great cook. The other issue is simply that the wall stub is 19 inches (23 with molding) so I'd need to have reduced depth cabinets on either side of it. @doraville: Unfortunately I can't really move the stove without running a new gas line, which I ruled out at the start to keep costs and drama as low as possible. But maybe I'm overestimating what a big deal that would be? BTW I've almost settled on going with the lighter wood doors. What I like best about the darker wood model from Ikea is the glass door version, which has divided lites. But I don't need display space - I need storage space....See Morenyc galley kitchen
Comments (15)hellonasty--I would be steaming over that GC comment, too! How did he fix it?? pricklypearcactus--Thank you!! I'm so impatient about seeing finished product. Argh! chihuahua6--That track lighting is by Kichler. You can find it here: http://www.bellacor.com/productdetail/524985.htm As for the countertops, we haven't actually placed an order yet, and from what I remember, the intial estimate for that quartzite is about $2300 for our sized kitchen, plus anywhere from $21 to $95 more depending on the edge you choose. The price includes delivery, installation, templating and sealing, as well as cutting for faucet, etc. If you post a comment on the blog when I write about our countertop installation when it happens, I'll be reminded and can give you the exact pricing then....See Morenycbluedevil
10 years agolast modified: 9 years ago
williamsem
10 years agolast modified: 9 years agoSparklingWater
10 years agolast modified: 9 years agoUser
10 years agolast modified: 9 years agoLoPay
10 years agolast modified: 9 years agogothaml
10 years agolast modified: 9 years agoandreak100
10 years agolast modified: 9 years agokksmama
10 years agolast modified: 9 years agogwlolo
10 years agolast modified: 9 years ago- PRO
modern life interiors
10 years agolast modified: 9 years ago ginny20
10 years agolast modified: 9 years agorosie
10 years agolast modified: 9 years agokam76
10 years agolast modified: 9 years agojudibean
10 years agolast modified: 9 years agoalvmusick
10 years agolast modified: 9 years agoblfenton
10 years agolast modified: 9 years agojudibean
10 years agolast modified: 9 years ago
Gooster
10 years agolast modified: 9 years agoscrappy25
10 years agolast modified: 9 years agojudibean
10 years agolast modified: 9 years agoscrappy25
10 years agolast modified: 9 years agojudibean
10 years agolast modified: 9 years ago
a2gemini
10 years agolast modified: 9 years agojudibean
10 years agolast modified: 9 years agoscrappy25
10 years agolast modified: 9 years agodeedles
10 years agolast modified: 9 years agogmoet
6 years ago
Related Stories
KITCHEN DESIGNKitchen Remodel Costs: 3 Budgets, 3 Kitchens
What you can expect from a kitchen remodel with a budget from $20,000 to $100,000
Full Story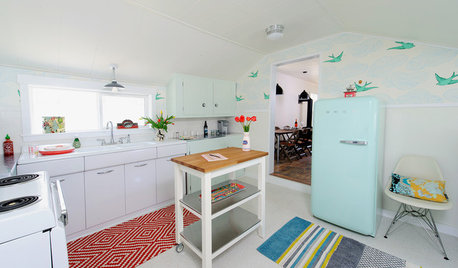
KITCHEN DESIGNKitchen of the Week: A Cottage-Chic Kitchen on a Budget
See how a designer transformed her vacation cottage kitchen with salvage materials, vintage accents, paint and a couple of splurges
Full Story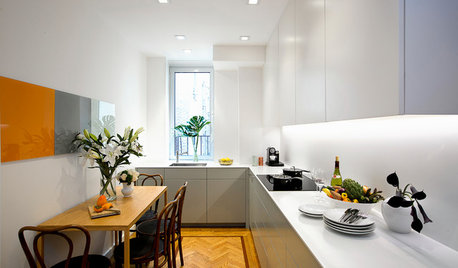
SMALL KITCHENSKitchen of the Week: Space-Saving Tricks Open Up a New York Galley
A raised ceiling, smaller appliances and white paint help bring airiness to a once-cramped Manhattan space
Full Story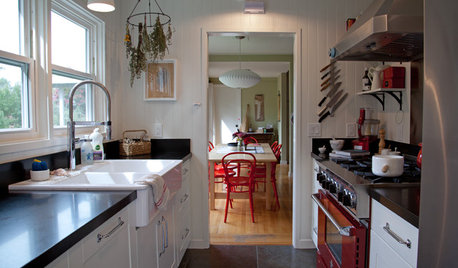
KITCHEN DESIGNKitchen of the Week: A Galley Kitchen in Wine Country
Smart reorganizing, budget-friendly materials and one splurge give a food-loving California family more space, storage and efficiency
Full Story
KITCHEN DESIGNTry a Shorter Kitchen Backsplash for Budget-Friendly Style
Shave costs on a kitchen remodel with a pared-down backsplash in one of these great materials
Full Story
REMODELING GUIDESFrom the Pros: 8 Reasons Kitchen Renovations Go Over Budget
We asked kitchen designers to tell us the most common budget-busters they see
Full Story
KITCHEN DESIGNKitchen of the Week: A Budget Makeover in Massachusetts
For less than $3,000 (not including appliances), a designing couple gets a new kitchen that honors the past
Full Story
KITCHEN DESIGNSingle-Wall Galley Kitchens Catch the 'I'
I-shape kitchen layouts take a streamlined, flexible approach and can be easy on the wallet too
Full Story
KITCHEN DESIGN10 Tips for Planning a Galley Kitchen
Follow these guidelines to make your galley kitchen layout work better for you
Full Story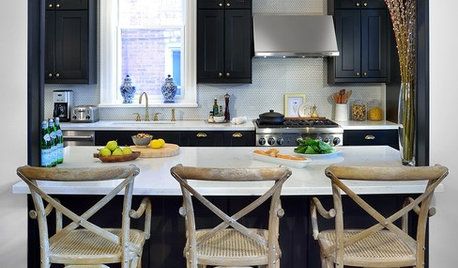
KITCHEN DESIGNKitchen of the Week: Galley Kitchen Is Long on Style
Victorian-era details and French-bistro inspiration create an elegant custom look in this narrow space
Full StorySponsored
Your Custom Bath Designers & Remodelers in Columbus I 10X Best Houzz


scrappy25