


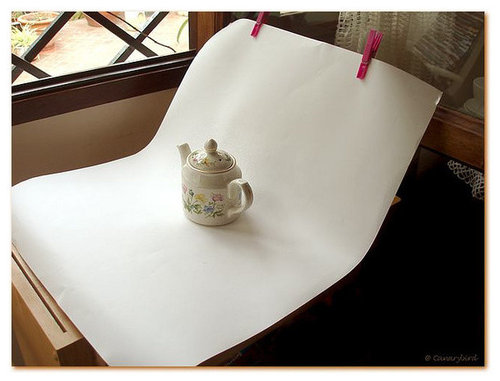
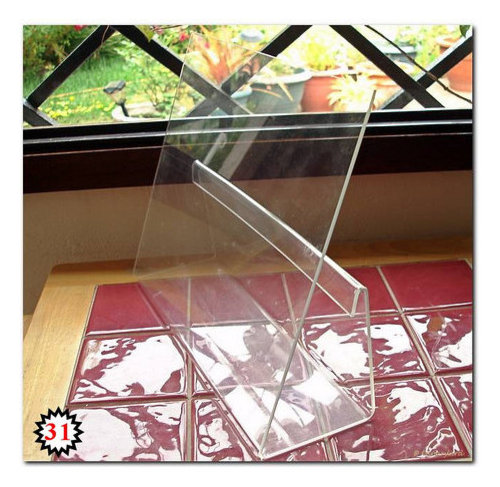
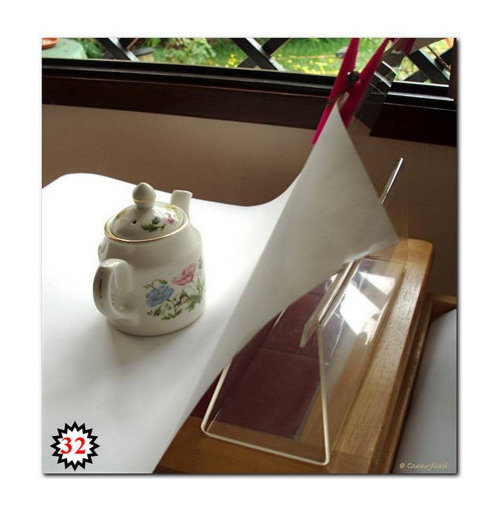
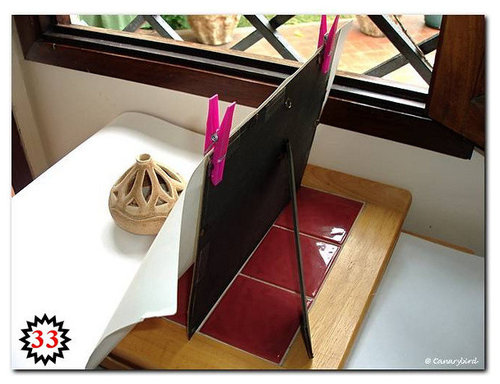
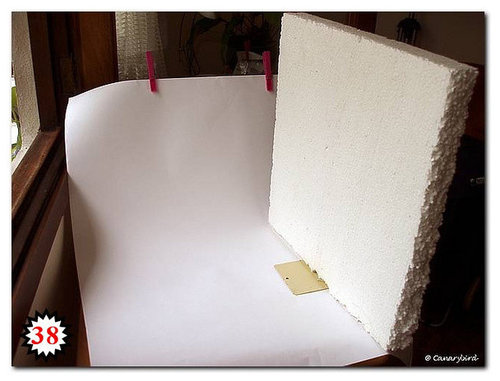
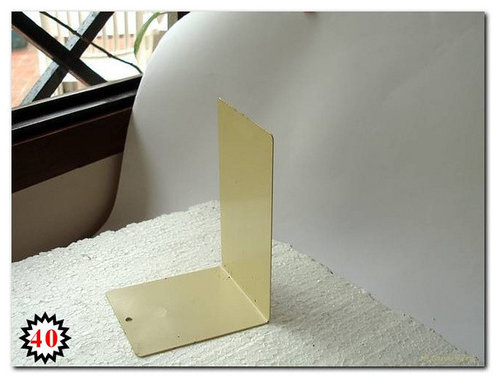
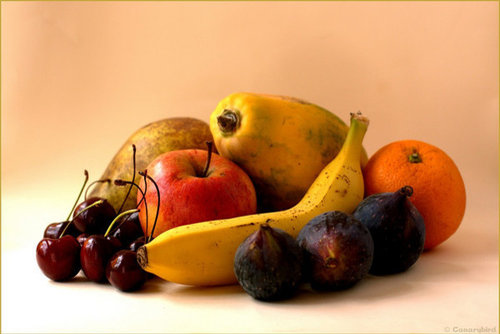
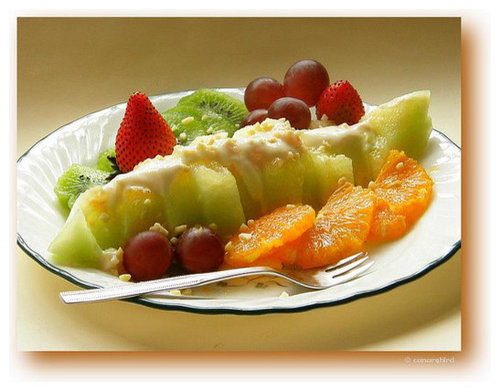
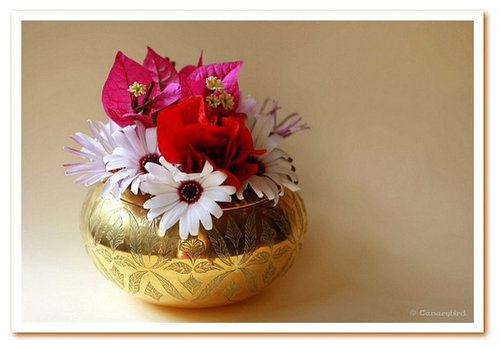
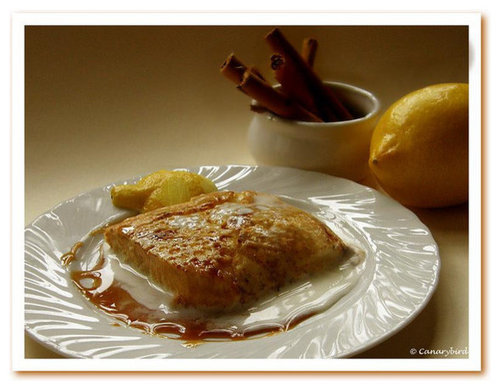
Food Photo Tips: Part 4 - Seamless Backgrounds
canarybird01
14 years ago


Featured Answer
Sort by:Oldest
Comments (8)

canarybird01
14 years agolast modified: 9 years agoRelated Discussions
Food Photo Tips: Part 2 - Lighting & White Balance
Comments (7)I've been threatening to take a photography class, but no one gives a class way out where I live! This is SOOOOO perfect and completely addresses my needs! Sharon, you are so patient and so amazing! I feel like you're talking directly to me in terms I can totally understand. I am very grateful. I cannot wait to put it into practice!...See MoreFood Photo Tips: Part 8 - Depth of Field
Comments (4)Lars is you can get what you want with fully automatic settings then that's great and it's true you can usually make adjustments in Photoshop or other programs. I had some disappointing results the other day with my DSLR in the Botanical garden where there are extremes of dark shade and bright sunlight. I'm going back there again and will use only automatic to see what settings the same camera chooses and how the pics turn out. Then I can go back again and hopefully fine tune my settings for some better pictures. It's all trial and error sometimes in difficult lighting situations. Luckily the entrance fee is just a couple of Euros. :-) SharonCb...See MoreFood Photo Tips: Part 6 - Making a Mini Light Box
Comments (0)Posted by canarybird (My Page) on Wed, Aug 12, 09 at 11:45 Food Photo Tips: Part 6 - Making a Mini Light Box Hi again everyone. I'm back with another entry on how to use your digital camera for taking tabletop photos. This time I'm going to show how to make a miniature version of a light box, which can be useful for photographing small objects. I'm also working on making a full sized box out of a cardboard printer box which will be used for photographing larger objects, including plates and dishes of food. Mini box (left) Full size box under construction (right) But it might be easier to practise with a mini box to test your results and your skills with a box cutter or sharp scissors. If you have a handy teenager, (or other person clever with crafts and model building, who won't cut off a finger with the box cutter) you may enlist some help with this although it takes less than an hour to make, requires no special skills and doesn't have to be good looking. The idea of a light box is to create a partially enclosed 'white room', with white walls, a white sweep (that paper background we made previously in Part 4 - Seamless Backgrounds), with cutout windows and ceiling covered with white paper, into which we project a strong overhead light and usually a light on either side aimed at the white paper windows so that any object introduced into the box will be bathed in total white light with no shadows. You will have often seen pictures on the web of an object which seems to float on a pure white background. Eg: Cook's Thesaurus. This effect can be achieved in a light box. And it's quite entertaining to see what you can produce from this setup. These last two pictures were taken with my 15 watt CFL desk lamp overhead and one 7 watt CFL spot lamp (that green one) at the left window. Even better would be a 2nd spot pointing at the right window. (I need to go out and buy that 2nd spot lamp...they cost about $12 here so not an expensive item and good for the mini box.) Construction of the Mini Box: Materials needed: small box of sturdy cardboard, box cutter or small sharp scissors, ruler or metal straight edge, pen, glue stick, white paper (I always seem to use printer paper.) I used a small box measuring 5.25 x 7 inches (13.5 x 18 cm) that contained a little desk lamp. You can use a larger box as well of course, but your lights will have to be accordingly more powerful. And I think it's better that you keep it as a vertical box, higher than wider, so that the lid opening will be your ceiling. We can still make the bigger box later once we have caught the idea of how best to create the whitest environment. On my little box I took off the top flaps of the lid and using a box cutter, cut out windows on the sides, leaving a frame of cardboard about 1 inch (2.5 cm) all around, except for the bottom edge of the front 'door' which I cut off. Then I took white printer paper and after cutting it to the size of one side (5.25 x 7 inches/ 13.5 x 18 cm) glued it with a glue stick into the INSIDE of a window side, then repeated that on the inside of the window facing it. Glue carefully and smooth out any wrinkles, which would show up in your photos. To further cover the edges, cut out strips of white paper to size and overlap the newly installed white paper to the back wall and the floor, smoothing carefully so the edges are well stuck down and wrinkle free. Do this on both window sides. Cut a paper sweep to go inside your box, but DON"T GLUE it in, just slide it in so it is removable when it becomes spotted . The measurements should be....width a little smaller than the width of your box. In my example, with a 5.25 inch (13.5 cm) box width, my paper sweep was perfect at 1/4 inch less than the box width...that is at 5 inches wide (11.5 cm). Length of the sweep:....start with a piece of paper a little shorter than the box height plus the box depth (from back wall to front door) and slip it into place until it reaches the edges of the door, as in the photo below. Check that you have a nice curve in the sweep, that it reaches the 'front door' and trim off any excess that sticks up over the top at the back. The finished box should look something like this. Many light boxes also use a thin sheet of paper...often white tissue paper or white tracing paper over the 'roof' of the box and this will give you a soft diffused light. If you are going to photograph any reflective item of metal, ceramic or glass you won't want a reflection of the light bulb in the top lamp showing on your object, so you should then use a thin white material or paper to soften the white glare. If you have a good strong light on both top and sides you will be okay with the diffusor on top as the light will be sufficient. If the light is too strong, then move the lamps away a little from the box. Some examples with fruit: First a sideview of the setup and one example of creating a very soft photo using Exposure Compensation (EV +1.3)... that's 4 clicks up from 0.0... to give deliberate over exposure. Here I was able to get photos using just the overhead desk lamp. If you don't have extra lamps (they must all have the same type of bulb...tungsten or CFL, not mixed) see how you can do with the overhead lamp close to the top opening of your box and raising the EV value to make the picture lighter. This you can do while looking through the viewfinder before taking the photo. A little less raising of the Exposure Compensation, that is.... pushing it up 3 clicks (instead of 4) to EV +1.0, makes the image a little less over exposed and more defined (left photo). With no EV changes to the picture, you would have a normal exposure, as in the second photo. Now you know how to make misty white photos if you wish to have that effect. When you raise the EV value using the plus+, you are actually decreasing the shutter speed of your camera, so it stays open longer, lets in more light and gives you a more exposed (lighter) image. Conversely, when you lower the EV value using the minus -, you are in fact increasing the shutter speed, the shutter closes sooner, letting in less light and your image is darker. If you manage to make this mini light box, try using a PORTRAIT setting, and maybe add a click on the MACRO option as mentioned below. Remember to set the White Balance WB for the type of bulb you are using...hopefully you have a CFL fluorescent in there, and practice using the EV button to lighten or darken your image while looking through the viewfinder. I think this is enough for one day but I did want to introduce MACRO, or closeup photography. If you look at the back your camera you will have noticed a little tulip icon somewhere on or near the round touchpad. That is your option to tell the camera that you want to make closeup photos. You should be able to click on it from any of the other options that you have, such as AUTO, PORTRAIT, INDOOR. By clicking on the tulip icon you will probably bring up three options: OFF, the tulip icon representing MACRO, or another tulip icon with a small 's' beside it. Some point and shoot cameras may not have this second tulip but it refers to SUPER MACRO where you can get even closer to your subject. Try it out....remember you can still be in another mode and add the macro option. I'll explain more next time with examples of how you can capture very close, sharp pictures of food, insects and plants. I hope you are understanding it all and if you have questions please ask here or PM me. So thanks for joining me. I'll be uploading the next installment soon. And please feel free to save the pages on your computer. Sharon (Canarybird) :-) (All text and photos copyrighted) Free for personal, non-commercial use Follow-Up Postings: o RE: Food Photo Tips: Part 6 - Mini Light Box & Macro clip this post email this post what is this? see most clipped and recent clippings * Posted by loves2cook4six (My Page) on Wed, Aug 12, 09 at 22:36 Ahh Sharon. THANK YOU!! When will the book be published :) I'm going to be the first to buy it! o RE: Food Photo Tips: Part 6 - Mini Light Box & Macro clip this post email this post what is this? see most clipped and recent clippings * Posted by ntt_hou (My Page) on Sun, Aug 16, 09 at 20:25 Wow, I learned more in these 6 parts than some photography books I have. Thank you so much !!! o RE: Food Photo Tips: Part 6 - Mini Light Box & Macro clip this post email this post what is this? see most clipped and recent clippings * Posted by antiquesilver (My Page) on Mon, Aug 17, 09 at 19:32 Ditto to what ntt_hou said! And now I'm going to make a light box so I can photograph my silver. Your instructions are great. Thanks for taking the time to do this. Hester o RE: Food Photo Tips: Part 6 - Mini Light Box & Macro clip this post email this post what is this? see most clipped and recent clippings * Posted by canarybird (My Page) on Mon, Aug 17, 09 at 19:56 Thank you again for your comments! They are appreciated. I'm looking forward to seeing your results. Hester I'm sure your silver will look beautiful in a light box! SharonCb o RE: Food Photo Tips: Part 6 - Mini Light Box & Macro clip this post email this post what is this? see most clipped and recent clippings * Posted by antiquesilver (My Page) on Sun, Aug 30, 09 at 0:38 Finally got around to semi-finishing my light box - WOW, what a difference! I gave it a quick trial run using an under counter light as an overhead with a thin cloth on top & a POS snake light on one side. I'm amazed that I got good shots without a tripod, although I know it will be necessary when I use a macro lense for the maker's mark photos. I didn't have time today for that, but wanted to thank you for taking time to enlighten all of us who aren't quite in the 21st century - at least photography-wise! Florentine Pie Server Florentine blade detail Florentine Shoulder detail o RE: Food Photo Tips: Part 6 - Mini Light Box & Macro clip this post email this post what is this? see most clipped and recent clippings * Posted by canarybird (My Page) on Sun, Aug 30, 09 at 6:40 Lovely shots antiquesilver! The focusing looks good but you do need a stronger light to brighten up the images. Keep the thin cloth on top as you have done to avoid sharp reflections on the silver (beautiful piece by the way,) and raise the Exposure Compensation (EV) higher...start with +0.3, then +0.7, and +1.0, taking one or two shots at each and see how they turn out. You would need a tripod as changing the Exposure Compensation will probably slow the shutter speed, opening up the possibility of camera shake. I would also check the ISO setting if you can do that. Perhaps that's not possible if you are using an automatic setting. Raising the ISO increases the camera sensor's sensitivity to light, so a higher number makes the photo brighter. (Same as when using film we could buy ASA 100, 200 or 400 for different film speeds.) For sure you can change the ISO when in manual or semi-automatic modes, which show as M, A, S, or P on your mode dial. I'm so glad to see you are trying this out and showing your photos here! Keep going....you are doing well! SharonCb o RE: Food Photo Tips: Part 6 - Mini Light Box & Macro clip this post email this post what is this? see most clipped and recent clippings * Posted by antiquesilver (My Page) on Mon, Aug 31, 09 at 15:06 I need to buy at least 1 more lamp but I wanted to try it out anyway & the difference (box vs. no box) is amazing even without the needed adjustments. Taking a decent photo of silver without glare, blur, & a tripod is no small feat so P&S is a small miracle! I did play with the EV but overexposure was a problem when going higher; maybe not so much overexposure as a loss of silver details - another problem w/silver. Yesterday, I realized the overhead light I used is halogen & I changed my setting to adjust for it & that got rid of the yellow tones. I can't remember if I can change the ISO in Portrait mode or not - I've found so many things on this camera that I didn't know were there, it's mindboggling! FYI - it's a Panasonic Lumix. o RE: Food Photo Tips: Part 6 - Mini Light Box & Macro clip this post email this post what is this? see most clipped and recent clippings * Posted by canarybird (My Page) on Wed, Sep 2, 09 at 18:01 Antiquesilver...I imagine that ISO is not changeable when in any semi automatic mode. The camera wants to do that for you so it will most likely be automatic. However you should be able to raise the EV just one notch up to +0.3, or get a stronger light bulb. Also try substituting the thin cloth with white tissue paper or tracing paper. The cloth might be cutting out too much light. I know what you mean about too strong a light blowing out the detail on the silver pieces. But keep experimenting to get the right combination of camera setting, light and diffusor. If you are interested in reading photography books, I can highly recommend this one "Light - Science & Magic. An Introduction to Photographic Lighting."" by Fil Hunter, Steven Biver, Paul Fuqua. There are detailed explanations of setting up tabletop lighting with a whole chapter dealing with how to photograph metal objects. You might want to have a look in your library or bookstores. The ISBN (I have the 3rd edition) is: ISBN-13:978-0-240-80819-2 , published by Focal Press. Tutorial number nine will be a few days late this week. Probably have it ready for the weekend since we had a lot to do this week, including rescuing our new cat from a neighbour's locked backyard LOL. (All turned out well there.) SharonCb...See MoreFood Photo Tips: Part 7 - Macro & Camera Icons
Comments (0)Posted by canarybird (My Page) on Wed, Aug 19, 09 at 16:21 Food Photo Tips Part 7: Macro, Closeups & Camera Icons Hi again everyone. I'm back with another entry on how to use your digital camera for taking tabletop photos. Today I want to again go over shooting closeups or macro photos, as well as explaining the use of some of those icons on your camera. Icons for MACRO and SUPERMACRO The term macro when used with photography refers to making small objects look larger through the lens of your camera. Point and Shoot cameras have a normal focal range within which objects are in focus, that is, the camera is able to see your subject clearly and record a sharp image. However if you get too close to something the camera is no longer able to focus. By using the MACRO function on your camera you are able to get a closer shot . You may have found that when you try to get a closeup picture of something on a table or even a closeup of a flower, the result is blurred, even though you braced the camera on the table or used a tripod and had enough light. Depending on your camera you were perhaps too close to the object for the camera to be able to successfully focus. Many digital cameras have a flashing focus light which you can see in a corner of the viewfinder or on the LCD screen to warn you that the camera could not focus properly while you attempted to take a closeup photo. You have to then move backward a little or switch on your MACRO mode. Remember that you should always press the shutter button half way to let the camera focus on your subject before pressing it fully. If the light begins to flash as you do that halfway press, then you know the photo will be out of focus unless you change something. Either move further away or turn on your MACRO setting, press halfway again and your focus lamp (that light in the screen corner that flashes) should stop flashing. It should stay fixed and give a little beep to tell you that it now has the subject in focus and you can finish pressing the shutter. Note: don't confuse the FOCUS light with the FLASH symbol because they can both blink. The flash symbol is a red thunderbolt, which if blinking, indicates there is not enough light to take an optimum photo. Examples of using PORTRAIT mode without MACRO when camera was too close to be within focal range, and then the same setup using PORTRAIT and MACRO mode. Some cameras have SUPER MACRO which allows you to get very close to your subject, where in some cases the camera can be placed less than an inch away from the subject. I'll show some examples: Coins in PORTRAIT mode without macro, then with MACRO, then with SUPER MACRO. Here are a couple of cameras owned by forum members with their focal ranges (distances at which things will be in focus.) The Kodak Easy Share DX 6490 - this camera will focus normally from infinity down to 2 feet away from the subject. If you want to get closer than 2 feet to that piece of blueberry shortcake, you will have to turn on your MACRO mode (it may also be termed CLOSEUP mode). The macro mode on this camera will focus from 2.3 feet down to 4.8 inches. So you should get a sharp picture within that range. Canon Powershot SD880 IS - another member's camera. This one can get as close as 1.6 ft in a normal mode setting. Closer than that and you have to turn on your MACRO mode which has a focal range of 1.6 feet down to 0.8". That means you could put the camera a little less than one inch away from your subject. That would be too close for food photography but you can try it at a distance of 1.6 feet and see how it turns out. On my Olympus SP560 UZ the macro and normal settings have the same focal ranges, which is 3.9" to infinity (10 cm to infinity.) So when I want to get really close I use the SUPER MACRO setting which gets as close as 0.4" (less than a 1/2 inch). Good for insects, flowers or miniature items. On the little pocket-size Olympus Stylus 800, the normal focal range is from infinity down to 19.7 inches. If I want to get closer than 19.7 inches to my subject, I have to turn on MACRO mode, which is good down to about 8 inches away. Closer than than I would switch on SUPER MACRO if it were appropriate for the photo. Examples with this pocket camera are the photos of eggs,above. You should be able to use macro in several of your cameras SCENE settings appropriate for a closeup photo , such as PORTRAIT, INDOOR, CANDLE, DOCUMENTS, AVAILABLE LIGHT, CUISINE, but not in pictures where distance is a necessary factor in the photo. (Landscape, landscape and portrait, fireworks, sunsets etc.) Try setting your camera to PORTRAIT mode and prepare a plate of fruit or other food. Set the WHITE BALANCE (WB) and if not during daylight, to the type of lighting you have. If the picture through the viewfinder (or LCD screen) looks dark, then use the EXPOSURE COMPENSATION (EV) button to get a plus factor until the picture through the viewfinder looks good. Take a picture. Then holding the camera in the same position (or with your tripod) switch on the same options plus the MACRO (or closeup) mode. Take the photo again and compare the two. Or better still, take several because its a fact that the more you practise and the more photos you take, the better they will become. If you continually experience blurry photos it might be a good idea to check out your normal focal range in your (shudder) manual under specifications, Macro Mode Shooting", or go online to *one of the websites that does reviews* and look at the specs for your camera model. There you will see the normal focal range (it may be called shooting range or macro/close-up mode) as well as the MACRO range. *A couple of good websites for checking out details of your camera are: Steves Digicams as well as DP Review. But the easy way to check it out is to get close to your subject, half press the shutter and if the focus light blinks, move back and repeat pressing the shutter until you find a distance where the light no longer blinks. That will be the focal limit of your normal range. Closer than that you will need to switch on MACRO. Other reasons for blurry photos are: 1. Not enough light. The camera needs more time to focus in low light and during that time you or the subject have moved. Use a tripod. This is true especially for indoor or evening photos, and when using night scene options on your mode dial. 2. Camera shake. Even though you have strong light your photos are still blurry. You are moving the camera or your subject is moving. Dont move the camera when you press the shutter button. Hold arms tightly to your sides, brace yourself against a wall, rest the camera on a solid object or use a tripod. If necessary, breath out and hold it while you press the shutter! (Remember to breath in again please.) Leaving MACRO for now, I wanted to go over the BUTTON OPERATIONS and THE MODE DIAL to briefly go over what some of those icons mean and what will they do when you click them into action. Heres a typical MODE DIAL, found on the top right of a digital camera When you turn this dial and select a mode, you are telling the camera to change the settings for a certain situation. Some cameras will have some of these icons together on a separate mode entitled SCENE or SCN on the mode dial. Typical mode choices found on the top of a modern camera dial are for :MOVIE, AUTO, CHECK PICTURES (Review), GUIDE, MY MODE, and M, S, A, P for choosing MANUAL, SHUTTER PRIORITY, APERTURE PRIORITY and PROGRAM. The photo shows icons for an older digital camera where some of the scene options were included there rather than in an in-camera menu. Heres what they mean: AUTO The simplest of all shooting modes, the settings are fully automatic. The camera selects what it deems to be the optimum focus and exposure for your still picture. PORTRAIT - suitable for taking a portrait style photo; the camera sets a wider aperture (lens opening) to blur the background a little, so the subject stands out clearly from the background. SPORTS - suitable for fast action shots, in this mode, the camera sets a faster shutter speed to catch moving objects such as people in sports events. LANDSCAPE & PORTRAIT the camera sets the optimal shooting conditions for a background scene with a subject in the foreground. LANDSCAPE the camera will use a small aperture (lens opening) to be sure the whole of the photo will be in focus, from foreground to background. This is the opposite setting to PORTRAIT where the background is deliberately blurred. Blues and greens are enhanced in this setting. NIGHT this is where you will need a tripod because the camera will use a slow shutter speed, meaning that any movement while the shutter is open will create a blurry photo. You can have some interesting results with coloured lights and portraits in night scenes. Do play around with this mode and see what comes out from your inventiveness. SELF PORTRAIT hold the camera at arms length and turn it toward you to take a photo of yourself. A fun mode. MOVIES the camera sets aperture and shutter speed for optimum results for taking movies. You may have to click on the microphone icon in one of your menus to include sound. MY MODE perhaps not seen on all cameras, this mode allows you to save a group of settings of your choice which can be recalled together with one click. PLAYBACK MODE allows you to go back and see the photos youve just taken. APERTURE PRIORITY also seen as AV on a mode dial. This setting lets you set the aperture setting manually while the camera chooses the appropriate shutter speed for that aperture (lens opening). SHUTTER PRIORITY also seen as Tv on a mode dial. This setting lets you choose the shutter speed manually while the camera chooses the appropriate aperture for that shutter speed. These two above settings are semi-automatic in that you have control over one or the other function. For example if you want to photograph sports and you know you need a fast shutter speed and dont want to rely on the automatic sports mode, then you would use the SHUTTER PRIORITY setting and let the camera choose the appropriate aperture. If you want to set a certain aperture setting but let the camera figure out the shutter speed then you would choose APERTURE PRIORITY. You can control the DEPTH OF FIELD, or the blurriness of the background where you want the background to recede and a subject in the foreground to stand out sharply by using a wide aperture setting. We could perhaps go in the next tutorial or so a little into DEPTH OF FIELD because I think many folks would like to learn how to get that beautiful effect of a single flower or piece of cake (!) standing sharply against a dreamy blurred background. PROGRAM MODE With just a little more freedom to be creative than the AUTO mode, here the camera sets both the shutter speed and the aperture, allowing you to adjust other functions such as white balance, ISO. I think this has been very long today so although we havent got much more to cover in the next two or three tutorials (I thought wed finish with ten all together), I think next time Ill go over the FLASH icon and FLASH menu as well as the SELF-TIMER option which lets you jump into your photos. Subjects Id like to mention: Depth of Field and how to make those beautiful Blurry Backgrounds, the important triangle of variables that you need to know: APERTURE, SHUTTER SPEED and ISO, how they work together and how to adjust them..or at least understand what is happening. And oh yes.I have to finish that full sized LIGHT BOX so we can see what results we can get from that! I hope you are understanding it all and if you have questions please ask here or PM me. So thanks for joining me. I'll be uploading the next installment soon. And please feel free to save the pages on your computer. Sharon (Canarybird) :-) (All text and photos copyrighted) Free for personal, non-commercial use Follow-Up Postings: o RE: Food Photo Tips: Part 7 - Macro & Camera Icons clip this post email this post what is this? see most clipped and recent clippings * Posted by coconut-nj (My Page) on Mon, Aug 24, 09 at 8:38 Sharon, while I haven't been posting directly to your photo tip threads, I've been following them avidly. I so appreciate all the effort you've gone to to explain in such an easy way so many aspects of taking good [better for some of us] pictures. The last week or so I've been very busy organizing and then hosting our family reunion at a local fancy diner and have not had a real chance to digest the latest installments. The macro stuff interests me very much. I've tried to use my macro recently and found when I did the camera refused to take the picture?? Odd. LOL.. I'll figure it out but I suspect I'll have to dig through the manual to see what the problem is. Your post makes me suspect it has something to do with the camera not being able to focus on what I'm trying to do or the distance, or something..heh.. and it won't fire as self preservation. Smiles. I'll figure it out and then be back to digest more of your post. Btw, I got a tripod for my birthday! Yay.. I relative I had staying with me for a while apparently absconded with my last tripod. Grrrr... Needless to say I'm looking forward to using the tripod to work on some of your 'lessons'. Thanks for all your great work on our behalf. o RE: Food Photo Tips: Part 7 - Macro & Camera Icons clip this post email this post what is this? see most clipped and recent clippings * Posted by canarybird (My Page) on Mon, Aug 24, 09 at 10:58 Thank you coconut, and good that you have a tripod now. I'm wondering what mode or scene you are using on your camera when you add in the macro factor. Are you in AUTO or PORTRAIT (closeup) mode? If you are in a scene mode such as landscape for example, you can't use macro as well because you would sending two different messages to the camera...a landscape or far away mode such as sport or sunset and macro, a very closeup mode. The other thing, if you are in PORTRAIT mode and adding in macro, the camera should take the picture unless you are too near your subject or it is too dark. Does you focus lamp blink (the dot in the corner of your screen) before the camera refuses to take the photo? If so, that tells you that the camera can't focus at the distance you are from your subject. Move back a little and keep pressing the shutter button half way several times until the blinking stops. Then take the picture. Let me know if that works and if not I'll think of something else. Luck....:-) SharonCb o RE: Food Photo Tips: Part 7 - Macro & Camera Icons clip this post email this post what is this? see most clipped and recent clippings * Posted by coconut-nj (My Page) on Wed, Aug 26, 09 at 1:13 Good points Sharon, I'll check it out. I thought I had been in food mode, but maybe not. Also the lack of light is quite possible, I'll check that out too. Thanks. Smiles. o RE: Food Photo Tips: Part 7 - Macro & Camera Icons clip this post email this post what is this? see most clipped and recent clippings * Posted by antiquesilver (My Page) on Sun, Aug 30, 09 at 1:42 I don't remember if it's this lesson or another that you suggested using the Self Portrait Timer setting with a tripod to avoid camera shake. So simple & yet so effective. The tripod part is standard but I don't remember being advised about using a timer before but it certainly makes a difference on inside shots. o RE: Food Photo Tips: Part 7 - Macro & Camera Icons clip this post email this post what is this? see most clipped and recent clippings * Posted by canarybird (My Page) on Sun, Aug 30, 09 at 5:57 Right on track antique silver. I'm going over the self-timer in the next entry, hope to have it ready for Wednesday for those who have never tried out using that feature on their camera, along with setting up the tripod and some tips on that. The self timer avoids any shake you might cause to the camera when you press the shutter button. A shutter cable release is another inexpensive addition which permits you to press the shutter without disturbing the camera body. Both systems will help you to eliminate blur caused by camera shake. SharonCb o RE: Food Photo Tips: Part 7 - Macro & Camera Icons clip this post email this post what is this? see most clipped and recent clippings * Posted by dirtgirl07 (My Page) on Sun, Nov 1, 09 at 13:54 Hi Sharon, I feel a little guilty not posting about food!! I have a question that you might be able to answer. I'm trying to take photos of miniature paintings (2.5x3.5in) and the varnish creates a major shine on them. Do you think your mini light box and macro would work on these? The shine is similar to that you get off of jewelry and silver. We've even tried scanning them in which does reduce that glare, but not completely. Thanks for any help! Beth o RE: Food Photo Tips: Part 7 - Macro & Camera Icons clip this post email this post what is this? see most clipped and recent clippings * Posted by canarybird (My Page) on Sun, Nov 1, 09 at 17:28 Hi Beth.... If you're taking closeup shots of miniatures you should be in macro mode. Reflection is always a problem with shiny objects. The light box would be fine as long as you can diffuse the light source by using white tissue or drafting paper and can change the camera angle as well as moving the objects around until the reflected light is not bouncing up into the camera. It will take quite a bit of juggling around to get the angle where you don't see the reflection, but diffusion is just as important. Good luck! SharonCb o RE: Food Photo Tips: Part 7 - Macro & Camera Icons clip this post email this post what is this? see most clipped and recent clippings * Posted by dirtgirl07 (My Page) on Sun, Nov 1, 09 at 18:44 Thanks Sharon! I guess it's going to be an experiment. After posting the question I realized that these were not 3 dimensional either - but flat surface.. That was going to be a challenge on the surface glare. They have to be photographed straight on. The scanned version may have to do, but it doesn't pick up the detail well. Thank you for your posts on the photography - those were great. Your photos are all wonderful looking and after seeing them and a lot of gorgeous blogs, you must have trained a LOT of people. Makes looking at all that food delicious!! Beth...See More
foodonastump
14 years agolast modified: 9 years agocanarybird01
14 years agolast modified: 9 years agoantiquesilver
14 years agolast modified: 9 years agohappygram
14 years agolast modified: 9 years agocanarybird01
14 years agolast modified: 9 years agokcsunshine_2006
14 years agolast modified: 9 years ago
Related Stories
LIFEShare Your Winter Storm Jonas Photos and Survival Tips!
Let’s see your pictures and hear your ideas on how you’re keeping your house warm and staving off cabin fever
Full Story
REMODELING GUIDES10 Tips for Renovating Your Basement
A professional contractor shares her tips on what to consider before you commit to a basement remodel
Full Story
COLOR5 Tips for Choosing a Primary Outdoor Color
Strengthen your style statement by carrying color choices from your home to all the parts of your property that surround it
Full Story
SMALL SPACES10 Tips for Chic Little Bathrooms
Get more visual appeal and storage in less space, following the lead of these stylish compact bathrooms
Full Story
ENTERTAINING8 Stress-Busting Tips for Hosting Small Gatherings
Make entertaining easy with these ideas for casual get-togethers
Full Story
CONTRACTOR TIPSContractor Tips: Countertop Installation from Start to Finish
From counter templates to ongoing care, a professional contractor shares what you need to know
Full Story
RUGS10 Tips for Getting a Dining Room Rug Just Right
Is the rug you’re considering the right size, shape and weave for your dining room? Here’s what to keep in mind
Full Story
BATHROOM DESIGN14 Design Tips to Know Before Remodeling Your Bathroom
Learn a few tried and true design tricks to prevent headaches during your next bathroom project
Full Story
LIFESlow Living 101: Tips for Turning Off the Chaos
It may feel as though you're too busy to slow down and enjoy life. But even little changes can have a big effect
Full Story
SELLING YOUR HOUSE9 Tips for Living a (Semi-)Normal Life While Your Home Is Being Shown
Preparation, routine and treats help you make the house you’re selling presentable at a moment’s notice
Full Story

loves2cook4six