


My latest SWC experiment
ferretbee
14 years ago
Sort by:Oldest
Comments (4)
Related Stories
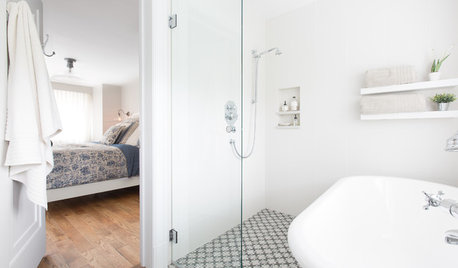
BATHROOM DESIGNSweet Retreats: The Latest Looks for the Bath
You asked for it; you got it: Here’s how designers are incorporating the latest looks into smaller master-bath designs
Full Story
INSIDE HOUZZHouzz Survey: See the Latest Benchmarks on Remodeling Costs and More
The annual Houzz & Home survey reveals what you can expect to pay for a renovation project and how long it may take
Full Story
SELLING YOUR HOUSEHome Staging to Sell: The Latest Techniques That Really Work
Get up to speed on the best ways to appeal to potential buyers through accessories, furniture, colors and more
Full Story
SELLING YOUR HOUSEThe Latest Info on Renovating Your Home to Sell
Pro advice about where to put your remodeling dollars for success in selling your home
Full Story
INSIDE HOUZZInside Houzz: See the Houzz App’s Latest Features
Update your Houzz app for iPhone®, iPad® and iPod touch® for your new profile page, enhanced searching and easier uploads
Full Story
DOORSLet's Walk Through the Latest Door Trends
The functional feature has been getting a dose of flexibility, creativity and glamorous detail
Full Story
INSIDE HOUZZInside Houzz: Take Houzz Anywhere With the New Mobile App
The latest version of the Houzz app takes advantage of several iOS 7 features. Get the scoop on the new capabilities here
Full Story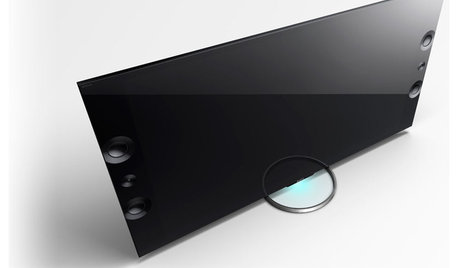
HOME TECHUltrahigh-Definition 4K TVs Sharpen Their Sights on the Home
Pixelation? What pixelation? The latest breed of TV offers a smoother picture than ever before — and the price is dropping all the time
Full Story
CITY GUIDESTravel Guide: Kyoto, Japan, for Design Lovers
Experience ancient traditions and modern expressions in this design-minded roundup of sights, hotels, shops and restaurants
Full Story
HOME TECHNew TV Remote Controls Promise to Do More — Without the Struggle
Dim your lights, set up user profiles and discover a remote you can't lose. Welcome to the latest and greatest way to change the channel
Full Story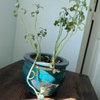
ferretbeeOriginal Author
sprtsguy76
Related Discussions
SWC,s 10' Pond Baskets?
Q
swc vs. non-swc. which one wins?
Q
Why so much lime in SWCs? Will it work for non-swcs?
Q
My tomatoes are getting too much water in my SWC.
Q
keepitlow
ferretbeeOriginal Author