


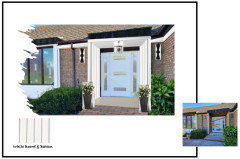
Hello All, Please help us finish this exterior entrance
Yon Chung
20 days ago
last modified: 19 days ago


Featured Answer
Sort by:Oldest
Comments (14)
 PRO
PROYon Chung, CPA | Realtor
20 days agoRelated Discussions
Please provide help on exterior finishes
Comments (3)Hi all, Searching GOOGLE i found a very interesting guide about pavers , i found the following section specially interesting for people not full familiar with this specific industry but you can found the full article at: 1. How are paving stones made? Briefly, paving stones are made by combining cement, stones, sand, color and minimal amount of water. These materials are combined by predetermined recipes in a steel mold of the shape desired. Under high vibration and hydraulic pressure the materials are compacted in the mold to create the paving stone you selected. The product is then set aside to air dry, subsequently packaged and shipped to the jobsite. 2. What about colors? A2. The paving stone color desired is achieved by conditioning various pigments in specific recipes. The color is included in the manufacturing process and your paving stone will have your selected color through the entire stone not just on top and not just a tinting of color in the base. You may also notice slight color variations within your project. Color variations are most noticeable when a project utilizes one solid color throughout the project (....) Photos at this site give some ideas too, are very nice. Kind regards Marie Here is a link that might be useful: Florida Pavers...See MoreBuilders/architects please help us design exterior steps!
Comments (6)Hi again, I think we have our step plan. Thanks to your words Renovator, we went to look at natural stone steps again. Because our entrance is recessed, we can get away with fewer steps than if all the sides were visible keeping the cost within reason. Our plan is to pour a footing, build concrete block walls for the porch landing and step stringers, top with a stone slab landing/porch and four matching thick stone steps. We will parge on the one side that is visible over the concrete block. We will also put a membrane between the brick and stones (not sure what the membrane will be; some have said rigid insulation) to protect the brick. Does this plan make sense? Also, how do we install the mandatory railings? I assume they can't go through the stones, so what else is an option. Do we install one side into the brick wall? Not sure about the other. Any comments welcome. Carol...See More"Please help, husband's design - fridge next to wall and at entry!"
Comments (53)Detailed Analysis: . General: First, note that I expanded the Kitchen a bit into the Nook space. With the configuration you appear to be forced to stick with, you really need more counter space. You don't want to try to combine the Prep Zone workspace with the Cleanup Zone workspace. It's an exercise in frustration when you try to prepare a meal while dirty dishes are in the same space. So, you really need plenty of space on both sides of the sink. The zones are nicely separated for allowing more than one person to work in the Kitchen at the same time - prepping and/or cooking and/or cleaning up. In addition, you don't want your dirty dishes "front and center" and on public display - so you need to hide them somehow - either behind a wall as in this design, or on the back wall where they're out of the way. Oh, and no one likes to sit at a counter with dirty dishes in their face - prepping OK, b/c you're working there, but not the day's dirty dishes. OK, maybe it's just me, but I find it very distasteful to sit at a counter with the day's dishes in my face. The peninsula is a more useful squared off design (similar to what your DH designer did - that was a good change, btw.) The counters on the bottom wall are 3" deeper than standard - this allows for more and better dish storage as well as enough counter space in front of the uppers - which are a Dish Hutch style and go to the counter. More on that in the "Dish Storage" discussion. The normal kitchen workflow is Refrigerator/food storage --> Sink/Prep Zone --> Range/Oven/MW/Cooking Zone --> Either Serving Zone (table) or Cleanup Zone. While the design doesn't follow the flow perfectly, it's actually pretty good. The cabinet on the peninsula end (left end) is turned 90 degrees. This gives you a better use of space than a corner cabinet. For cabinets - get as many drawer stacks as you can. Drawers are far more useful & functional than stationary shelves or even roll out tray shelves (ROTS). There are a lot of discussions about drawers vs ROTS on the forum; here's one: http://ths.gardenweb.com/discussions/2664194/drawers-or-doors-with-pull-outs The landing zone for the refrigerator is either to the right or across the aisle. With French Door refrigerators, landing space across from the refrigerator is usually more useful than next to it. The MW is mounted under the cabinet to the left of the sink. Alternatively, it could be in the corner - just be sure you can open the MW door. Or, you could make the Dish Hutch shorter (say, only 27" wide) and gain a bit of space to fit the MW in the corner. I put in a wider aisle b/w the peninsula and the range wall b/c the Cooking Zone and range are not only unprotected, but in the middle of a busy aisle. By making that aisle wider, it will allow people to swing around farther into the Kitchen and farther away from the range. Will they do it? I don't know, but at least the option is there. -- However, It doesn't address the issue of trying to cross a busy aisle with a pot of boiling water from the range to the sink for draining. Without changing the range's location -or- the location of the peninsula and the DR doorway, I'm not sure there's much to do to fix that. It's unfortunate as I think the cost would be relatively inexpensive (as opposed to changing later if you find it's an issue) and well worth it at this point – no walls are up yet, just frames. -- Do you have young children? That would be the biggest hazard – children (or pets) running around underfoot and you trying to dodge them without spilling the boiling water on them or you. I put in a 9" utility cabinet b/w the refrigerator and wall for a couple of reasons -- First, it pretty much guarantees you'll have enough room to open the refrigerator doors fully -- Second, it pushes the refrigerator out of the somewhat narrow aisle in front of the DR doorway. When the refrigerator is open, the person opening the refrigerator and the refrigerator door will block that aisle. It should only be for a short time, but it will block it. (I have a similar pinch point in my Kitchen - b/w the refrigerator and the end of one of my peninsulas.) -- Oh, and a third - it pushes the refrigerator into the Kitchen more it's even easier to access it from the Prep Zone. OK, it's just 9", but that's 9" closer! :-) Dish Storage: The dishes are stored in a Dish Hutch arrangement. The upper cabinet goes to the counter and gives you a lot of extra storage - something that I think you may need in this Kitchen. (It's also a nice look.) The upper cabinet is 39" wide x 15" deep - the extra depth will allow you to store wider dinner planes, platters, etc. Note that when a cabinet is stated as 12" deep, that is the total depth - including the back wall and the front frame. The wall & frame can shorten the depth by up to 1.5" - leaving you with a cabinet that's really only 10.5" deep. Adding 3" to the depth gives you 13.5" of usable depth. (If you have frameless cabinets, you only lose the thickness of the back wall since there is no face frame in frameless cabinets.) The 27" wide base cabinet below it is 27" deep - also adding 3" of additional storage. The location of the dishes will help keep people getting a dish or setting the table out of the Prep and Cooking Zones. It also puts them next to the DW and next to the DR. It's also a direct shot from the Nook to the dishes w/o wandering into the Prep Zone. Prep Zone: Utilizing the peninsula, the Prep Zone has a nice expanse of counter space - 27" immediately adjacent to the sink and another 30+ inches on the peninsula. The trash pullout is in the Prep Zone for easy access during prepping (prepping and cooking generate the most trash & recyclables than cleaning up - and for a much longer period of time.) When prepping on the peninsula, you are a bit closer to the range, which will help when you're carrying prepped food across the Kitchen to the range/Cooking Zone. Cooking Zone: The Cooking Zone contains the range and surrounding landing space. Prep work will (should) be done near a water source, so you will be prepping next to the sink across the aisle. However, you do need space for emergency landing space as well as staging food/ingredients for placing on the top of the range or in the oven. You also need landing space nearby when taking things out of the oven Post & Pans can be stored in the drawers next to the range. I would have like to include the MW, but there really isn't enough room on that wall. Cleanup Zone: I think I've covered most of the Cleanup Zone comments throughout the above discussions. To summarize, the Cleanup Zone is separated from the Prep and Cooking Zones and it's near the dish storage. ....See Moreplease help us update our exterior
Comments (15)The two bay windows seem to be centered with the upstairs double windows. To compensate for the entry and window above it being "off " and for the wider space between the door and the bay on the right, I would drop the sidelight idea and put a wide single door to the far right of the present door's location. Brick up the gap with similar style (if not the same color) brick, but paint it all. Then add a porch and roof that visually center things between the two bays. Maybe removing the roofs from the bays will help focus the eye on the new porch, or let the new porch span over the bay windows as celerygirl showed. The symmetry of the linear hedge is just accenting the asymmetry of the building. Pull that out and landscape with plantings that help disguise the imbalance....See More
millworkman
20 days ago
Yon Chung
20 days agoCandice McCabe
20 days agoCandice McCabe
20 days agoCandice McCabe
20 days agoYon Chung
19 days ago- PRO
lisedv
19 days agolast modified: 19 days ago - PRO
Yon Chung, CPA | Realtor
19 days ago - PRO
lisedv
19 days ago Yon Chung
18 days ago
Related Stories

EXTERIORSHouzz Call: Show Us Your Home’s Exterior Makeover
Have you improved the curb appeal of your house? If so, we’d love to see the before-and-after
Full Story
SUMMER GARDENINGHouzz Call: Please Show Us Your Summer Garden!
Share pictures of your home and yard this summer — we’d love to feature them in an upcoming story
Full Story
EXTERIOR COLORThe Joyful Exterior: Say Hello to Yellow
Whether you favor bright or mellow, see how to add eye-catching yellow accents
Full Story
EXTERIOR COLORWhite Delights on Home Exteriors of All Styles
You can't go wrong looking on the bright side for a home's exterior — white exteriors like these have been succeeding for hundreds of years
Full Story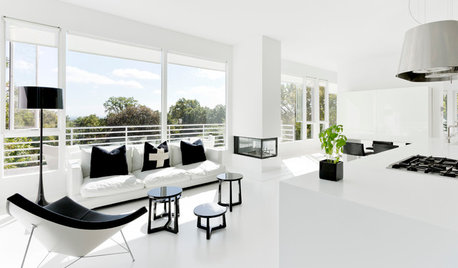
MODERN HOMESMy Houzz: All Right With All-White in a Modern New Jersey Home
A bold monochrome palette with black accents, modern art and treehouse-like views of NYC are stars in this couple’s dramatic home
Full Story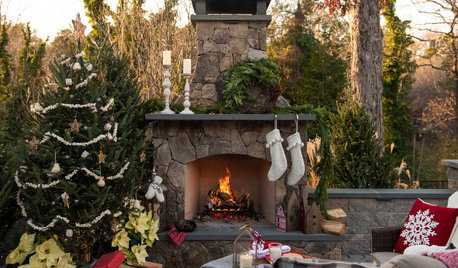
HOUZZ CALLShow Us Your Outdoor Holiday Decorations!
We want to see your front doors, winter gardens and exteriors with seasonal cheer! Please share your best photos
Full Story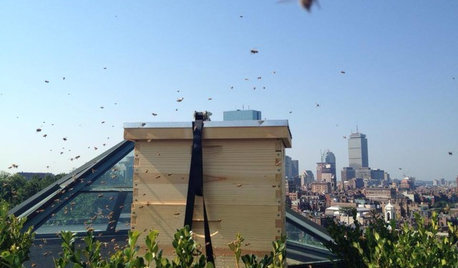
FARM YOUR YARDHello, Honey: Beekeeping Anywhere for Fun, Food and Good Deeds
We need pollinators, and they increasingly need us too. Here, why and how to be a bee friend
Full Story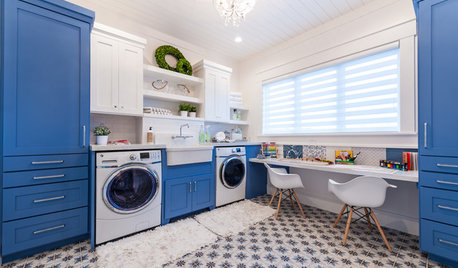
LAUNDRY ROOMSHouzz Call: Show Us Your Laundry Room Remodel!
Did you recently renovate your laundry room? We’d love to hear all the details
Full Story
HOUZZ CALLShow Us Your Pets!
Share a photo of your personality-filled dog, cat or other pet who’s helping you pass the time at home right now
Full Story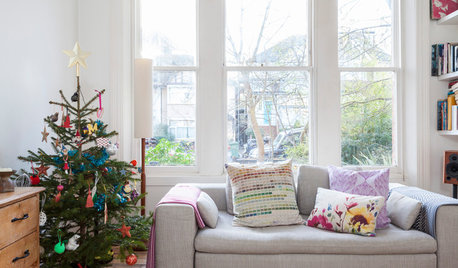
HOLIDAYSHouzz Call: Show Us Your Christmas Tree!
We’d love to see how you make your tree your own. Please show us your best photo and tell us about your traditions
Full Story


Yon ChungOriginal Author