


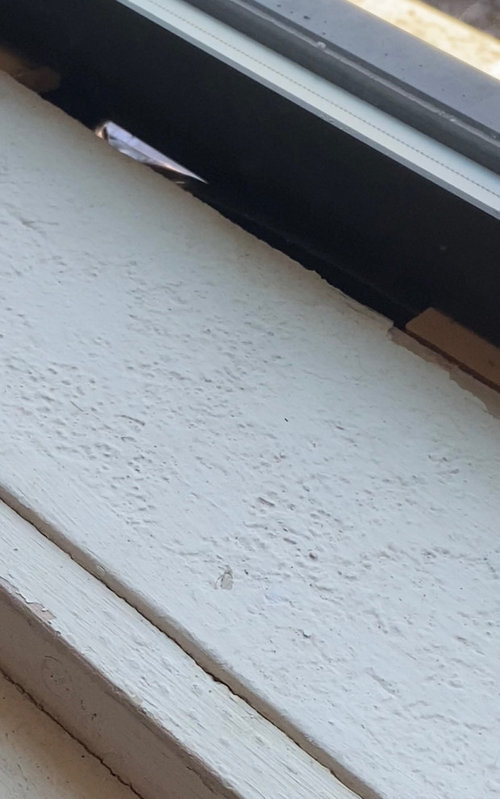
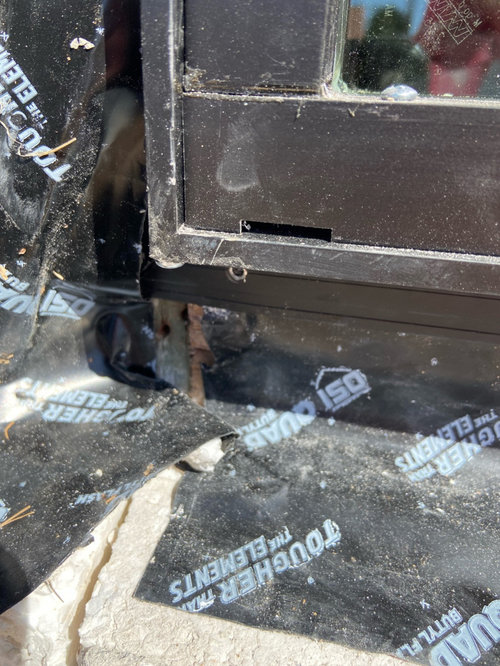
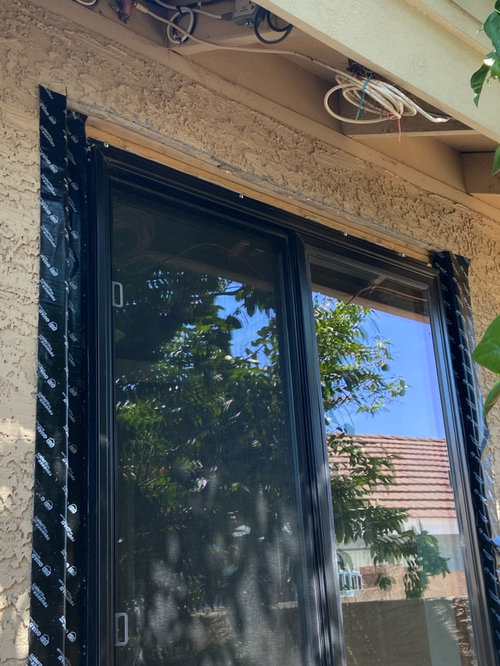
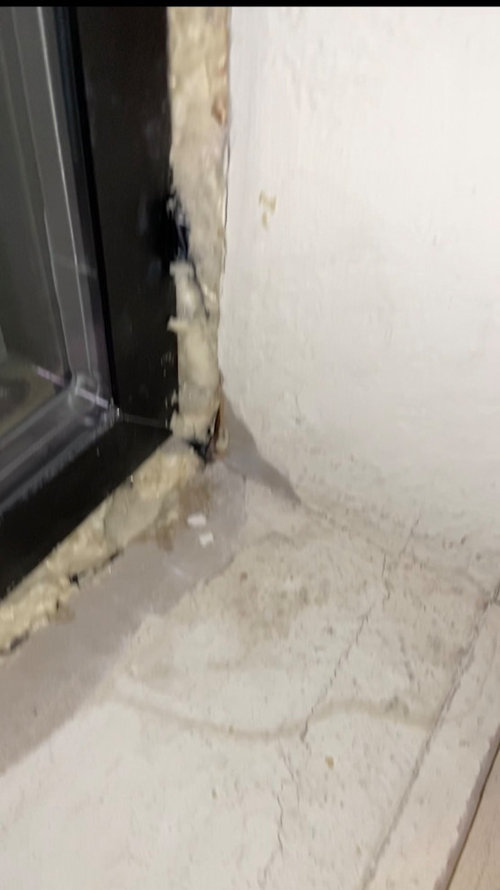
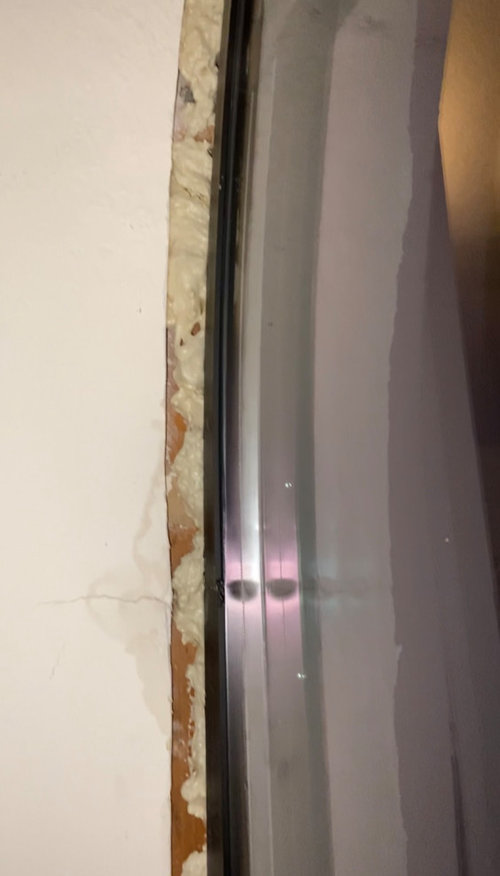
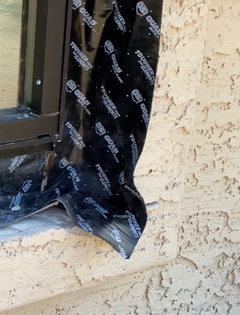
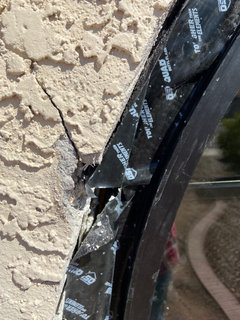
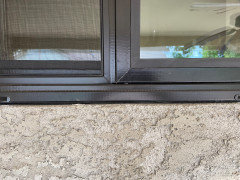
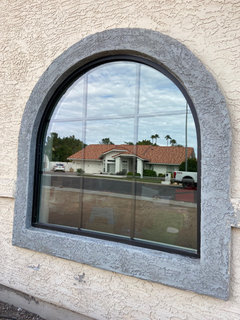
Advice please from the Houzz Window Experts
Gigi Rosa
last year
last modified: last year


Featured Answer
Sort by:Oldest
Comments (14)

Gigi Rosa
last yearRelated Discussions
Advice from Lilac expert, please
Comments (3)Google non suckering lilac cultivars and the site "NGC -Lilacs for the Prairies" will give you a listing of the Father Fiala's and a lot more. Can't recommend any of them since my 100' plus hedge is comprised of the old common lilacs which were planted @1900. These, of course, sucker, but it makes the hedge extremely dense. This was a good year for lilacs, the blooming was spectacular....See Moretile experts, others, please weigh in / give advice
Comments (6)Clumsy, my patuty!! WOW!! Where do you live??? Can I come out and tile your bathroom??? :-) In all seriousness, that's going to be one sweet masterpiece to put together! Before I get to your questions, though I do see one problem. It's going to be tough to run the chair rail through the shower and have any kind of glass enclosure. Not impossible, but tough. You would have to work together with your glass guy to figure out EXACTLY where the glass would go, so you could leave notches in the chair rail. I can guarantee you-- they're not going to notch the glass for you. :-) Now, on to the questions: #1-6) What you have drawn is excellent. With reference to the subway tile, no, the corner pieces do not need to be mitered. What you can do is cut the pieces, but then turn the cut edge into the field, and use the "factory" edge as the bullnose. Now, I said they don't NEED to be mitered. However, if you'd PREFER to miter them, there's no reason why you couldn't. It's not like it's ceramic where you'd have to worry about a sharp edge. As for the chair rail and liner, you're right. Those WOULD have to be mitered. The biggest tip I could give you about mitering the chair rail would be to have a piece of 2x4 handy with a 45 degree mitered end on it. You can place the mitered side of the 2x4 against the wet saw tray table's edge, and that'll give you the correct angle, and the thickness of the 2x4 will give you something to make sure you're standing the chair rail up straight while you cut it. If you decide that you want to miter all the outside corner tiles, the only advice I can give you is leave a little "meat" on the edge. You don't want to take the miter all the way to the face of the tile. If you do, you'll end up with an extremely ragged edge. Leave 1/16" of meat or so on the front edge. The finished miter will still look just as tight, and it'll be 100% stronger. #7) Don't worry about continuing the cuts. Atleast not on the subway tiles. For the most part, the ONLY time you really need to worry about it is when you use a diagonal layout. With running bond (the brick joint pattern), there's no need to continue it. Take each wall individually. Now, the best thing is to center the walls. However, sometimes that gives you small pieces on each end. With a square layout, moving the layout over half a tile, so the tile is centered instead of the grout joint, the problem is solved. With running bond, if you move it over half a tile, it puts you right back where you started!! So how do you move the layout over and still keep it centered? Move it over a QUARTER of a tile (1 1/2"). What this does is it'll give you equal, but alternating cuts. Lay it out on paper and try it-- You'll see what I mean. #8) Yes, that's normal. #9) Ya had to give me a hard one!! :-) You're right-- this CAN be tricky. But you're dead on the right track. You need to figure out your coursing (each course is one tile and one grout joint). Lets say yout tile is exactly 3" high, and you're using a 1/4" grout joint. Going by your drawing, I come up with a height of 51 1/2" high. You show a 6x12 piece on the bottomwith the 1/4" joint, that's 6 1/4". Next is 12 courses of subway tile. That's 39 inches (with 12- 1/4" joints). Then the pencil liner, which, if it were me, would get an 1/8" joint (to match the joint in the 3 rows of mosaics), so that's another 1 1/8", and then I'm assuming the chair rail is 2", plus another 1/8" joint, 2 1/8". Just a side note-- this would be another reason for NOT using the chair rail, unless you have the shelf come out over the top of the chair rail. With the other three sides, you can either cap the edges of the niche pieces, or you can have the niche pieces cap the edges of the wall. But the shelf MUST come over the edge of the wall tile. You want any water running down the face of the tile, rather than going into the grout joint. Alot of times, I'll even use a piece of granite tile, and round it out PAST the face of the tile, so that it doesn't even come doen the face of the tile, but actually gives a drip edge. Okay-- back to your niche. Just for the sake of argument, lets say the height is 51 1/2". You want to take into account the thickness of the cement board, as well as the kerdi (figure 5/8"). I would also, as you surmised, give it extra as a "fudge" factor . That way if you need the play, it's there, and if you don't, you can always fill it in with thinset. If it were up to me, and the chair rail was definitely going to stay, I'd set the framing at 50 1/2". The only question is, are you going to set your levels off the finished floor, or off the subfloor? Personally, I'd set it off the subfloor, but when I actually set the tile, set it over the finished floor, cutting it in. That way, if the floor's out of level at all, you'll never see it. Either way, it's up to you. The point is, I'd set the bottom of the niche framing an inch below what you expect the actual coursing to be. #10) That's the way it LOOKS when it's done. :-) You start with a full course above by nailing a piece of wood, and tiling off of that, and then removing it afterward and cutting in the bottom. As for the Kerdi in the shower, you can patch the holes afterward with Kerdi-Fix. You want to wait as long as possible to tile the shower and bathroom floors. You never want to be working over finished work any more than absolutely necessary. #11) I already addressed this above. #12) Install your wood trim first and tile to it. #13) Diamond hole saw. You can check some of the online tile tool supply sites. if you have a hard time locating them, let me know, and I'll see what I can do to find em for you. #14) this is where we get back to the thing about going from center to 1/4 and 3/4 tiles to get back to center. It works with diagonal layout, too. One other thing to think about, and this would work as a nice design feature, too-- from the chair rail up, turn one row of subway tiles on end, running them lengthwise up the sides of your diagonal tiles as a border. WOW!! This reminds me of Rodney Dangerfields's movie Back To School-- to paraphrase right after he finishes the oral exam and says "I feel like I just gave birth!! To an apprentice!!"...See Moreassistance please from the window experts
Comments (3)thanks guys, i did finally find their door sizes for aluminum on their website, obviously we wouldn't want to customize them since that would be cost prohibitive and we would just as soon go with a custom door mfg like la cantina, nana, western windows, or fleetwood. thanks again for chiming in though, i appreciate it!...See Morecalling all kitchen experts and enthusiasts - layout advice please!
Comments (25)I know some folks will not like the stove and sink directly across from each other, but I do not mind Yeah, this is often touted as a no-no on this board, but I think the question is, are you planning a ONE-butt kitchen or something larger? My husband and I are solidly united in this: we both like to cook, but we are both highly annoyed by other people in the kitchen while we're doing it. I know some folks will think it is not necessary to have a eat-in kitchen table when there's an island and adjoining dining room, but I want to keep that and know we will get a lot of use out of it Eh, here's the question: do you really need the kitchen table AND island seating AND an adjacent dining room (and I bet you have outdoor dining that doesn't show on this plan as well). The question isn't, Is an eat-in kitchen table worthwhile? The question is, Which of these options is best for my family? And it's pretty certain that ALL OF THE ABOVE is overkill. I could also move the microwave over to the pantry or replace the wine fridge tower (although hubby is excited about that - probably doesn't need to be that large) .. but I do like microwave hidden in island in theory If you're thinking about hiding the microwave, you can probably get by with a small model. I know I can -- we really don't use ours much. You have no prep space next to the sink. You're not going to prep on the dishwasher side and 30" on the other side isn't enough. Do the 24" dishwasher on the end, the sink, the trash and then microwave and you'll have better prep space. Agree -- good eye. Also you will have to turn 180 anytime you need to load the fridge with groceries or take something out. Note that a 36" refrigerator won't fit in a 36" space -- you need a couple inches of "wiggle room"; if you're doing a surround, that'll take a few more inches. The point: if you build a 36" space, you're going to get a 32' or 33" refrigerator, and the difference in size is significant. Go look at refrigerators before you commit to this spot. Consider, too, that while French door refrigerators are all the rage right now, a right-hinged door will work better in this space. A right-hinged door will open "towards your work area", and you won't have to reach things around one of the doors. side as most kitchen tables are 42" wide. My kitchen table is 42" octagonal, and it's perfect for a family of four. It's enough space to comfortably include serving dishes, if desired. It's a nice size for playing a board game. There’s too much going on in the island and the area to the right of stove is underutilized. I’d put the microwave there. Agree with the premise; question the conclusion. Note that microwaves all hinge on the left, so a microwave to the right of the stove would "open wrong" -- not the end of the world, but also not ideal. Personally, I'd like to see the microwave hidden in the 24" pantry to the left of the refrigerator. It'd be "in the right spot" for warming leftovers. And, what’s the appliance garage for? If for toaster or coffee that requires milk or butter from fridge, that could move that to the other side, too. Yes, the concept of "away space" is popular when thinking of rooms ... but I think it's applicable to kitchens too. I'd skip the appliance garage /go with an open counter "away space" next to the refrigerator. This space could house the toaster, coffee maker, cookie jar, bowl of fruit ... you know, the "always outs" that clutter your counters. Either you assign them a spot, or they're always in the way. The microwave could go in this area ... perhaps in a shelf above the counter. I say put them by the refrigerator because this spot is "set apart" from the main working area already. I really think symmetry is overrated when it comes to this stuff. I do NOT like the 2 pendants that are not centered with the island. I could live with some things not being centered, but pendants ABSOLUTELY have to be centered - they're super-visible. Other thoughts: - Ideally your dishwasher - refrigerator - glassware storage would be close together. This is just convenient for the person taking a glass out /filling it AND for the person putting away clean dishes. - Similarly, where do you see your silverware drawer? Again, this needs to be handy to the dishwasher AND to your most-used dining spot. Plates and bowls aren't hard to carry a couple steps, but glassware and silverware need to be "placed right". - Much of your prep work happens at /near the sink ... and you have no handy drawers for your knives, cutting boards, measuring cups and other gadgets. This is a good reason to get the microwave out of the island. - This is a big kitchen, and you're looking at all your storage in $$$ cabinets /under stone countertops. If you were to lose some cabinetry /replace it with a plain pantry, you'd save a great deal of money. - The sink is the single most-used thing in your kitchen, and 33" isn't small ... but it's on the small side for a kitchen this size. I'd argue for taking it up to 36", which doesn't seem like a huge difference ... but is. The sink is not a place to skimp. - You want to store cooking oils (and vinegars seem to go with them) near the stove -- do you see an obvious spot for them? A chef's drawer would be ideal. - You said you're planning a spice drawer -- where is it going? I keep my spices in an upper cabinet /on a turntable, and I consider that ideal. - What's going in the tiny upper cabinets? - Do you have a spot for a fire extinguisher? If not, pick one right now! That's a must....See MoreGigi Rosa
last yearGigi Rosa
last year- PRO
toddinmn
last year Gigi Rosa
last yearGigi Rosa
last yearlast modified: last yearGigi Rosa
last yearlast modified: last year


Related Stories
WORKING WITH PROSInside Houzz: What You Can Learn From a Houzz Photo
Get access to the designer's info, product names, other photos in the project and much more by clicking on a Houzz image
Full Story
COLORPaint-Picking Help and Secrets From a Color Expert
Advice for wall and trim colors, what to always do before committing and the one paint feature you should completely ignore
Full Story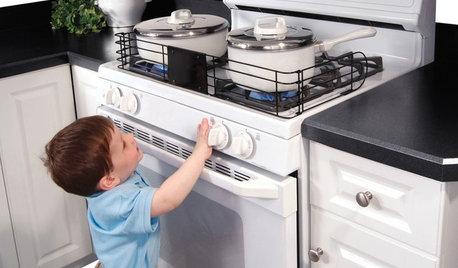
HEALTHY HOMEHow to Childproof Your Home: Expert Advice
Safety strategies, Part 1: Get the lowdown from the pros on which areas of the home need locks, lids, gates and more
Full Story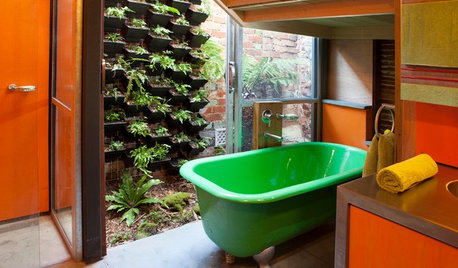
GARDENING GUIDESOn the Up and Up: Expert Advice for Growing a Green Wall
Houzz pros share solutions for 7 common challenges you can face with a vertical garden
Full Story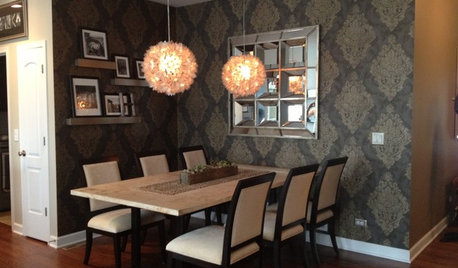
DINING ROOMSInside Houzz: Taking a Dining Space From Plain to Polished
By-the-hour design advice helps a homeowner define a dining area in an open floor plan and give it a decorator look
Full Story
HOUZZ PRODUCT NEWS‘Understand Your Clients’ and Other Advice From Pros
Several pros share important business lessons they’ve learned from recent home design and remodeling projects
Full Story
HOUZZ TOURSHouzz Tour: Design Secrets from a Dallas Model Home
Designer Cristi Holcombe Shows How to Mix Colors, Find Bargains, Create Great Tablescapes and More
Full Story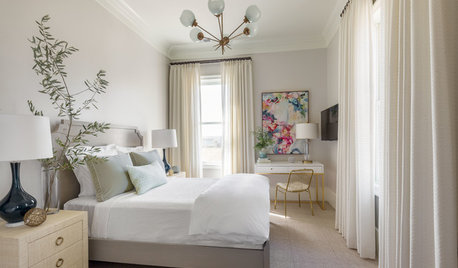
BEDROOMS8 Lessons From the Most Popular New Bedrooms on Houzz
These relaxing spaces make us want to dive in and get a good night’s sleep
Full Story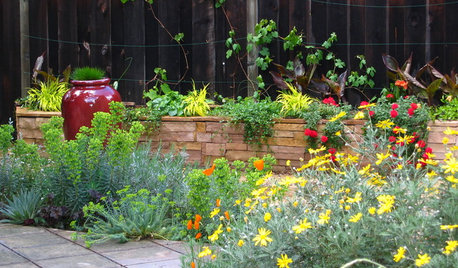
SUMMER GARDENINGHouzz Call: Please Show Us Your Summer Garden!
Share pictures of your home and yard this summer — we’d love to feature them in an upcoming story
Full Story


millworkman