


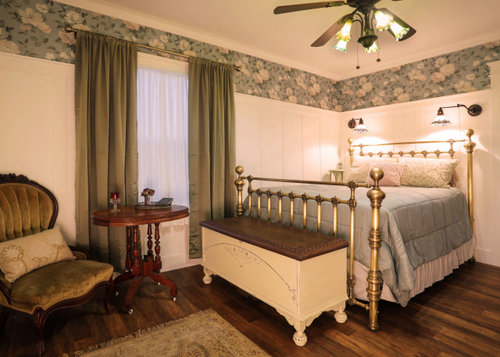
From Business Blues to Company Comfy - Simple Guest Room Makeover
Farley McDougal
last year
last modified: last year


Featured Answer
Sort by:Oldest
Comments (14)

Farley McDougal
last yearRelated Discussions
Calling all fabric gurus- family room makeover
Comments (46)Yes, that room is all sorts of gorgeous sophistication, but again, when I look at many of the Houzz pics, I can never tell if what I am responding to is the elements themselves in a fabulous space or the overall space itself. And this journey isn't quite so fun for me! I confuse myself every day. Point in case, what do you think of something like his chair with a bit of wood around the frame for that corner? Not necessarily in ivory, but I am thinking that the wood frame helps to tie it into the colors in the rug and the sofa, so the addition of another color there wouldn't seem so random. But maybe the style is completely off (disclaimer - I love love love the style) Of course this chair is solid walnut and thousands of dollars, but if I decide I like it perhaps I can find a more reasonable similar option....See MoreGuest room details - WWYD?
Comments (83)I love the hutch. I love the picture. Both look good to me. I am not someone who needs a big mirror, but there are lots of decorative ones you might come across which could be placed anywhere in the room. Even ones that sit on a nightstand, I have one of those in my bedroom. Or a groovy hand mirror. There are plenty of mirrors in other areas of the house for me, don't need one in every room....See MoreLiving room makeover help. Working almost from scratch
Comments (82)Here's a picture of our old layout, minus the rocking chair that we had by the wall unit and the fireplace. And a picture of best layout incorporating all needs/stipulations I had to work with. The new layout has templates with existing tables that I will change as I am able. You can see how much the entry was blocked, I had 1 little picture to the right of the fireplace (sunset was in dining room) and that big honking wall unit with an analog TV and a small hand me down digital TV with a firestick on the coffee table and extension cords running from there to the fireplace wall. I think I've thought of every possible configuration of things and have gone back to the drawing board several times when I've run them by my husband. 100's of media consoles, sofas, fireplaces, floors, layouts. We use the turntable. The Ikea bottom cabinet doors slide....See MoreOur guest room looks like a garage sale!
Comments (37)I think you have great pieces to have a really great room. My problem is more with your current layout. I think if you moved the bed to the opposite wall where the mirror and table is the room would feel larger and more open. I feel that the natural walkway in any room should be from the door directly to the back of a room. I hate that the bed is blocking that natural path. Then you wouldn't have to deal with having the bed off centered so you can open and close the door. It's also a plus to be able to easily see the door from the bed. A queen bed is a plus in a guest room but if it's not in the budget at least get a headboard. You can pick them up real cheap at garage sales, thrift stores and Craigslist. Newer ones have places to use for both full and queen beds. Don't get a bed with a footboard. They tend to make the room feel smaller. I like the color of the sham you bought. fold your quilt in half the long way and place at the foot of the bed so it drapes farther down the sides. I like the idea of placing the mirror between the 2 doors. Full floor to ceiling drapes to soften the look with a nice comfy chair for reading angled in the corner across from the door by the windows to take advantage of the natural light and view. With this layout your rug is the statement piece of the room... the first thing you see when you walk in the room. I love that it is a family piece you want to use. My own guest room has things from my family and we call it grammas room. this picture was taken from the door in my old home showing the layout I'm suggesting with quilt folded at the end of the bed....See More PRO
PROFrameMyMirror
last yearFarley McDougal
last yearlast modified: last year
Martin Hossen
last year
Related Stories
PRODUCT PICKSGuest Picks: Set Up a Comfy Guest Room
Soft and warm, these neutral-toned furnishings and accessories will make guests feel welcomed with open arms
Full Story
TRENDING NOW8 Beautiful Blue Powder Rooms From Spring 2020’s Top Photos
See how this classic color can add style, surprise and serenity in various ways to a small space
Full Story
ROOM OF THE DAYRoom of the Day: Making Over a Harlem Living Room From 3,000 Miles Away
Using photos, video and email, San Francisco designer Jacqueline Palmer created a stylish living room for a New York City entrepreneur
Full Story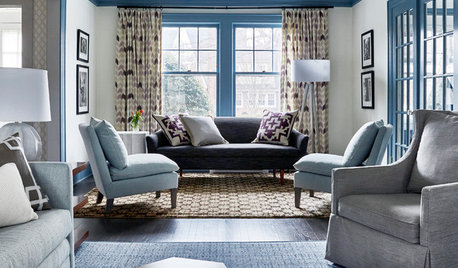
BEFORE AND AFTERS5 Sophisticated Living Room and Family Room Makeovers
See how designers carefully selected colors and furnishings to create elegant living spaces
Full Story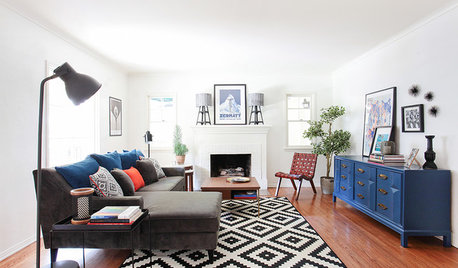
LIVING ROOMSRoom of the Day: A Chic Living Room Makeover for a Temporary Space
Stylish energy suits a young family’s lifestyle in their rental home
Full Story
DECORATING GUIDESImpress Your Guests: 8 Tips for Gracious Guest Rooms
Offer concierge-style luxury on a bellhop's budget with these ideas to turn a spare bedroom into a first-class, guest-ready retreat
Full Story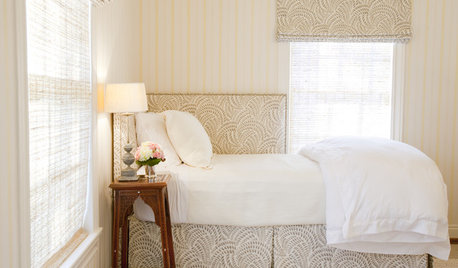
DECORATING GUIDESThe Cure for Houzz Envy: Guest Room Touches Anyone Can Do
Make overnight guests feel comfy and cozy with small, inexpensive niceties
Full Story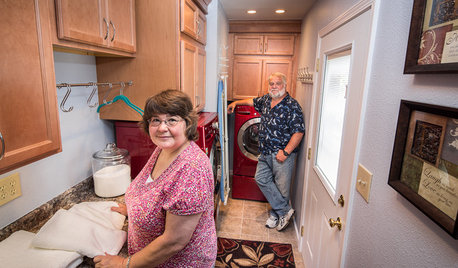
REMODELING GUIDESCheck Out Our Sweepstakes Winners' 2-Room Makeover
The laundry room's organization needed ironing out. The guest bath didn't make a splash. See the makeovers a Kentucky couple won
Full Story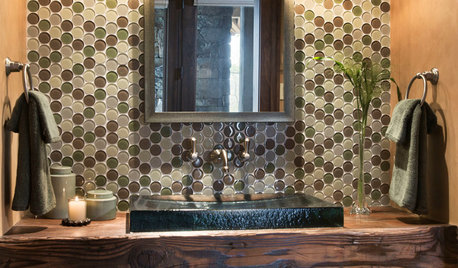
BATHROOM DESIGNPowder Room Essentials to Keep Guests Happy
Set out these bathroom necessities (hello, hand towels) to make your company comfortable and your parties run smoothly
Full Story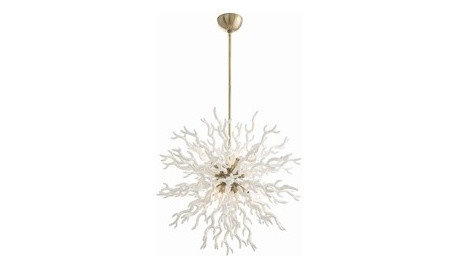
PRODUCT PICKSGuest Picks: 19 Standouts From High Point Market
Let these metallic and nature-loving pieces inspire a spring decorating makeover and a bright outlook
Full StorySponsored
Franklin County's Preferred Architectural Firm | Best of Houzz Winner


abbisgram