


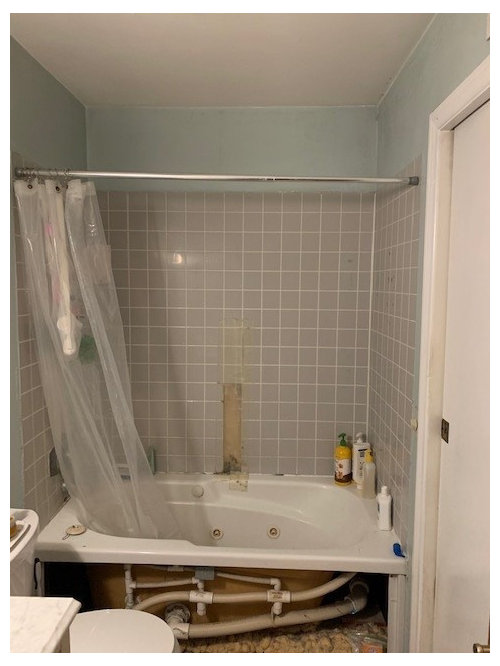
Tile up to the ceiling in bathroom remodel?? Need input plz
always1stepbehind
2 years ago

Featured Answer
Sort by:Oldest
Comments (8)

Lyndee Lee
2 years agoRelated Discussions
Bathroom Reveal, Thanks to the Bathroom and Remodel Forums! (pic
Comments (56)This old thread got revisited. @dani_m08 to answer the question about extra probe, I believe I ordered an extra one when I bought the set up. The probe wire is just setting in the junction box I think but honestly I cant remember. When I laid out the underfloor heating and the probe, I just ran another probe near the first probe, and it was then sealed into the floor self leveling compound as per instructions. then the end was just threaded into the wall like the one that would be live, and not connected, but just laying there in the box. Regarding the tile layout. I just decided to run it this way, after getting instructions on the 90Degree way, IIRC. The herringbone that I love is from my childhood and the side walks in my neighborhood that all ran at 45Degree. so that to me is herringbone. I know you posted on @sochi thread about her amazing bathroom and a wall mounted faucet. I would totally do it if I had the right sink for it. In my case I had made my sink out of soapstone and an integrated backsplash. The pictures of this bathroom reveal are no longer available because of the use of photo bucket, when it was Gardenweb. I did not keep my account with photo bucket. I'll add some of the reveal pictures so you can see the sink and floor. Regarding the sink there is no ledge for water to drip from my hands when using the faucet. The water drips right into the sink. In my other bathroom with a deck mounted faucet I am always wiping up drips and it is a nuisance. I much prefer the setup for this sink. Below: I love the flush finish from the faucet to the bottom of the sink. nothing drips on a counter or edge of a sink. Below: looking in from the doorway. Below: Here I am finishing up the sink. the backsplash was epoxied on as a separate piece. The whole soapstone install in the room took next to nothing to buy as they were all small pieces that I epoxied together with a 3 part stone epoxy. Below: this is the counter at the tub, and is in 2 long pieces but I was able to epoxy them together at there edges to make a wide slab for the top. All the soapstone was finished with a 60 grit sandpaper to be rough and this lovely soft tone of blue/green/gray/white. I did not oil it so this color tone would remain light. Below: If I recall correctly @sochi helped me decide on this Hubberton Forge Mirror. I have 3 different metals in this room, but they are all a cool silver to black color. Below: the center of this tower shares space with the kitchen on the other side of the wall. there is also some extra space that houses some electrical wiring. this is an old simple house. this bathroom was an add on when it got move to the farm in the 30s IIRC. The plumbing was all rearrange and some of the details that were orignially there I kept but updated it, such as this tower feature. The old one went and the carpenter did a wonderful job with this one. Below: This feature was another thing I kept from the old bathroom but flipped it from the other end and had the carpenter put drawers in it. Before it was a hell hole. things got lost and the build was soooo old and creapy I didn't like using it for storage. Now it is perfect for storage....See MoreBathroom remodel input needed
Comments (5)At first glance, what about moving your tub to the opposite wall and put a nice long vanity where your tub is now. Agree that area with the TV just doesn't work. I would play with this a bit more with paper cut outs and a scaled graph. It helps to move stuff around that way. Also keep in mind some areas need a certain amount of clearance to work properly. I would try and move toilet if you could somewhere else. It's kinda just sticking out there. Look into moving doors and/or moving into closets. You mentioned your on a budget, before you get too in love with a freestanding tub, do a little on-line shopping on that it's a budget buster....See MoreNew Bathroom/Addition vs. Bathroom/Kitchen Remodel
Comments (5)thanks to all who have posted so far, especially Eric. We can probably save/budget down the road for a kitchen redo, or do part of it ourselves. Additions would be a little harder for us except finish work (floors, tile, etc. Can do drywall even but would need to find time to do it). What that kitchen has is a U shaped layout, not too bad except there are overhanging cabinets between a small dining/family space and the kitchen. It's a counter/pass through kind of setup where someone can sit at stools and talk with the person in the kitchen....except the cabinets hang down so the person in the kitchen has to look under them. We would likely tear those out and relocate the stovetop to the perimeter wall and make that pass through an island. Then that entire space could become kitchen/dining. It is possible we could still move out a wall on that (kitchen) side of the house down the road too, we are in Hawaii so all the construction costs are much, much higher than mainland. So jealous of all the posters here who can put on a large extension for less than 50K. Plan A or Plan B will cost us about the same. We don't plan to sell and move anytime soon, but should we need to we're leaning toward sq. footage instead of just extending current bath and upgrading the kitchen. Our neighborhood is about 20 years old so people are beginning to redo those rooms as the fixtures and appliances are ageing. We redid all the appliances about three years ago with stainless finishes, new faucet/sink, and redid the countertop Corian, so the kitchen is livable - just need to clear out some clutter and make smarter usage on available storage space. We could paint or restain the cabinet doors to freshen it up. A few neighbors are creating the "big bang" kitchen now but I'm not certain a 70K upgrade will improve the value that much as a new neighborhood is planned about 5 miles away within the next couple of years. Would we love to live in a "WOW" kitchen, of course. But as with most people we have to make a decision on where it is best to spend the money for now. We could feasibly also add on a 2nd story in future years, but we prefer the single story and if we age-in-place as planned, the new bath will include wide accesses and no-curb shower....See MoreAdvice needed: Tile Job, bathroom remodel, uneven grout
Comments (10)Here are a few quick tips to find out how "correct" the install is (or isn't). Correct meaning 'will not fail' vs. looks pretty. Looking pretty and being correctly installed are two different animals. 1. Caulking is used at EVERY change of plane (ahem...corners). Grout is NOT allowed when tile goes around a corner or goes from flooring tile to wall tile. To check for caulking just poke your finger nail in there and push. If it feels rubbery = caulking. If it feels like hardened sand/stone = grout. **Hint** Look at the GROUT that is sitting all around the wall cubby and the grout that is running down the corner...check the marble floor/tile wall connection. Do you see more grout? 2. Did they use wood (raw wood) at the shower threshold? If you remember seeing a plank of timber being 'tiled' you have issues. 3. Water Draining out of the shower should be even. The shower floor should not have areas that are left 'wet looking' (ie. darker...marble is AWESOME at showing this...which means you can test this very easily for yourself) for hours while other areas look 'dry' very quickly. An uneven drying time tell us water is SITTING (ie. not draining) under the marble. Issues like a mentioned above can be a perfect storm waiting to come crashing down (through the ceiling? below?) around your head. They are also issues that point to a REDO (especially the shower floor stuff). The uneven wall tiles = uneven wall. They needed to shim the walls (when the studs were exposed) and/or float the tile (very difficult and expensive and requires an OLD FASHIONED Tile Pro to get it done properly). You didn't get either. In other words your General Contractor used 'guys' to lay the tile and not the EXPENSIVE Tile setters (ahem...GCs HATE using expensive pros...it messes up their bottom line/quotes)....See Morealways1stepbehind
2 years agoalways1stepbehind
2 years agoalways1stepbehind
2 years agolast modified: 2 years ago
worthy
2 years agolast modified: 2 years agoJeff Meeks
2 years agolast modified: 2 years ago

Related Stories
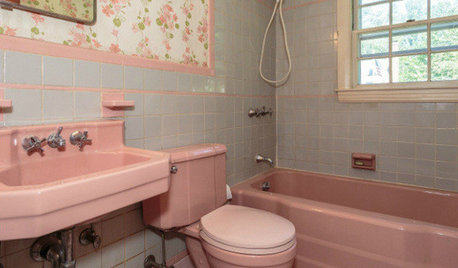
BATHROOM COLOR8 Ways to Spruce Up an Older Bathroom (Without Remodeling)
Mint tiles got you feeling blue? Don’t demolish — distract the eye by updating small details
Full Story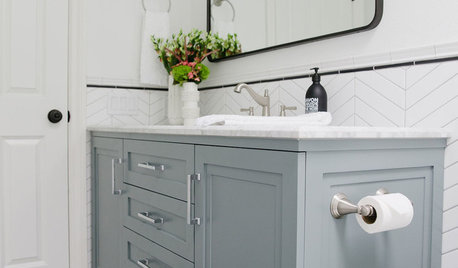
BATHROOM OF THE WEEKWhite Paint and Patterned Tile Freshen Up a 5-by-11-Foot Bathroom
A designer uses a light palette and hardworking cabinetry to update a couple’s 1970s hallway bathroom
Full Story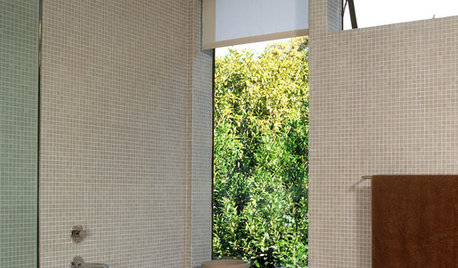
BATHROOM DESIGNFloor-to-Ceiling Tile Takes Bathrooms Above and Beyond
Generous tile in a bathroom can bounce light, give the illusion of more space and provide a cohesive look
Full Story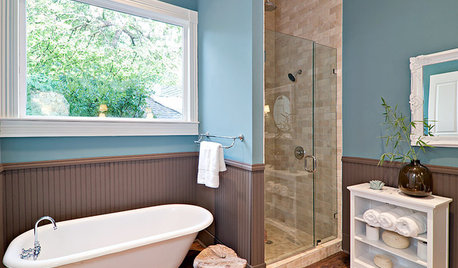
4 Easy Ways to Renew Your Bathroom Without Remodeling
Take your bathroom from drab to fab without getting out the sledgehammer or racking up lots of charges
Full Story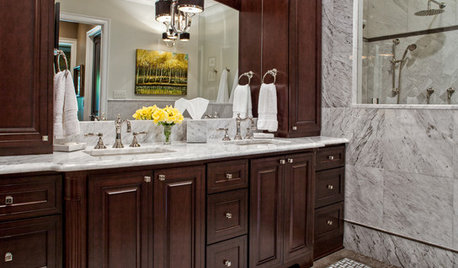
REMODELING GUIDESBathroom Workbook: How Much Does a Bathroom Remodel Cost?
Learn what features to expect for $3,000 to $100,000-plus, to help you plan your bathroom remodel
Full Story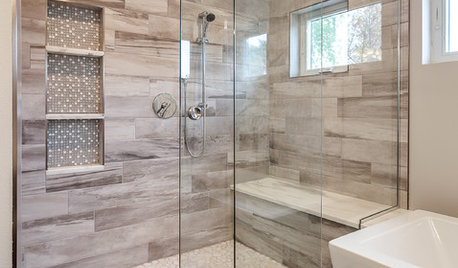
BATHROOM DESIGN10 Things to Consider Before Remodeling Your Bathroom
A designer shares her tips for your bathroom renovation
Full Story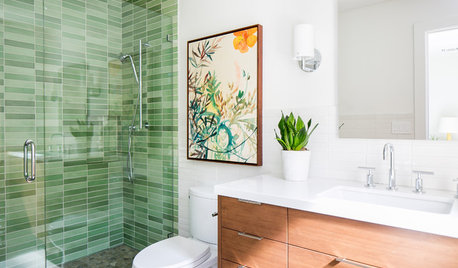
BATHROOM DESIGNTry These Bathroom Remodeling Ideas to Make Cleaning Easier
These fixtures, features and materials will save you time when it comes to keeping your bathroom sparkling
Full Story
BATHROOM DESIGN4 Rookie Bathroom-Remodeling Mistakes and How to Avoid Them
A remodeling expert reveals the blunders first-time bathroom remodelers make and how to steer clear
Full Story
TILEHow Tiny Tiles Can Elevate Your Bathroom’s Style
Thanks to their ability to add texture and subtle pattern, petite hexagonal and penny tiles may be here to stay
Full Story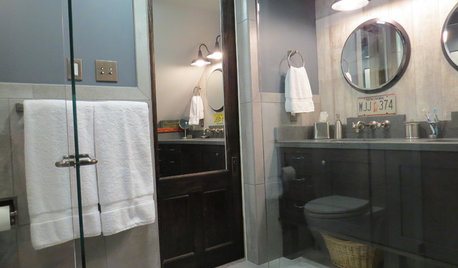
BATHROOM DESIGNSee the Clever Tricks That Opened Up This Master Bathroom
A recessed toilet paper holder and cabinets, diagonal large-format tiles, frameless glass and more helped maximize every inch of the space
Full Story


Julie R