


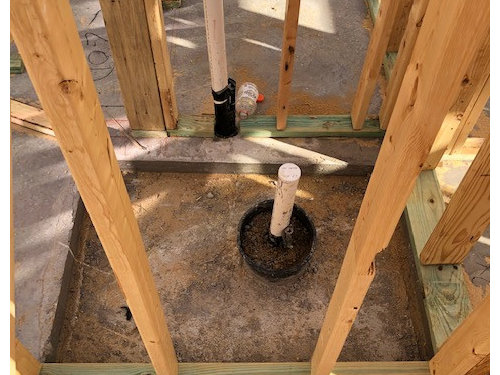
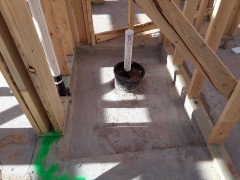
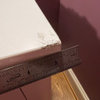
Framing Phase and Shower Mud Pan is not lining up with the 2x4
Texas Longhorn
3 years ago


Featured Answer
Sort by:Oldest
Comments (11)

Texas Longhorn
3 years agoRelated Discussions
Remodeling Bathroom- Custom shower pan with bench question
Comments (10)To further clarify, I just found a picture of a similar shower to mine. Instead, they inserted a premade plastic shower pan. As you can see in this pic, there drain is exactly center over the standing area. Im thinking I should either reduce the depth of my bench so that it is truly 3x4 shower pan so the drain is center. Or just move the drain forward 1.5 or 2 inches so that is centered.. I plan to install frameless glass very similar to this shower. So i realize that the drain will be visible from outside the shower and thus should probably be exactly center for aesthetic purposes.. To me, though, the bench in this picture (which i believe to be 11 or 12inch depth) is too shallow to sit comfortably.. The bench I made is very comfortable size wise, with room to lean back somewhat.. P.S. I am installing a custom mortar shower pan, and will not be using a premade... Would appreciate any opinions or ideas, as I am trying to put this pan in immediately.. Here is a link that might be useful:...See MoreShower curb & pan questions
Comments (18)Okay-- concerning 2 vs 3 2x4's, I don't really see a problem with it. it'd be a little unorthodox, but you could actually "form" the shower pan with the 2 2x4's, and then bring the mud pan all the way to the top (including cement board on top of the 2x4's). Use a Kerdi drain, and either Kerdi Membrane of Laticrete Hyroban liquid membrane (either way, a surface applied shower pan), and just make an elevated curbless shower base, mounting your glass over the 2x4's. if you want to have some sort of curb, though, I would strongly suggest going up the third 2x4, or you're going to have a very small piece between the top of the curb and the top of the shower floor. You really want to have a little bigger piece-- won't collect "junk" as easily. As for your shower pan question, Below is a link to the step by step construction of a standard shower pan. Additionally, For the standard pan, if the plumber's going to install it, and he balks at the thought of a preslope under the pan membrane, you can show him this: Uniform Plumbing Code related to shower pan construction. "412.8 When the construction of on-site built-up shower receptors is permitted by the Administrative Authority, one of the following means shall be employed: (1) Shower receptors built directly on the ground: Shower receptors built directly on the ground shall be watertight and shall be constructed from approved type dense, non-absorbent and non-corrosive materials. Each such receptor shall be adequately reinforced, shall be provided with an approved flanged floor drain designed to make a watertight joint in the floor, and shall have smooth, impervious, and durable surfaces. (2) Shower receptors built above ground: When shower receptors are built above ground the sub-floor and rough side of walls to a height of not less than three (3) inches (76 mm) above the top of the finished dam or threshold shall be first lined with sheet plastic*, lead* or copper* or shall be lined with other durable and watertight materials. All lining materials shall be pitched one-quarter (1/4) inch per foot (20.9 mm/m) to weep holes in the subdrain of a smooth and solidly formed sub-base. All such lining materials shall extend upward on the rough jambs of the shower opening to a point no less than three (3) inches (76 mm) above the top of the finished dam or threshold and shall extend outward over the top of the rough threshold and be turned over and fastened on the outside face of both the rough threshold and the jambs. Non-metallic shower sub-pans or linings may be built-up on the job site of not less than three (3) layers of standard grade fifteen (15) pound (6.8 kg) asphalt impregnated roofing felt. The bottom layer shall be fitted to the formed sub-base and each succeeding layer thoroughly hot mopped to that below. All corners shall be carefully fitted and shall be made strong and watertight by folding or lapping, and each corner shall be reinforced with suitable webbing hot-mopped in place. All folds, laps, and reinforcing webbing shall extend at least four (4) inches (102 mm) in all directions from the corner and all webbing shall be of approved type and mesh, producing a tensile strength of not less than fifty (50) psi (344.5 kPa) in either direction. Non-metallic shower sub-pans or linings may also consist of multi-layers of other approved equivalent materials suitably reinforced and carefully fitted in place on the job site as elsewhere required in this section. If you want to go with the Kerdi/ Hydroban hybrid, Laticrete WILL warranty it, so long as you follow their spec. Email me, and I';ll send it to you (for some reason, I can't upload it to Photobucket, and therefore can't post it here). Here is a link that might be useful: Harry Dunbar's Showerpan tutorial...See MoreContractor messed up shower pan. Fixable?
Comments (88)As an update to this the bathroom is finally coming together. I'll post pics here when bath is fully done. Lot of work doing all the tile but I took my time and it looks awesome. Far better than the job done by the builder in rest of the house and way better than the contractor I had hired. The shower pan build was a bit of a pain and I did the first layer twice (ie: ripped out first attempt and started over). Once you get the hang of it though it's not bad. Still, if doing it again I might think hard about a pre-formed tileable base despite the extra cost. The end-result though was great and it drains amazingly well as I made sure to slope it slightly over the minimum recommended. One advantage of doing it yourself on the floor was with the natural marble floor my wife could take her time figuring out which pieces to use where so that the overall pattern was optimal. Don't think you could do that with a pro without extra charges for sure. I found I really like the Ditra. Great product for tile and goes down easily. I used the recommended adhesive for it but think in the future I'll just use Custom's Uncoupling mat mortar for laying the Ditra....See MoreHow to select tile (floor, shower) and shower pans
Comments (30)Hi tmnca! One thing to think about with the Kohler shower pans is whether you may ever be using a shower stool with legs. If you were to get a longer shower bench, the Salient may cause problems because the oval really does have quite a bit of "curb" to it, as shown in Badgergal's photo of her son's shower. With a small shower stool set in the center of the shower, it is fine. If you ever need a longer shower stool, the Bellweather gives you a surface not impeded with the raised oval. I does, however, have a slant to the overall shower floor, so that must be taken into account. I have seen the Bellweather in person. It is a non-slip surface. It almost felt like a surface that would make me trip - catching my foot if I did not pick it up and step. Like if I dragged the foot, it would catch and I would trip and fall. It was a funny feeling to the bottom, and I wondered how it would feel when wet. It was NOT going to feel slippery, though! As for tile in a shower floor, the other reason to have small tiles (besides the grout lines giving traction), is that the small tiles allow the tile layer to better cope with the slant toward the drain. Larger tiles only allow you to slant in one direction. The smaller the tile, the better it is for following contours on a floor that is flowing to a drain from all directions....See More PRO
PROMark Bischak, Architect
3 years agoTexas Longhorn
3 years ago
booty bums
3 years agolast modified: 3 years agoTexas Longhorn
3 years ago
millworkman
3 years agoMongoCT
3 years ago PRO
PROJeffrey R. Grenz, General Contractor
3 years agoTexas Longhorn
3 years agores2architect
3 years ago
Related Stories
BATHROOM DESIGNConvert Your Tub Space to a Shower — the Fixtures-Shopping Phase
Step 2 in swapping your tub for a sleek new shower: Determine your mechanical needs and buy quality fixtures
Full Story
BATHROOM DESIGNConvert Your Tub Space Into a Shower — the Tiling and Grouting Phase
Step 3 in swapping your tub for a sleek new shower: Pick the right tile and test it out, then choose your grout color and type
Full Story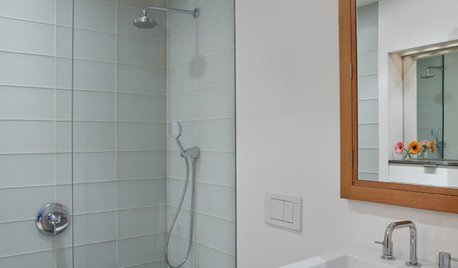
BATHROOM DESIGNConvert Your Tub Space to a Shower — the Planning Phase
Step 1 in swapping your tub for a sleek new shower: Get all the remodel details down on paper
Full Story
BATHROOM DESIGN21 Dream Showers Let You Soap Up in Style
These sensational showers have it all: spectacular design, luxurious materials and sleek high-tech features
Full Story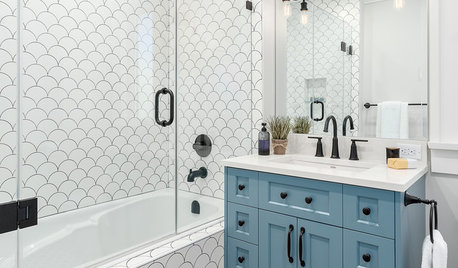
BATHROOM DESIGNShower Curtain or Shower Door?
Find out which option is the ideal partner for your shower-bath combo
Full Story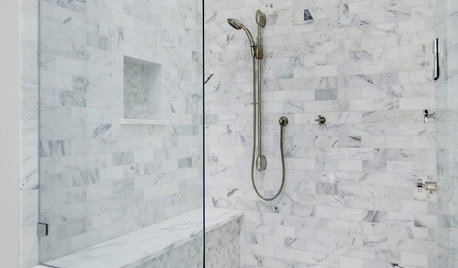
BATHROOM DESIGNConvert Your Tub Space Into a Shower — Waterproofing and Drainage
Step 4 in swapping your tub for a sleek new shower: Pick your waterproofing materials and drain, and don't forget to test
Full Story
BUDGETING YOUR PROJECTDesign Workshop: Is a Phased Construction Project Right for You?
Breaking up your remodel or custom home project has benefits and disadvantages. See if it’s right for you
Full Story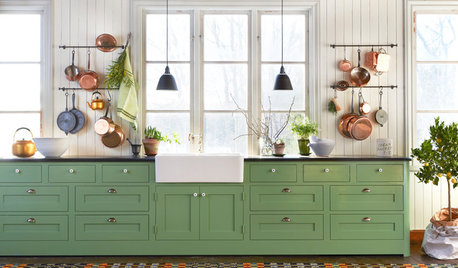
KITCHEN STORAGE7 Reasons to Hang Your Pots and Pans on a Rail
Well-placed utility rails are popping up in stylish kitchens. Here’s why you may want to consider one too
Full Story
BATHROOM DESIGNBefore and After: 4 Bathrooms That Ditched the Tub
See how designers removed bathtubs in favor of sleek walk-in showers in these bathroom remodels
Full Story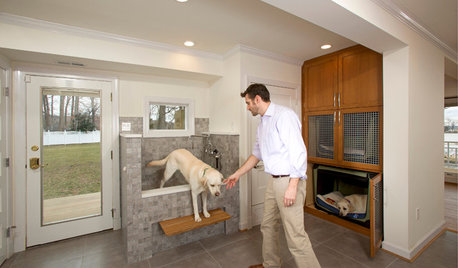
LAUNDRY ROOMSA Laundry Room With Bunk Beds and a Shower for Muddy Dogs
Custom cabinets with dog beds and a new step-up dog shower turn a laundry room into a hardworking hot spot
Full Story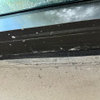

PPF.