


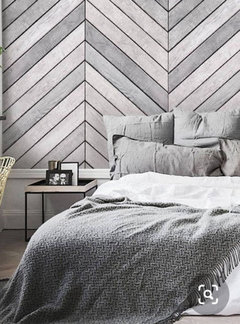
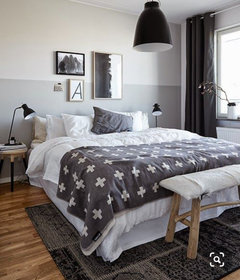
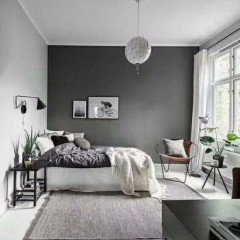
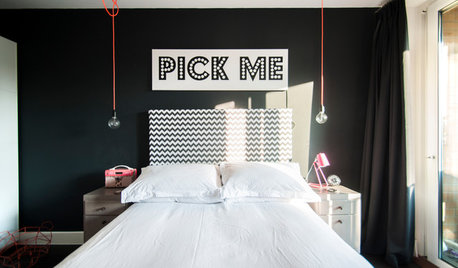
I need some advice on brightening up my son’s bedroom.
Shamim Temour
3 years ago
Featured Answer
Sort by:Oldest
Comments (9)
Related Discussions
Need some help/advice on my old house
Comments (12)Removing Paint from Siding. There are two tools that, in our experience, are very good at taking paint off siding, and a lot better than the traditional heat and scrape, or scrape and sand methods.. 1. Silent Paint Remover is one. This tool is a GIANT STEP above heat guns and the dangers they cause. The other is 2. Paint Shaver. This is a mechanical, high speed stripper that uses replaceable carbide blades. Which one we use depends on the paint to be removed. Silent Paint Remover is slower, but does a very neat job requiring very little sanding. Paint Shaver is faster, but takes a bit of practice to remove the paint without putting a lot of crescent-shaped divots in your siding that require a lot of sanding out. One mistake to guard against using this tool is setting the depth adjustment for too-aggressive a cut. You don't need to remove all the paint, just the loose paint, so don't try to get down to bare wood in one pass. When you are removing paint, you hope the original painter did a lousy job so it will come off easily. If he was good at his job, it's going to come off hard no matter what tool you use. Keep in mind that the EPA lead abatement rules govern the safe removal of any exterior lead paint. As a homeowner, they may not apply to you, but follow them anyway for everyone's safety. Both of these tools are commonly available at a deep discount over retail from e-Bay and Graig's list. We have used and cannot recommend the Metabo or Wagner machines. They don't work nearly as well as the suggested machines. Repairing Plaster To repair cracked or falling-off true plaster you need to reattach it to the wood or metal lath underneath. The traditional way is with screws and plaster washers. These usually extend proud of the wall, making them difficult to conceal except with thick coats of patching plaster. The better way is to glue the plaster to the lath. There is a commercial kit to do this called Plaster Magic which we like, but which we also think is pretty expensive. We just use our own, locally available materials, that work just as well and are a lot less expensive. Here's what to do: 1. Using a concrete bit, drill about 3/8" holes in the plaster until you hit the lath -- do not drill through the lath. You will feel it when you reach the lath. You will want to drill about 1" on both sides of any crack, putting a hole about every 4-6" along the crack. Its a judgment call. Drill as many holes as you think you will need. If in doubt, more is usually better. For large loose areas, drill about every 4"-6" in the field and every 4" around the perimeter of the loose plaster area. Sometimes you will hit the gaps between lath strips. Don't worry about it. Just move about 1" away and drill again. 2. With your trusty shop vac, suck the plaster dust out of each hole. This is important, plaster dust interferes with the adhesive. 3. Using your caulk gun and a good construction adhesive (we like Power Grab, but any quality adhesive should work. In a pinch, we have used most of them at one time or another and none have failed.) squirt a good glob of adhesive into each hole. This will probably be messy, so have some mineral spirits and rags around to cleanup any drip-out. 4. Make a bunch of 4" square wood washers. You can make them out of job scrap. We use 1/2" or 3/4" OSB most of the time just because it happens to be around. Drill a hole in the center of each washer - 3/16" or 1/4" ought to do it. 5. Line the washers up with the holes you drilled earlier and, using a drywall screw, attach the washer to the wood lath beneath the plaster. You don't need to screw into every hole, about every 4-6 holes is a good rule of thumb. What you want to do is put even pressure over the loose plaster area and draw it back to the lath. This will allow the adhesive you just applied to bond the lath tightly to the plaster once again. As you tighten the screw, you will feel the plaster draw in. DO NOT try to sink the screws all the way in one go. Draw them in gradually moving from screw to screw. This lessens the risk of cracking the plaster further. When all the screws are sunk, you are done until tomorrow. Go have a beer. 6. After 24 hours, remove the screws, put them back in the box (they can be reused) and throw the washers away. The plaster is now stuck solidly to the lath once again. There are no screws or washers in the wall - so finishing the plaster is much simplified, and this fix is strong. The adhesive sticks like, well, like glue. 7. Using patching plaster, a setting joint compound, or even regular joint compound, patch the screw holes, cracks and fill in any missing plaster. The purists will tell you that joint compound has a different texture than real plaster and is softer, so you should not use it. It does have a different texture and is softer, but so what? The paint will hide any differences. 8. We recommend against paper tape on cracks. What we use is nylon screening -- the stuff in screen doors. buy a role from your hardware store and cut it into 6" strips while it is still rolled up -- its easy to cut with normal shop shears or even your utility knife. Use this in place of nylon mesh tape -- it works better. We embed it in a thin coat of joint compound, then, when the first coat of mud has set, mud over it. Its wider footprint is better at stabilizing cracks than narrow nylon mesh tape. In fact, we have never had a repair fail using this method. Removing Layers of Paint from Interior Trim Definitely use a commercial stripping service if you have one in your area. At $1.00 - $2.00 per linear foot, the price is well worth not having to deal with the mess of stripping in place or on saw horses in your garage. After stripping be sure to sand with a fine sandpaper to remove the fuzzing that stripping causes. Good luck....See MoreHow can I optimize my son’s room
Comments (16)Well, I'll be the odd-person and say that if I were you, I'd get rid of the shelf-thing. I'd try to make a memorabilia wall maybe, or get that stuff either on the wall decoratively, or in the closet, mounted attractively or organized. The blue is moody, and "cool" as in, a great color for a teen (if he likes it). Some bright art on the wall, or art with a lot of white in the background, and a lighter rug, will add some brightness to the room. I don't mind the sofa at all in there. He sleeps (and I like the queen), he studies (at an attractive and functional desk), and if anyone comes in (group projects, sleepovers), the couch is really nice. Plus he can drop his backpack there. I like it. It's the shelf unit that's not a "functional" object, imo....See MoreI've founds some bedding that I love! Need advice.
Comments (22)I'm not good at sewing so I googled how much yards of fabrics one has to use for one Euro sham https://findanyanswer.com/how-much-fabric-do-i-need-for-a-euro-sham#:~:text=This%20means%20that%20you%20require,the%20sham%20portion%20added%20in. so judging by that link-can take up to 4 yards of that fabric to make two shams. If you're doing the work yourself it's only fabric-if no, then of course you'll pay for labor as well. Not a lot in terms of saving. Also take into account it's dry clean only. To me would be a consideration. And I'm not the most change-your-bedding-often person out there. Gorgeous bedding, no doubt, in love with it myself. But many things to take into account. Now a bolster pilow will require less fabric I guess, and will be more decorative(I guess)-one can worry about it being dry clean only less. But in terms of pattern-might be a bit lost in a bolster shape. Their ready made sham is 375$ on their website. 319 $ on Overstock. Maybe to purcase only one? They also have smallish (14 by 14) pillow for 215$. Not sure about that, but as another way of introducing you favorite fabric for less.. I understand you falling in love with it. I'm always falling for the most expensive thing. In a store, online, whenever. Without knowing the price first. My remedy-either very small thing made by same designer/out of same fabric/etc. Or-to borrow from it its idea. Watercolor effect? Big florals? Luminescence? Hues you love? Or you can just buy it of course. Enormous sum of money ..yet they say it's a best seler in a very limited stock, so obvously there are enough people for whom it's not a huge conideration. Do ask about return policy if you're getting in touch with them. This set of theirs is pretty and washable..https://anngish.com/categories/597636/duvet-sets-dash-art-of-home/products/ysetdvsfq-ble/smokey-floral-duvet-set-dash-blue.. only it's 100% polyester, and to me a price still steep for polyester.. I'd do linen (my favorite fabric for bedding, even though cotton percale is great too)..try to find a coverlet that would double as a layer...add a pillow that's reminiscent of the bedding..or one Euro sham of theirs to know you have this exact bedding, only in small dosage....See MoreDark kitchen in NYC rental needs brightening up
Comments (23)Part of what it might be acceptable for you to do is how long you plan on staying in the apartment. I know things are evolving in the rental market and evolving there, but unlike people who rent in other cities and move every year or two, I know people who held onto apartment leases for years in Manhattan because of the difficulties of moving and rent control and such. I know people who have been in the same apartment for decades. I know someone who sublet an apartment in a tenement in Hell's Kitchen in the early 2000s from someone who had held the lease since the 1970s. Some of those people did all sorts of things in the apartment because the security deposit was of litle consequence over such a length of time. I have been looking at small studios in Manhattan for the last several years and it's clear that some of them have been lived in for a very long time by one person....See More
Shamim Temour
3 years agoShamim Temour
3 years ago


Related Stories
LIGHTINGChange Up Your Bedroom’s Look With Pendant Lamps
When table lamps seem snoozy or you want to save space, bedside pendant lights are a bright idea
Full Story
GREEN BUILDINGLet’s Clear Up Some Confusion About Solar Panels
Different panel types do different things. If you want solar energy for your home, get the basics here first
Full Story
BEDROOMSHow to Set Up Your Bedroom Lighting for a Perfect Night’s Sleep
World Sleep Day is March 15. Here are 5 bright ideas for lighting your bedroom for optimal shut-eye
Full Story
FLOWERS AND PLANTSBlanketflower’s Yellow Blooms Brighten Up Summer and Fall Gardens
Gaillardia aristata welcomes wildlife, shrugs off drought and poor soils, and can help restore grasslands
Full Story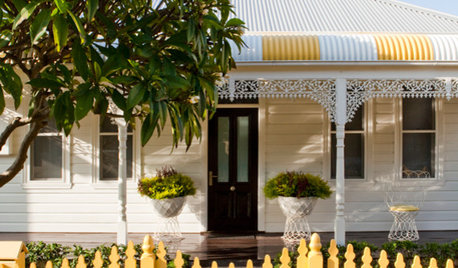
DECORATING GUIDESLighten Up — or Brighten Up — With Yellow
You can use this versatile color to create a buttery backdrop, add a zesty accent or make a bold design statement
Full Story
GARDENING GUIDESOn the Up and Up: Expert Advice for Growing a Green Wall
Houzz pros share solutions for 7 common challenges you can face with a vertical garden
Full Story
COLORWhy My Son’s Room Will Be Red: An Expert Weighs In on Colors for Baby
Historical facts, trend recaps and enthusiastic support for painting your nursery any darn color you like
Full Story
HOMES AROUND THE WORLDHouzz Tour: A Father and Son’s Compact Design for a Family Home
The new house in New Zealand makes the most of a tight site and a tight budget
Full Story
BEDROOMSRoom of the Day: Porcelain Inspires a Bedroom’s Saturated Color
Blue-and-white walls and accessories complement existing furnishings and a ceramics collection in an Atlanta guest room
Full Story
BEDROOMSPerk Up Your Bedding’s Personality
Nix that whole ‘bed in a bag’ thing in favor of artfully arranged separates that speak to the imagination
Full Story

Patricia Colwell Consulting