


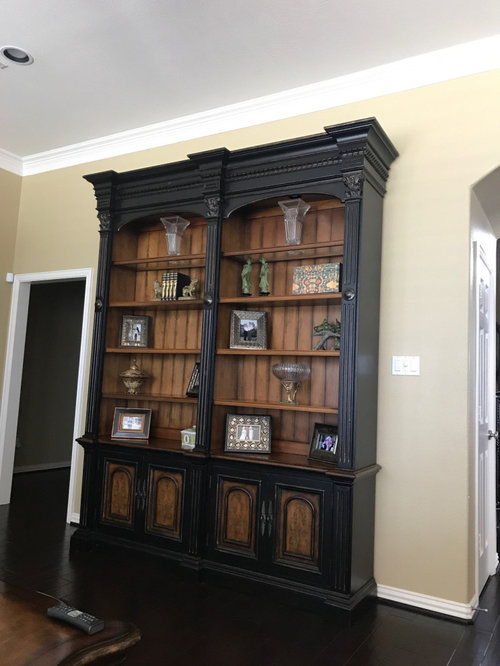
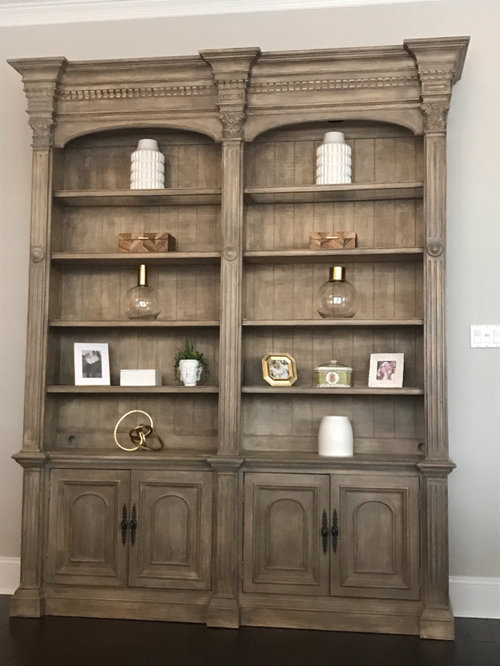
Before/after - bookshelf design help
Kelly Z
4 years ago
Featured Answer
Sort by:Oldest
Comments (16)

jmm1837
4 years ago
Kelly Z
4 years agoRelated Discussions
Secret bookshelf door's roller will ruin floor-help with support
Comments (8)My cabinet maker was able to do it with large hinges. It is strong enough for me to stand on the cabinet while it swings. Let me know if you want me to see if I can identify the size/brand/quantity of the hinges...I'm not near them right now. We had to trim the bottom of it after we added the area rug, so keep that in mind. From finire From finire...See MoreHELP ... Questionable results with Cabinet Coat on Bookshelf
Comments (4)Hi Faron -- thanks for the reply. Unfortunately disassembling is not an option -- it is built-in and has been completely fastened to the wall (plus the top/bottom/center shelf were dado'd and glued with screws). I do believe I could have primed more thoroughly -- some areas, especially those that were rolled probably didn't get enough primer. So, besides using a wider brush, is there a painting technique/method you would reco that would allow me to achieve a higher quality, more uniform finish? I am content to go slow, and get it right. What about something crazy like taping off the shelf bottom and top and painting just the sides and back one day, then removing tape and taping off the sides/back and painting the top and bottom??? Or, should I consider using a different product. I was so excited about the Cabinet Coat given the amazing reviews and the fact that this corner bookcase will be a real workhorse in the kitchen (holding phone, cook books, kids school info, etc -- along with some decorative pieces). But, maybe I should use something that doesn't have such a short dry time? I've already invested the almost $50 in the CabCoast, so I'd like to give it a shot, but I am a realist and wondering if I will be able to achieve a nice finish. Finally, one last question, let's take an example of painting a vertical 45"H x 20"W section (ie. the shelf back) --- if I start painting at the top and I am moving left to right, should I take a single brush width all the way from top to the bottom before moving tot he right? I have to admit, I am kind of confused by the description of "painting from dry into wet areas" -- I don't want to make this harder than it is, but haven't had great results so far, so ready to give it another shot the proper way!...See More95% done - now DH hates side bookshelf :)
Comments (21)Thanks all for siding with me:) I think I owe credit to the design to jbrodie, but that was before I learnt about clippings, so I'm not sure. Anyway, I digress. We solved the problem of the garage door not banging into the cabinet with a $1.28 door stop, so having the fridge there instead would not have that issue, at least, unless the fridge door is open more than 100 degrees and someone opens the garage door at the same time! Cabinet maker said $1200 to redo it all anew with base filler pull-out, and we get to keep the existing cabinet - we can re-use the bookshelf/cabinet and he would finish the wall side of it for us if we wanted to. GC agreed with me to leave it, which is why he came in at a high $900 to reframe the header to extend the fridge recess, something to do with the door header and existing studs and general re-work. Countertop company has not yet responded. Now, DH wants to just do the cabinet/counter portion! He says to live with the fridge sticking out until it dies, then get a counter depth one. I have coveted the 30" Liebherr for a while, but just couldn't justify tossing out my 6 year old working Amana for it. I think he definitely needs to contribute way more than $1200 to that fund!! We do now have plenty of other counterspace on the opposite side -- 6 ft of the peninsula (or 8 if you count the corner). He said 7-10" difference is hard to visualize in drawings and 3-D renderings, but the cabinets without counter have been in place for at least a week with just the plywood tops, although the cooktop just recently became usable. Not sure whether $1200+ more in the grand scheme of already being over budget lies....See MoreCan drywall holes be repaired strong enough for a bookshelf anchor?
Comments (12)If the wall is hollow. You will not need to spackle it. For to install a toggle you need a hole large enough for the toggle to go through and sometimes the hole needed is a little to large for the item being attached to cover.. This appears as if it could be a factor in the book case you show.. One solution..... Check for the proper hole size that the toggle will fit through. If it is smaller and will not show by bookcase frame. Good. If the hole is larger and would show once the shelf is mounted.. Remove the screw from the toggle. Place the screw through the shelf frame. Slide on a Rosette washer. It should be place between the wall and frame. Install the toggle until two or three threads are shown. Repeat for the other side of the frame. Position the shelf to where you can shove the toggles through the holes in the wall. May want a helper for this. Once both toggles are inside of the wall cavity. Tighten the screws alternating one side then the other until the unit is secured to the wall.. Rosette Washer can also be used if you are on a stud to hide any damage previous screws or drill may have caused with spackling. Rosette Washers can be gotten at just about any hardware store and they come in many styles and colors....See MoreShasta
4 years agocatpat66
4 years agodillobr
4 years ago
decoenthusiaste
4 years ago
K R
4 years agohollybar
4 years agolast modified: 4 years ago PRO
PROWindow Treats Inc.
4 years ago PRO
PRONorwood Architects
4 years ago PRO
PROJill Nelson Design Service
4 years ago- PRO
AHA
4 years ago  PRO
PROMeldium
4 years agoteamaltese
4 years agoskunst2017
4 years ago

Related Stories
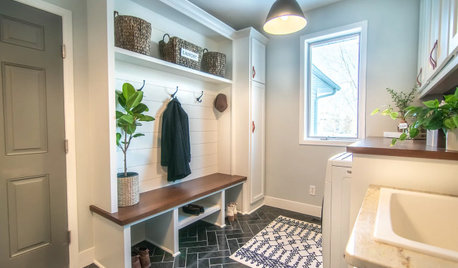
ENTRYWAYSBefore and After: New Mudroom Helps a Family Get Organized
A designer improves functionality while adding modern farmhouse style to a family’s landing zone and laundry room
Full Story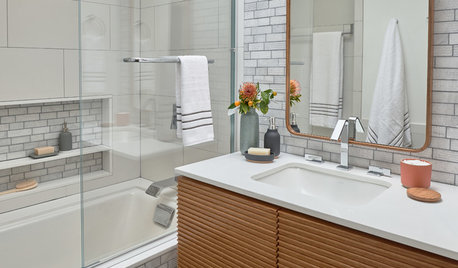
BATHROOM DESIGNBefore and After: 63-Square-Foot Bath With a Space-Saving Design
A family bathroom gains a spa-like look and a large tub-shower, separate toilet room and linen closet
Full Story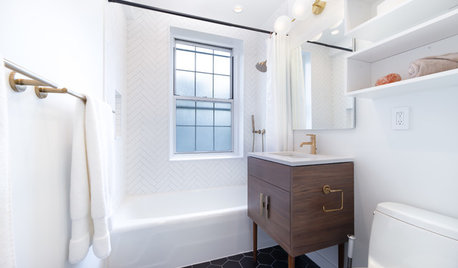
BEFORE AND AFTERSBefore and After: Stylish and Streamlined Small Bathroom
A design firm helps a New York couple update a 45-square-foot bath and avoid surprises by limiting material choices
Full Story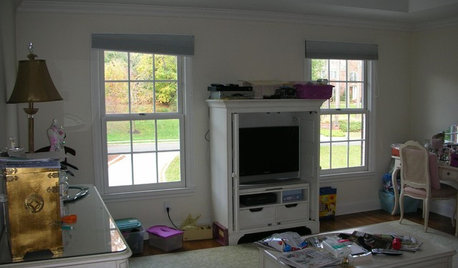
BEDROOMSBefore and After: French Country Master Suite Renovation
Sheila Rich helps couple reconfigure dark, dated rooms to welcome elegance, efficiency and relaxation
Full Story
BEFORE AND AFTERSBefore and After: Gray and Marble in a Serene Master Suite
A designer helps a California couple create an efficient and stylish space where they can relax, rest and rejuvenate
Full Story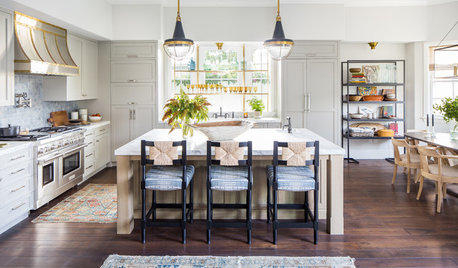
KITCHEN DESIGNBefore and After: 5 Open Kitchens That Work With Adjacent Spaces
Repeating colors, finishes and shapes helps these open-plan kitchens blend stylistically with the spaces nearby
Full Story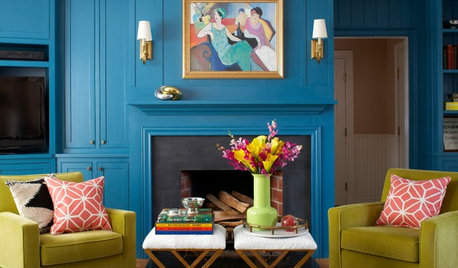
LIVING ROOMSBefore and After: Living Room Goes From Blah to Bright in 4 Days
See how a designer helps her client surprise his wife with a living room transformation for her birthday
Full Story
BEFORE AND AFTERSBefore and After: 5 Bathroom Makeovers With Fresh Palettes
See how pros helped homeowners update these spaces with new colors and materials
Full Story
BATHROOM MAKEOVERSBefore and After: Tub-Shower Combo Gets a Major Update
A mother-daughter bathroom in Toronto now has function and style, thanks to clean design and custom storage
Full Story
MOST POPULARBefore and After: 5 Laundry Rooms That Make Washday More Fun
Pretty wallpaper, pullout baskets and a bed for the pup help these laundry rooms work for their owners
Full Story


jmm1837