


Crispy baked chicken with skin on? Best technique?
linnea56 (zone 5b Chicago)
4 years ago
Featured Answer
Sort by:Oldest
Comments (12)
Related Discussions
Baked Chicken recipes please
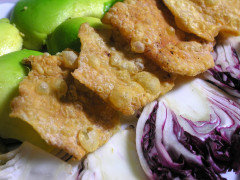
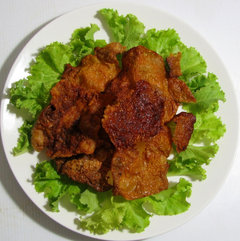
Comments (17)This is not a baked chicken dish, but it's quick and easy and fairly healthy. If you're cooking for a bunch of hungry kids, you might note that you can fit a five pound value pack of chicken thighs (cost around $6) into a 14 inch nonstick skillet (available at Sams for around $28) and have the entire batch cooked in 20 minutes. Worth getting a big nonstick skillet just for this recipe. Crispy Chicken Thighs This is more a technique than a recipe. I learned it from a recipe by Jacques Pepin. That recipe involves making a sauce, but the chicken thighs by themselves are tasty on their own even if you don’t want to bother making the sauce. You get crispy ‘fried’ chicken without a batter and with much less fat than regular fried chicken. Quick, extremely easy, and very tasty. From a food-science-geek standpoint, what you’re doing is rendering the fat out of the skin, and the skin fries in that fat, while the flesh side is steamed in the covered skillet by the vapors liberated in the cooking process. You can vary the seasoning if you want; a little bit of smoked Spanish paprika (‘pimenton’) or chipotle powder works well instead of or in addition to the black pepper. Penzeys has a spice mix called ‘Arizona Dreaming’ that works very well on this. So does lemon pepper (Penzey's 'Sunny Spain' salt free lemon pepper is very good on this) Ingredients 4 chicken thighs, skin on salt black pepper Procedure 1. Set the chicken thighs skin-side down on a cutting board. Trim any excess floppy skin. In the flesh side cut a ½ inch deep slash on either side of the thigh bone, parallel to the bone and about ½ inch away from the bone (this helps the thigh to flatten out somewhat). Season the thighs on both sides with salt and pepper. 2. Place the chicken thighs skin-side down on an unheated non-stick skillet. Only then turn the heat to high. When the chicken starts to sizzle, turn heat to medium and move the thighs around to make sure they aren't sticking to the skillet. Cover the skillet and cook for 16 to 18 minutes. Check the chicken occasionally to make sure it isn’t sticking. If the skin is browning too much after 10 minutes, then turn the heat to low. If after 18 minutes the flesh side doesn’t look quite done, flip the thighs and fry them flesh side down for a minute or two, uncovered. When done, serve....See MoreBest turkey techniques
Comments (34)Talking about turkey breast for two...here's what I have done with good results: I was feeling under the weather with the flu one Christmas and as there were just the two of us for Christmas dinner I made a change and instead of buying a whole turkey, I bought a whole breast, which I roasted with an orange, onion, jam and thyme glaze. The results came out so tender and juicy that even I was surprised. I made a quick dressing which I cooked alongside in a separate dish and made a gravy from deglazing the pan with the vegetable water and a little help from a teaspoon each of Bisto gravy granules, Knorr dry onion soup, cornstarch and an Avecrem chicken stock cube. Served with brussels sprouts, peas, carrots, mashed potatoes and gravy. So this is what I did: Ingredients: 2 TBS sugarless apricot jam 1 heaping TBS dried thyme + a little more for sprinkling on top 1 teasp garlic powder fresh ground black pepper 2 TBS runny honey 2 TBS butter 1 orange 1 onion cut into 8ths Turkey breast weighing 1.360 kg (slightly under 3 lbs) 1. Preheat oven to 350F (I used 325F in my fan oven) 2. In small bowl, mix the jam, thyme and garlic powder to a paste. Spread all over the turkey breast. 3. Cut orange in half and squeeze some of the juice over the turkey, then cut orange into slices and arrange under and on top along with the slices of onion. 4. Cut butter into pieces and dot all over and under breast, then drizzle honey over all. 5. Grind black pepper over top and sprinkle on a little more dried thyme. 6. Cover with foil and roast 1 hour, then remove foil, baste once with juices and butter in pan and roast for another half hour (without foil) or until a thermometer inserted in thickest part of breast reads 170F. 7. Serve with turkey dressing, cranberry sauce and gravy. SharonCb...See Morebaked chicken vs roasted chicken
Comments (10)As far as meat is concerned, I think the popular use of the two terms is the same, whether that's accurate or not. The temperature doesn't matter. The way to avoid dry meat, no matter what kind, is to use good quality meat and avoid overcooking it. Times you find listed are only an approximation, it's the internal temperature in the deepest part that matters. For chicken, about 155-160 is the right point for breasts and then let the pieces rest 5-10 minutes. Another approach that can be used for chicken is to brine it though the final target internal temperature is the same. I won't go into the details, the method is easily found. I buy skin on, bone in air cooled breasts and bake/roast them at about 375 deg. With no more preparation than a light rub of olive oil and a little salt and pepper, the skin comes out brown and crisp by the time the right internal temperature is reached. They're always moist and tasty....See MoreBest way to cook chicken breasts for chicken salad
Comments (24)Late to this. but I have a baked chicken breast recipe specifically for chicken salad that I use often - from a Martha Stewart cookbook. The meat comes out very moist and tender. I usually bake 2 skin-on, bone-in breasts in a pyrex casserole with a lid. I don't always make chicken salad with it tho, I more often use the meat in chef's salads or for sandwiches. Butter a baking dish and place the chicken in a single layer, then squeeze half a lemon or lime over both sides and salt and pepper generously. Sometimes I add some ground coriander, sometimes I use Old Bay seasoning instead of S&P. Season both sides of the meat, bake covered @ 350F oven for 35-40 minutes. Let cool in pan and use accordingly....See More
dcarch7 d c f l a s h 7 @ y a h o o . c o m
4 years agolinnea56 (zone 5b Chicago) thanked dcarch7 d c f l a s h 7 @ y a h o o . c o mdcarch7 d c f l a s h 7 @ y a h o o . c o m
4 years agolast modified: 4 years ago
plllog
4 years ago
linnea56 (zone 5b Chicago)
4 years ago

Related Stories

EDIBLE GARDENSNatural Ways to Get Rid of Weeds in Your Garden
Use these techniques to help prevent the spread of weeds and to learn about your soil
Full Story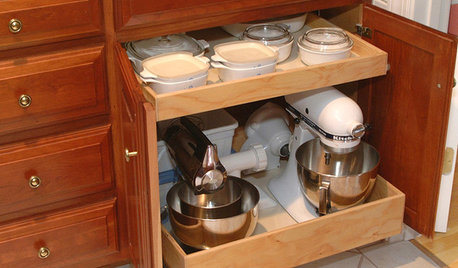
KITCHEN APPLIANCESConsidering a New Kitchen Gadget? Read This First
Save money, time and space by learning to separate the helpers from the hassles
Full Story
KITCHEN DESIGN7 Steps to Pantry Perfection
Learn from one homeowner’s plan to reorganize her pantry for real life
Full Story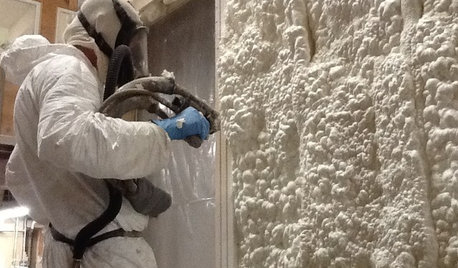
MATERIALSInsulation Basics: What to Know About Spray Foam
Learn what exactly spray foam is, the pros and cons of using it and why you shouldn’t mess around with installation
Full Story
HOUSEKEEPINGHow to Clean Your Fridge, Inside and Out
Keep your refrigerator clean and fresh, while you gain storage space and lose those ‘UFOs’
Full Story
HOUZZ TV FAVORITESHouzz TV: Life, Love and Purpose Down on the Farm
A Missouri native proves that you can go home again — and discover something entirely unexpected
Full Story
BATHROOM DESIGNA Designer Shares Her Master-Bathroom Wish List
She's planning her own renovation and daydreaming about what to include. What amenities are must-haves in your remodel or new build?
Full Story
HOUZZ CALLShare Your Sheltering-in-Place Accomplishments
Let’s celebrate small victories and say how we’ve managed to pass the time at home
Full Story
MOST POPULARHow to Get Rid of Those Pesky Summer Fruit Flies
Learn what fruit flies are, how to prevent them and how to get rid of them in your home
Full Story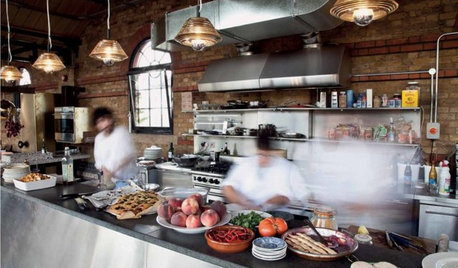
KITCHEN DESIGN16 Practical Ideas to Borrow From Professional Kitchens
Restaurant kitchens are designed to function efficiently and safely. Why not adopt some of their tricks in your own home?
Full Story


sushipup1