


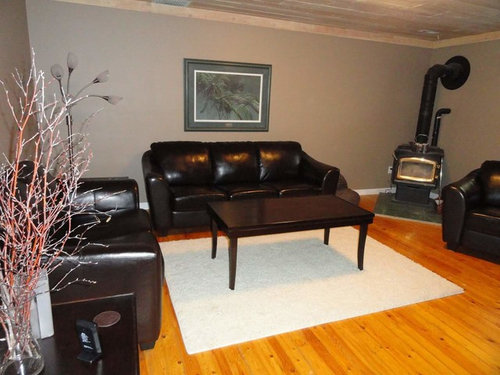
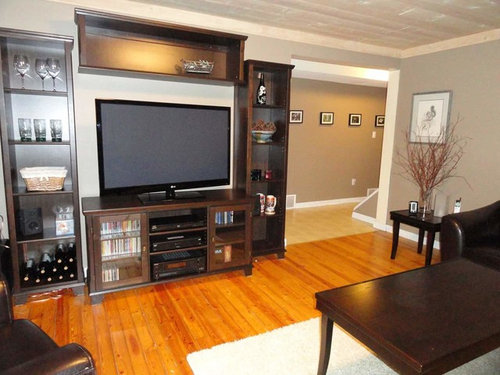
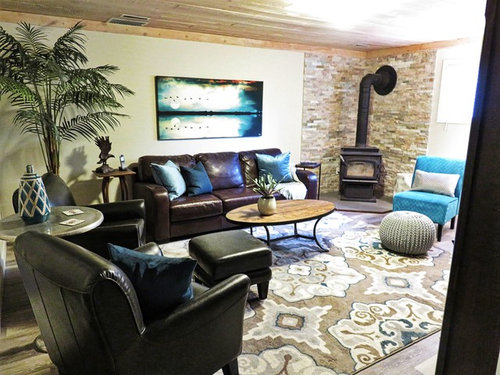
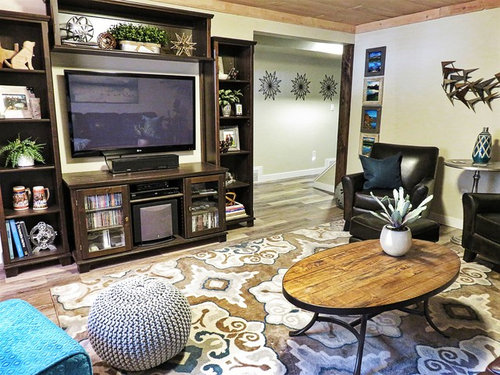
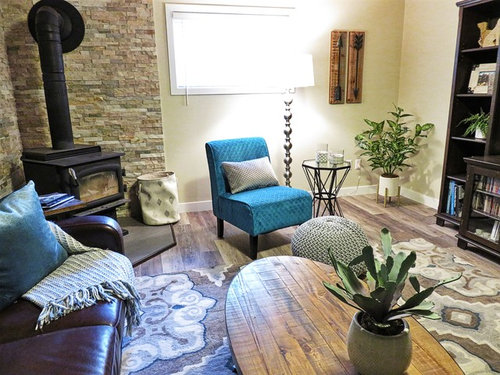
DIY Family Room on a Budget Reveal Before/After Pics
RenoGirl
5 years ago
Featured Answer
Sort by:Oldest
Comments (33)

teeda
5 years ago
JustDoIt
5 years agoRelated Discussions
Modern Kitchen and More Reveal - Before and After
Comments (87)Weird - I didn't even notice that the number of pictures went way down. It's very good information for anyone doing a reveal thread who enjoys before/after pictures. All the pics are copyright (me), not anyone's site. With the laundry room we're caught between a rock and a hard place. It's in the garage right now, a long trek from anywhere and it's complicated but there are water/drain/dryer vent issues that cannot be reconciled at that location. To move the washer/dryer to the area with three bedrooms we would completely lose a bedroom or bathroom. We no longer plan on having it directly off the master bedroom, however by process of elimination it will either be off the master bathroom or (large) master closet. Luckily both areas are ideal in terms of utilities/venting and where laundry is generated, and they're reasonably easy to access from the other three bedrooms. Wish we could have a dedicated laundry room but the floorplan of the house pretty much eliminates that possibility....See MoreOver-budget budget yellow kitchen reveal
Comments (35)Awww, you are all so sweet. Lol laughable - dh now reads the paper at the TABLE! One of the deep drawers near the table is for newspaper recycling so the paper doesn't pile up. Beth - love love love the Super Susans. The shelves are not adjustable, but are very deep and they hold so much. I was surprised to find that the lid holder fit so well. The really big stockpot lids are on top of the pots to which they belong. It is nice to not have to dig for lids in a lower cabinet. The baking ss easily holds canisters with 10 lbs. of flour, 10 lbs. of sugar, brown sugar, xxx sugar, measuring spoons & cups, lots of bowls, etc. The bottom shelf of that one also holds serving trays, serving bowls, vases, and tons of other stuff. My cabinet maker had only done lazy Susans, but said he would try the ss. Dan is a true miracle worker and does beautiful work. He took a weird, old, uneven-walled kitchen and turned it into a miracle of storage. Other than a few 1/2" fillers, there is no wasted space. The toe kicks were built on site and everything was scribed to the walls. The finish is beautiful, durable yet soft looking. We almost went with Kraftmaid (it was a little cheaper) but to me it looked too shiny. I am soooo glad I asked raee who did her kitchen. I also was so lucky with Scott from Tuscarawas Valley Construction. He made our lumpy old plaster walls perfectly smooth and untangled a truly terrifying nest of electrical. We will be hiring him to build our deck once the finances are better. He is also the only person who has ever noticed that in our hall bathroom the toilet handle (chrome) does not match the other ORB fixtures. He is very detail oriented and a perfectionist. The soapstone fabricator was a bit of a disappointment. There a few minor uh-ohs with the soapstone, but we can live with it. The entire ordeal, from demo to kitchen sink install, took 4 1/2 weeks. Scott left the kitchen sink intact for the first week of that time. I had scheduled everyone so as to finish in 3 weeks, but the 4th of July and too much work coming in for the soapstone people interfered with the schedule....See MoreGreige Kitchen Reveal (before and after pics!!)
Comments (47)THANK YOU so much for all the wonderful feedback! I'm sorry I've dropped off the face of the earth but btwn going back to work after 2 weeks off and having a sick kid at home I feel like I've been hit by a fast moving train... I wish I knew how to hyperlink back to specific people so I can respond directly but I will try to address a few questions that I've seen! Table -- we definitely had to replace that sucker! It was Pottery Barn circa the mid-90's, and was very "well loved"!! We did have a smart idea that actually my PAINTER suggested -- we painted it (the same color as the island, b/c we had a lot of it left over and loved the color - Black Fox), and moved it up to our playroom to use as a game table (took the leaves out). It looks like a million bucks, and it's so nice to be able to reuse it! I do love our new table (which was the last thing to arrive, just last week!). I definitely wanted round so we had more space to navigate, but we were torn btwn 60 and 54"... Went with the smaller one which is perfect for five, but might be tight for more people! But, I do think any bigger would have been a little crowded down at that end of the room. I had to keep reminding myself to think about our day to day needs as opposed to much more infrequent entertaining or hosting situations. Day to day it is perfect!! And yes we did just keep our existing chairs and reupholster. Tried to tie in a couple of "pop" colors (turquoise and orange) so it was not so monotone. We also had considered painting the chairs to match the table more closely, but I like the contrast of the wood! Here is a close up picture (with one chair removed): Hutch -- definitely was a great idea to hide clutter! Funny story: My 11 yr old took one look at it once the glass was installed and was horrified! "Mommy did you actually PAY for it to look that way? It's all spotty!" :) Very funny to see things through the eyes of a child!! Here's a close up of the mirror: Oven/Range -- I hope I love my griddle some day! I'm really intimidated by it. I actually bought steaks to make on it tonight. I wish I could find a griddle cookbook!! Please lmk if anyone knows of such a thing! I need to just keep trying and hopefully the love will grow... :) My husband uses it for breakfasts but that's about it so far! Outlets - we did include just one pair of outlets at the hutch, and tbh we have not really plugged anything in except the phone. So we have an outlet and a phone connection in there. Otherwise, we put an outlet on each end of the island (facing the window wall). We do not have any outlets on the other side (facing the pantry wall), which sometimes is annoying but mostly I would use it for my laptop, and I can just reach around. Aesthetically it would not have been the best. Also, for some reason my GC was very down on installing plug mold under the cabinets. He did not want to put it in, and I did not want outlets on the backsplash. Ultimately he put regular 2-gang outlets (?) up under the lip of the cabinets, mounted against the bottom of each cabinet -- genius idea. So now I have two plugs (if that makes sense) under each of the three cabinets. Definitely more than I need! And we put a couple of outlets in the coffee bar, and had a couple on the walls. So far so good! Floors - One more thing I'm really glad we did while we were redoing the floors, which I never would have thought of, is to replace our old metal A/C registers with wood ones that are flush with the floor. My GC suggested it, and I think they were like $10 a piece -- another genius idea!! They look SO great compared to the old ones! I love the small updates that end up making a big difference! Microwave - this was a tough decision as well. We were going to put it in the island, but I was worried about it being too crowded wherever it went. We really only use it for popcorn and an occasional reheat. It's definitely not a super convenient location, but I thought it was the lesser of two evils! (ie in the way, or out of the way!!). It is also nice to be able to close those doors and not look at it, too. TV over fridge -- someone on this site gave me that suggestion, literally at the very last minute, and I'm really glad we did it! Funnily enough, my husband wanted to put it between the two windows by the table, but then I realized we would not be able to see it b/c of the light fixture. So then he wanted to put in recessed cans, which I briefly considered, but I really like having a hanging fixture there. So over the Refrigerator it went. Here is a picture of it taken from the family room with the TV cabinet open. A great side benefit, which we did not plan for, is that apparently my husband can sit on the sofa and watch two football games at once, since we arched that doorway -- he can clearly see it from the other room! While I'm at it, here is a pic of the kitchen from the Dining Room (other doorway). I was hesitant to put the oven against the wall b/c this is literally the view you have as you walk into my front door -- you can see through the dining room and into the kitchen. But, I figured, it's a beautiful appliance, and at some point you just have to make the best decision you can with what you have. It was either on the island (I was not crazy about having a ceiling-mounted hood), or against the wall, so the wall is where it ended up. Last thing -- this is pretty much off topic, but I wanted to share my favorite "score" during our reno!! Unfortunately we had some scope creep, and since we were redoing the floors, we ended up redoing a couple of bathrooms and the laundry room - partially... Husband did not want to rip and replace cabinets b/c after all it's just a laundry room! So we kept the boxes, replaced the ugly doors, repainted inside and out, installed new floor tile that we found at Home Depot (previously had been linoleum), got new sink/faucet, and then I was left with what to do about countertops. I looked and looked at builder-grade granite, but it was all speckly and just not what I wanted. There were so many great options but all were more than I wanted to spend. One day at Home Depot I happened upon the laminate area, and lo and behold, there was a laminate in the SAME PATTERN as my quartzite - Mother of Pearl! I ended up spending $325 on the countertops, which I think look AWESOME, and coordinate w/the rest of the house really well! I'm afraid that if there is such a thing as over sharing, I crossed that boundary LONG ago... Sorry for such a long post!!!!!! Oh and the pig - I do love that guy! He is a pitcher actually. Still need to do some work on "accessorizing" a rather monotone kitchen... I admit that I had to google towel pig and now I must try to find one!!! :)...See Morekitchen reveal and before/after!! (link to pics and sources!)
Comments (14)thanks, CEfreeman, you're so nice! we loved the space and the layout, but goodness did those pinky cabinets have to go! that pink oak was the trim all over the house... most rewarding painting project ever. the space was missing a microwave, and moving the cooktop off the island has been fantastic. i feed my two preschoolers there five times a day like a short-order cook. and when it's time to make cookies or pasta it's a great workspace! since the floor was there from previous owner, we had to get a maple that worked with its colors. a white shaker style was in my heart, but the home needed some warmth, earthiness and class. hard to inject into a 1991 boring home! that nook on the other side is actually all paperwork/junk drawers. the bottom right cab is an office pull-out file drawer. and the uppers hold all incoming mail/kids school paperwork/meds/etc....See More
My3dogs ME zone 5A
5 years ago
J J
5 years ago
marycharm
5 years agoSerendipity M
5 years agolizziesma
5 years agoUser
5 years agolast modified: 5 years agoNick Miller
5 years ago
havingfun
5 years ago PRO
PROMega Builders
5 years ago
cat_mom
5 years ago
Laurie Gordon
5 years ago PRO
PROHome Interiors with Ease
5 years agoNewhome2018
5 years ago
RenoGirl
5 years ago PRO
PROVerona Home Design
5 years agotackykat
5 years agoJ J
5 years agoRenoGirl
5 years agopamelamacleod
5 years ago
curlyq75
5 years ago
ingrid_vc so. CA zone 9
5 years ago PRO
PROOTM Designs & Remodeling Inc.
5 years ago
1stgarden
5 years agoRenoGirl
5 years agolast modified: 5 years ago PRO
PROKT tile
5 years agoartemis_ma
5 years agotrinityofsix83
5 years agoHU-4802054326652770
5 years ago PRO
PROStecki Construction
5 years agoRenoGirl
5 years ago
Related Stories
HOUZZ TOURSBefore and After: Family Home Refreshed for a New Lifestyle
A couple turn to a trusted designer to update their home for their changing needs and a future resale
Full Story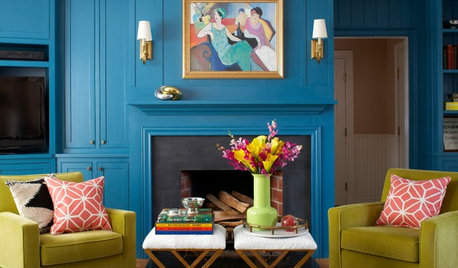
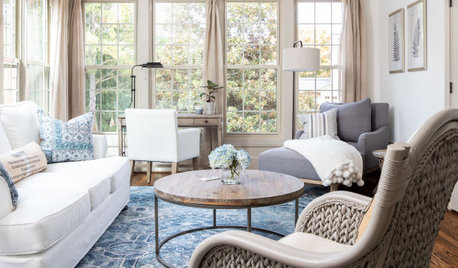
LIVING ROOMSBefore and After: Living Room Goes From Blah to Bright in 4 Days
See how a designer helps her client surprise his wife with a living room transformation for her birthday
Full Story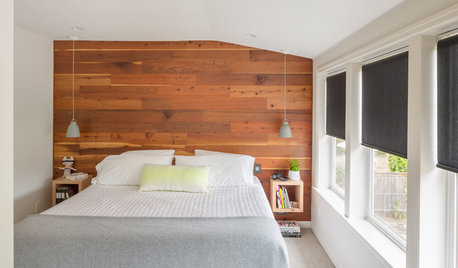
BEDROOMSRoom of the Day: An Upstairs Suite Makes Room for Family
Efficient space planning, increased storage and light finishes transform an underutilized second floor
Full StoryDINING ROOMSRoom of the Day: Grown-Up Style in a Family Dining Room
Easy-care fabrics, a lighter color palette and a great furniture save help a Boston-area family get the transitional look they were after
Full Story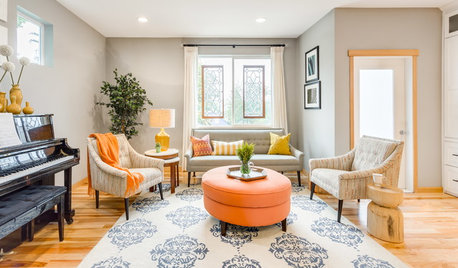
DECORATING GUIDESRoom of the Day: Something for Everyone in a Seattle Family Room
Family members downsize to a home that will shorten their commutes and give them more time together — much of it spent in this room
Full Story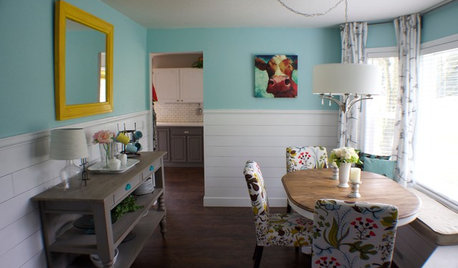
ROOM OF THE DAYRoom of the Day: A DIY Dining Room Full of Cheer
Seeking an uplifting spot during gray days in Washington state, this couple brightened their space with turquoise paint and DIY spirit
Full Story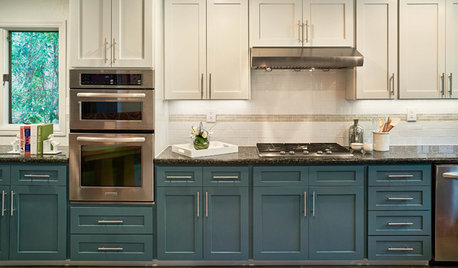
KITCHEN OF THE WEEKKitchen of the Week: Refacing Refreshes a Family Kitchen on a Budget
Two-tone cabinets, vibrant fabric and a frosty backsplash brighten this eat-in kitchen
Full Story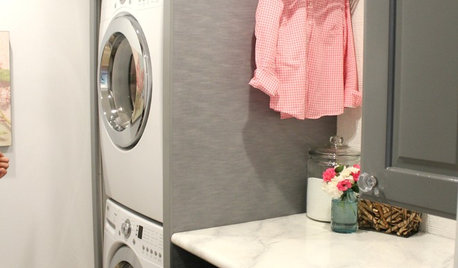
LAUNDRY ROOMSSee an Amazing $400 Laundry Room Remodel for a Family of 8
Budget shopping and DIY spirit create folding space, smart storage and better organization for a couple and their 6 kids
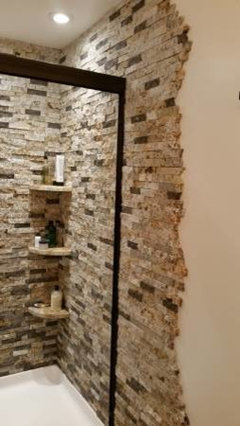
Full StoryBEFORE AND AFTERSSee a DIY Powder Room Transformation for $1,100
Determination, DIY skill and a stunning tile feature wall helped make this formerly dark and gloomy powder room feel spacious
Full Story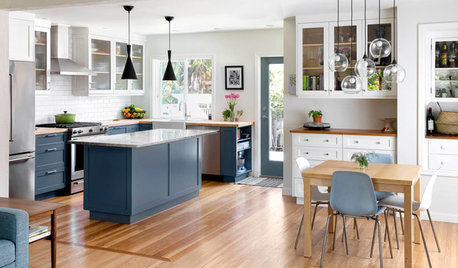
BEFORE AND AFTERSBefore and After: Bright New Look for a Chopped-Up Bungalow
The walls come down in a 1940s house to let in the light and give a family in British Columbia room to hang out together
Full Story

cawaps