


Room of the Day: A DIY Dining Room Full of Cheer
Seeking an uplifting spot during gray days in Washington state, this couple brightened their space with turquoise paint and DIY spirit
Mitchell Parker
March 18, 2015
Houzz Editorial Staff. Home design journalist writing about cool spaces, innovative trends, breaking news, industry analysis and humor.
Houzz Editorial Staff. Home design journalist writing about cool spaces, innovative... More
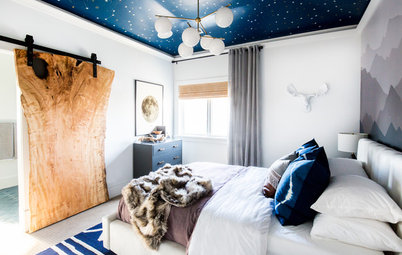
If you’ve ever been to Washington state, then you know things can get a bit dreary when the gray winter rains settle in. That’s why Emily and Scott Baker decided to make their dining room a beacon of cheer inside their otherwise monochromatic home. “I wanted at least one room that was happy and made me smile when I walked in,” Emily says.
The stay-at-home mom and her Army helicopter pilot husband updated the room themselves, building furniture, mixing snappy paint colors, installing shiplap siding and more. Eye-opening turquoise walls and a vibrant yellow mirror make the new space anything but drab. “Crazy bright color is a coping strategy that cheers me up,” Emily says.
The stay-at-home mom and her Army helicopter pilot husband updated the room themselves, building furniture, mixing snappy paint colors, installing shiplap siding and more. Eye-opening turquoise walls and a vibrant yellow mirror make the new space anything but drab. “Crazy bright color is a coping strategy that cheers me up,” Emily says.
Before Photo
Room at a Glance
Location: Roy, Washington
Who lives here: Emily Baker, a stay-at-home mom and blogger working on her real estate license; her husband Scott, an Army helicopter pilot; and their 2 kids, ages 3 and 1
What happens here: This is a bright retreat during dreary weather and where family meals happen.
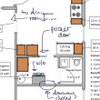
Size: The room is 8 feet, 6 inches by 11 feet, 8 inches, with a bay window that adds about 20 square feet.
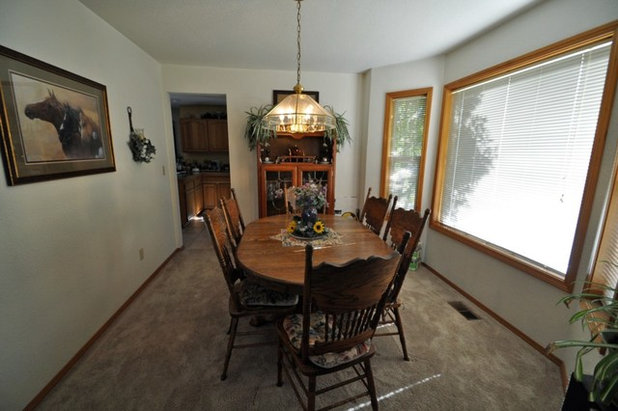
BEFORE: The home was last updated in the 1990s, and Emily and Scott didn’t care for the honey-colored oak trim. “It was a bit boring and needed a facelift,” she says. This photo was taken before the couple had moved in, so the furnishings were not theirs.
Location: Roy, Washington
Who lives here: Emily Baker, a stay-at-home mom and blogger working on her real estate license; her husband Scott, an Army helicopter pilot; and their 2 kids, ages 3 and 1
What happens here: This is a bright retreat during dreary weather and where family meals happen.
Size: The room is 8 feet, 6 inches by 11 feet, 8 inches, with a bay window that adds about 20 square feet.
BEFORE: The home was last updated in the 1990s, and Emily and Scott didn’t care for the honey-colored oak trim. “It was a bit boring and needed a facelift,” she says. This photo was taken before the couple had moved in, so the furnishings were not theirs.
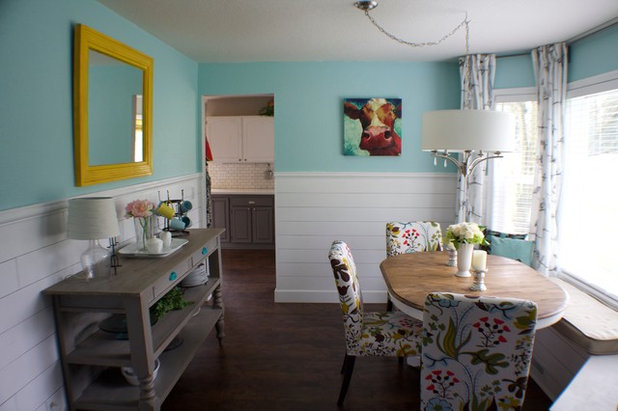
AFTER: Emily chose the paint first: turquoise, her favorite color. “It was kind of a risk, but it’s my house and I like it,” she says. “Plus, paint is so easy and cheap to change.”
She says she picked a couple of sample paint colors from about 1,000 swatches and tried them on the wall, but nothing looked right. When she randomly poured two samples together, she found her match. She painted that onto a piece of paper and took it to the home improvement store for them to scan and create the paint. “Some people call it Tiffany blue, but I don’t know what it is,” she says.
For inspiration, Emily compiled photos she found on Houzz and used those to guide her decisions. “I am definitely not a professional decorator,” she says. “But I love to look at pictures of what others have done and emulate that and make it my own.”
She chose horizontal planking based on photos she saw on Houzz. “I know it’s trendy, but it’s my house and it’s what I wanted,” she says. “Some decorate with the next buyer in mind. I want my home to look nice, and the next person can do whatever they want with it.”
For the horizontal planking, Emily had ¼-inch-thick plywood cut into 6-inch-wide strips. She glued those up, put finishing nails in, then painted the boards white. Most strips are 8 feet long except on the long wall, where they are cut and staggered. The couple used nickels to set the spacing between each plank. They first eyeballed the height they wanted, then measured to a spot that would give them even planks. They settled on eight planks capped with a chair rail.
The couple built the window bench themselves after finding a tutorial online.
Next came the flooring, for which they chose laminate wood. “We have a dog and kids in muddy Seattle, so we went with cheaper flooring because we knew it’d be beaten up a bit,” Emily says.
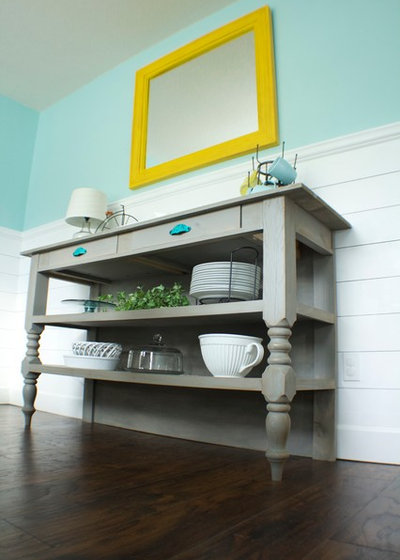
She found an online tutorial to build the buffet out of 1-by-4s for $140. The front legs are bedposts she found at a thrift store for $15 each. She tried a gray stain at first, but that didn’t work. So she then combined two different gray paints, filled up half a paint can with the mix and watered it down with 3 or 4 8-ounce glasses of water. She started brushing the paint on until she was happy with the coverage.
While Emily has a lot of knickknacks passed down from her mother, she’s had to put most of her pieces away as the kids get older and grabbier. “I call them my childproofing consultant team, because they will always come in and show me where the weaknesses are,” she says.
Emily bought the mirror at Goodwill for $12.99. She then used leftover baseboard and molding to make a chunky frame that she painted yellow.
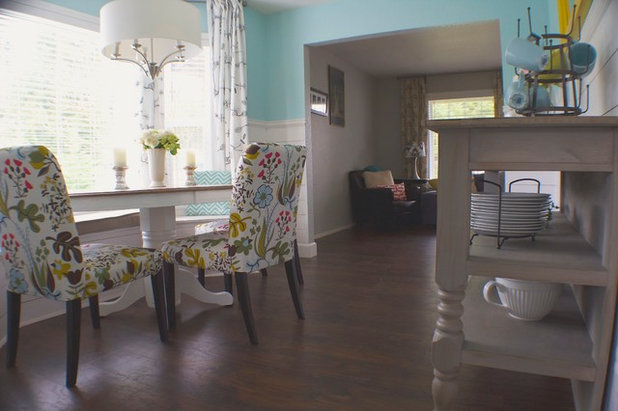
She bought the dining table at ReStore for $19, brought it home, sanded it down, stained the top and painted the bottom white. The chairs are from Ikea and have slipcovers that the couple can remove and wash — handy with two kids.
And just when did this couple manage to remodel a dining room with two small kids in tow? Mostly late at night after the kids were asleep. “I don’t know how they slept through us using power tools downstairs,” Emily says.
See more Rooms of the Day
Drum shade: Lowe’s
And just when did this couple manage to remodel a dining room with two small kids in tow? Mostly late at night after the kids were asleep. “I don’t know how they slept through us using power tools downstairs,” Emily says.
See more Rooms of the Day
Drum shade: Lowe’s


We care about your home construction project needs as much as you do. We believe in conducting business with... Read More
What are you working on?
Related Products


Related Stories
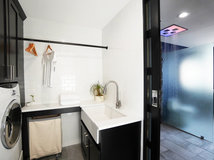
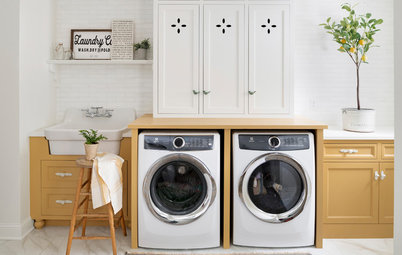
Laundry Rooms
Loads of Function in a Classic Black-and-White Laundry Room
By Becky Harris
A designer incorporates expansive storage, a drying rod, a generous sink and a counter for folding
Full Story

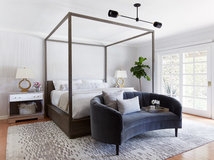
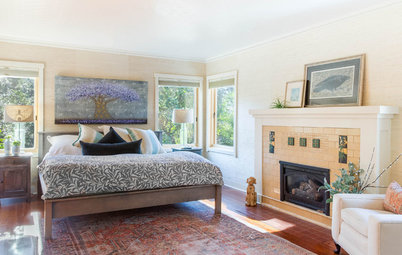
Bedrooms
Soothing Whites and Grays Create a Refreshing Master Bedroom
Strategic changes help a California master bedroom go from dark and heavy to light and bright
Full Story
Basements
A Light, Bright Basement Inspired by Midcentury Design
By Becky Harris
Designers create an organic and airy feel in this underground space in Toronto
Full Story
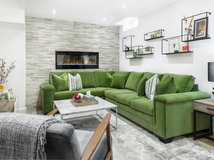
Living Rooms
A Sliding Door Hides the TV in This Attractive Living Room
By Erin Carlyle
See how a designer transforms the barn door concept using walnut veneer and modern styling over a fireplace
Full Story
Before and Afters
100-Year-Old Craftsman Home’s Master Suite Lightens Up
A designer balances architectural preservation with contemporary living in this Northern California remodel
Full Story
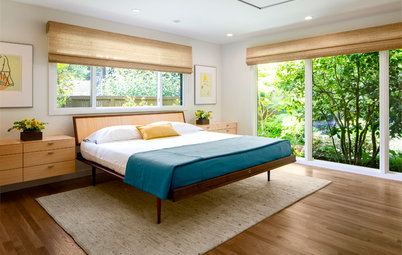
Bedrooms
Warm, Minimalist Style for a Master Suite in Oregon
By Becky Harris
Garden views, built-in storage and nods to Japanese design contribute to a calm and beautiful retreat
Full Story
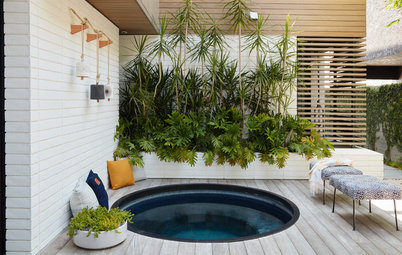
Landscape Design
Relaxed Courtyard Celebrates Indoor-Outdoor Living
Sliding glass walls open up to connect the living spaces in this Southern California retreat
Full Story
Laundry Rooms
A Warm and Bright Laundry Room to Welcome a Family Home
See the inviting vibe a designer created for this renovated Minneapolis room off the garage
Full Story
Kids’ Spaces
Nods to Nature and ‘Star Wars’ in 2 Boys’ Bedrooms and Bath
Bold color, graphic patterns and custom murals create a kids’ zone designed to grow up with brothers in Utah
Full Story
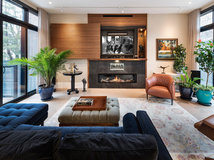
Living Rooms
Sand and Surf Inspire Look of New Great Room With Pacific Views
A designer renovates a coastal California living space to highlight its amazing views and create a chic beach vibe
Full Story
I notice in the before picture that there is a vent below the large window. How did you compensate for that when you covered it with the window bench?
To me room looks chopped up and too busy, no focal point. Furniture looks exactly like what it is garage sale and thrift store pieces.
What about bringing back that BEAUTIFUL dining table and bring light into the rest of the room in other ways, and leave dining table showcased as the focal point of the room?
Also, a consultation from a professional decorator to get some guidance is affordable at a one time fee. Sorry, but I felt I had to give my opinion, even if I am in the minority.
I don't think that there is an issue with design elements in this room. I think that margaret94546, who is entitled to express her opinion, just doesn't like the style of this room. I suspect her style is more structured and traditional, as well perhaps she's not fond of the tourquiose. Anyone given oodles of money can make a room fabulous. It takes real imagination to pick up thrift store finds and make them appealing. My home office space was gutted and I renovated it for $500 which includes furniture. Everything is used and either painted or re-purposed except for a chair, a rug and the flooring. I did manage to get a grey colored office chair afterwards