

KT’s personal New layout FAQ
8 years ago
last modified: 8 years ago
Featured Answer
Sort by:Oldest
Comments (38)
 8 years agolast modified: 8 years ago
Related Discussions
Tile FAQ
Comments (0)1) What is the difference between ceramic and porcelain tile? Which is best for indoor flooring and why? How do I know when I am buying a good quality, durable tile--are there ratings I need to be aware of? Answer: In all actuality, porcelain IS ceramic tile, just made with a much denser clay, and fired at much higher temps. As for which is best, all around porcelain is the answer. It's harder, will take much more abuse, and won't chip scratch, or stain as easily as most others. In addition, it'll stand up to much higher and lower extremes temperature wise. However, especially for residential applications, most glazed floor tiles will stand up to whatever you have in mind. There are two indicators to the quality of the tile you're interested in, when it comes to glazed tile-- first, the PEI (Porcelain Enamel Institute) rating, which rates the hardness of the glaze on a scale of 1-5 as follows: CLASS 0 - Tiles technically unsuitable for floors CLASS 1 - Residential and Commercial wall and bare foot traffic CLASS 2 - Wall and Residential bath floor, soft soled traffic CLASS 3 - All residential floors and Light Commercial CLASS 4 - Medium Commercial, Light Industrial and Institutional, moderate soiling CLASS 5 - Extra heavy traffic, abrasive dirt, chemically more resistant. Secondly, although some may disagree, and there ARE exceptions, price is a good indicator. For the most part, you get what you pay for, and although two tiles may look exactly alike, there may be a big difference in the hardness of the glaze, as well as the density of the bisque, or body of the tile. 2) My tile's/ grout's cracking! What's happening? Can I just replace it? Answer: Any time tile or grout cracks, it's a SYMPTOM, not a problem, and just repairing the tile or the grout will not take care of it. Until the REAL problem is found and rectified, the same tile or area of grout will continue to crack, no matter how many times you replace it. 99% of the time, it can be attributed to seasonal movement in the structure, either under, or surrounding the tile in question, and the tile needs to be isolated from that movement. Sometimes it can be as simple a fix as adding soft (caulk) joints. Other times, it may be necessary to either add joisting, or beef up the existing joisting to minimize the deflection of the floor. What the fix is depends on the individual problem, but in all cases, again, the problem has to be identified and resolved before the cracking will stop. 3) How good is premixed thinset? Answer: Premixed thinset is nothing more than organic adhesive (mastic) with a fine sand mixed in to give it some bulk. For wall applications where mastic is appropriate, it's fine, although I don't see any advantage over traditional mastic. But for the use it was intended, that being replacing portland cement based latex modified thinset, it's an extremely BAD idea, for several reasons. First, ALL mastics are formulated to be used in very thin applications. The thicker it's used, the longer it takes to dry, and for some of the heavier notches that are used in flooring installations, it never completely dries. I personally know of one case where premixed thinset was used on a floor in April, and the following November, it was STILL soft. ANY kind of pliability will cause flex in the tile, which will cause the tile floor to fail, allowing either tile, grout, or both to crack. Secondly, even if it's used in a thickness that WILL allow it to dry, all it takes is a little moisture to cause problems. All mastics are water based, and any moisture will allow the mastic (or premixed thinset) to re-emulsify which, again, causes a failure in the floor. 4) Do I really need thinset under my backerboard? Answer: The short answer is ABSOLUTELY. The manufacturer requires it, and if, for some reason, there's a problem with the floor afterward, you've immediately lost any kind of warranty protection. Now, there's a big controversy in the industry right now concerning the TYPE of thinset to use. The manufacturers, for the most part, recommend latex modified thinset, whereas the Tile Council of America (TCA) recommends UNmodifed, or dryset thinset. The reason is that the thinset isn't there to bond the backerboard to the subfloor. If it were, then the modified thinset would make a difference. In reality, it's actually there to fill the paper thin voids between subfloor and backerboard, thereby eliminating another source of flex, or movement, and extending the life of your floor. 5) What size trowel do I need? Answer: This all depends on the size and thickness of the tile, as well as how smooth or rough the substrate is, and how deep the embossed pattern on the back of the tile is. For the most part, 3/16" v-notch for ceramic mosaics (1x1 and 2x2) or mastic walls, and either 1/4x1/4 square notch or 1/4x3/8 for just about everything else. There ARE some exceptions though. If there is a question as to which you should use in your particular case, your best bet would be to go to and ask one of the pros there. You'll be sure to get a good concise answer. 6) Do I spread thinset on the tile, the floor, or both? Answer: Either or both. Usually floors are gridded out, and then the thinset is spread on the floor. It's a lot easier and quicker. However, for those who would rather backbutter the tile, that's fine, too, as long as you flat trowel thinset onto the floor to "burn" it into the floor. In other words, you want to make sure you get a good bond by pushing the thinset into the "grain" of the floor, be it concrete, backerboard, or plywood. 7) Can I tile right over my brick fireplace? Answer: Yes, you can. You might want to make sure the brick is clean and free of any contaminants, such as dust or soot (TSP-- trisodium phosphate works well for this). If the brick is painted, it needs to either be sanded or, if this is a renovation, sandblasted. Do NOT use any kind of chemicals to remove the paint, as they tend to leave behind residues that will inhibit the thinset bond later. Once the brick is clean, your best bet would be to flatcoat the brick with a latex modified thinset. This will do two things for you. First, it'll give you a flat surface to tile over, and secondly, it'll show up any errant bricks that might be sticking out too much, and they can be addressed before the tile is going up. Once the flat coat dries, you can take a rubbing stone to take care of any ridges in the thinset from the trowel. 8) Can I tile over sheetrock? Answer: So long as it's not a wet area (i.e. tub enclosure, shower area, tub deck, etc.) yes, you can. Even stone tile will adhere well. 9) Can I tile right over plywood? Answer: Yes, you can, and it's done on a daily basis. However, you really need to KNOW what you're doing. There are additional steps you need to take care of, as well as pitfalls to watch out for that either don't exist, or aren't as important when using backerboard (CBU-- cementitious backer units) as your underlayment. The thinset you use, how you lay your plywood down, how you SCREW it down, even the species and rating of the plywood used, all make a difference. 10)Can you tile over ceramic tile? Answer: Yes, you can, as long as the original tile is sound (i.e.-- no cracks, tile is still well adhered, etc.). You need to make certain there are no contaminants on the face of the tile, such as cleaner residue, solvents, skin or cooking oils, etc., and then especially if the tile is bright glazed, hit it with an orbital sander to rough up the finish and allow a better bond from the thinset, and use an UNMODIFIED thinset that's mixed with a liquid latex additive, as opposed to a thinset that's already modified and mixed with water. The reason being that with the liquid latex additive, there's more of a latex content, and therefore, a stronger bond to the original tile. 11) Should I seal my tile? Answer: Most tiles should NOT be sealed. Most glazed tiles, as well as porcelains, will not allow the sealer to absorb into the surface, and as a result, it dries on the surface as a white haze, which is a BEAR to remove. The only tiles which should be sealed are most natural stone tiles, quarry tile, or terra cotta. 12) Do I really need to seal my grout? Answer: There are a lot of contractors who will tell you yes, and still others who will tell you no. The reason for sealer is to make cleaning and maintenance easier. There has been a trend in recent years to use light colored grouts in the main floors of the home in order to match lighter colored tiles, and a sealer is used to prevent "wear paths"-- darkening of the grout joints in areas of main traffic in the home. Unfortunately, sealers will not prevent this. You're much better off to use either a medium or darker colored grout. As for using sealer in the bathroom, sealer WILL help, but again, over time, grout will discolor somewhat, or "age", and cleaners will be, for the most part, just as effective, with or without sealer. (Obviously, I'm one of those who doesn't believe in them) 13) Can I use mastic in my shower, or over my tub? Answer: Although on just about every pail of mastic it says "approved for wet areas", no, you can't. Mastic is used extensively in commercial projects for these kinds of areas-- places such as hotels, apartment buildings, college dorms, all use mastic in wet areas, because it's so much faster to install the tile, thereby reducing budget costs. However, they also have maintenance staffs, not to mention that these buildings get renovated every 5- 10 years, and from the contractor's standpoint, the work only has to be warranteed for one year. After that, it's not their problem any more. A home is a different story, though. You want your tile to last for years and years. Once it's up, you want it to STAY up, and last. The problem with mastic is that it's water emulsive, and even after being up for a while, it can still re-emulsify, become soft, and even wash out, causing your tile to fail. It's one of the leading causes of tile failure in wet areas. 14) Is tile or grout waterproof? Answer: No. Even with a grout sealer, most sealers used these days are "breatheable," meaning the moisture can transmit through it, both in and out, so even sealer won't make it waterproof. 15) How long do I wait before sealing? Answer: This depends on the sealer being used. Because of the different formulations, different sealers require different waiting times, anywhere from 3- 28 days, and the best advice I could give you is to check your particular brand of sealer for its recommendation. Generally speaking, there are two types of sealer base -- water and solvent, and the solvent based sealers generally require the shorter waiting period, but they're also much more expensive. 16) What is an isolation membrane? Should I use one? Answer: An isolation membrane is one made for the specific purpose of isolating ceramic or stone tile from movement in the structure on which it is installed. It can come in a couple of different forms -- trowel applied or sheet membrane. Either one is good, but the preference is usually for the sheet membranes, because of their greater tolerances for movement. To use an isolation membrane just as a general rule, it's not necessary. If you have any question at all as to whether or not there would be too much movement in your subfloor without it, then yes, it should be used, whether it be over concrete or wood frame. NOTE -- isolation membranes will greatly decrease the chance of your tile cracking if your movement is lateral (side to side-- in the case of concrete cracks, ones that open and close). However, there's not a membrane made that will address the problem of vertical movement. If you have cracks in a slab where one side of the crack is higher than the other, or in wood frame, where an addition meets the original structure, you'd be much better off to put in an expansion joint that that point. 17) Height of TP holders, towel bars, coat hooks etc etc. Answer: The best advice is wherever they feel comfortable to you. About the only one that would be somewhat difficult to figure out when it's time to install is the toilet paper holder, and the general rule is about 24-30" off the floor, and 18-24" forward of the toilet flange. As for the soap dish, you'd want to locate it somewhere where it won't be in the direct line of the showerhead spray, even though the traditional location (middle of the back wall, 6" from the tub) puts it right there. Putting it in the "line of fire" just gives water a chance to work its way behind the soap dish and shorten the life of your shower wall. NOTE: Some municipalities may require that these articles must be placed at heights determined by ADA Accessibility Guidelines. Please check with applicable agencies in your area from prescribed regulations. 18) What kinds of tile can be successfully used outdoors (ie: on porches, patios)? Any special techniques for installing? Answer: There are two types -- Vitreous tile, which has virtually no absorption, and porcelain, which only has approximately .05% absorption. As for installation techniques, the biggest differences are: 1), you want to use a thinset that gets mixed with a liquid additive, as opposed to one that's already modified. 2) you want to make sure you use either a polymer modified or epoxy grout. 3) You need to make sure the surface to be tiled is pitched at least 1/4" per running foot, to make sure water doesn't sit on the tile. 4) In the case of wood frame structure (for something like a deck) you want to make sure you use a good quality waterproofing membrane made for exterior applications. Noble's Nobledeck ( ) is a good example of this. 5) In the case of slab, you want to honor all expansion and control joints, making sure that you either position your layout so that a grout joint falls over them, or cut the tile along these joints, and either way, caulk them with a good urethane caulking. Latex or silicone won't be strong enough. 6) If there are any cracks in the concrete, or in the case of slab on grade, if you have a lot of sand or clay in your soil, or any other kind of ground that's prone to minor shifting, and isolation membrane designed for outdoor applications would be a real good idea. 7) You want to make sure that you do the installation at a time of year where the temperature (both air and surface) stays over 50 degrees F. Otherwise problems could occur. 19) Are there different kinds of sealers for different locations, such as bath/shower, floor, kitchen counters? Answer: When it comes to protectant type sealers, any penetrating sealer can be used in all places. The differences come in the finishing sealers. Do you want the wet or dry look? High gloss, or satin (matte) finish? Smooth or non-slip? 20) Should granite countertops be sealed? If so, how do I do this? Answer: Some should and some shouldn't. Your best bet would be to ask your distributor (or installer) whether your particular granite should or shouldn't be sealed. As a rule, though, if you put a wet sponge on granite, and when you remove it, it leaves a wet spot, it should be sealed with a good penetrating sealer, which can be wiped on with a soft absorbent cloth. 21) Can I lay tile over lino/VCT/VAT? Answer: There are those who say you can, and in some instances this is true. The problem is in properly investigating whether or not your particular case is one of those instances. There are so many variables, and ANY ONE of them could make your floor fail-- is your vinyl cushioned or not? Is it adhered well? In the case of lino, is it perimeter glued, or fully glued? Was there an underlayment used, or was it laid directly over the subfloor? (ALL underlayments used for lino are no good under tile-- any one of them will make a tile floor fail). When it comes down to it, it's a very risky proposition, and when dealing with the time and money investment required to install a new floor, why gamble with it? You're much better off to do it right and take out the vinyl, as well as any underlayment that might be involved, and then start your installation from the subfloor. This way you KNOW it'll be done so that it lasts. 22) Can you comment on the coefficient of friction with respect to choosing floor tiles for wet areas? Answer: Basically speaking, the wetter areas should have some kind of texture to the tile, so as to make them more difficult to slip on. The best rule of thumb is to avoid bright glazes for floors, including bathroom floors. A matte finish (or honed finish, in reference to natural stone) will always give better traction. As for showers, you're better off with ceramic mosaics for two reasons -- first, they tend to be more non-slip than most tiles, and secondly, their smaller size makes it easier to install a sloped floor without having corners sticking up. If not ceramic mosaics, I'd recommend something in the way of 6x6 or smaller textured porcelain or tumbled stone (IF you're ready to deal with sealing issues). I can't give you a textbook recommendation on coefficient of friction, but a gentleman by the name of Dave Gobis, who is the executive director for the Ceramic Tile Education Foundation in So. Carolina, and also one of the most knowledgeable people in the industry, just happened to give the textbook definition over at John Bridge's site a while back, and can be found by doing a search in the "Library". To make it easier, here it is, copied and pasted: C1028 Static Coefficient of Friction (or SCOF) In this test a tile to be used on a walking surface is tested by dragging a 50 lb. weighted sled over the surface of the tile and measuring the force required to just start the sled moving. A Neolite test pad is used as a standard friction surface. The SCOF is determined by dividing the force required to just start moving the weight by the 50-lb. test weight. For example, if 25 lbs. of force is required to just start the sled moving, then 25/50 is 0.5 and the SCOF is 0.5. The guideline that is generally accepted in the U.S. is that the SCOF should be at least 0.6 for a level walking area exposed to foot traffic and 0.8 for ramps. These are typical guidelines used by the industry. When water and grease contaminate the surface of the tile, the SCOF will lower. A worst-case is a mixture of contaminates. Proper cleaning solutions must be used to prevent build-up. A water extraction process after using a mild neutral cleaning product is preferred. Ceramic tile is generally waterproof and is easy to clean. Harsh acidic base chemicals should not be used as they can damage the tile and the grout. The areas of a home that require the greatest safety are those where a wet walking surface can occur such as the entryway. People walking in will have grit, water, and other contaminants on their shoes or feet. Once you get further into the house, for example, the kitchen, the SCOF may be lower and lower still in the bathroom. Sometimes the homeowner wants a glossy look with ease of cleaning. There is a trade-off between high SCOF and cleaning ease. 23) Is a wet saw worth the investment? Answer: It all depends on how much work you're going to do with it, and what KIND of work you're going to do with it. If you're just going to do a normal ceramic floor, most times, a score and snap cutter will take care of any straight cuts, and a 4 1/2" angle grinder with a CONTINUOUS RIM dry diamond blade will take care of the rest. The reason I emphasize the continuous rim is that there are also segmented and what's called "turbo" rim blades which will, indeed, cut the tile, but it'll also chip the edges all to heck. The continuous rim blade won't. I wouldn't use it for stone, though, especially marble or granite. Now, if you're going to have major footage, or multiple projects, or if you're installing any kind of natural stone, then it might be worth the investment. If you fall into one of those three categories, but really don't want to lay out the major money it takes to get a full sized wet saw, there ARE smaller ones available, but most times when I've advised people, I've recommended one of two things. First, you can lay out the money to buy a full sized saw, complete your project, and then list it in the classified or on Ebay. The saws hold their value well, so it might cost you 2-300.00 by the time all is said and done. Second, you can buy a saw used, again, thru the classifieds or Ebay. I've seen several brand NEW saws on Ebay for a fraction of the normal price, and personally know of two people who've bought their saws there, and both experiences were favorable. 24) What is "preslope" in a shower pan, and do I really need it? Answer: In a shower pan, the slope is the pitch from the perimeter to the drain. This allows 90% of the water to run down the surface of the floor and into the drain. Preslope is for that other 10% of the water that seeps into the floor's surface to be caught by the shower pan (floor) liner. It's a slope that goes UNDER the pan liner so as to make sure that any water that gets through the surface will seep down the liner to weep holes surrounding the drain underneath the shower floor, where again, it will be directed to the drain's pipe. Without this preslope, the water sits in the bottom of the shower pan, where it can become a major area for mold, mildew, and bacteria to fester and become a bad health problem. So, yes, you really need it. created by Bill Vincent...See MoreFAQ -- How do I get more responses to my posts?
Comments (3)Layout Help Threads... Issue: Lack of Pertinent Information...Some people don't read the "Layout Help" topic and post asking for help without giving us very much information about the poster's goals, family composition, plans for using the space, etc. Trying to design a kitchen in a vacuum of knowledge can be frustrating and can lead to "generic" kitchens and lack of responses because it's too labor and time intensive to draw the information that we need to help with a layout out of posters. See the "How do I ask for Layout Help and what information should I include?" FAQ topic. Often, the layouts themselves don't have enough information for us to work with. A full set of dimensions is very helpful! (again, see the "Layout Help" FAQs topic). If you're trying to decide whether to post a computer-generated drawing that shows the elevation (things shown as they will be against a wall with cabinets, etc.) vs an overhead plan (2D as seen from overhead) - choose the overhead! It can be computer-generated if it has alldimensions, etc.or a hand-drawn diagram using graph paper. Issue: Layouts with dimensions that are difficult to read. If I have to open a layout image in another window and fiddle with resizing and then still not be able to read the dimensions, I often bag it and move on to another thread. If you need to draw a layout/floorplan up by hand, keep in mind that it takes no drawing skill. All you need to produce a drawing to post here are: Good measurements of the room Graph paper which you can download and print from the web if you don't have any on hand Pencil & eraser (for sketching in the first lines) Straight edge (ruler, piece of plastic, triangle, etc., because even with graph paper it's easier to draw against a straightedge, and most kitchen lines are straight) Dark, fine or extra fine Sharpie (or similar marker/pen) to go over the pencil lines before taking a picture of it for posting. Without the dark pen/marker, most drawings are too faint. A camera or scanner to convert the drawing into an electronic version for posting here Using graph paper forces you to pay attention to scale....See MoreNew construction Kitchen layout
Comments (11)Welcome Cliftonite82! Based on the posted picture, both the Nook and Kitchen are 11'0" x 17'4" overall. What we don't have are the specific window/doors/wall measurements. Is this a builder's plan or one you found on the web? If the web, what's the URL? We might be able to find more information. In the meantime a few questions: Are you sure you can make changes? I know when we looked at a couple of developments I was told I could only make minor changes if I went with one of their plans - so that eliminated that option for building (all the Kitchens were poorly designed - all for looks, not function!) If you can make changes, to what extent? Can windows and exterior doors be moved/changed/eliminated? Can interior walls & doorways be moved/changed/eliminated? Can plumbing be moved? Do you have a picture of the entire floor? It helps us see how the Kitchen relates to the rest of the house and how traffic flows in and through/around the Kitchen. A full-floor layout will also help us to see how the rest of the home is designed and whether it can be improved as well (I would post it on the Building A Home forum for review/comments.) +++++++++++ To answer the questions you asked...the layout definitely needs work! As others have mentioned, the island is a major barrier island to the Prep Zone and Cooking Zone - the two zones in which access to the refrigerator is most needed. Where is the Family Room? It seems you would like to have seating b/w the Kitchen and FR. If the FR is below the Nook and Kitchen, there are stairs in the way. Can you move the stairs? -- OR -- Is the FR on the other side of the Nook (far left of the picture)? If so, I'd consider expanding the Kitchen into the Nook space and the island as well - with seating on at least two sides, maybe even three. Where will the family entrance be? How far will you be lugging grocery bags to get to the pantry - it seems very secluded. +++++++++++ I recommend reading the Layout Help FAQ and answering the questions in that FAQ. How do I ask for Layout Help and what information should I include? http://ths.gardenweb.com/discussions/2767033/how-do-i-ask-for-layout-help-and-what-information Kitchen Design FAQ Threads: Kitchen work zones, what are they? http://ths.gardenweb.com/discussions/3638270/faq-kitchen-work-zones-what-are-they Aisle widths, walkways, seating overhangs, work and landing space, and others http://ths.gardenweb.com/discussions/3638304/faq-aisle-widths-walkways-seating-overhangs-work-landing-space-etc How do I plan for storage? Types of Storage? What to Store Where? http://ths.gardenweb.com/discussions/3638376/faq-how-do-i-plan-for-storage Looking for layout help? Memorize this first. http://ths.gardenweb.com/discussions/2699918/looking-for-layout-help-memorize-this-first...See MoreNew build kitchen layout advice needed
Comments (16)Here's an idea: The counters and cabinets along the perimeter are all 3" deeper than standard: 28.5" deep counters 27" deep base cabinets 15" deep upper cabinets The deeper cabinets provide a lot more storage and the deeper counters provide more workspace. If your cabinetmaker does not offer 27" deep base cabinets, then simply pull standard depth base cabinets out 3" from the wall. Most, if not all, cabinetmakers offer 15" deep uppers. The Cleanup Zone and Dish Storage are near the Dining Room for ease of setting the table and cleaning off the table. They're also a direct shot from the Living Room. Dish Storage is in a 30" wide dish hutch. The upper cabinet goes from the counter up to the ceiling (or however high your uppers go). This gives you a lot of storage space for dishes, glasses, etc. With the deeper counters, the upper cabinet of the hutch is 15" deep so you can fit all your plates and platters. The two Prep Zones are separated from the Cleanup Zone, which allows you to have someone cleaning up while others are prepping/cooking. With two "primary" Prep Zones, you can have two people doing major prep work at the same time. It also provides you with a choice of where to prep - on the island or b/w the range and cleanup sink. As your toddler grows up, s/he will be helping in the Kitchen, so you will each have your own space! It also allows guests, etc., to help out during get togethers. With the prep sink offset, you have a wonderful expanse of workspace for large projects such as baking, cookie decorating, crafts, school/science projects, wrapping gifts, staging food during parties, etc. Both the MW drawer & wine cooler are on the sides of the island to keep people out of the main work zones. It really doesn't matter which side of the island they're on - you can switch them. I can argue for/against both arrangements. The refrigerator & freezer are on the periphery of the Kitchen for the same reason. The trash pullout is located so it's easily accessible from both Prep Zones, the Cooking Zone, and the Cleanup Zone as well as on the periphery. Small Appliances...There's a mixer lift for your stand mixer and the other small appliances can be stored in the 27" wide drawer bank across from the mixer lift. No appliance garage, but in all honesty, most people end up taking them out when they remodel b/c they take up too much counterspace and the what counterspace there is in front of the garage is useless b/c you don't want to block access. Better to store them where they can be easily accessed without having to move things around or even to shuffle appliances around in a smaller space inside a garage. With the drawers, they're all accessible without shuffling or taking up valuable counterspace. If there's room, you could also store them in the Pantry - 12" deep shelves hold the vast majority of standard small appliances. Cookbooks could be stored in the shelves of the 24" upper cabinet, if you'd like. I ended up storing mine in an upper cabinet next to my hood b/c I forgot to plan for them and that location is actually working out quite well! They're right were I need them! If you have dozens of cookbooks, they probably won't all fit, but you could at least store your most used cookbooks there on 1 or 2 shelves. I put in the Savigny range. It's still quite large, but at least you gained a few inches of workspace! The pantry is a reach-in, possibly step-in pantry with only 12" deep shelves. Built-in pantries are much more efficient and flexible storage if their shelves are not too deep - and they're less expensive! They provide a full view of what you have so there's no opening/closing drawers or roll out tray shelves looking for something Shelves can be adjustable for not only flexible storage initially, but if your needs change later, you can re-adjust them. If needed, you can store larger items on the floor. You have access to the entire space for storage - floor to ceiling. You can even use the side walls to hang a broom or mop. The "sweet spot" for pantry shelf depth is 12". Just about everything will fit on 12" deep shelves - cereal boxes, rolls of paper towels, cans, boxes, small appliances (food processors, mixers, blenders, breadmakers, standard size toaster ovens, toasters, waffle irons, etc.). The shallow depth doesn't allow you to store things too deep so things do not get lost. If you're concerned about organization, get bins or similar to organize smaller items on the shelves. The problem with 24" deep pantry cabinets is that they are not particularly flexible, things get lost in the back and in the "middle" of the roll out tray shelves (especially those above your chest), and if you're not quite sure where something is, you have to open/close multiple drawers/roll out tray shelves looking for the item. In addition, you only have "access" to the internal height of the pantry cabinet - usually quite a bit less than floor-to-ceiling b/c of toekick and limited cabinet heights available, Oh, and they're expensive. . Layout #1: . Layout #1 Zone Map: ....See More- 8 years agolast modified: 8 years ago
 8 years ago
 8 years ago
- 8 years agolast modified: 8 years ago
- 8 years ago
- 8 years ago
 8 years ago
 8 years agolast modified: 8 years ago
 8 years ago
 8 years ago
- 8 years ago
 8 years agolast modified: 8 years ago
- 8 years ago
- 8 years ago
- 8 years ago
- 8 years ago
- 8 years ago
- 8 years ago
- 8 years agolast modified: 8 years ago
- 8 years ago
- 8 years ago
- 8 years ago
- 8 years agolast modified: 8 years ago
- 8 years ago
- 8 years ago
- 8 years ago
- 8 years ago
 8 years agolast modified: 8 years ago





Related Stories
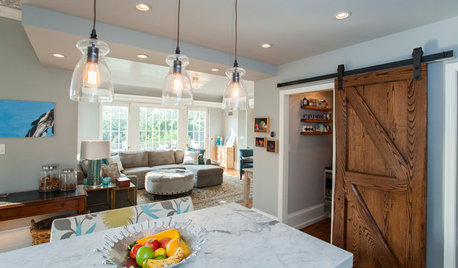
KITCHEN DESIGNKitchen of the Week: Barn Wood and a Better Layout in an 1800s Georgian
A detailed renovation creates a rustic and warm Pennsylvania kitchen with personality and great flow
Full Story
ECLECTIC HOMESMy Houzz: Family’s Personal Style Warms Up a New House
A Northwest family seeks out a kid-friendly neighborhood and makes a ‘development home’ their own
Full Story
ARCHITECTUREPersonal Spaces: It’s All About the Light
See 10 homes that worship the sun beautifully
Full Story
DIY PROJECTSDIY: Two Colorful, Personalized Gifts for Mother’s Day
Follow along to make a patterned photo frame or floral artwork using simple materials
Full Story
HOUZZ TOURSMy Houzz: Personalized Style in a Portland Painter’s Live-Work Home
Empty nesters bring DIY touches and industrial-style creativity to their 1908 Oregon house
Full Story
BEFORE AND AFTERSMy Houzz: Minimalist, Airy Style in a Chicago Family’s 1950s Home
See how these homeowners resolved their layout design dilemmas in a midcentury split-level house
Full Story
LIFEData Watch: What’s Great, and What’s Not, About a Smaller Home
Houzz asked more than 200 U.S. homeowners about life in 1,000 square feet or less. Here’s what they said
Full Story
HOMES AROUND THE WORLDHouzz Tour: 1980s Home Updated for a Family’s Modern Lifestyle
An architect helps his sister and her sons make a fresh start in an English row house
Full Story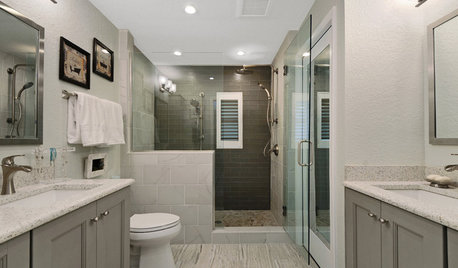
INSIDE HOUZZSee a Couple’s New Spa-Like Bathroom From Lowe’s and Houzz
The sweepstake winners’ master bathroom gets a makeover with a new shower, tile and storage space
Full Story
ARCHITECTUREWhat’s Fueling Austin’s Edgy Modern Architecture?
A look at the blossoming design scene in Texas’ capital city — and what’s behind all the experimentation
Full Story

ravencajun Zone 8b TX