

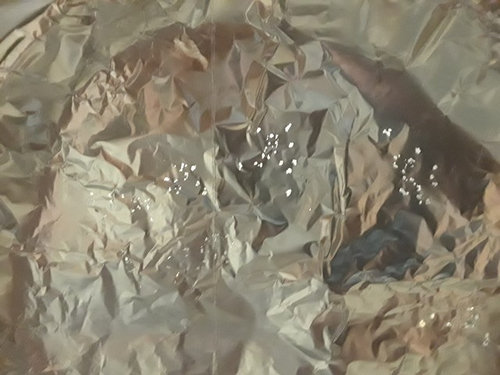
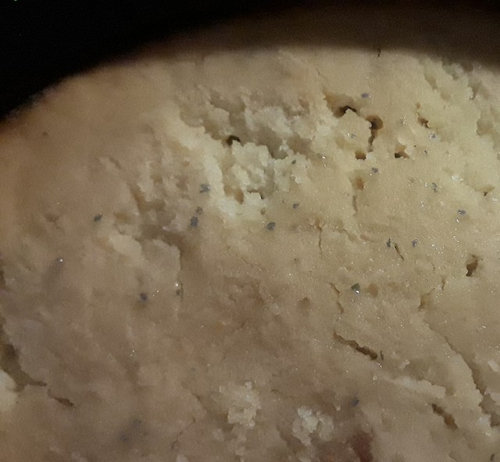
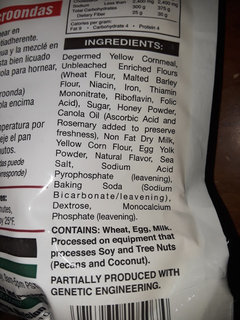
Cornbread melts aluminum foil?
8 years ago
Featured Answer
Sort by:Oldest
Comments (16)
 8 years ago
Related Discussions
My cornbread sucked
Comments (18)I posted this a while back; regular readers, please forgive the repetition. You have touched on a topic which people will debate with theological zeal, i.e., should corn bread have sugar and/or flour. The farther removed from the Deep South you are, the more acceptable such 'adulterants' (grin) become. I will grant a point to those who use sugar and flour: unless the quality of the corn meal is very good, cornbread made with just corn meal can be bitter. Meal can go rancid and stale pretty quickly. But cornbread made with fresh cornmeal, preferably stone-ground locally, is plenty sweet on its own. I generally only buy small quantities of cornmeal--just enough to make whatever recipe I'm making, and I buy it at a store that seems to have a good turnover of product. (That means not buying it at a gourmet store. No telling how long that stuff has been on the shelf.) Fortunately in my area of South Carolina there are a few grist mills not too far away that supply the local stores. Bernard Clayton's 'New Complete Book of Breads' actually has a listing for 2 different breads. One he calls "Yankee Corn Bread" (sugar, flour, yellow corn meal) and the other is Southern Corn Bread (white corn meal, no sugar or flour.) I find, though, that the freshness of the meal is more important than whether it's white or yellow. For those with access to good fresh meal I recommend this recipe for Southern Corn Bread, from Clayton (it's pretty similar to Jimster's prior post): 2 eggs, room temp 2 cups buttermilk, room temp 1 tsp baking soda 2 cups white cornmeal (but yellow is okay, too) 1 1/2 tsp salt Preheat oven and baking utensil (skillet or 9 x 9 pan) to 450 while mixing batter. In a small bowl beat the eggs and mix in the buttermilk. In a mixer bowl, mix the baking soda, cornmeal and salt. Pour in the egg-buttermilk mixture and mix well until smooth. Pour batter into the preheated pan, return to oven for 20 to 25 minutes. It's done when a knife inserted into the center of the pan comes out clean & dry. I use this recipe when I make cornbread dressing for Thanksgiving; a quadruple recipe just barely fits into a 5 quart KitchenAid mixer bowl, and into an 11 x 14 pan. Absolutely delicious. This is what you use to soak up the pot juices from cooking black-eyed peas or greens. I always called those juices 'pot liquor' but my wife wondered what the heck I was talking about when I used that term. I guess that's southern as well. If I seem to go on & on, please forgive me: I'm on Atkins and can't have any cornbread right now. When I lose another 20 pounds, though, I'm going on a carbo bender which will most definitely include a batch of this cornbread....See MoreFoil stuck to my caramels!
Comments (10)I'd use Reynolds Non-stick Foil the next time. That stuff is well worth the extra $$$ for the few jobs I use it for, but stuff truly doesn't stick to it (just be sure to use the correct side up, which is marked on the foil). I'd sit the pan on a heating pad and see if that warms it enough to un-stick it without melting the whole thing, or maybe placing it in a low oven - just guessing, no real experience. I haven't made caramels, but would it work on a Silpat? I dump the molten hot liquid for peanut brittle on a Silpat and it never sticks to that, and that's always been one of my favorite uses for a Silpat. -Grainlady...See MoreCornbread Help
Comments (28)Wild Haired Mavens - My BFF wanted a bean pot like my Memere's. It took us 4 trips to the Brimfield Antique Flea Market but we finally found one. That was 10 years ago and I think she paid $60 for it. Good luck in your search! :-) lindac92 - Boston Baked Bean are traditionally made with Navy beans but in our famiily we had both Baked Navy Beans and Baked Kidney Beans and yes the recipe is the same. Here's the one I use. 1 lbs. dried beans (kidney or pea/navy beans) ½ lb. lean salt pork 1 medium yellow onion, cut in half 1½ cups molasses 1 heapin’ tablespoon dry mustard ½+ cup brown sugar Hot water Rinse the beans in cold water. Remove any floating beans or debris. Drain the beans. Preheat oven to 250o. Adjust racks to bottom half of oven. Rub the inside of the bean pot with the salt pork. Place beans in bean pot. Add molasses, brown sugar and mustard. Stir mixture. Place onion halves in beans and press down into bean mixture. Place the salt pork on top of bean mixture. Add enough hot water to just cover beans completely. Cover bean pot and place in oven. Bake beans for 8 hours, checking beans every 2 hours, adding hot water to just cover the beans and stirring gently to incorporate. You will add the last of the hot water 2 hours before the end of the cooking time. There’s an old adage about the disastrous results of stirring the beans so use restraint or you’ll “bruise” the beans. During the last 2 hours, you should just barely be able to see the juice in the beans. Don’t add too much water toward the end or you’ll end up with soupy beans. Remove the beans from the oven, remover the salt pork and gentley stir. Serve directly from the bean pot or pour into a serving bowl. A lot of folks soak their beans before cooking, I don't, I just cook them longer. That way they get infused with all the flavors not water. I can bake 2 lbs of beans in each bean pot. I normally only use 12 oz. of salt pork for 2 lbs. of beans but if I am only making 1 lb. of beans, I still use a 1/2 lb. Not sure why but it seems to work best this way. LOL I typically serve this with "Church Relish" and either ham or hot dogs....See MoreCleaned oven but burned-on aluminum foil is stubborn
Comments (5)I’d put a baking soda paste on it. It’ll probably wipe up after a few hours. I have an enamel interior oven and have read not to use self clean. My installer said the same. Perhaps others have different experiences. I find baking soda and water paste left sitting in there works wonders. ....See More 8 years ago
- 8 years ago
 8 years ago
- 8 years ago
- 8 years ago
 8 years ago
- 8 years ago




Related Stories
SMALL KITCHENSSmall Living 101: Smart Space Savers for Your Kitchen Walls
Get organized with hooks, baskets and more to maximize your storage
Full Story
MOST POPULARThanksgiving Tales: When the Turkey Tanks
Houzz readers prove adept at snatching victory from the jaws of entertaining defeat
Full Story

MOST POPULAR33 Magic Household Cleaning Tips
Houzzers from around the world share their tips for transforming housework into child’s play
Full Story
HOUSEKEEPINGBaking Soda: The Amazing All-Natural Cleanser You Already Own
Battle grime, banish odors and freshen clothes with this common nontoxic cupboard staple
Full Story
GREAT HOME PROJECTSHow to Add a Radiant Heat System
Enjoy comfy, consistent temperatures and maybe even energy savings with hydronic heating and cooling
Full Story
LAUNDRY ROOMSOne of the Biggest Building-Code Offenders in the Laundry Room
A dryer vent specialist shares what to do — and what to avoid — to keep things safe and efficient
Full Story
UNIVERSAL DESIGNWhat to Look for in a House if You Plan to Age in Place
Look for details like these when designing or shopping for your forever home
Full Story
MOST POPULAROur Favorite Kitchen Storage Ideas Now
Make the most of every square inch with these clever cabinetry solutions
Full Story
HOUSEKEEPINGHousekeeping 101: How to Clean Silver
Learn from a pro how to properly clean and care for your precious silverware
Full Story
annie1992