


More on Seasoning as well as Bread and Sourdough
plllog
8 years ago
Featured Answer
Sort by:Oldest
Comments (6)
Related Discussions
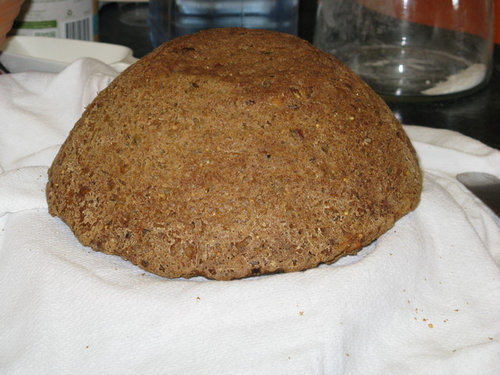
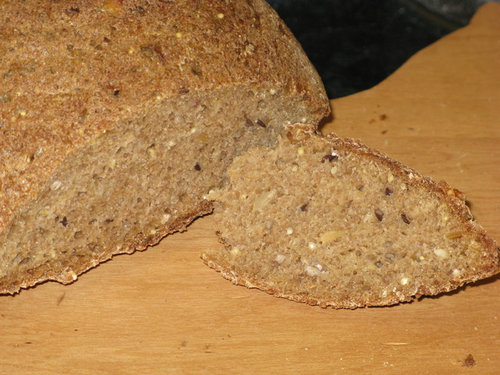
Sourdough Bread
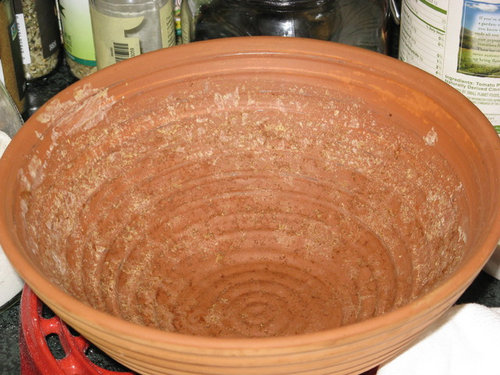
Comments (67)hm....to tell the truth I have never checked the temp of my starter or my oven with/without the light or my bread dough or the starter as I was getting it going ! My house is 68 all winter and then in the Summer we keep the thermostat on 78. Whatever time of year it is all seems to do just fine. I have never made an exception for my bread dough other than to place it in the oven with the door propped open with an oven mitt. That is how it is today with the dough I am currently making. It has to rest at "room " temp for 3 hrs...with stretch and folds every 30 min for the first 2 hrs and then leave it alone for one hour. Then shape and let rise one hour at room temp then retard overnight and bake direct from fridge in 500 degree pre-heated pots tomorrow. I just checked my oven temp with the light on and it is 73. That is where I do my apple yeast water and my starter after I feed it and that is where my first and only , current , stater got going. One of the things they caution is not to over feed your starter...as in until it doubles don't feed again. I followed the method I linked 4 yrs ago and didn't have a problem. I know others on the Fresh Loaf have had to try about 3-4 times to get one going. I used rye flour from my local health food store and bottled water ( that is important when getting it started) and King Arthur white AP flour. It could be that is the problem with your first starter is over feeding. As to the second starter I wouldn't worry at all about "bad" stuff growing at this point. The tiny bubbles and concept of "bad" are not a problem at this point. Simply carry on and move it to a slightly cooler place and feed/discard and definitely stir well and give it air via a loose cover. It should be fine. As to the other one after 6 days if it has bubbles and has a fine odor I sure wouldn't discard it either. I would take out half and feed it and leave it where it is about 75 for 24 hrs and see what is what. As to apple yeast water just chop up 100g of apple and put it in the quart jar with 2/3 full filtered water...it does love the 80's so use your oven with light. Stir very well every couple hours all during the day for 3 days - 4 days. It is ready to rise bread. The apples will always float and the water will be VERY fizzy ! You can hear it ! It does need a lot of attn and warmth the first 3-4 days and then it is completely care free and can be in the fridge for weeks at a time and not used. Once you get your other starter going....and I do urge you to go to TFL and read some of the discussions on getting a starter going...I will tell you how to store it when not in use for lengths of time...when I am gone on a bicycle tour I leave mine unattended in the fridge for months. Keep us posted. c http://www.thefreshloaf.com/search/node/debra%20wink%20starting%20a%20sour%20dough%20starter read the first two articles by Debra Wink...linked above and then the link below...you will know more than I do when done :) Debra's way always works !! c Here is a link that might be useful: TFL...link to a lot of discussions...See MoreSourdough Bread
Comments (4)1. Personally, I wouldn't use a freshly-made starter, I would feed the starter a couple more times to make sure I had a good colony of natural yeast growing in the starter. If your starter won't double in bulk when you feed it, it's not going to raise your bread dough. 2. You don't say whether your recipe uses starter only as the leavening agent, or both starter and baker's yeast. In recipes where the bread is raised with starter, I only use my Zo for mixing the sourdough bread dough - I don't allow it to raise in the machine. As soon as it's done mixing/kneading, I remove it from the bread machine and put it in a dough-rising bucket so I can monitor the rise. It takes sourdough a lot longer to rise than it does baker's yeast risen dough. Even on the sourdough cycle on the Zo, it may not be right amount of time. Then I bake the bread in the oven. If the recipe uses starter as a flavoring agent, and also uses a normal amount of yeast, then it should work to mix and bake in the Zo - as long as the amount of ingredients is correct for a loaf of bread. 3. Both fat and sugar have important jobs in breads. You don't say if you are making a lean dough or an enriched dough, and that would be helpful information, but I'm going to assume it's an enriched dough because it includes fat and sugar. There typically is only a small amount of each (with exceptions - such as a Portuguese Sweet Bread or brioche). The fat helps tenderize the crumb and keeps it from drying out as quickly as a lean dough. Depending on the type of bread you are making and the mixing method used, fat plays a vital part. If you want to skip the fat, don't use butter on your sliced bread after it's baked. If you want to skip sugar, don't use jelly or honey as a topping. If you are watching carbs - sugars - then don't forget the flour is jam-packed with them - as is applesauce. If you don't want sugar or fat in your loaves, choose lean bread recipes (Italian and French Breads) and skip the enriched breads (those that include sugar, fat, dairy, eggs - such as sandwich bread). 4. Splenda would NOT be a good substitute for sugar in a yeast bread. Bread isn't a good place for a no-calorie substitute. Sugar (honey, syrup) in a recipe provides food for yeast, flavor, tenderizes the crumb, keeps the crumb moist, makes the crust darker. You can't get those same results using a no-calorie sugar substitute. If you take some time and do a Google search on - care and feeding of sourdough starter - that will give you a lot of information about making and using starters. You will quickly find it's not one thing, there are rules and broken rules for it's use, it's a contradiction and as individual as the people who use it. Good luck with your sourdough bread. I hope you have good success and many more loaves to come... -Grainlady...See Morehow much nuts can you add to bread recipes, especially sourdough?
Comments (4)The weight of nuts, if there are too many, can affect the rise. With well developed, strong gluten in a white bread, you can get away with a lot and still get a good rise. With a less strong dough, I've managed up to about 20% of the weight of the flour in non-glutenous add ins, but none as heavy as whole nuts. Chopped would be better. For finely ground nuts, the texture of meal or flour, again, about 20% of the weight of the flour works fine. More than that might be possible, if you want to experiment. However you do it, don't substitute for any of the flour. Just add....See MoreJungle bread -- perfect sourdough flavor
Comments (5)I, myself, have been having issues that made me give up my beloved whole grain, so I've been doing more with white flour and figured I'd try some starter. I used to keep five starters but that was too much. I can make a rye starter any time I want, or just transition a portion of ww to rye in a few days. Similarly, I can get a ww low hydration starter by doing the math again and giving it a few days, and can make a new unbleached from the bleached any time as well. I have my "French" low hydration "levain" starter, which is 95% unbleached and 5% whole wheat, which I can easily transition a piece of to all unbleached, normal hydration, as well, so unless I'm making white bread with a wet starter (I'm more likely to make the levain style with the French style mix), I don't really need the unbleached. So I fed it bleached, pursuant to our discussions of mucilaginous goo. :) All the starters except the rye that died are children of Wubby, my original whole wheat starter. It takes longer to transition from a totally different flour, but still only about 7 days if you don't mind a little mystery flour in there. All of these are 200g, so not very much before they're fed up for use....See More
plllog
8 years agolast modified: 8 years agoplllog
8 years ago
Related Stories
KITCHEN DESIGNKitchen Ideas for Bread Lovers
Any way you slice it, a kitchen designed with bread in mind conveys warmth and homeyness
Full Story
FALL AND THANKSGIVINGSimple Pleasures: Celebrate Fall With These Special Traditions
Enjoy a meaningful autumn with seasonal ideas for decorating, cooking and entertaining
Full Story
GARDENING GUIDESCool-Season Vegetables: How to Grow Chard
A year-round garden favorite with a colorful stem, Swiss chard comes into its own in early spring and in fall
Full Story
OUTDOOR KITCHENSYour Guide to Grills and More for Great Outdoor Cooking
Learn the pros and cons of gas versus charcoal grills, and about neat add-ons that let you do more
Full Story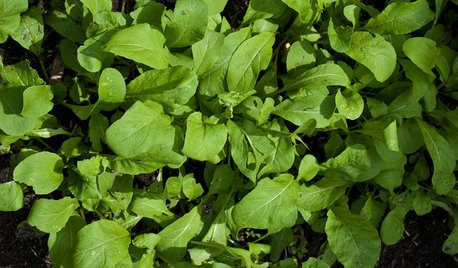
COOL-SEASON CROPSCool-Season Vegetables: How to Grow Salad Greens
From arugula to radicchio, greens have taken a top spot on the table and in fall and winter gardens. See how to start growing them now
Full Story
SELLING YOUR HOUSEHelp for Selling Your Home Faster — and Maybe for More
Prep your home properly before you put it on the market. Learn what tasks are worth the money and the best pros for the jobs
Full Story
DECORATING GUIDESYou Said It: 'Make It Easy on Yourself' and More Houzz Quotables
Design advice and observations that struck a chord this week
Full Story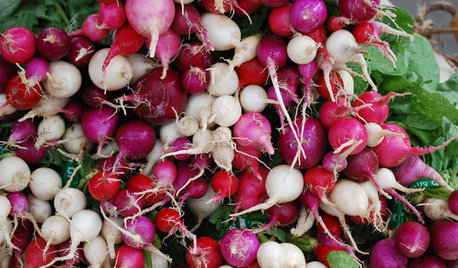
COOL-SEASON CROPSCool-Season Vegetables: How to Grow Radishes
Fast growing and bright, these easy-care veggies are great for kids and bring plentiful color to a fall or spring garden
Full Story
CHRISTMAS10 Easy Decorating Ideas for a Festive Entryway
'Tis the season for welcoming guests with wreaths, special lighting and plenty of comfy seating
Full Story
PRODUCT PICKSGuest Picks: Come to the Table
20 ways to update your tabletop for the entertaining season
Full Story
annie1992