


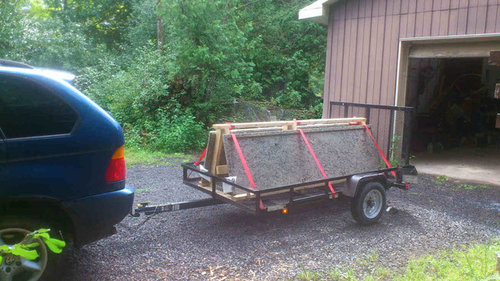
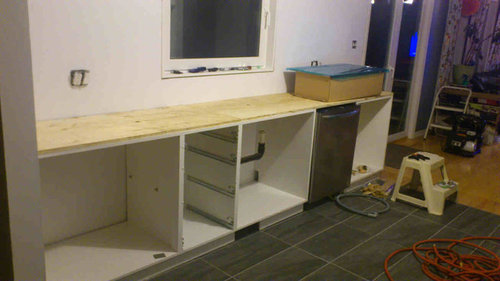
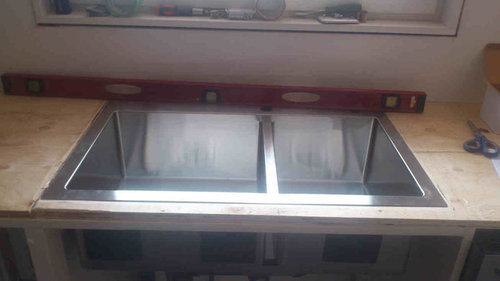
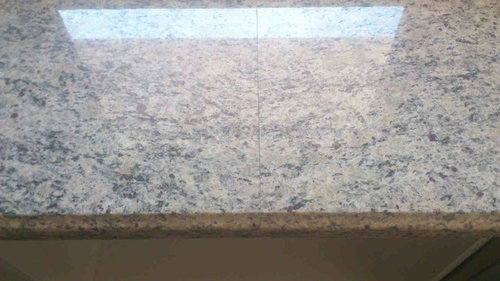
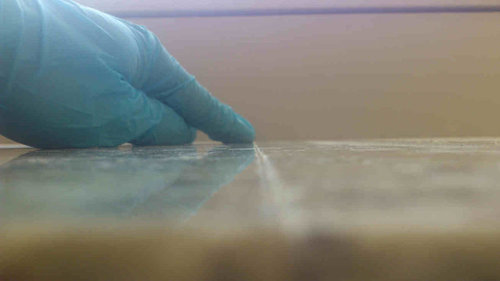
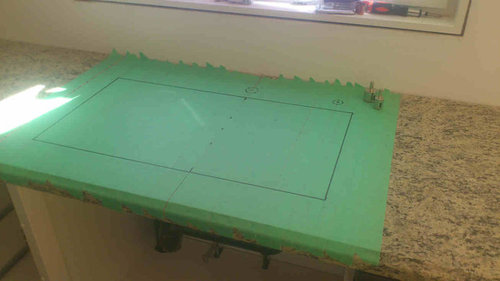
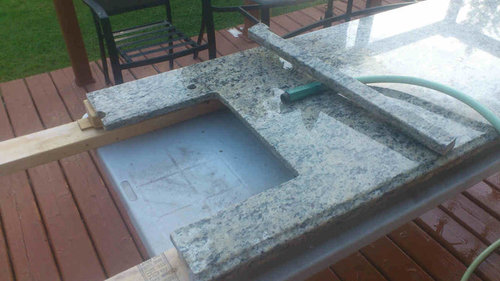
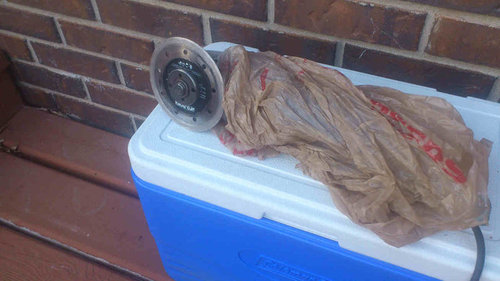
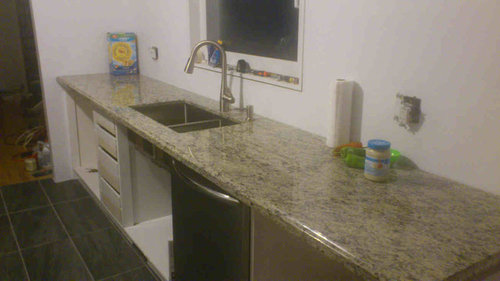
DIY Granite - Easier than you might think
Braydon
8 years ago
last modified: 8 years ago
Featured Answer
Sort by:Oldest
Comments (14)

mama goose_gw zn6OH
8 years ago
geoffrey_b
8 years agoRelated Discussions
Do-It-Yourself Wall-O-Water
Comments (29)For a couple of years I had a garden spot away from my house, with no water supply available so if I wanted to supplement rainfall I had to haul gallon jugs of water. To make my watering efficient, when I planted my peppers & tomatoes in the spring, I dug down and buried empty gallon plastic jugs, one between each plant. I had poked 4-5 holes in the bottom of each, of course, and left the caps on until later in the summer. Once the weather warmed, and after a good soaking rain, I mulched the beds 4-6" deep with chopped leaves, being sure to cover the tops of the (so far empty and still capped) bottles to protect them from the sun since I had found that the plastic degrades and becomes brittle when exposed to the sun. (In previous years, just cultivating around the bottles inevitably resulted in my breaking the tops off by midsummer.) When the weather reached a point where I actually needed to water, I cleared the mulch away for the moment and poured a gallon of water into each buried bottle. I set the cap loosely back atop each bottle to keep the leaf debris from falling in and clogging the exit holes in the bottom, then pulled the mulch back up to protect the plastic. I did not care about how long it took for the bottle to empty-- it seemed like a gallon or two a week per plant was sufficient, and the best part is that by burying the bottles the water went right down to the root zone where it was most effective. As for using wall-o-waters, since I had gotten some free from a friend, I tried them last year with 3 really early tomato plants I started specifically to experiment with. While they survived a good bit of frosty weather, in the end the plants I had started weeks later and planted out a month after the first ones when the weather had warmed quickly caught up to the wall-o-water ones and all the tomatoes pretty much bloomed & set fruit at the same time & rate. So my conclusion is that it was satisfying to my eager gardener's soul to be out planting early, but it really made no difference in overall plant performance. I have found the same to be true with early plantings of such things as peas and salad crops, too. Early plantings may survive, but later plantings quickly catch up and may even surpass earlier ones that have been stressed by the weather....See Moreeasier for me to identify this spider than this flower
Comments (13)Hey, check this out (from Wikipedia)! I've always just thought of them as not-likely-to-be-dangerous garden spiders. They can be found most everywhere at times including in my goldenrod: "Misumena vatia is a species of crab spider with holarctic distribution. In North America, where it the largest and most well-known flower spider, it is called the Goldenrod crab spider, because it is commonly found hunting in Goldenrod sprays in the autumn. Females can grow up to 10mm (without legs), males reach 5mm at most. Young females in the early summer may be quite small and easily overlooked. These spiders may be yellow or white, depending on the flower in which they are hunting. Especially younger females, which may hunt on a variety of flowers such as daisies and sunflowers, may change color "at will" (aggressive mimicry). Older females require large amounts of relatively large prey to produce the best possible clutch of eggs. They are, therefore, in North America most commonly found in Goldenrod (Solidago sp.), a bright yellow flower which attracts large numbers of insects, especially in autumn. It is often very hard even for a searching human to recognize one of these spiders on a yellow flower."...See MoreInterested in do-it-yourself vertical structures!
Comments (28)I use those 4' orange electic fence stakes from home depot (about $1 a piece)for lots of things in the yard & gardens. Pound it in the ground and then slide the PVC pipe over it and into the soil a bit. Set out several of these with holes drilled in the PVC pipe and string wire through them to make a fairly sturdy, portable & cheap trellis. I use these stakes to build easy fencing. I use plastic cable ties to secure wire or plastic mesh fencing to them. Because I dislike the orange and it stands out like a sore thumb, I paint my stakes black. Pound 2 rows of these stakes in the ground about 4' apart and slide each end of a flexible PVC pipe over them, making an arch. Cover this with garden cloth or plastic to protect plants. I "sew" the fabric to the pvc with fishing line. If you are using plastic, cut some flaps in it, to keep it from blowing away in a big wind. I use them to brace non secured retaining walls. At my old house I built a raised bed using them to hold the lumber together. I drilled holes in the timbers and slid them over the stakes, then I lined the interior side with heavy plastic....See MoreDo-It Yourself Water Softener Installation?
Comments (8)If you are reasonably handy, yes, you can plumb a water softener. One issue is what type of piping (copper, PEX, CPVC, etc.) to use to make the connections. CPVC is probably the easiest, soldering copper takes a little skill but is doable (it's all in the prep work), and PEX requires tooling that you probably don't have and don't want to buy ($$$). You've run conduit as an electrician, so you should be able to transition to water-based conduit. lol! When you buy the softener, be sure to know what the pipe fittings/connections are going to be. Probably most accept threaded pipe or adapters, some are sweat-soldered. Plan for a bypass valve setup either on the softener or in the supply lines. Do the softeners come ready to install? Most don't, which requires one to assemble a few items and put the resin in the tank. It's not hard. You only need a twin tank softener if you will be using soft water in the middle of the night (when a typical softener regenerates). The computerized on-demand control valves can predict water usage and maintain enough reserve that you won't run out of soft water before the unit regenerates. Do get a softener that regenerates based on gallons of water used (demand type). It will save salt $$ in the long run. A good valve to consider is the Clack WS-1. Just google it for some softener vendors. It has a computer chip that does a lot of nice things for the softener. Fleck has a model to compete with the Clack (Fleck 7000??). A big issue is how big a softener do you need? Most softener vendors figure on 60 to 70 gallons of water usage per day per person. You will have to use some sort of adjustment factor to estimate your dog water usage (based on people). You probably want to bathe the dogs with soft water,but if you can replumb and use hard water for the dog drinking and kennel washdown water, I think you would be way ahead....See MoreBraydon
8 years agoUser
8 years ago PRO
PROJoseph Corlett, LLC
8 years agolast modified: 8 years agoUser
8 years agodekeoboe
8 years agoBraydon
8 years agolast modified: 8 years ago- PRO
Joseph Corlett, LLC
8 years ago rwiegand
8 years ago
Vith
8 years agoBraydon
8 years agolast modified: 8 years agoVith
8 years agolast modified: 8 years ago
Related Stories
HOLIDAYS10 Things to Do Early for an Easier Holiday Season
Make a gift list and check supplies twice, then ensure that the house looks nice, and buy travel tickets if you’re leaving town
Full Story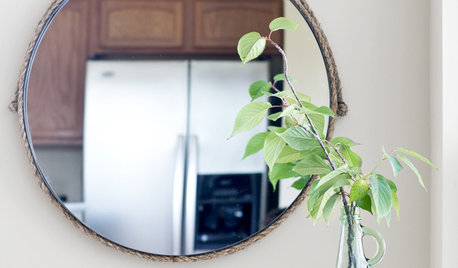
DIY PROJECTSMake a Custom Nautical Mirror for Less Than $30
Be a captain of style with a rope-bordered mirror you can fashion in an afternoon
Full Story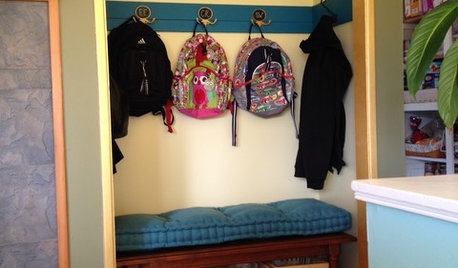
MUDROOMSFrom Coat Closet to Mudroom for Less Than $300
Clever DIY moves give a family of 5 the drop-off space they needed
Full Story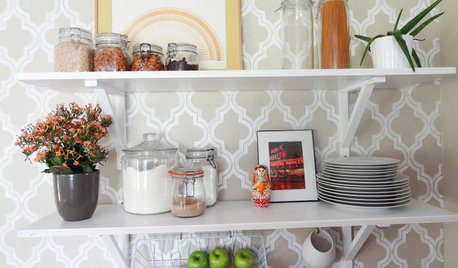
DECORATING PROJECTSDIY Home: Add Open-Shelf Storage for Less Than $40
Got an empty wall and overflowing cabinets and drawers? Curb the clutter with inexpensive open shelves you can install in a day
Full Story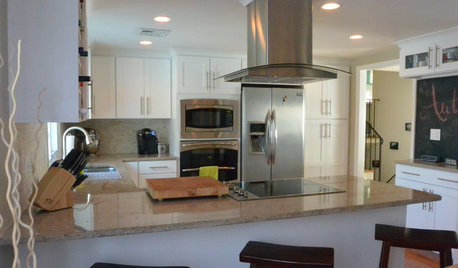
BEFORE AND AFTERSA ‘Brady Bunch’ Kitchen Overhaul for Less Than $25,000
Homeowners say goodbye to avocado-colored appliances and orange-brown cabinets and hello to a bright new way of cooking
Full Story
FEEL-GOOD HOME9 Ways to Boost Your Home’s Appeal for Less Than $75
Whether you’re selling your home or just looking to freshen it up, check out these inexpensive ways to transform it
Full Story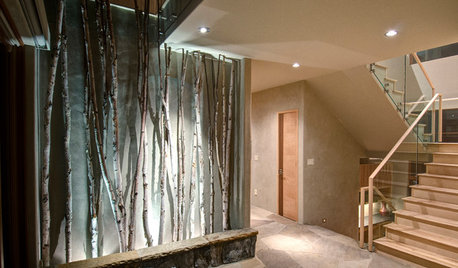
DECORATING GUIDESBranches and Twigs for More Than Just Decor
Think beyond the vase with twigged-out railings, gates, room dividers and more
Full Story
WORKING WITH PROS3 Reasons You Might Want a Designer's Help
See how a designer can turn your decorating and remodeling visions into reality, and how to collaborate best for a positive experience
Full Story
KITCHEN DESIGNNew This Week: 4 Kitchen Design Ideas You Might Not Have Thought Of
A table on wheels? Exterior siding on interior walls? Consider these unique ideas and more from projects recently uploaded to Houzz
Full Story
FLOORS5 Reasons Vinyl Flooring Might Be Right for You
This increasingly popular flooring material has some very real benefits
Full Story


BraydonOriginal Author