

Pizza dough for the grill
11 years ago
Featured Answer
Sort by:Oldest
Comments (15)
 11 years ago
Related Discussions
LOOKING for: Pizza or Calzone Dough
Comments (14)My boyfriend is originally from Philly and is incredibly picky about pizza (thin crust only, for example, among other rules). I set my sights on a project of learning to make a pizza at home that he might favour and after some practice and documenting, this is how I make mine (and when I haven't made something in advance and he wants pizza at the last minute, Trader Joe's pizza dough is pretty darned good). Apologies for the overly thoroughness, it's how I got it all down for my records after a few attempts. 5 1/2 teaspoons sugar 2 teaspoons kosher salt 1 tablespoon pure olive oil 3/4 cup warm water 2 cups bread flour 1 teaspoon instant yeast 2 teaspoons olive oil olive oil, for pizza crust flour or cornmeal, for dusting the pizza peel (I used whole wheat flour and found it to be my new favourite(also I do not have a peel and simply use a flat cookie sheet) -Place the sugar, salt, 1 TBSP olive oil, water, 1 cup flour, yeast, and remaining cup of flour into your mixer's work bowl. Using the paddle attachment, start the mixer on low and mix until the dough just comes together, forming a ball. Spray your hook attachment with cooking spray and swap it out with the paddle. -Knead dough for 15 minutes on medium speed. -After 15 minutes, tear off a small piece of dough and flatten into a disc. Stretch the dough until thin, hold it up to the light, and look to see if a taut membrane has formed (also called a baker's window), you should be able to see a webbing of membranes and nearly be able to see through the dough. If the dough tears before it forms, if you aren't able to pull it thin to almost see through before it rips, knead the dough for an additional 5 to 10 minutes. -Form the dough into a smooth ball on the countertop, sealing it unto itself. Place the dough ball in a large stainless or glass bowl and add 2 tsp olive oil, tossing to coat. Cover with plastic wrap (doesn't have to be a perfect seal) and refrigerate for 18 to 24 hours. -Place pizza stone or tile onto the bottom of a cold oven (or if your heating element is on the bottom of your oven, simply place stone onto the lowest position oven rack) and turn the oven on to its highest temperature, 500° or mine goes to 550°. -Split the dough into 2 equal pieces using a knife or dough scraper. Flatten each piece into a disc onto the countertop and then fold each piece into a ball. Wet hands barely with water and rub them onto the countertop to dampen the surface slightly to make it 'sticky', roll the dough on the surface until it tightens into a smooth ball. -Cover with a tea towel and let rest for 30 minutes. If you won't be immediately using the second ball of dough, spray the inside of a ziplock bag and place the dough ball into the bag. Seal and refrigerate for up to 6 days. -Sprinkle flour or cornmeal onto peel and place dough onto the peel. Using your hands, form a lip around the edges of the pizza. -Stretch the dough into a round disc, holding the center with one hand and gently pulling the edges outward with the other hand, rotating after each stretch, try tossing if you're up for it, but do not use a rolling pin! -Shake the pizza on the peel to be sure that it will slide onto the pizza stone or tile. Dress and bake the pizza immediately for a crisp crust or rest the stretched dough for 30 minutes if you want a chewy texture. -To dress the pizza, brush the rim of the pizza with olive oil. Spread the pizza sauce evenly over the pizza. Sprinkle the herbs onto the sauce and then any toppings you might want. Top with cheese. -Slide the pizza onto the tile and bake for 7 or 8 minutes, or until bubbly and golden brown, checking the underside for doneness before removing. Rest finished pizza for 3 minutes before cutting....See Morea few bread baking tips and the pizza dough recipe
Comments (33)I've been reading these and all of trailrunner's post. They are just great. All the hints were great. I bake bread out of boredom, I rarely use a recipe, for better or worse and like the wet doughs as well as quicker higher yeast doughs for pizza. Someday I'll get that "super peel" with the cloth belt thingy. I am forced to pre-cook my thin pizza crusts without one- My favorite bread is an olive bread that is made locally in the East Bay and sold now only at the local Berkeley farmer's market- you can go to their bakery, and they will sell stuff to you, but it's not a store front, no sales help, no hours- if they are there they'll sell it to you- they're also fresh pasta makers- 'Phoenix Pastificio'- if you're ever in the area. I've never tried to make that bread, it's almost Holy to me...( although I know he uses a biga and those black Kalamata olives). It has a thin almost black burnt crust, with large ciabatta holes to the crumb and flavor to die for....See MoreIdeas for dull, dead pizza dough rescue?
Comments (16)Did you make that recipe by the volume measurements or by weight? It looks like they messed up the conversion with the recipe. It says 3 cups (16 1/2 ounces) bread flour. Flour is 4.2 to 4.4 ounces per cup (depending which site you look up the conversion on). I generally use 4.2 ounces per cup when converting recipes to weight because it usually works and I find it easier to add flour to a too wet dough than to work water in to a too dry one. That would mean 3 cups is 12.6 ounces. Even at the high end, it would be 13.2 ounces. That's about 80% hydration so it should be a fairly wet dough. If you make it by the weight measurements, 10.5 ounces of water to 16.5 ounces of bread flour would be a very dry dough - 63.5% hydration. The recipe I usually use is about 76% hydration. A half tsp of yeast should be fine with a long enough rise. Maybe the dough being too dry inhibited it's action. I can't see why rehabilitating the didn't work. That sounds like either the yeast is dead (maybe not totally inactive but mostly inactive so with a small quantity you don't get enough active cells) or something is killing off the yeast....See MoreHelp with pizza dough recipe
Comments (35)If you like crackery thin pizza, that is a different recipe, but I make regular thin pizza by stretching it thinner. :) Really. As to toppings, if you don't par bake a thicker dough, and load up the center to the point where it's weighted down, it gets thin. Generally people who want thin crust aren't looking for a forest of toppings for the balance per bite, but thin doesn't prevent more toppings. what iit's baked on makes a big difference, IMHO. A clay "stone" will absorb excess moisture and give a nice solid bottom, from leathery to crusty to crunchy, depending on the recipe, heat, temp/time, etc. A pizza pan will give a more bready bottom. A steel gives a more leathery bottom, but that may also depend on recipe, etc. (I haven't played with it enough to know). I have a stoneware "stone" that's good for bread, but gives a very meh bottom to pizza. I haven't tried cast iron....See More- 11 years ago
 11 years ago
- 11 years ago
 11 years ago
- 11 years ago
 11 years ago
- 11 years agolast modified: 11 years ago
- 11 years ago
- 11 years ago
- 11 years ago
 PRO11 years ago
- 11 years ago
- 11 years ago
Related Stories
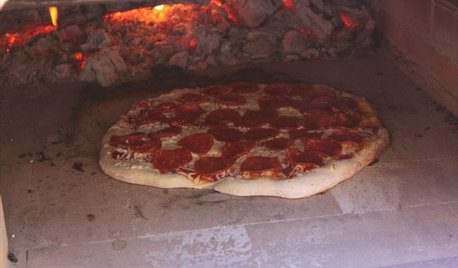
GREAT HOME PROJECTSHow to Get a Pizza Oven for the Patio
New project for a new year: Light a fire under plans for an outdoor oven and claim the best pizza in town
Full Story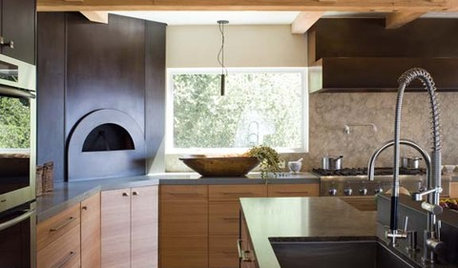
KITCHEN DESIGNKitchen Luxuries: The Wood-Fired Pizza Oven
If you love homemade pizza and are (ahem) rolling in dough, a wood-burning oven may be just the right kitchen investment
Full Story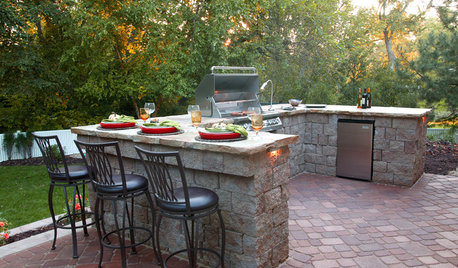
OUTDOOR KITCHENSYour Guide to Grills and More for Great Outdoor Cooking
Learn the pros and cons of gas versus charcoal grills, and about neat add-ons that let you do more
Full Story
SHOP HOUZZFall Grilling Alfresco
Take your fall feasts to the great outdoors with a grill large or small and the right tools
Full Story0

OUTDOOR KITCHENSOutdoor Room of the Day: This Patio Cooks, Even in the Rain
Washington homeowners create their dream outdoor kitchen with a pizza oven, gas grill, fireplace and more
Full StoryMOST POPULAR13 Upgrades to Make Over Your Outdoor Grill Area
Kick back on your patio or deck with a grill that focuses on fun as much as function
Full Story
MOST POPULAR8 Ways to Improve Your Grill Setup
Rethinking the old grilling station? Here’s how to pack more function and style into your backyard cooking zone
Full Story
GREAT HOME PROJECTSHow to Get a Built-In Outdoor Grill
Put fresh-air grilling on the menu with a built-in setup that suits your patio or yard
Full Story
GARDENING AND LANDSCAPINGSplurge of the Week: The Kamado Grill
These Unique Grills Look as Good on the Outside as What's Cooking Inside
Full Story
OUTDOOR KITCHENSYour Grill Season Checklist
Get your barbecue in top shape and round up essential grilling tools to make your backyard cookouts sizzle
Full Story
Lars/J. Robert Scott