


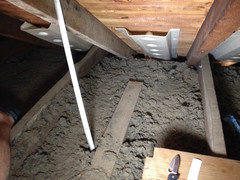
Final preps before blowing in new insulation
David Stembridge
9 years ago
Featured Answer
Sort by:Oldest
Comments (11)

David Stembridge
9 years agoRelated Discussions
How to Seal Attic Before Insulating
Comments (11)The coolers work awesome except some foams and caulks eat styrofoam so some testing needs to take place before you head into the attic. If you have to deal with codes and an inspector ask his opinion first. There are covers available that can be caulked in place and are treated so they won't burn and aren't quite as easy to find, are more of a pain to work with and to some are expensive if you have a dozen to do. One other option is a 'sealed' trim that goes on the inside. I think these are great if installed and caulked in place so they truly are sealed but then painting can be a challenge later. They come with a flakey stick on gasket which is still much better than a cheap trim but still is far from perfect without caulk. I have purchased the trims from Ebay much cheaper than home depot or lowes and I did use caulk and caulked the tiny slots in the top of the trim and at the ring to sheetrock contact area. Doing the rings inside the house still does not spare you from sealing the wires and pipes that enter into the attic which are huge leaks also. Most people blow off the recessed light sealing and they can be the largest hole into your attic and cause the most comfort/allergy issues. I have 14 and on an energy audit we tested the cfm or cubic feet per minute of air at each vent and register and also tested each recessed light on a day with light wind. I had an average leakage of 5 cfm from each light which doesn't seem like much until you do the math per hour and per day. 70cfm per minute for 14 lights 4,200 cfm per hour 100,800 cfm per day. I don't even remember the numbers when we fanned the doors but they went all over the place negative and positive which pulls nice clean air out of your attic and cellulose fibers or fiberglass fibers in for the owner to live in. I highly recommend paying someone to shoot your house inside and out with a thermal imaging camera before you jump in too far so you can develop a game plan. I also highly recommend a blower door test with the thermal camera and cfm testing ducts and such. I had less than 150cfm total of actual return air going through my registers on a 1200cfm system because I was sucking air out of the attic and basement for return air. I would have never known the severity of the issue without the test. Get the testing done and pay for it get photos of the results. I would pay for the testing and any other services I would wait on until you digest the information and figure the best way to attack the issues. I hope I get to read your findings and what approach you decide on. You are on track to keep money in your wallet and be more comfortable in the process....See Morefinal plans, can you take at the kitchen before we submit?
Comments (24)"...We are large mammals, my husband is 6'5" and I am 6', so elbow room is a necessity! ..." I don't know if anyone has mentioned this, but if you are both tall, chances are your children will be as well - and pretty soon! My kids were way off the charts from the moment they were born! (Our pediatrician always chuckled when she plotted their length/height - b/c they were literally off the charts!) Anyway, I bring this up b/c while the minimum recommended overhang is 15" of clear knee/leg space, I recommend you shoot for at least 18". We have 15" and while my daughter (6') and I (5'10") will sit at it, our knees are up against the back of the peninsula. My DH (6'5") and DS (6'6") don't use it at all - they said it's too shallow for them (and I thought I was doing great with 15 inches!!) If I ever do another kitchen, I will have at least 18", maybe more. BTW..."clear knee/leg space" means after accounting for the cabinets and decorative doors/panels on the back of the island (or peninsula). So, your island should be at least: 15" overhang: 41.5" deep 1.5" counter overhang + 24" deep cabinets + 1" decorative door/end panel + 15" overhang = 41.5" 18" overhang (what I recommend for you): 44.5" deep 1.5" counter overhang + 24" deep cabinets + 1" decorative door/end panel + 18" overhang = 44.5" As to the total depth of your island, chances are you have long arms like I do - so you can probably have an island deeper than 60" deep. Our peninsula is 41.5" deep and I can reach across it and grab the far end (so probably I can reach another 3 or 4 inches) - so I know I could have an island at least 83" deep and still be able to reach half-way across to wipe it down. Would I want one that deep - no, but my point is that you should fit the island for (1) the scale of your kitchen and (2) what you can reach across to wipe down (at least half-way). If you are planning to re-sell in the next few years, you might want to consider keeping the depth to what most people can handle (I'd say 60"); if you're not planning on selling anytime soon, then make it what you want it to be and can handle. I'll check back later to take a look at the layout, right now I need to attend to my family! :-)...See MoreTell me how to prep this before painting, how do we cover the stairs?
Comments (22)I am a diy housepainter, and what I've done with the high ceiling is to paint everything up to where I can reach with my ladder (and I certainly don't put my ladder on stairs). By the time I'm done, there's just the high walls and the ceiling, which covers our large-ish living room and the stairs. I had a crew sent by a professional contractor come just to spray the high ceiling and the walls of the stairway at the top. I used the same color as the wall paint, same eggshell sheen, and I provided the paint. In my HCOL area, it was, as I recall, $500, and this is a 22' ceiling with wide staircase (2 guys, 1 day), which looks much bigger than yours. In the interests of safety, I would explore options like this. It is easy to test your existing paint to see if it is oil-based or latex. You can google it. If it's oil-based, you'll do an extra step or two, but it's not hard. Another thing to note is that you can do a LOT of prep work in advance of the painting day. You can sand, spackle, and especially tape off the trim, unscrew and prepare the switch plates and vents and light fixtures. You can peek at some diy videos for how-to best prepare. I'd buy a couple canvas tarps, and some of that paper on rolls to cover the walkways to protect your floors. And lots of painters tape, primer, and good quality paint....See MoreWould love input on our kitchen design before I start finalizing
Comments (32)If there's no sink in the island, then turning the island doesn't gain you much since without water in the island it's not equipped to be a good Prep Zone. A well-designed Prep Zone has: Key component -- Direct access to water -- in the Zone (not across an aisle) Key component -- Sufficient work/counterspace -- bare minimum is 36" straight counter with 42" or more much better Key component -- Near the Cooking Zone -- adjacent to it or directly across the aisle Trash & recycling in or right next to the Prep Zone No barriers b/w it and the refrigerator No DW In the way However, if you want to be able to have two people working in the Kitchen at the same time, be sure the aisle b/w the sink/refrigerator and the island is wide enough -- 48" at a minimum. That's 48" b/w the refrigerator handle and island counter (unless it's a true built-in/fully integrated refrigerator, it will stick out 5 to 6 inches beyond the counters (for counter-depth), more if it's a standard-depth (9 to 10 inches)). Aisle widths are measured to/from the items that stick out the farthest, not cabinet-to-cabinet....See MoreDavid Stembridge
9 years ago
energy_rater_la
9 years agoDavid Stembridge
9 years agoDavid Stembridge
8 years agoDavid Stembridge
8 years agoenergy_rater_la
8 years agoDavid Stembridge
8 years agoDavid Stembridge
8 years ago


Related Stories

GREEN BUILDINGInsulation Basics: Heat, R-Value and the Building Envelope
Learn how heat moves through a home and the materials that can stop it, to make sure your insulation is as effective as you think
Full Story
REMODELING GUIDESCool Your House (and Costs) With the Right Insulation
Insulation offers one of the best paybacks on your investment in your house. Here are some types to discuss with your contractor
Full Story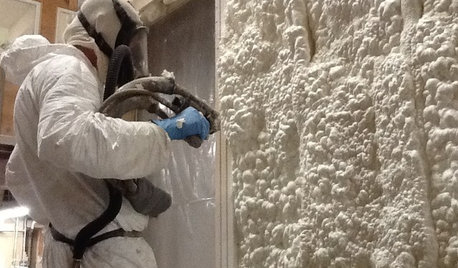
MATERIALSInsulation Basics: What to Know About Spray Foam
Learn what exactly spray foam is, the pros and cons of using it and why you shouldn’t mess around with installation
Full Story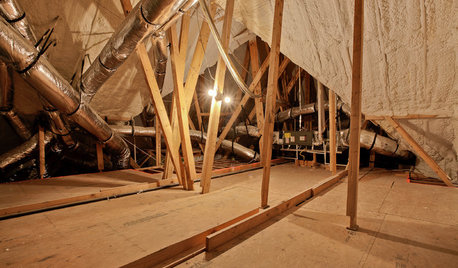
GREEN BUILDINGEcofriendly Cool: Insulate With Wool, Cork, Old Denim and More
Learn about the pros and cons of healthier alternatives to fiberglass and foam, and when to consider an insulation switch
Full Story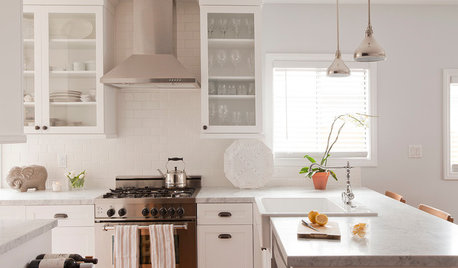
REMODELING GUIDES10 Things to Do Before the Renovation Begins
Prep and plan with this insight in hand to make your home remodeling project run more smoothly
Full Story
BEFORE AND AFTERSBefore and After: 19 Dramatic Bathroom Makeovers
See what's possible with these examples of bathroom remodels that wow
Full Story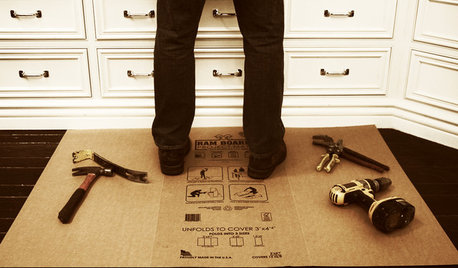
BATHROOM DESIGNOut With the Old Tile: 8 Steps to Prep for Demolition
This isn't a light DIY project: You'll need heavy-duty tools and plenty of protection for your home and yourself
Full Story
LIFEHow to Prep Your Home for Summer Fun
Create a relaxed, beach-ready vibe with these ideas that let good times roll
Full Story
SELLING YOUR HOUSEKitchen Ideas: 8 Ways to Prep for Resale
Some key updates to your kitchen will help you sell your house. Here’s what you need to know
Full Story
MONTHLY HOME CHECKLISTSYour Checklist for Quick Houseguest Prep
Follow these steps to get your home ready in a hurry for overnight visitors
Full Story

mike_home