


Floors! (A Marmoleum primer...)
artemis78
13 years ago


Sort by:Oldest
Comments (21)
Related Stories

DECORATING GUIDESPattern Primer: How to Pair Different Prints
From demure florals to fearless camouflage, learn to mix patterns without making a mishmash
Full Story
GARDENING AND LANDSCAPINGSpring Party Primer: 20 Ideas for Fabulous Fetes
Roll out the green carpet. On a lawn or in your living room, your spring party will be a hit with these tips and ideas
Full Story
FLOORSHow to Paint Your Hardwood Floors
Know how to apply nail polish? Then you can give your wooden floors a brand-new look
Full Story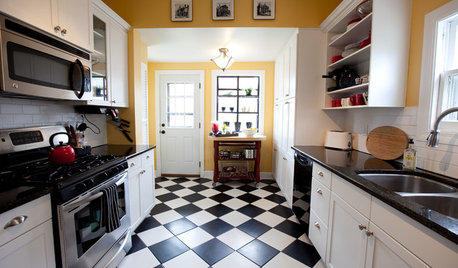
KITCHEN DESIGNKitchen Flooring 101: Find Your Material Match
From cork to concrete, our guide will help you pick the perfect surface for your kitchen floor
Full Story
DECORATING GUIDESSo Your Style Is: Traditional
Smitten with classic home design? Use this primer to bring the best of the traditional look to your house
Full Story
HEALTHY HOMENontoxic Paint 101
If 'VOC' sounds like gobbledygook and you have no clue what causes that funny smell, check out this primer on ecofriendly paint types
Full Story
COLORBathed in Color: When to Use Red in the Bath
Rev up your space and flatter all skin tones with bold, beautiful red on bathroom walls, floors and fixtures
Full Story
KITCHEN DESIGNDesign an Easy-Clean Kitchen
"You cook and I'll clean" might no longer be a fair trade with these ideas for low-maintenance kitchen countertops, cabinets and floors
Full Story
DECORATING PROJECTSDIY: How to Paint Stripes on Your Floor
Paint brings a dreary porch floor to life in New England — watch the process unfold and get tips and ideas for your own floors
Full Story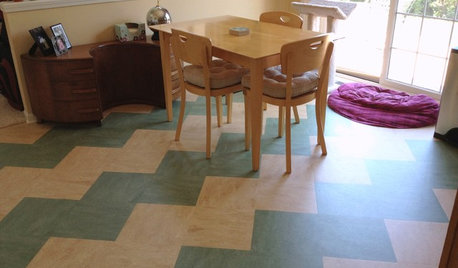
REMODELING GUIDESLinoleum, the All-Purpose Flooring Wonder
Dashing in a rainbow of colors, able to be cleaned with ease and courteous to budgets everywhere, linoleum is a super choice for floors
Full Story
honeychurch
xand83
Related Discussions
Flooring for basement-Laminate vs Marmoleum?
Q
Is a steam mop safe to use on Marmoleum floor?
Q
Surface Scratches On Marmoleum Flooring: Can They Be Repaired?
Q
Split level basement flooring- tile, LVP, LVT, linoleum? marmoleum?
Q
wizardnm
xand83
dianalo
igarvin
artemis78Original Author
oldhousegal
artemis78Original Author
Fori
rhome410
flwrs_n_co
Fori
margcooks
artemis78Original Author
igarvin
babushka_cat
flwrs_n_co
cookingofjoy
artemis78Original Author
cookingofjoy