


Rubbing Out Waterlox Finish to get rid of Dust
2LittleFishies
11 years ago
Featured Answer
Sort by:Oldest
Comments (6)

sombreuil_mongrel
11 years agozagut
11 years agoRelated Discussions
Waterlox floor finish sheen recommendations
Comments (13)I recently enclosed what was a screened porch. It's raised two plus feet off of dirt floor that's indirectly exposed to the weather in Southeastern PA (cold winters/humid summers). I heard horror stories of other floors buckling due to temp differences below and above (the porch will be heated this winter) so we opted for a Mahogany "deck" floor due to its history in being used outdoors for wraparound porches etc. We put a moisture barrier down, "insulayment" , luan and the Mahogany. The plan was to stain and poly the floor but the stains seem difficult to apply evenly. The only thing that works where you can still see the grain is just poly over the top. Should I condition first? Should I just abort the mission and paint the floor??? We're looking for a darker (almost Walnut color). Did I blow the call all together with the flooring vs wall to wall carpet? Thanks...See MoreAny tips to get sanding-dust out of oak grain?
Comments (7)A dry microfiber cloth isn't dong anything (and I don't have a shop vac.) Brickeyee: you said the solvent may have made it worse. So I should stay away from the denatured alcohol? Would water be a better option? Any other suggestions? I'm wondering if I should rub over with another light coat of stain and quickly wipe it off. That would stain the dust caught in the grooves and the rest of the wood should be OK. I could then repoly and just seal in the stained-dust. Is that making a bad situation worse? It doesn't look bad... but I don't want to make it worse! TIA!...See MoreFavorite alternatives to Waterlox for finishing wood counter?
Comments (14)Wood finishing products really only fall into a few broad categories. Penetrating oils such as linseed and tung oil offer minimal protection. They're easy to apply and "repair", which just involves adding more. You thin them with mineral spirits. Mineral oil falls into this category but offers the least protection of all. You can get a polymerized version of tung oil which is heat-treated and offers a little more protection. If you clean up spills quickly and don't let wet stuff sit on the counter, these types of finishes are probably fine. "Varnishes" build up a coat on the surface of the wood. Polyurethane is the most typical varnish-type product. I believe Waterlox is a form of oil-based polyurethane. From browsing their website a while back I think they use some proprietary resins. You can get oil or water-based polys. You can apply oil-based poly over dried tung oil if desired. You can also apply wax over oil or poly. Wax doesn't do a whole lot, but it feels great and gives a nice sheen. Folks on this board are very fond of waterlox. Personally I just grab whatever oil-based poly off the shelf at home depot (typically minwax). I thin about 30% with mineral spirits and hand-rub 4-6 coats. For a special furniture piece I first apply a couple coats of thinned tung oil then follow up with the poly, then finish with wax. You'll see some finishes touted as "food safe". No wood finishing products have ever been tested and certified by the FDA. Rather, they all fall into the "generally accepted as safe" category. Nobody has ever died from eating off a table finished with them, so they're all "generally accepted as safe" without having undergone the rigorous testing required for actual certification....See MoreFor those who have finished a wood island with Waterlox...
Comments (34)We moved into our new house about 4 weeks ago and finally have internet hooked up! Woo hoo! I just read the above post. I am having trouble with the satin finish WL too. I still haven't gotten our wood top completed and started the process of applying the first coat of WL probably at the beginning of Sept! We applied the original WL with no problem. I just poured it on and smoothed it out with an old t-shirt. The girl at the store where we bought it had a lot of experience with applying the original and she said that's what she always did, and got beautiful results. Unfortunately, she did not have experience with the satin. After applying several coats of the original, I followed the instructions on the Craft Art website and applied the 75%satin/25%original mix with a bristle brush. It had some bubbles in it and mistakenly I tried to get them out after the mix had been sitting for a few minutes. I should have just left it alone! Maybe the bubbles would have come out on their own..I ended up with noticeable brush marks where I had messed with it... I tried two more times to put on the satin/original mix! Next I tried with a t-shirt (not good). The third time (after talking to WL, and yes they are snippy) I used a natural bristle brush and applied liberally as the WL man said. After I applied it I had to go back over it because I noticed some of the WL was puddling. It was very difficult to get it on thick without this happening! After it dried I still had brush strokes! Then we moved in and I haven't had the energy to deal with it since. I've been a little distracted with getting unpacked, etc... The wood top really looks gorgeous when the light is NOT shining on it in a certain way, and you can't see the brush strokes! LOL! I'm sure it will be worth it in the end and I'm very happy with the money I saved doing it myself. I'm starting to get my energy back and now I'm trying to figure out what to do next. I sanded the brush strokes out already and it now has sanding marks on it. I hope those go away when I reapply. I am thinking about going back to the original for the final coat but I'm a little frightened of trying the satin AGAIN! Any advice! Hope all this makes sense. Capegirl- did you end up using the satin for a final coat or a mix? Thanks! Jill...See More2LittleFishies
11 years agobobismyuncle
11 years agoUser
11 years ago
Related Stories

MOST POPULARHow to Get Rid of Those Pesky Summer Fruit Flies
Learn what fruit flies are, how to prevent them and how to get rid of them in your home
Full Story
KITCHEN STORAGEGet It Done: How to Clean Out the Pantry
Crumbs, dust bunnies and old cocoa, beware — your pantry time is up
Full Story
HEALTHY HOMEWhat You Need to Know About Dust and How to Fight It
Breathe easier with these 10 tips for busting mites, dander and other microscopic undesirables
Full Story
HEALTHY HOMEGet the Lead Out: Lead Safety at Home
Keep your family safe by properly testing for and dealing with lead in old painted surfaces, water and soil
Full Story
DECLUTTERINGGet It Done: Clean Out Your Bedroom Closet
You can do it. Sort, purge, clean — and luxuriate in all the extra space you’ll gain — with this motivating, practical how-to
Full Story
STORAGE10 Ways to Get More Storage Out of Your Space
Just when you think you can’t possibly fit all your stuff, these storage ideas come to the rescue
Full Story
LIFE3 Ways to Get Unstuck — About Organizing, Decorating, Whatever
Break out of the do-nothing rut to accomplish your goals, whether at home or in other parts of your life
Full Story
HOUSEKEEPINGThe Best Way to Get Your Windows Spotlessly Clean
Learn the pros’ tips and tricks for cleaning windows and getting them streak-free
Full Story
HOUSEKEEPINGHow to Clean Grout — Stains and All
If your grout is grossing you out, this deep-cleaning method will help it look new again
Full Story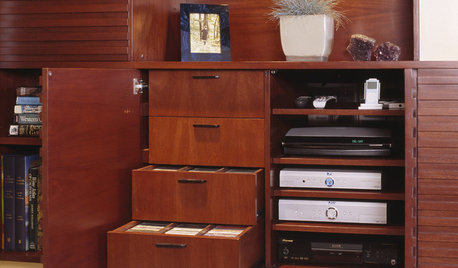
MEDIA ROOMSGet It Done: Organize the Media Cabinet
Ditch the worn-out VHS tapes, save valuable storage space and find hidden gems with this quick weekend spruce-up
Full Story

aidan_m