


prep sink placement in island - how far from edge?
muskokascp
12 years ago
Featured Answer
Sort by:Oldest
Comments (13)

cmilton
12 years agoRelated Discussions
How Far Away is your Microwave from Sink/Prep Area?
Comments (10)General guidelines for MW placement... Best location...MWs (and refrigerators) should be on the periphery of the kitchen so they are (1) easily accessed by those working inside the kitchen and (2) easily accessed by those from outside the kitchen who may be looking for a snack or other use without interfering with those working in the kitchen. Second best location...Inside or just outside the Prep and/or Cooking Zone b/c that's where it's used the most. Less desirable location...In the Cleanup Zone, especially over the DW or anywhere taking up needed cleanup work space. You don't want to be tripping over an open DW or getting in the way of someone cleaning up while trying to use the MW. Bad location...Over the range b/c you have to reach over a hot stove and hot food (think steam from boiling water wafting up or greasy smoke from browning meat or frying as you try to use the MW or even check the food that's in the MW; if you have gas, you're reaching over a flame. Additionally, it is too high for the majority of people to truly use safely...i.e., they're above the head & neck level. Oh, and OTR MWs are notoriously bad vent/range hoods b/c of inadequate venting as well as inadequate coverage of the cooking surface (you need coverage that extends past the front burners by about 3 inches to capture the steam/smoke/grease/odors/etc.). [These MWs are also more expensive and shorter than other MWs...countertop or built-in. On OTR MW may also lock you into a specific brand in the future b/c of sizing and installation procedure.] Ideal installation height...Between your waist and chest, inclusive for "regular" MWs with a door (i.e., above your hip and below your neck). With a regular MW, you have to reach inside and pull food out to check/remove so you don't want it so high that you're in danger of spilling it on you as you reach up and in and you don't want it so low you have to squat to get to the food inside. MW Drawers can be below your waist b/c the drawer comes out from under the counter when open and you can simply reach down & stir or place/remove food. Ideally, the MW should also be near a water source as many items that are MW'd need water added to them (leftovers, veggies, etc.) However, the periphery location is more important as it's easier to bring water to the MW or take the dish to the sink than it is to work around someone else using the MW. Our MW Drawer is in the Prep Zone. Unfortunately, we did not have a periphery location so we had to settle for the "second best" location. But, it is near a sink and it is out of the way of people working at the cooktop. We also have two primary Prep Zones, so it hasn't been much of an issue...only very occasionally. Even if you decide to go the route of the MW over the wall oven, I would consider having your builder put it in a MW alcove (with finished sides/top/bottom on the inside) instead of building it in so you can place the MW inside the alcove but not build it in. As others have said, most MWs do not last as long as other appliances and will need to be replaced. It is much easier and less expensive to remove & replace a MW sitting in an alcove than one built-in. You also will not need a Trim Kit if you place the MW in an alcove instead of building it in. Just remember to make the alcove big enough for a full-size MW + air clearances on all sides, top, and back + plug. If you're putting it in a cabinet for a 27" or 30" oven, width & depth should not be a problem (a 24" wide x 23"D opening should be plenty of width/depth). Don't forget about height as well. You will also need an outlet inside the alcove to plug the MW in. And, be sure the inside of the alcove is finished to, preferably, match your cabinets. This may require "skins" to put on the inside (if so, be sure to include the thickness of the skins in your calculation of the inside space)....See MorePrep sink placement in island - where is yours?
Comments (39)Do you mean what I store in each area? I'll try...If it's not what you wanted/what you were asking for, let me know and I'll try again. Pantry area, starting at the left end by the freezer: Step stool cabinet, freezer, fridge, broom cabinet...all with cookbooks above. The walk-in pantry has my wheeled bins for grains and pet food. (I have another placed planned for pet food, so hopefully some day it will be out of the pantry) Also in the pantry: Grain mills, smaller containers of various grains, canned goods, extra of baking and other supplies, dry beans, rice, crockpot, garbage bags, baskets of potatoes, oranges, onions, garlic. Cooking area: Above microwave is microwave dishes...Like 2 qt Pyrex covered casserole dishes. In the upper section of that cabinet is a shelf with my extra oven racks, and another with extra party napkins, paper plates, etc that we don't need very often. In the base cabinet under the microwave is cooling racks, glass baking pans, and large broiler/roasting pans. I have 5 shelf spaces in that cabinet so things don't have to stack too much. I got so tired of having to nest everything just right and sort through to get the pan I wanted. In the gray cabinets: Upper to left of stove: spices Over stove: hood vent pipe...Wasn't supposed to be there, but that's a long story Upper to right of stove: Spices Base to left of stove: Drawer 1 (top): utensils like whisks, can openers, tongs, thermometers Drawer 2: Pyrex measuring pitchers Drawer 3: pot and pan lids Under stove: top drawer: stainless pots and colanders bottom drawer: cast iron Dutch oven and skillets, non-stick and cast iron right of stove: Drawer 1: utensils like metal spatulas/pancake turners, cooking spoons, meat fork Drawer 2: Wok and wok grate Drawer 3: waffle irons Wood cabinet to right of stove: Upper: oils and vinegars, noodles, etc. Lower: large stainless bowls, vacuum sealer, deep fryer, flip-over waffle iron On counter: canisters with flour and sugar since the baking ingredients are in the baking area and occasionally I need just a bit when cooking at the stove. The other canisters hold cookies. :-) Main sink wall The shelf built into the wall has some 'display items' at the top and coffee and tea supplies, coffee grinder, and mugs in the rest. The coffee maker sits on the counter in front of it. In the far left drawer bank: Drawer 1: kitchen towels and dish rags Drawer 2: Panini grill Drawer 3: pasta maker and salad spinner (One day I should actually try out the pasta maker...A friend gave us their extra) Then dishwasher, sink (cleaning supplies and dw detergent underneath), and the other dishwasher. The far left base cabinets hold dishes...bowls (cereal and pasta sized), plates (dinner and salad/dessert), platters, and Tupperware sort of storage containers. (I think they're actually mostly Rubbermaid) The hutch above holds glassware, pitchers, and serving bowls. Main sink side of island: From right as facing the island from that side (nearest stove): Trash and recycle pullout with knives above. 4 drawers: vegetable peelers, graters, knife sharpeners 2 mixing bowl sets 3 and 4 are yet to be determined for sure, because my dh just replaced a doored cabinet with the drawers that I thought would be more useful. A very deep drawer/pullout that holds cutting boards and rolls of plastic wrap, foil, parchment, etc. Baking side of island: Prep sink 2 drawers that hold my bread mixer and bread pans Shelves...also new, but I think I'll put baskets or boxes that will hold cake decorating supplies and cookie cutters, because they're in my way in the baking area Baking/breakfast center wall: From left... Breakfast center Upper: cereal, peanut butter, honey, crackers, chips Lower: Drawer 1: bread Drawer 2: napkins, placemats Drawer 3: water bottles Fridge with cabinet above that holds vases and plastic pitchers, and a shelf for my extra fridge shelves. Baking center with supplies like flour sugar, spices, dried fruit, flavorings, coconut, etc. etc in the uppers. Base cabinets have utensils in all the top drawers. A baking sheet rack in the doored cupboard, and in the big drawers: Top: Food processor, chopper, handmixer, stand mixer parts Bottom: cake, cheesecake, and pie pans Oven with vitamins, medicines above, and storage of extra dishes above that. In the drawer under the oven are hot pads and my pizza stone. I think that covers it and I hope it's right...I'm not going to read it over before posting, because it's taken me so long and my family wants dinner!! :-D...See MorePrep sink placement on the island
Comments (18)gizmonike, you are not in the KFB either, could you post a picture? I changed my plans (again) with the GC this morning so the prep sink is in the corner of the island. I took the air switch out and put a standard but horizontal switch on the island side. I didn't want to accidently turn on the disposal when I was prepping. So I'll have the single hole faucet and a soap dispenser...and wide open space!! rhome: I am so excited to be getting wood counters and I see you have them. Mine will be lyptus on the side grain made and installed by my GC. He is also making me two butcher blocks on the end grain. I love wood. I also chose granite for the balance but I love your ss and how economically you had them done. Do I remember right that your island is 4x6?...See MoreHow far should sink be from edge of island?
Comments (13)If the granite fabricator wants only 22" interior width but you want a 24" interior width, it seems that the fabricator wants only one more inch of granite on that side. Is there any way to slide the sink further to the other side to give him that inch? Joseph recently posted an explanation of how to minimize a sink rail width by eliminating clips and using a harness in this link here. It don't know if it would help in this circumstance, and, as granite guru points out, the issue may be the size of the cut out itself. I am just learning this stuff now in preparing my own remodel, so hopefully a pro could comment on this (perhaps crazy) idea I am throwing out. But I found Joseph's explanation so helpful here, that I thought I'd share it in hopes that it helps you too....See Moremuskokascp
12 years agodavidro1
12 years ago
Cloud Swift
12 years agoxicanopride_yahoo_com
12 years agoxicanopride
12 years agoCloud Swift
12 years agomrssmith692
12 years agoalku05
12 years agoCloud Swift
12 years agomarcydc
12 years agomrssmith692
12 years ago


Related Stories
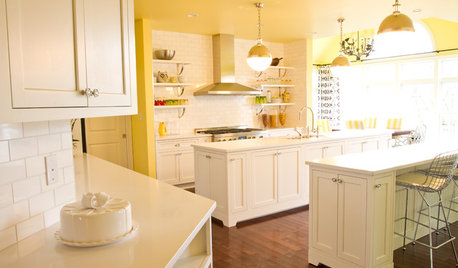
KITCHEN DESIGNDouble Islands Put Pep in Kitchen Prep
With all that extra space for slicing and dicing, dual islands make even unsavory kitchen tasks palatable
Full Story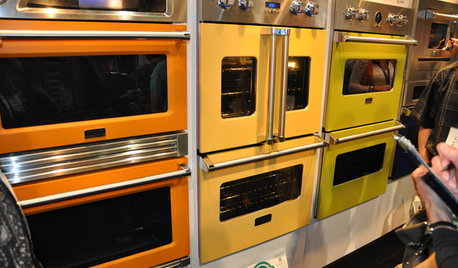
KITCHEN DESIGNStandouts From the 2014 Kitchen & Bath Industry Show
Check out the latest and greatest in sinks, ovens, countertop materials and more
Full Story
KITCHEN DESIGNKitchen Counters: Try an Integrated Cutting Board for Easy Food Prep
Keep knife marks in their place and make dicing and slicing more convenient with an integrated butcher block or cutting board
Full Story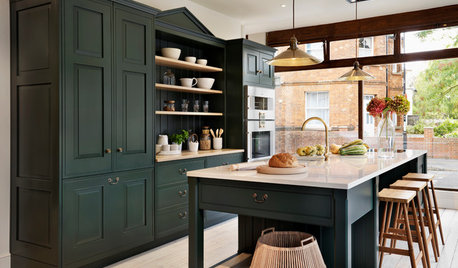
SELLING YOUR HOUSEKitchen Ideas: 8 Ways to Prep for Resale
Some key updates to your kitchen will help you sell your house. Here’s what you need to know
Full Story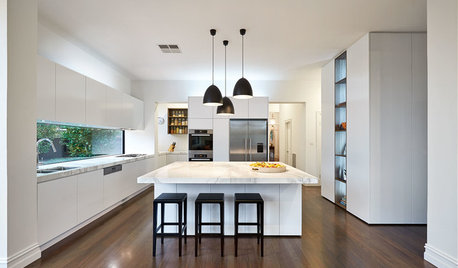
LIGHTING8 Creative Lighting Solutions for Food Prep
Get all the task illumination you need while distracting the eye from fluorescents, following the lead of the kitchens here
Full Story
INDUSTRIAL STYLEMy Houzz: From Raw Space to Hip Home in a Converted Utah Garage
Creative repurposing with an industrial edge defines the first home of an engaged couple in Salt Lake City
Full Story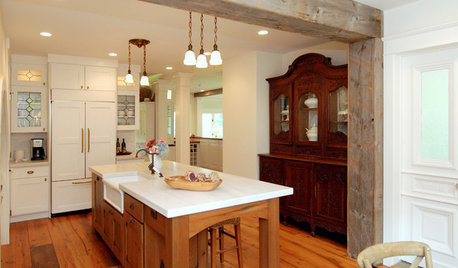
KITCHEN DESIGNKitchen Solution: The Main Sink in the Island
Putting the Sink in the Island Creates a Super-Efficient Work Area — and Keeps the Cook Centerstage
Full Story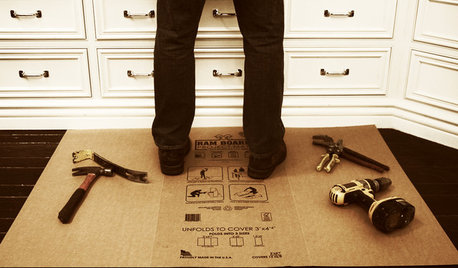
BATHROOM DESIGNOut With the Old Tile: 8 Steps to Prep for Demolition
This isn't a light DIY project: You'll need heavy-duty tools and plenty of protection for your home and yourself
Full Story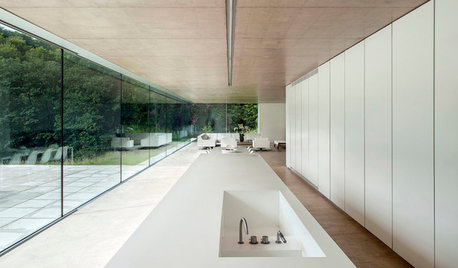
KITCHEN ISLANDSWhat to Consider With an Extra-Long Kitchen Island
More prep, seating and storage space? Check. But you’ll need to factor in traffic flow, seams and more when designing a long island
Full Story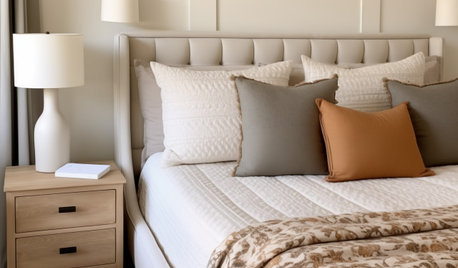
MONTHLY HOME CHECKLISTSYour Checklist for Quick Houseguest Prep
Follow these steps to get your home ready in a hurry for overnight visitors
Full Story


coffeebreak