


Drywall over Plaster?!?! Please help!!
kkelly028
14 years ago
Featured Answer
Sort by:Oldest
Comments (14)

palimpsest
14 years agodrywall_diy_guy
14 years agoRelated Discussions
I need help with taping plaster to drywall & prep to paint.
Comments (5)First you need to cover the 2 hole. You need to attach the replacement piece of drywall on the big hole to something solid before mudding and taping it. 2 choices are to open up the hole larger until you have some wood to attach it to or improvise! My favorite way to improvise is to cut 1 or two thin boards about 2-3 inches wider than the narrow width of the hole. Stick it up the hole the long way and rotate it so it is resting on top of the hole with about an inch on either side. Hang on to the board in the middle through the hole and put two screws up through the ceiling on either side of the hole to hold the little board in place. Screw your new piece dry wall into the little board(s) you put up there. Tape and mud. Can't tell how big the little hole I but I would probably jut dry to put a piece of mesh tape over it and mud. If it sags you might need to put something up there to back up that patch too or purchase a firmer patch to go over it. No need to prime anything until you get all your mudding and sanding done. Use a putty knife and scrape as much loose paint away as possible. I would do little to no sanding of the paint edges as you are sanding paint with lead. Just skim coat everything with mud. Patch, tape your corners, mud everything (couple thin coats) and sand. Then prime and paint. Your joint compound will be perfect for all. Wear a dust mask when you sand....See MoreUpdate on My Post Re: Drywall, Plaster, & Ceiling Hole
Comments (8)Yesterday and Saturday I worked on the taping for my ceiling and corners. The big hole patch was incorporated into the corner taping. Here are some pictures after the tape and one coat of joint compound. That joint compound is easy and hard to work with at the same time. Easy to get into the pan and on the wall, but hard to get it smooth and even:) It's kind of fun and frustrating at the same time-like life ;) I used a tape that is meant for edges. It is a webbed product called Strait-Flex. It was the "medium" grade. It was expensive. It is thicker than paper and I think that is a problem for me. I thought it would make it easier being more ridged and straight. There were areas where the edge would want to bow out and not lay flat. That was a problem. When it dried I had to cut these 1" sections out, at the edges where it raised up from the surface. There were 2 or 3 of these. I tried some paper tape in an area and that was easier and smoother. I just added this detail for GW info. Maybe someone else has had better luck than I with this product. Here is a faraway shot. Old plaster ceiling and wall to the left with new drywall on the right wall. I only taped the drywall to the plaster. I did not add any tape to the patch along the plaster wall: And a closeup, again old plaster ceiling and wall to the left with new drywall on the right: Now I have to put a second coat on the area. These right angle areas are hard. from far away it looks even but closeup there are irregularities. This is the first time I've drywalled. Any tips for right angles?...See MoreDrywall over Plaster plus new electrical
Comments (23)"aren't you an example of an 'incredibly fast' pro?" Not at fixing lots of large cracks. Every crack more than about 1/16 inch wide needs to be brushed clean, then vacuumed clean (crevice tool along the crack), then bonding painted into the crack, then your choice of material used to fill the crack while the bonding material is tacky but not dry. I use Durabond many times. If the crack sides are still in plane you can use a narrow drywall knife to force the Durabond into the crack and then strike it level. Durabond does NOT sand easily, so make sure any excess is removed. Easysand is better for the inexperienced. At least you can come back and scrape it dry or sand it lightly. Plaster is not all that useful without a LOT of retarder added. It sets WAY to fast. Even narrower cracks can have Durabond forced into them, but running a vacuum is still a good idea. If a narrow crack is in an area that shows badly, widen it with a Rotozip (buy a lot of bits, plaster eats the edges off in a very few inches) through the finish layer(about 1/8 to 1/4 inch deep) and then treat as a wider crack. Larger areas that are solid can be patched using bonding agent, but if the lathe is exposed you should try to clean it enough to allow new keys to form to hold the patch in place....See MoreBad Drywall Job Over Plaster
Comments (12)RM, Are you clear about the advice that Billl gave you? It sounds as if you might not be. What he said about the window frames sticking out 1/4" too far meant that the sides of the window frame (literally the sides of the window, that are at right angles to the sashes holding the glass, the sticking-out edges of which you can not see when the trim is in place) were (after he had replaced the plaster with sheet rock) deeper than the plane of the installed sheet rock. He could have used two or more layers of sheet rock to build up the depth equal to the old plaster, or as he chose to do, he planed these edges down to meet the sheet rock evenly. He was not talking about planing the visible trim which is installed on top of the edges of the window frame and extends from there over and on to the plaster or sheet rock. The window trim bridges (and conceals) the joint between the edges of the window frame and the wall surface. That's why the window trim sticks up proud (as it is called) from the wall. It can only provide this bridge if the edges of the window frame and the overall plane of the wall covering are even. There is an excellent book on windows ( Working Windows) by Terry Meany, that you might find useful in grappling with complex construction, and nomenclature, of window frames. And I have a suggestion, I'd recommend emulating your user name's approach. Do your homework and understand what to do, what not to do and how to do each before you try to engage handymen, or semi-skilled home repair persons. Whatever you do, don't rely on the "professional" advice from workers with less knowledge, affection, or experience in old house renovations than you have. There are excellent resources on line (of course, tons of crappy info online, too); good print resources on the curatorial care of old houses, and of course a wealth of free advice here and on similar old-house positive fora. (Old House Web and Historic Homeworks are two very helpful and knowledgeable sources - Google 'em and post questions.) When I was a new old house owner, I figured that most workers knew more about houses renovations than I did. Most did, but only a few knew more about old house renovations than I did, which was next to nothing, at first. Luckily, I didn't have too much money to do renos right away, so I was spared making mistakes by not being able to pay workers. In the meantime I made it my business to learn about how my buildings were put together and, what others had done with similar structures. When I was finally ready to embark, I knew that many of the things I might have blythely embarked upon were really bad ideas. The best thing you can do for your house is clean it, study it, and learn about it. Only then would I suggest getting involved with workers. What I suggest is both money-saving (which you'll need as good old house work is never cheap) and absorbs all that new-house-I-gotta-make-it-mine-energy that everybody has right after they close. The handyman who got upset about you wanting to save money by demoing is exactly why you need to learn more about houses before you hire workers. But, please, use your energies to scrub the floors, or dig a garden, or something else, instead of demoing right off the bat. It's not that hard (but a much bigger mess than you can ever imagine, though, and once started you have to see it through to conclusion) but don't use it as a catharsis. It must be done in a deliberate manner, (I really like the "deconstruction" approach noted above) after careful consideration of whether it is the right thing to do. Sometimes it is, sometimes not. Have you tried to remove the drywall from one small area to see what's underneath? Do you know by whom and under what circumstances it was installed? There may be some clues to be gained by investigating, or querying about it. Again, a case of the benefit of not just launching into it....See Morejoed
14 years agomklein3
14 years agoalphonse
14 years agomightyanvil
14 years agobrickeyee
14 years agohendricus
14 years agoalphonse
14 years ago
worthy
14 years agobrickeyee
14 years agonkkp
14 years agoMongoCT
14 years ago
Related Stories

HOME OFFICESQuiet, Please! How to Cut Noise Pollution at Home
Leaf blowers, trucks or noisy neighbors driving you berserk? These sound-reduction strategies can help you hush things up
Full Story
MATERIALSRaw Materials Revealed: Drywall Basics
Learn about the different sizes and types of this construction material for walls, plus which kinds work best for which rooms
Full Story
WALL TREATMENTSSurface Smarts: Venetian Plaster
Centuries-old Venetian plaster has made a roaring comeback in modern interiors. Could this old-world wall favorite work in your home?
Full Story
REMODELING GUIDESWisdom to Help Your Relationship Survive a Remodel
Spend less time patching up partnerships and more time spackling and sanding with this insight from a Houzz remodeling survey
Full Story
HOUSEKEEPINGQuick Fix: How to Patch a Drywall Hole
Dents and dings disappear, leaving your walls looking brand new, with this fix that even a novice can do
Full Story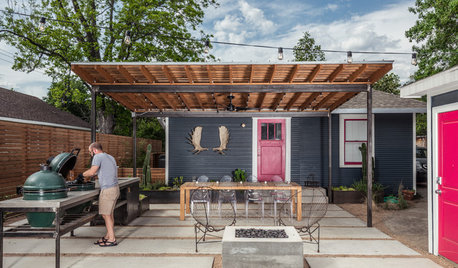
OUTDOOR KITCHENSHouzz Call: Please Show Us Your Grill Setup
Gas or charcoal? Front and center or out of the way? We want to see how you barbecue at home
Full Story
DECORATING GUIDESPlease Touch: Texture Makes Rooms Spring to Life
Great design stimulates all the senses, including touch. Check out these great uses of texture, then let your fingers do the walking
Full Story
DECORATING GUIDESDecorate With Intention: Helping Your TV Blend In
Somewhere between hiding the tube in a cabinet and letting it rule the room are these 11 creative solutions
Full Story
EXTERIORSHelp! What Color Should I Paint My House Exterior?
Real homeowners get real help in choosing paint palettes. Bonus: 3 tips for everyone on picking exterior colors
Full Story


tryinbrian