


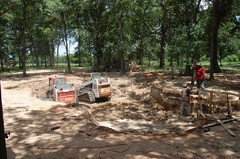
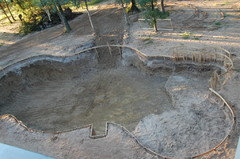
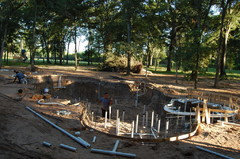
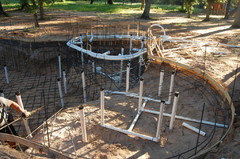
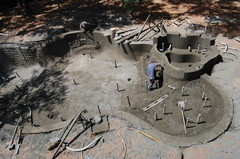
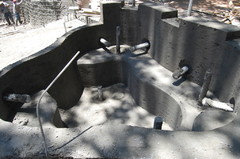
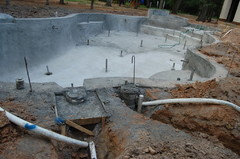
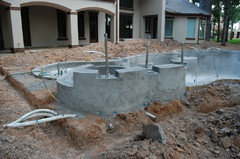
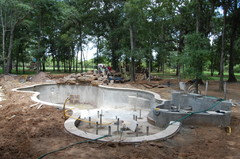
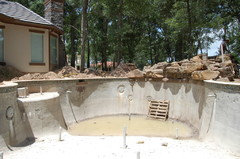
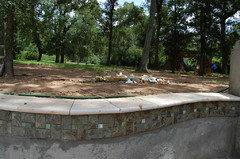
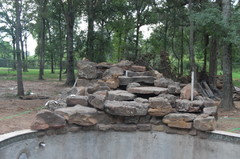
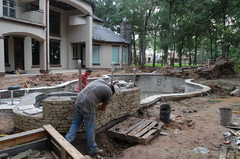
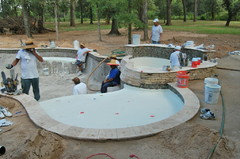
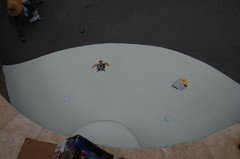
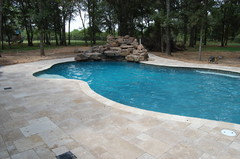
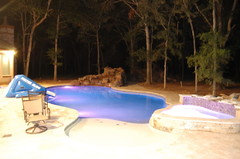
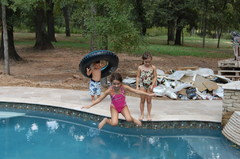
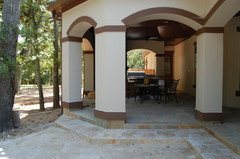
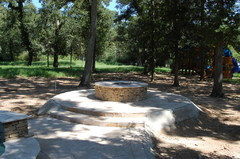
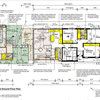
Pool Build in Richmond TX
lemonspinner
13 years ago
Featured Answer
Sort by:Oldest
Comments (45)

lemonspinner
13 years agodomingos35
13 years agoRelated Discussions
McKinney, TX Pool Build by SouthernWind Pools
Comments (21)LOL. I KNEW it was Borba. It's a sad day when I've become so obsessed over tile selection that I can identify tile name and brand with 99% accuracy. :-) I have a sample of the Borba. I'm torn between that and the Tondela Blue, also by NPT and in the same series. I'll post pics of my build. I also have a 45' lap lane with a narrow end. I think mine is 6' wide. It's an unusual design but like you, I wanted a lap lane, play space and a shelf. In addition we have a water line in the yard that needed to be avoided/contended with. Thanks for tile confirmation - I love how it looks. So nice to see a picture of a pool in progress that is using it. Makes me comfortable with my choice....See MoreYou're Getting a Pool in that Yard? Yep! Spring, TX Pool Build
Comments (150)We finally got started planting behind the raised bond beam! Talk about a lot of work! We had to build a retaining wall behind the curved portion of the wall with Castlerock, and those things are heavy! I haven't planted anything along the new sundeck, but hope to start that today. We also still have four Pygmy Date Palms for behind the raised bond beam, that we have to plant. Two will flank either side of the CI Date Palm for some added privacy. Here is a close up of the area we planted: I'm super pleased with the look of the ferns. We're lucky in that we only get about 1 hour of direct sun there a day, and it's from about 5:30PM - 6:30PM. Hopefully these Kimberly Queens will thrive there. I looked forever, before finding these bowls for the lower portions of the bond beam. There is a really good nursery, showcased in Southern Living, in a nearby town. They're my go-to place for hard-to-find Texas plants, and they have awesome decorative items. The bowls look amazingly like Oklahoma Wister flagstone! I've planted this combo before. It'll be white in the back (Angelonia), Liriopi in the middle as a perennial, and eventually the purple Scaevola and New Gold Lantana should spill over the front. With the Blue Plumbago in the back, the color combo should look nice. In about a month, it should be totally full. All I'll have to do is change out the annuals each season for color. The fence is in. Now all we have left is the flagstone inlay and the flagstone on the steps and we're done!...See MorePool Build Magnolia, TX
Comments (6)Thanks, we are thrilled with the pool. Fire/water bowls installed today and the plumber will hook up the gas line tomorrow and fill the bowls up with the lava rock. Can't wait to light them up at night and see how they look. Two 75 pound bags of lava rock each which sounds like too much to me but it's what the manufacturer of the bowls said would be needed. We love the deck and initially was doing stamped concrete but changed our minds. Our design started out as a free form design with moss rock like our previous pool then my wife and I decided to do something totally different. We looked at hundreds, if not thousands, of photos and came up with a basic design that we wanted and then went from there. The one thing we didn't do which seems very popular was install a variable speed pump. Guy that built my pool isn't a big fan of them and I decided to go with a regular pump. My previous experience with pool pumps wasn't that great so I couldn't see that it would ever pay for itself. I'm probably wrong but figured I could always add it later if I changed my mind. What surprised me today is how quiet the 4 bowls are. The water comes out of the spout but gets really narrow by the time it hits the pool water and hardly make any splash or sound. May be normal but I was expecting them to be much louder. This post was edited by ktm250sx on Wed, Aug 13, 14 at 22:50...See MoreNew Pool Build - The Woodlands, TX
Comments (94)We have been out and around the pool area more the past few weeks as the weather has gotten a bit warmer. Of course with the warming weather in Houston the number of mosquitos as well as annoying gnats greatly increase. We were sitting in the hot tub last week and mosquitoes were landing on our head and biting us. Not good. We decided that with the level of investment made in our backyard that we needed to ensure we could use it without being attacked. As a result, I began looking at options to get rid of the problem. I looked at foggers...I would need to regularly do this to keep mosquitoes and gnats away and I knew I wouldn't keep up with it. That led me to look at automatic mosquito misting systems. As I am fairly handy around the house, I decided to look at Do It Yourself options. The main choices were systems with 55 or 125 gallon tanks or the newer tankless systems that mix the chemicals with water for each application. I decided that I did not not want the large tank in the yard and I had a good location for the small tankless box which had a power outlet and a hose bib nearby. So I focused my internet research on the tankless systems. The tankless option adds about $400-$500 to the base system cost. I will start this out by saying I am a consumer only and do not represent any company or in any way benefit from what I am writing below. I have no connection to the industry. I have just found very limited information from other consumers on the internet other than " We bought one and love it" and so I decided to write about my experience and will document what I see in the way of results over time. I will also comment on installation and if there are any lessons learned for others. RESEARCH AND PURCHASE The main options that I considered were the Mist Away Gen 3 and the Mosquito Max Series 2 tankless system as both were readily available on the internet for Do It Yourself installers and also available at stores in the Houston area for purchase and service. I could not find a lot of consumer reviews on either system, but the Mist Away Gen 3 did seem to be the more prevalent unit with more dealers/installers nationally. Base features seemed to be similar, although the Mist Away looked to offer a few more options, such as a wind sensor, etc. When I compared prices on the internet, the best I could find on the base Mist Away Gen 3 was $1,645 and the 30 nozzle complete DIY install kit put the final price typically in the $2,400 range. The Mosquito Max system base price was $1,395 and their 25 nozzle complete DIY install kit was $1,725. Adding another 5 nozzles to get to 30 would bring the price up to $1,775 at $10 per nozzle assembly. I looked out on You Tube and found several videos from mosquito system installers with tips and tricks for installation. After watching a few of these I became confident that I could indeed install my own system and would be aware of the typical installation methods and pitfalls. Generally, installation is fairly simple and there are sites that have go-bys to help you design your system. I used a plot plan of my house with measurements to determine the best path for the nylon tubing and the spacing (every 8-12 feet) so that I could add up all the parts needed in advance to see if I should buy a system "kit" or buy parts individually. For me buying a 25 nozzle kit and adding a few nozzles worked out best. I ended up purchasing the Mosquito Max system and picked the unit up from their main office in Katy, Texas with is where the units are made. The unit has a one year warranty and all parts are available from this location should I need them after the warranty period expires. Another plus with a tankless system is that I can easily load it into the trunk of my car and take it to the shop if I need it repaired as opposed to paying for a service call should it be an item I don't feel comfortable trying to fix on my own. SYSTEM DESIGN AND INSTALLATION General installation advice was to create a "perimeter" around the back yard and then add some additional lines as needed that "T" off the main line using a 3 way connector called a "union tee" to cover interior flower beds with shrubs and trees. Tubing can be attached to fence lines with clips or many installers used a combination of clips and a staple gun. In my case the pool and paved areas take up most of the center of the yard (see plot plan at top of blog), which makes for a simple installation. I installed the base unit on the wall just beyond where the pool equipment is located on the plot plan. I bought some 1/2" outdoor rated PVC from our local home improvement store as well as some 90deg. elbows and ran the tubing through the PVC down the wall from the main unit used a 90deg fitting and ran another piece under ground across the small 6' wide small yard and then another 90deg fitting and a PVC piece to go up the fence to just underneath the top cap of the fence which was the starting point for my perimeter backyard installation. I followed a similar process with the water supply tubing that runs from the base unit to the hose bib to protect it from the lawn crew / week whackers. The installation of the tubing and nozzles was so simple that my kids could have done it...and I enlisted the help of my 14 year old to make things go faster. Of course you could do a more elaborate installation than I chose to do, and I am sure many professional installers would have ran the lines inside our fence where it is double sided. However, I chose to attach the tubing just under the top cap on the fence using a combination of staples and plastic clamps that screw in and were supplied in the install kit by the manufacturer. If you keep the lines very straight and choose a tubing color to match your fence the install becomes nearly invisible. As you move along the perimeter you install "T" fittings by pushing one end of the tubing inside the fitting until it locks, then you push in a nozzle until it locks in place via quick connect type mechanism, then you push the next section of 8-10' of tubing in the other side and then keep going and do it again. I used a "C" clamp on each side of the "T" connection to tightly secure it to the fence and this allows me to aim the nozzle in the direction up/down that I wanted it. These "C" clamps are just small plastic fittings that go around the tubing or fitting and have a hole that allows you to screw them into the fence or wall to hold the line/fitting secure. You can use 90deg. fittings in corners so that you do not kink the nylon tubing. Generally I found these to be unnecessary and used "C" clamps to hold the line in corners to ensure it stayed in a smooth curve and did not kink. When you need to branch off the main perimeter line, you just install another "T" fitting, but rather than installing a nozzle in one of the openings, you just insert the nylon tubing for the branch line and then continue down that line adding "T"connections and nozzles as needed. At the end of that line you would install an Elbow fitting and nozzle instead of a "T". Very simple. Each system will have a maximum number of nozzles it can support (80 in my case) and recommendations on how many "branches" they support. Both systems I researched offered a zoning system for purchase that could expand the capacity by sending pressure to one zone at a time similar to an automatic sprinkler system. So I could install a zone for my front yard at a later date and control misting times and durations separately from the back yard. Or I could just choose to install a small valve to turn on/off the front yard if I had enough remaining nozzle capacity on my system (I can still add 50 more nozzles to my machine). All the manufacturers also offer riser assemblies for use in flower beds as well as ways to attach nozzles to trees. These riser assemblies also offer easy push-in connections and copper risers for durability. These are a bit pricey, but would make the install faster and neater. SYSTEM STARTUP Once I had all the tubing installed and the water line connected, I read through the instructions to ensure I had everything correctly connected. I then filled the chemical tank with water to test the unit. After plugging in and setting the spray time to the maximum setting, I did a test spray. We noticed that some of the nozzles were not spraying and adjusted the pressure up to 100lbs per the directions given by the folks when I purchased the unit. This increased the mist near the unit and we immediately noticed that one of the push in connections at one of the "T" locations was leaking. I pushed that tube in firmly and all nozzles began to spray a fine mist as intended. I had no other leaks or issues. I then spent some time aiming nozzles to ensure I had good coverage of each area. After that I poured the selected chemical (Riptide) into the Chemical tank inside the main control box and secured the lid, finished the programming and then tested again. Everything worked perfectly! I did see a few areas that did not have as much mist coverage as I would have preferred. But since adding nozzles is as easy as cutting the line and inserting a new "T" fitting / nozzle, I plan to add several more over time to improve the coverage. Overall, it took me about 5-6 hours to install my simple system around the perimeter of the back yard with some of that time spent reading instructions, digging a small trench (4-5' deep across 6' wide side yard) and hanging the unit on the brick wall. I would estimate I saved between $1,000 and $1,500 on installation fees as most systems installed that I read about were in the $3,000-$3,500 range. SETTINGS I used the system's "SUMMER" setting initially which sprays 4 times a day for 45 seconds. Twice in the early AM and twice in the evening. Once I have the mosquitoes under control I will likely change to once in the AM and once at dusk. CHEMICAL SELECTION As I noted above I chose Riptide initially, but I read that many people rotate between Riptide and Sector. Riptide generally had higher ratings and I liked that it was water based and does not leave an oily residue and was safety for plants (some will burn plants so read labels closely). It also works on many other pest insects such as ants, gnats, fleas, moths, etc... RESULTS I will come back to the site after some time to report on results as most manufacturers say it takes 2-3 weeks to eradicate the mosquito population in your yard. What I did notice immediatly was that the number of small flying insects under our covered patio lights was down significantly by the second night the system had been in operation. I will also post some pictures of the unit and infall....See Morelemonspinner
13 years agomudn
13 years agoking_michelob
13 years agolemonspinner
13 years agolemonspinner
13 years agotravis_turner
13 years agolbridges
13 years agowomanowned
13 years agolemonspinner
13 years agolemonspinner
13 years agosharoncbrn
13 years agojsldh
13 years agotrhought
13 years agolemonspinner
13 years agohawkfive
13 years agolemonspinner
13 years agotypea
13 years agokeithintx
13 years agoking_michelob
13 years agolemonspinner
13 years agolemonspinner
13 years agopoolnovicefl
13 years agolemonspinner
13 years agocakelady_2010
13 years agolemonspinner
13 years agolemonspinner
13 years agohawkfive
13 years agolemonspinner
13 years agotrhought
13 years agolemonspinner
13 years agolemonspinner
13 years agomegankheaps
13 years agocnr1089
13 years agosgregor
13 years agolemonspinner
13 years agonosabe
13 years agolemonspinner
13 years agoclassicalone
13 years agolemonspinner
13 years agofriendswoodnewbie
13 years agorob_chillcitty_com
12 years agoDirkSu
11 years ago


Related Stories
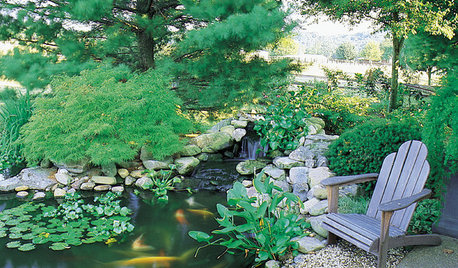
GARDENING AND LANDSCAPINGHow to Make a Pond
You can make an outdoor fish paradise of your own, for less than you might think. But you'll need this expert design wisdom
Full Story
LANDSCAPE DESIGNNatural Swimming Pools: More Beauty, No Chemicals
Keep your skin and the environment healthy with a pool that cleans itself, naturally
Full Story
MOST POPULARWhat Is a Living Building?
Part philosophy, part advocacy, the Living Building Challenge is pushing designers and homeowners to rethink how we live
Full Story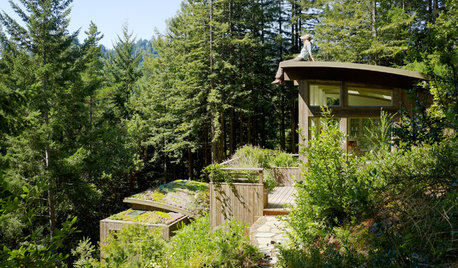
REMODELING GUIDESLiving Roofs Crown Green Design
Living roofs save energy, improve air, water, curb appeal — and the view from above doesn't hurt either
Full Story
DREAM SPACESWorld of Design: 15 Swimming Pools With Dream Views
Join us on a refreshing tour of spectacular swimming pools from Sydney to Moscow
Full Story
HOUZZ TOURSMy Houzz: An Animal Lover's Texas Sanctuary
Dogs, cats and horses enjoy an idyllic temporary refuge here, but the eco-minded home has a permanent place in its owner's heart
Full Story
GREEN BUILDINGGoing Solar at Home: Solar Panel Basics
Save money on electricity and reduce your carbon footprint by installing photovoltaic panels. This guide will help you get started
Full Story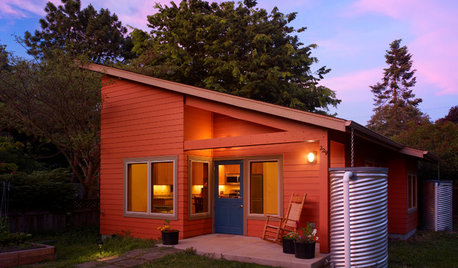
GREEN BUILDINGHow to Harvest Rainwater for Your Garden
Conserve a vital resource and save money by collecting stormwater for irrigation in a barrel or tank
Full Story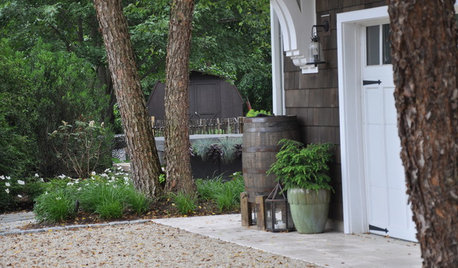
SAVING WATER6 Reasons Why You Should Save Your Rainwater Now
Collect and store during the rainy season so you’ll have water ready for irrigation when you need it
Full Story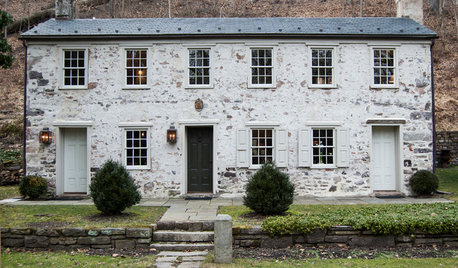
TRADITIONAL HOMESHouzz Tour: A Historic Remodel Keeps the Romance Alive
It was love at first sight for the owner of a 2-centuries-old house. She and her husband renovated it with tender loving care
Full Story

huskyridor