

Best spiral sliced ham from Grocery store?
18 years ago
Featured Answer
Sort by:Oldest
Comments (32)
 18 years ago
- 18 years ago
Related Discussions
I just started 4 mango seeds from grocery store mangos.i have ???
Comments (8)Bravo...a 19 YEAR OLD GARDENER...bravo to you. Although I never heard of the maxipad idea for sprouting..it seems like a good idea. It reminds me of how folks start avocado seeds by sticking them with toothpicks and suspending the seed in water 1/2 way. I am sure mango's would grow in the warm climate of Colton since they are a tropical fruit. Did the video tell you want to do after they start to sprout? A tree in general will take some time to get big enough to produce an abundant amount of fruit. I found this information on another website 1 Purchase a large healthy mango at the grocery store. Keep in mind that a healthy fruit will often produce the healthiest seeds. Resist the temptation to purchase a shriveled mango for a discounted price just to get the seed. Step 2 Slice and eat the mango. Be careful not to cut into the husky seed in the center. Step 3 Remove the seed husk and wash any remaining mango meat from the husk. Scrub lightly with a scouring brush to remove any residue. Set aside to dry for a few days. Step 4 Pry the husk open with a butter knife once it begins to crack slightly. You can also cut a thin slice around the rim of the husk until you see a tiny opening to the inside. Crack the entire husk open and remove the giant lima bean-shaped seed. Step 5 Use care when handling the seed as it may have a large root that has begun to grow. If the root is present, do not remove it. Don't worry if there isn't any root, yet. There is plenty of time for your seed to grow. Step 6 Fill a 6-inch pot with a regular potting soil. One with extended release fertilizer is a good choice. Be sure the soil is fully moistened before planting your mango seed. Step 7 Make a small indentation in the center of the pot. Plant your mango seed with the curved edges down and the rounded hump just above the surface of the soil. Cover the seed, leaving the very tip of the hump visible. Step 8 Keep the soil moist, but not soggy. Place the seed in a sunny location where the temperature will remain as close to 80 degrees as possible for the next week. Cover loosely with a clear plastic bag to increase the temperature and humidity level. The seed should germinate within a week. Step 9 Try sprouting your mango seed in a layer of moist paper towels. Insert the seed and paper towels in a plastic storage bag and set it in a warm location. The top of a TV or water heater works great. Once roots have developed, plant the seed in potting soil and place in a sunny location. Here is a link that might be useful: grow a mango tree...See MoreHam & grocery/Von's/Pavillions rant
Comments (11)We have 3 major chain groceries stores in the area, Market Basket/Demoulas, Shaw's and Stop & Shop. Stop & Shop has always had a limited selection compared to the other two stores. MB has a good selection but is a not a flashy store. I shop there for the basics plus. For example, MB has the best fresh cilantro in the area. Shaw's has a wonderful selection is more upscale but tends to be pricey. I have noticed that all three have started to limit their selections more than they used to. I haven't been able to find duck breast which all three used to carry. Luckily the local butcher shop can get it for me. I shop a lot at farm stands and farmers' markets, the local family owned grocery store, local butcher shops and order online. It's not as easy as it used to be to one stop shop. I agree that cooking from scratch which used to be the norm has become hobby cooking. My family has always been scratch cooks but I noticed more and more of my friends and co-workers leaning toward convenience. My BFF is a marvelous cook who always had a passion for cooking has decided that cooking is too much WORK and she NEVER cooks now. :-( Now she eats out or buys convenience items; ten years ago she would have been horrified at the thought! I still love to cook and the bonus is my 18 year old daughter is now taking an active interest. We're sharing some great bonding time. This week we are working side by side each evening preparing for our annual Winter Open House this Saturday. We're expecting about 50 or so guests for laughs, camaraderie, tall tales, oh and food....Turducken, sides, appies and of course dessert. We've served Turducken the last 15 years hence it's become tradition and is always requested so........See Morespiral sliced ham or shank?
Comments (22)Yes, the Costco ham is salty. All cured ham is salty. Different processes are used for different 'cures'. (many methods) (-I appear to be invisible. I posted above how to desalt a ham.) Some are lest sensitive to the salt, some love it. The sugar coating mixes balance the salt making it appear less salty but that does not remove it, just masks it. Directions will be on your package of spiral ham. From a company in Quebec(lafleur) that has been in the ham business for over a 100yrs has this on their web page... "Before cooking Since ham is often salty, it's best to desalt it before cooking or, for cooked ham, before eating. Desalting ham In a large saucepan, cover the ham with water. Bring to a boil. Let stand for 20 minutes, then drain. If the ham is very salty, repeat the process." -another recommended method, if your ham came out to salty, especially for left-over slices for breakfast, is to put slices in a zip-lock with with some milk and soak a few hours or over-night. Milk will draw out some of the salts. (-i use that method for desalting the final rinse of salt fish.) The Cooks bone-in sounds delish and bone-in is preferred in our home. Less likely to dry out. DH loves it but tends to over-eat so we do a leg of lamb. His choice....See MoreFantastic melon recipe from my grocery store...
Comments (10)Thanks, Kframe, this sounds terrific! Sharon, any chance this is the recipe you were looking at - its simple but quite good! Posted by littleonefb (My Page) on Wed, Jan 31, 07 at 23:33 I forgot to add this recipe my daughter wanted for her party. The girls wanted something "healthy and refreshing" to also go with all the "unhealthy type food." CUCUMBER AND WATERMELON SALAD FROM EVERY DAY FOOD INGREDIENTS 3 cups peeled and cubed european cucumber 3 cups cubed watermelon 3 tablespoons lime juice optional pepper and salt to taste combine the cucumber, watermelon and lime juice. If not serving right away add salt and pepper if desired just before serving. My changes. I leave out the salt and just add pepper. This tastes wonderful served over sherbet or vanilla ice cream as well. My daughter likes to make one as is without any salt and another bowl without salt but she adds a sprinkle of white wine to the salad just before serving....See More- 18 years ago
- 18 years ago
- 18 years ago
 18 years ago
- 18 years ago
- 18 years ago
- 18 years ago
- 18 years ago
- 18 years ago
- 18 years ago
- 18 years ago
- 18 years ago
- 18 years ago
- 18 years ago
- 18 years ago
- 18 years ago
 13 years ago
- 12 years ago
- 8 years agolast modified: 8 years ago
- 8 years ago
- 8 years agolast modified: 8 years ago
 8 years agolast modified: 8 years ago
 8 years ago
- 8 years ago
 8 years ago
- 8 years ago
- 8 years ago
- 4 years agolast modified: 4 years ago
- 4 years ago
Related Stories

KITCHEN DESIGN20 Kitchen Must-Haves From Houzz Readers
We asked you to tell us your top kitchen amenities. See what popular kitchen features made the list
Full Story
FUN HOUZZDon’t Be a Stickybeak — and Other Home-Related Lingo From Abroad
Need to hire a contractor or buy a certain piece of furniture in the U.K. or Australia? Keep this guide at hand
Full Story
DECORATING GUIDESTop Design Trends From the Winter 2015 Las Vegas Market
Interior designer Shannon Ggem is tracking finishes, motifs and design combinations at the 2015 show
Full Story
KITCHEN DESIGNStandouts From the 2014 Kitchen & Bath Industry Show
Check out the latest and greatest in sinks, ovens, countertop materials and more
Full Story
ENTERTAINING5 Home Cooking Tips From the Experts
Make entertaining and mealtimes run a little smoother with these simple tips from chefs
Full Story
Get Thanksgiving-Ready with the Season's Best Picks
Deck out your dining room for a festive feast with 25 faves from top stores and catalogs
Full Story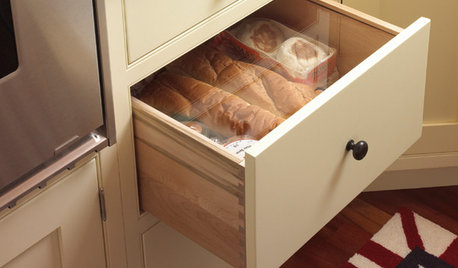
KITCHEN DESIGNKitchen Ideas for Bread Lovers
Any way you slice it, a kitchen designed with bread in mind conveys warmth and homeyness
Full Story
KITCHEN DESIGNDouble Islands Put Pep in Kitchen Prep
With all that extra space for slicing and dicing, dual islands make even unsavory kitchen tasks palatable
Full Story
PRODUCT PICKSGuest Picks: Add Instant Workspace With a Kitchen Island
Get more room for slicing and dicing without cutting into countertop space with one of these freestanding pieces
Full Story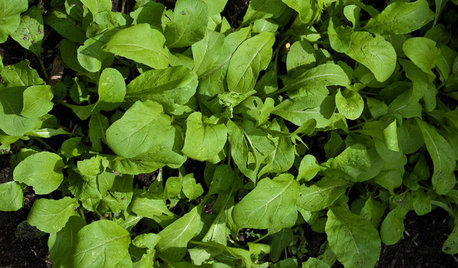
COOL-SEASON CROPSCool-Season Vegetables: How to Grow Salad Greens
From arugula to radicchio, greens have taken a top spot on the table and in fall and winter gardens. See how to start growing them now
Full Story

rickmerr