


Best primer over joint compound
nap101
11 years ago
Featured Answer
Sort by:Oldest
Comments (9)
 PRO
PROChristopher Nelson Wallcovering and Painting
11 years agoRelated Discussions
Dry wall/joint compound wall sufficient?
Comments (6)I had a contractor who added a laundry room to a house. He insisted on adding his "fancy" signature ceiling texture that he does with a thin layer of joint compound -- and then he told me to just leave it as it was, with no paint or anything. It's held up fine for years with occasional vacuuming. :) Just speculating, but I'd say that the problem with leaving just joint compound on walls would be the porosity... the ability to absorb moisture (and mildew as a result?), the inability to wash/clean them, and the fact that they'd scratch and dent easily without the protective layer of paint. However, I've never seen a problem with the ceiling in that laundry room, and if mildew was going to happen I guess it would happen there. Based on that, If it looks great as it is, I might just give a try to leaving it!...See MorePrimer over joint compound results and update
Comments (5)I am going to suggest stuck-tape removal a little differently than christophern (as an alternative for you to try). Loosen the tape very slowly from the loose/floppy edge (hopefully you left one) toward the stuck edge -- try do a whole segment or length at a time if you can. This should minimize what comes off at the edge line. For any tape splotches that are totally adhered, use a blade to loosen the far edge and pull off toward the wall edge. Flick off anything that is clealy a peel, sand that with fine grade paper, prime the splotches, paint the spots free hand. In the future -- try priming and first coat of paint with no tape. A little trick is to deposit paint with a good, angled brush (1.5") at your edge line in a perpendicular fashion (yes, crosswise and short strokes for about two feet along your window edge or moulding). Then, gently swipe with the grain (now parallel) along the edge using the side of the brush and WITHOUT reloading your brush and WITHOUT touching the edge itself. This technique will first "deposit" the paint close to your edge via the 1.5" bristles, followed by smoothing the paint along the grain with a normal stroke. Repeat as needed. Never put a loaded brush (bristles or side of brush) close to an edge! Even if you use tape with the above approach, you will rarely get paint on your tape ... if you do it will be light bristle touches during your cross-wise load .... or a swipe wisp with your parallel smooth-outs. In either case, you won't be putting any significant amount of paint onto your tape and the protected adjoining surface (which is usually the culprit for any sticking). Finally, if/when laying tape, use two/three foot segments and run your fingertip LIGHTLY on the edge you are protecting (1/8" or 1/4" adhesion at the most) -- leave the rest flapping loose. The light touch will minimize any chance of the tape stickum penetrating an under coat (which is shouldn't anyway) and the little stuck line (1/8" or so) will minimize the tape edge available for paint-oopsies. Then -- like Christophern said, take the tape up when your top layer is still wet. This post was edited by PinesEverywhere on Wed, May 8, 13 at 8:52...See MorePrimer over joint compound and painted wallpaper
Comments (9)Well, it's not an option at this point to remove it. We have wallpaper in all the rooms in our second floor, and the walls would need to be rebuilt behind the wallpaper. We can't rebuild all our walls on the second floor right now, for financial and other reasons. We plan to do one room at a time eventually. For now, unfortunately, we have to make the best of it. Can you recommend a good acrylic general purpose primer? (For what it's worth, the person at my local paint store said I should use Gardz, which sounded a bit like overkill to me, especially, as christophern noted, the wallpaper is already painted. But I haven't been able to find any good information about whether Gardz is appropriate for surfaces that are already painted). Whenever I go to prime, do I spot prime first over the joint compounded areas, and then go back over the wall? Or should I just do the whole wall in one go? Thanks for the advice!...See MoreDrywall joint compound bubbling, help!
Comments (7)Setting compound comes in paper bags labeled setting type compound, with a time on it. Get the longest time you can find,90 minutes or greater.Home depot sells setting compound that sets up in 110 minutes . The time is the working time after you mix water with the powder. After the working time is up whats left in your bucket solidifies. That means you have up to that time to clean your tools and bucket out. When working with setting compound take extra care cleaning your tools and bucket. any residue of the previous batch will cause the new mix to solidify very fast. So just clean everything thoroughly. The nice thing with setting compound, is the fact it doesn't shrink when it dries like the premixed does. You then need less coats....See More
phxphoto
11 years agoVertise
11 years agonap101
11 years ago- PRO
Christopher Nelson Wallcovering and Painting
11 years ago Ednamaee
11 years agoVertise
11 years ago- PRO
Christopher Nelson Wallcovering and Painting
11 years ago
Related Stories

REMODELING GUIDESConcrete Driveways: Poring Over the Pros and Cons
Concrete adds smooth polish to driveways and a sleek look to home exteriors, but here are the points to ponder before you re-surface
Full Story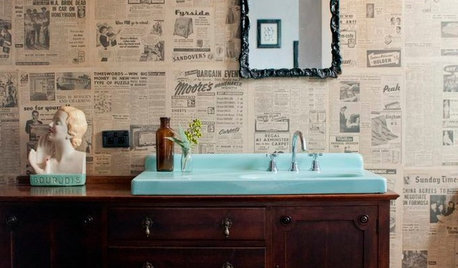
DECORATING GUIDESSo Your Style Is: Black, White and Read All Over
Make headlines at home with newsworthy decor
Full Story
HEALTHY HOMENontoxic Paint 101
If 'VOC' sounds like gobbledygook and you have no clue what causes that funny smell, check out this primer on ecofriendly paint types
Full Story
MOST POPULAR6 Kitchen Flooring Materials to Boost Your Cooking Comfort
Give your joints a break while you're standing at the stove, with these resilient and beautiful materials for kitchen floors
Full Story
CRAFTSDIY Project: Home Improvement Store Pop Art
Turn Drywall Mud and Paint Into a Minimalist Conversation Piece
Full Story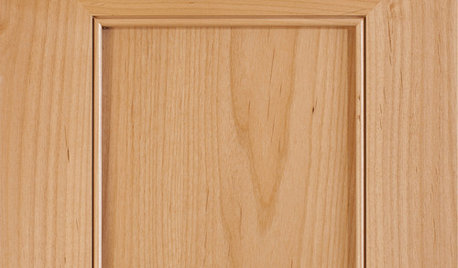
DESIGN DICTIONARYMiter
A miter cuts right to the point with beveled edges on moldings, cabinet doors and more
Full Story
DECORATING GUIDESEasy Green: 5 Ecofriendly Paint Companies
Dizzy spells and headaches, begone. Be kinder to your health and the environment with these safer paint choices for your interior decorating
Full Story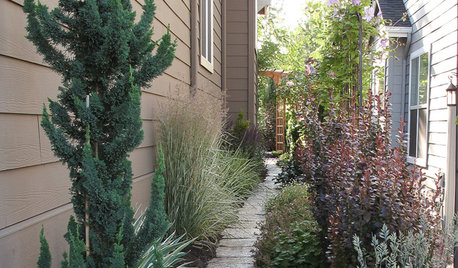
SIDE YARD IDEASNarrow Trees for Tight Garden Spaces
Boost interest in a side yard or another space-challenged area with the fragrance and color of these columnar trees
Full Story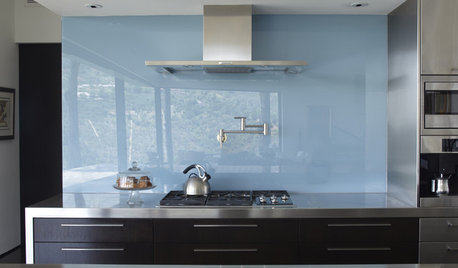
KITCHEN DESIGNThe Future of Backsplashes
Grout is out. Continuous sheets of glass, stone, metal and porcelain are saving cleaning time and offering more looks than ever
Full Story
TILEWhy Bathroom Floors Need to Move
Want to prevent popped-up tiles and unsightly cracks? Get a grip on the principles of expansion and contraction
Full Story

nap101Original Author